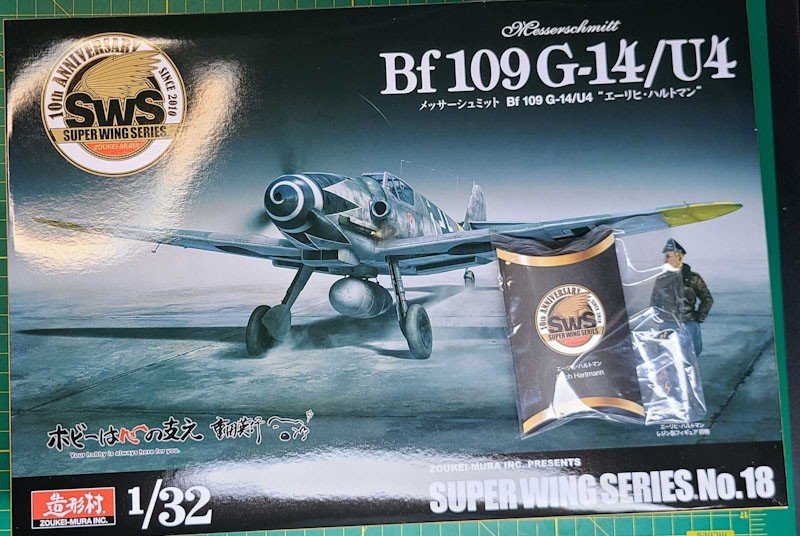
Zoukei-Mura BF109 G-14 "Hartmann's Plane"
That practice on the Tamiya 1/48 BF109 paid off (updated Aug 3, 2023)…

ANother BF 109….but bigger!
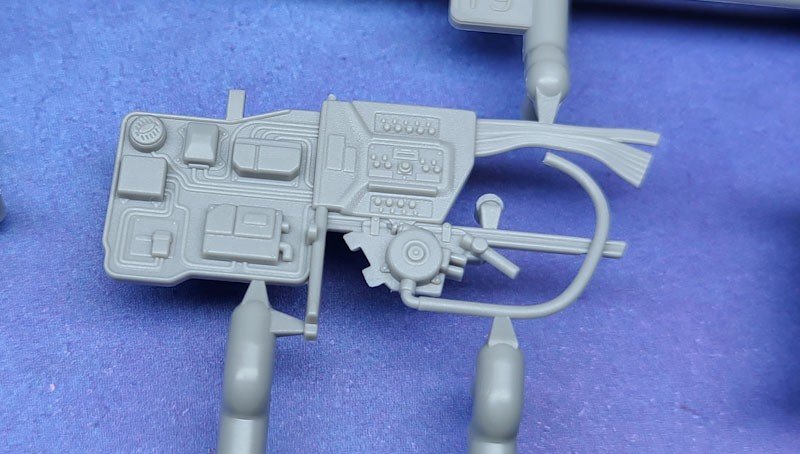
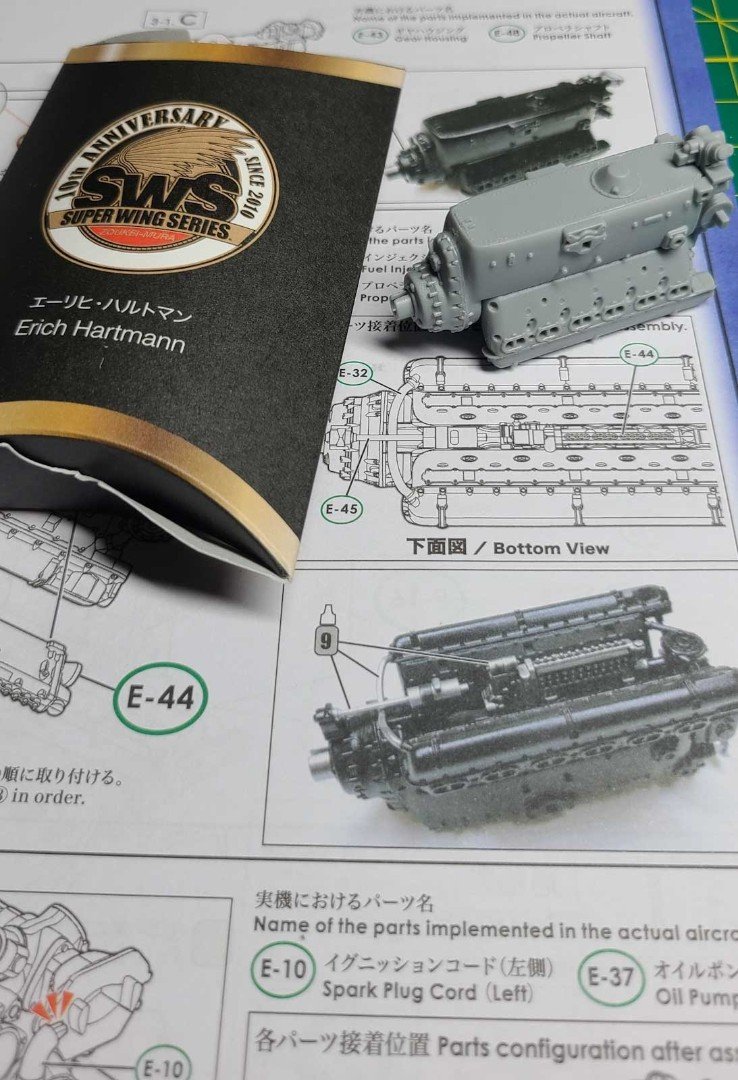
My initial impressions are that it’s an incredibly detailed kit, the instructions are also super detailed, but they are missing some painting steps and the pictures they take of the assemblies are murky. I had a tiny fit issue w/several engine parts, and there is some flash on the engine cooling pipes. That said...most of the sprues were excellent and the clear bits are beautiful.
I'd also like to point out that early on you have to decide if you're going to build the open engine version or not...there are different parts for each.

I still think it may be the best 109 kit in production right now, but I sense they rushed the finish a tiny bit. Time will tell.
I bought some nice HGW belts and the eduard-produced cockpit PE.
I worked on this for about a month so the posts you see below were spread out over a month. I post in real time over at Flory Models and this build log is right HERE and includes the comments from the other Flory members (if interested).
Oct 7, 2022
I read these two sections as you need to choose one or the other. In the first example you do not assemble several cooling pipes if the engine is to be closed.
In the second you have to choose which wing fillets (?) to install based on open or closed cowlings. You could probably get by doing the top with both options, but I don't think there's any mechanism to display both open or closed depending on how you feel that day (like the Tamiya 1/48). As I get near that section during the build, I'll post what I figure out.

Pick the Version you want
I wish they didn’t force you…but without a lot of DIY work…you’re forced to pick open or closed cowling

Musings:
There's no doubt it's the most detailed aircraft engine I've seen in a kit at this scale...more so because they included all the cooling pipes than anything else (the things you would use lead wire for in less detailed kits). I can't tell you if it's "accurate" because I have little knowledge other than some reading material about this particular aircraft...but I'll put it this way...I doubt some company will build a resin substitute for it. What one could do is build a resin copy of it if you wanted to build a version in a repair shop where other engine parts would be strewn around. And in this case...the engine in this kit makes it easy to build a really nicely detailed model. It's more the kit than the modeler.
Reminds me of what people felt when the Tamiya Mosquito came out and some resin engine kits were built. Some very serious modelers bought the resin kits and then decided not to use them because those Tamiya Merlin's were really good.
And…At this price point ($95+ US), it's more than competitive with most of the detailed single pilot/single engine 1/32 aircraft models out there.
Oct 13, 2022
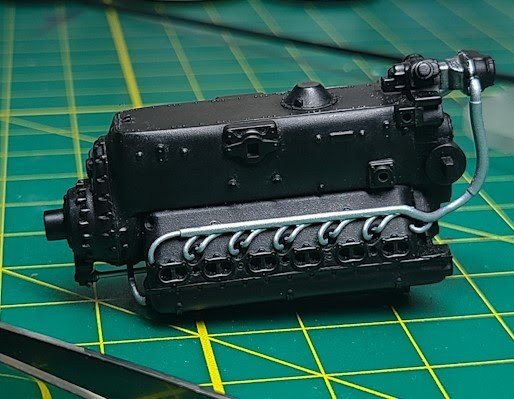
Just motor work and I have done nothing here other than to follow the instructions and using the listed paints (just three so far). I still have another three or four more cooling pipes to add, I need to touch-up the paint that I've worn off w/my clumsy hands, and detail the exhaust out, and then do the weathering...but a few things for future builders:
The cooling tubes are awesome and awesomely fragile. I have not broken any yet but between removing seam lines and cutting them from the sprue, I say be careful out there.
The MG mounts are easy to break off and I had trouble getting them in place (the connection points are not solid).
I used super glue for a lot of the tube connections. I like the thicker super glue.
Make sure you follow the instructions in terms of the order parts go in (or you'll be forced to pull stuff apart to fit things).
I sprayed Mr. Color 1500 black on everything before I painted. I recommend using the rattle can version as it really helps not having to clean the airbrush all the time and it covers just fine (I use it on all my models).

Only plastic left to put on the engine are two oil pipes that you cannot install if you're building the closed version and a couple of bit parts associated with the transmission. Although I'm building the open version I don't want to install these two pipes because they point down and connect to the oil cooler in the open/hinged bottom cover. I know I'd break them before I got to connecting the engine to the airframe.
Used AK rust paint Vallejo dark earth pigments, and Tamiya weather masters to rust and soot the exhausts up a tad. That's the only hard weathering I've done so far. Next will be semi-gloss, oils to weather, a flat coat and then a bit more weathering. I'm not adding any DIY to this...pure out of the box.
Oct 17, 2022

Some light weathering. On to the cockpit next. This model really builds itself...all I did was follow the instructions. The weathering is just some Tamiya panel liner that I followed with enamel thinner to wash out the thicker parts. The only thing a bit difficult was trying not to break all the fragile tubing bits. Also takes some patience because the instructions are dense. Like Wingnut wings dense. It would be easy to miss something small or the order you need to build in (ZM often tells you to build components in a specific order).
I do think this is good practice for my Tamiya 1/32 Mossie...the engines on that are comparable in terms of detail and parts.
Oct 21, 2022
Slow go but a little movement on the cockpit. I'm using the Eduard pe set for the instrument panel and the seatbelts (metal) and have not weathered the belts nor anything other than the seat and floors...there's a lot of detail work to go on the cockpit sidewalls and firewall before I can even get to the fuselage and starting to put it together as a recognizable BF109.
So a good model...I like Tamiya cockpit construction better but ZM's engines are world-class. And earlier I said ZM has a tendency to build thick-walled fuselages and wings...not this time. The fuselage looks beautiful when back-lit (I'll get a pic).

So a report card of sorts, so far, on things modelers need to be aware of when building this kit
Take special care of the sprues w/engine cooling tubes on them. These tubes are fragile. Be extra careful when cutting them off the same and sanding them.
ZM likes to build in sections so study a section in-depth before starting. For instance...you can read all the engine build process and realize you can put most of it together without painting the bits separately (notable exception are the cooling tubes...paint them before putting them on.). You can also read ahead and find other bits to the engine that can be built early.
Some of the engine parts don't fit perfectly...notably the engine top (part E22 how it fits to N22). You'll probably find gaps at the rear and front. You also may have some trouble with parts E12 and E13 the engine covers. Fit issue there as well
E48 fit super tight in E43 (propellor shaft and gear housing)...might want to sand E48 a bit
Be super-careful to follow the "put-these-parts-in-this-exact-order" instructions you'll find on some pages
I had some trouble with the rudder pedal assembly and had to pull it up and realign to get the firewall to fit
Dry fit EVERYTHING ALL THE TIME...I sense I'm going to run into other issues as I get down the build because I didn’t do this at first and I’ll bet I’m off somewhere.
Put your seatbelts in BEFORE you put the side instrumental frames in, or you will not be able to glue in the lap belts.
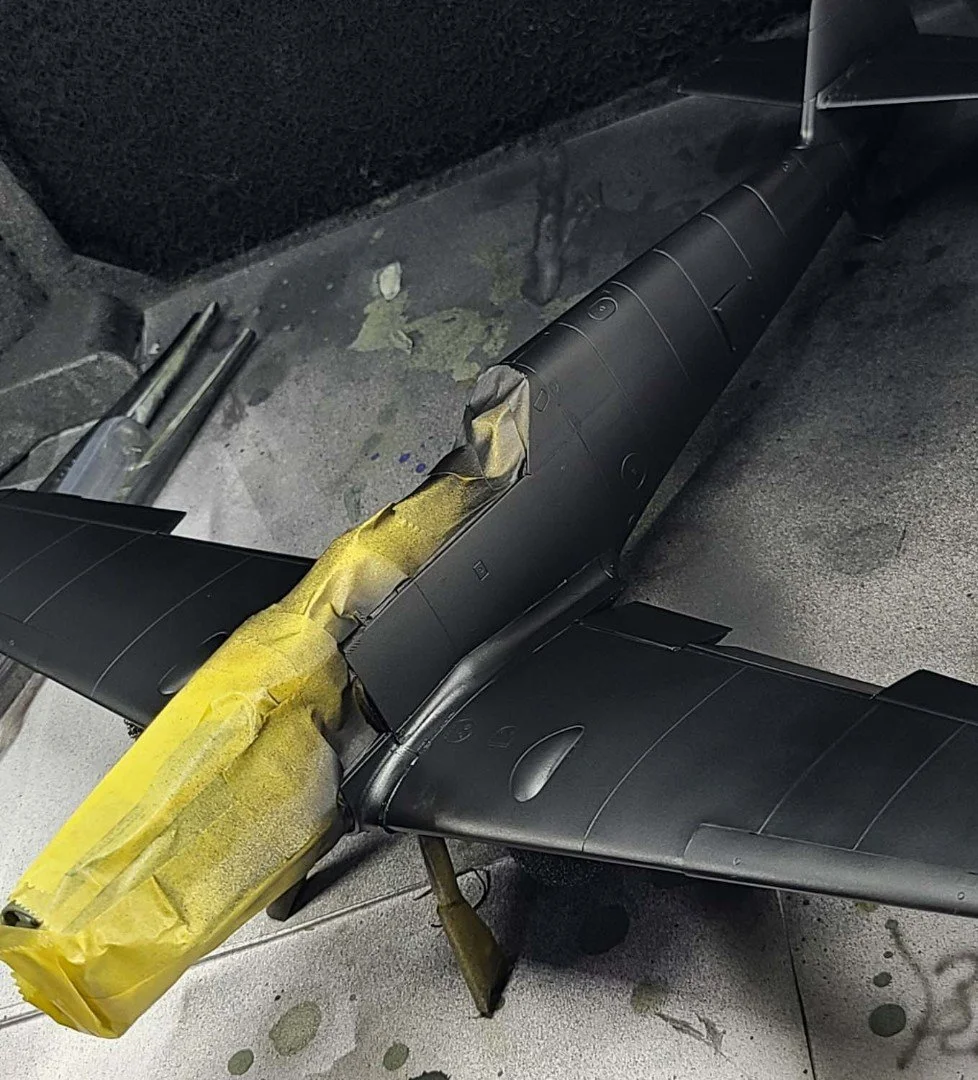
Use a masking fluid to cover up the clear part of the reserve tank fuel line before painting...works far better than tape.
The cannon ammunition box has two sides...understand which side goes because you can build it the opposite way and then it will not fit into the rest of the cockpit assembly. Ask me how I know...
Really pay attention to the photographs they show on each subassembly as you build...really nice way to show you how it's supposed to fit/lean/curve/etc.
And as promised...a back-lit view of the fuselage. Very thin and nicely molded.

Oct 24, 2022
Some additional findings. One thing about the two ZM kits I've built is the cockpits are both a marvel of engineering and almost comically hard to put together without frustration. IMHO Tamiya 1/32 cockpits are far, far easier to work with and so far, give better results. ZM uses interlocked parts not unlike those magic wooden boxes you can't figure out how to open. It's cool and all but seriously over engineered. To combat down-the-line fit issues I'm dry fitting and taping on the fuselage as a jig.
Don't get me wrong...a good and beautiful kit but my criticism of ZM kits remains...all this work and detail that you'll never, ever see but you can't skip any of it because without it, you can't build the plane. ZM builds kits as close to the actual engineering of the plane as possible with structurally-sound and accurate components required to support the model. In this pic you'll see where you mate the engine to four attachment points while threading three cooling tubes through the firewall that is connected to the cockpit which has the structural components to support the landing gear and the actual cross-brace needed to structurally support all that.
Way freaking cool...but a minor panic attack trying to make it all work.

So yeah...I know it's a pity party here but in the end, this will make an awesome display piece, but this is seriously wacky on multiple levels.
Engine is just taped on. Eduard instrument panel, rest OOB. The RLM02 colored braces on the side of the fuselage are the wing spar attachment points.


Oct 27, 2022
Still messy but I made a decision not to do any major extra detail and hardcore work on the inside fuselage. Just painted per the instructions and added two wires to simulate rudder control wires/tubes (whatever they are). By the size of the fuselage hatch you can see why most of it is hidden. I did the same thing with my HS129.
I do have to give ZM some credit... everything here fits nicely so far. Pictures not the best quality but here you go.


Oct 28, 2022
Originally, I wanted to do a cutaway, like you see on actual tanks in some museums, so I looked at blueprints to find all the extra detail (wiring, control components, electronics fuel pipes, etc.) and at some point, lost the desire, nerve, and need to do that. I really respect the modelers who do, and perhaps I might try a "hanger queen" build one day, but not this day.
I'll have a build hints/issues update in a few days...on the the landing gear and wing construction but I have to say, even with all that detail in the fuselage, and having to slide in both the engine and cockpit sections, all of which interlocks...it fit nicely. A bit fiddly and I can see some build mistakes...but nothing that breaks the build so far.
Build picking up speed. I know I've complained about what, in some cases is unnecessary detail you'll never see...in this case it's so cool I forgive them. What ZM did here is make a pretty accurate wing root assembly where the main spar engages at the wing root and the radiator coolant pipes slip into the fuselage and line up with the pumps. Wing fillets will cover this up but I guess if you want to know a bit more about how aircraft are built, ZM does a good job of showing it to you. The other thing they do with their instructions is name every single part with the actual name of the part.

IT HAS the ACTUAL Spar connections…
Beautiful but I like how HK does theirs better.

Also this last pic...that cross brace is important to make sure the landing gear is in the right position (the pic isn't straight on, so the gear looks a bit askew but it's not). As sloppy as all that looks and there a hundred or more parts in that pic...it all fit nicely when I dry-fitted the skin over this section.
Oct 29, 2022
I just found this and wish I had seen it before I started, but really solid views of the engine, landing gear and radio compartment. I knew this company had done an extensive restoration effort on this G6.
I made enough cumulative mistakes to find a 0.25mm gap at the wing fillet where it meets the wing and the front wing fairing. Only place I could not force the parts into submission w/glue. I had some 0.25mm flat plastic strips and they fit perfectly. Filled in the gaps, cemented it, and rough sanded it (still have finishing sanding to do). This worried me so I dry-fitted on the rest of the cowlings and I think it'll be OK. Considering most of the cowlings will be in the up position...it might not matter they don't fit like a glove.

Once you attach the wings you have to support them...that's done by the fillets, the front fairing, and fuselage bottom panels....but all of them basically fit like the real stuff...small overlaps that you rivet (glue) together. All of them have to be in place. Without them the wings are like on rubber bands and wobble forward and aft. So....before you insert the wings....check fit, get the other parts ready and dry fit everything. You might want to sand the part of the spar that comes out of the wing before inserting it in the fuselage (see pics above this).
Oct 30, 2022
Got all the major parts together for the first base coat and I think I'm good. Mr Finisher 1500 to start. I'll black-base the entire model (as do with all mine) with mottled RLM 76 on all sides then start the camo job. Using RLM76 Light Blue (Mr. Color 117), RLM 75 Grey Violet (Mr. Color 37), and RLM 74 Gray Green (Mr. Color 36) as the primary camouflage colors and will mix XF3 and XF6 to create the RLM04 yellow you see on the fuselage and underside wingtips.
This one is easier to camouflage than the 1/48 if for anything the cockpit...the frame on these models was almost always painted RLM 66 (same as the interior color) and not integrated into the overall camouflage scheme. So I'll do the cockpit and engine panels last. Couple of more days and I should have the generic camo done and started in on decals.

So the only sanding work I need to do on the entire model is to smooth out the area at the wing root...but a few coats of primer might do the trick too.
Started with the RLM 76...mottled it at 50-50 w/leveling thinner, then sprayed thinner layers (25-75) until I thought I should stop. Doing the Tamiya 1/48 first really helped with knowing what works. I might touch-up a few of the darker area but inclined to let this one stay as is.

Progression on the camo.
Mask

Remove mask, mottle the next section

Mask, paint, remove mask...sides next but looking for decent side shots to get the pattern fairly accurate. Will free hand that as they did in the field. Need to fix that sanding error I made at the wing root and then apply yellow trim, semi-gloss it, and decals.

One thing...the instructions never tell you the colors to use for the mottling effect on the fuselage. Sure...it's a combination of the gray and dark green on the wings but nowhere will you find a paint marker showing you "this grouping is green...this one is gray". That said...the truth is the Germans towards the end of WW2 were not picky on the side-camo. I think they just went at it with whatever they had and whoever knew how to use the compressor and air brush/gun was the "painter".
Oct 31, 2022
Almost done with primary painting. Some touch up to feather some of the more abrupt lines but close.

Nov 1, 2022
I've been repainting and repainting, but I did find a technique that worked for me...basically overdo the gray and green mottling and the use the blue to feather it. This isn't anything new but it worked for me. That and I had some thinner on a finger and left a fingerprint on the wing I had to fix. Here's where I am this evening:


Nov 5, 2022
Taking my time...got a gap around the cockpit so used Mr. Finisher 500 and I probably need a bit of scribing to even it out but real minor gaps to fill all around.
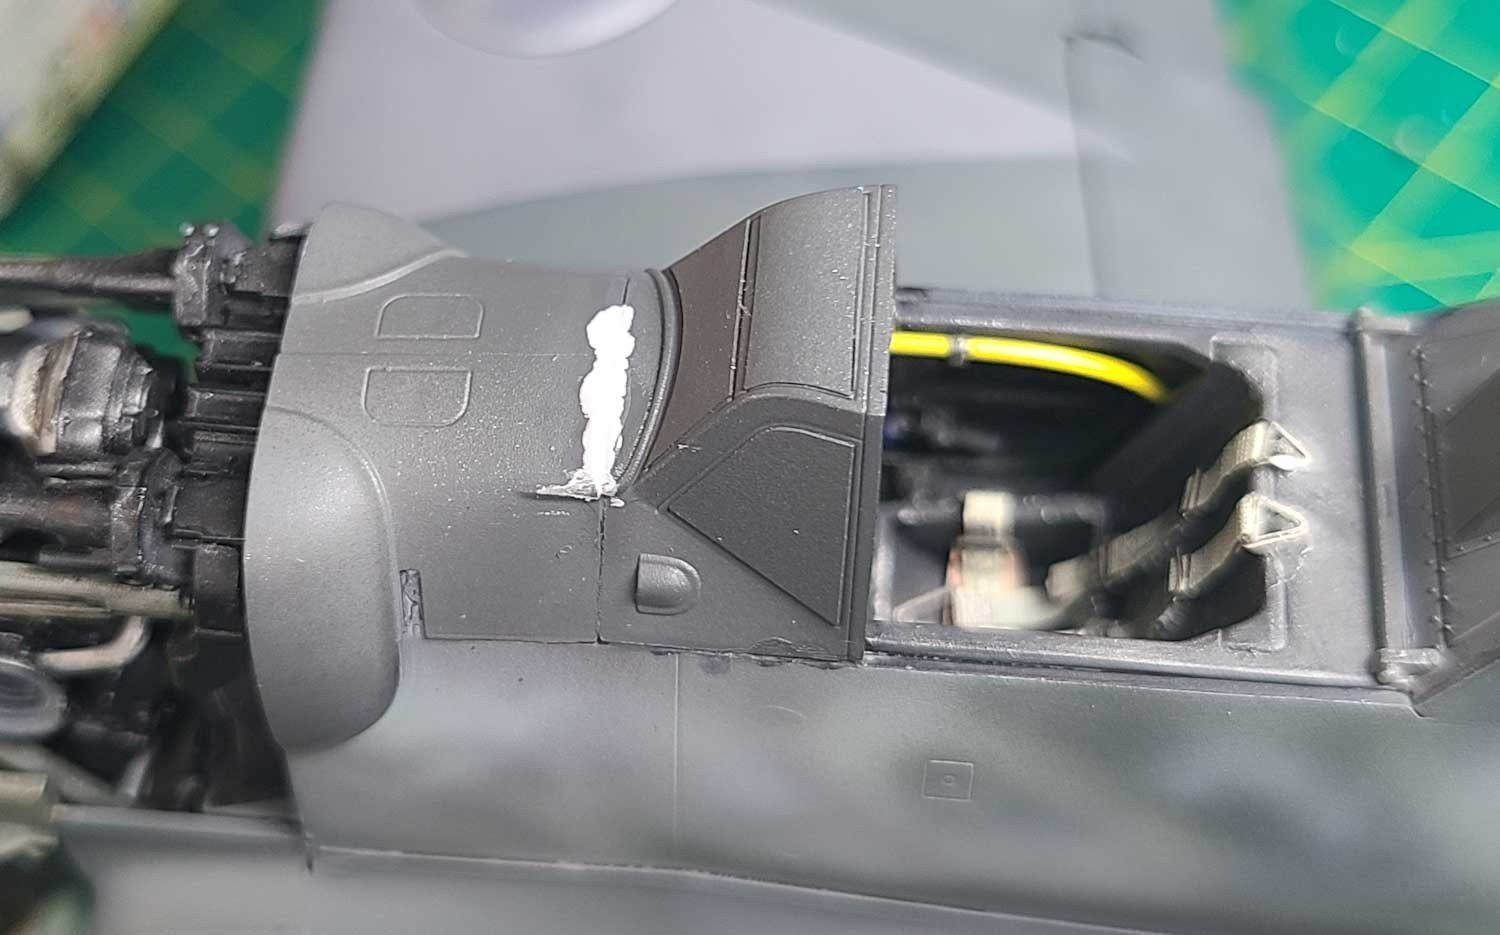
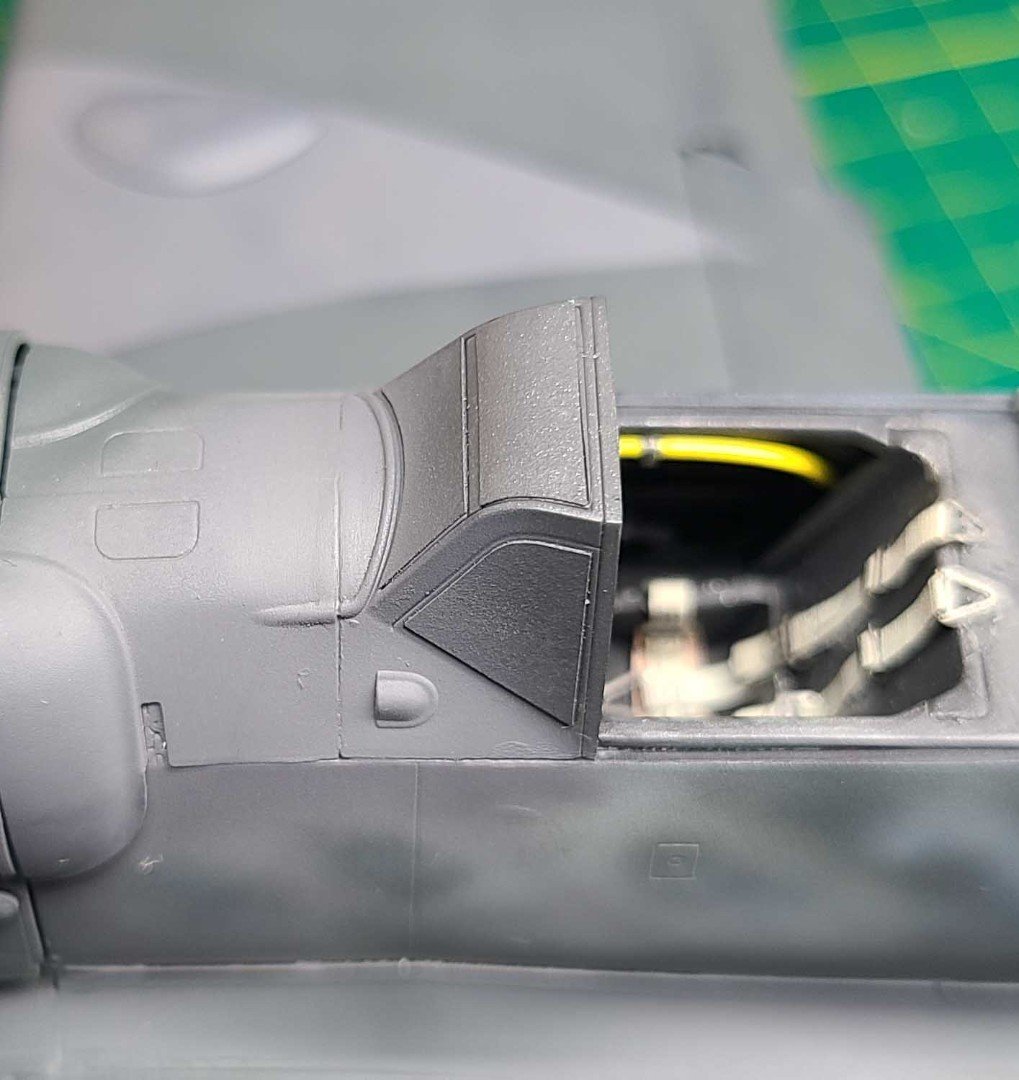
I decided to paint the flower on the nose rather than use the decals. One this dries I'll fill in the black. Im building the open cowl version so for me, this was the trickiest part to paint. I have some masks coming for the German Crosses.


Nov 5, 2022 (cont)
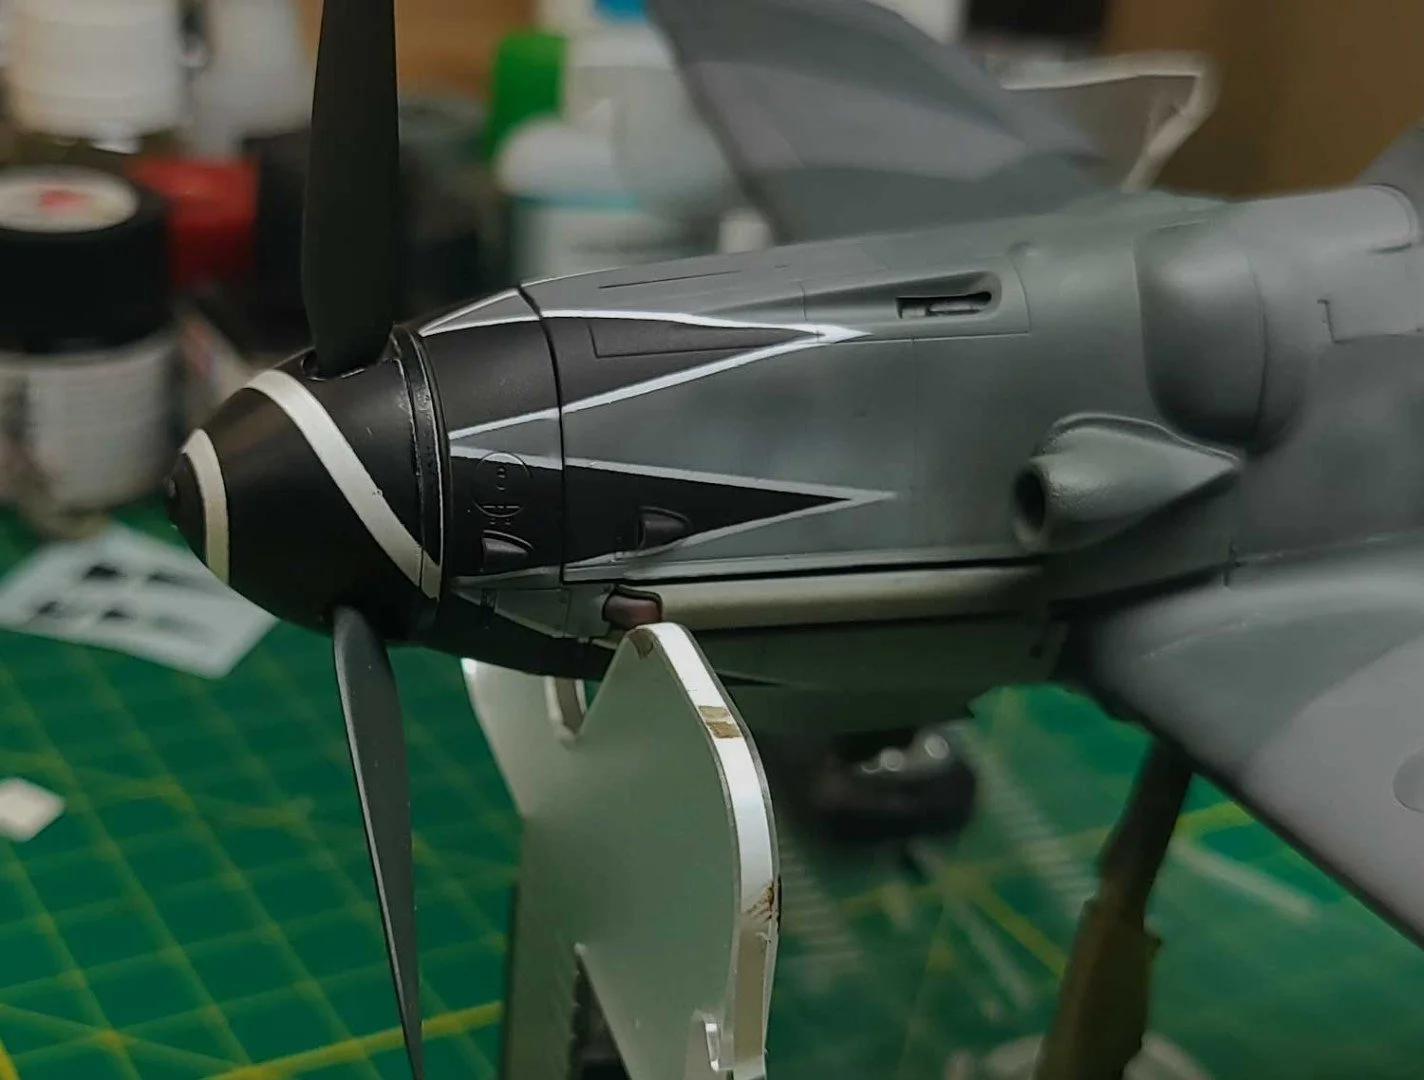
The white lines are a tad thicker than I wanted but weathering later will dull them. The black is just Mr finisher and the white is Mr. Color Cool. The cowlings are just placed on top, eventually I'll have them in the open displayed look...maybe I'll shut one side off for silly.


Another Build Note
There are so many individual pieces that make up the front end of the aircraft that being off in one area by a mm will absolutely throw you off somewhere else. For instance...if you put the cockpit together and are off by a mm....the engine mount will be off by a mm and then your engine covers will not fit. There's little or no room for slack
The landing gear connection points are weak. Make sure you REALLY glue those in...might be a nice place for some epoxy. Kinda makes sense too...they built the wings so thin they had to connect the pivot point for the wheels under the fuselage and since this model recreates that connection...it's a weak point.
If ZM had just put a few more parts in the box you could easily make closed and open-cowling versions for display (not unlike Tamiya's 1/48)...all you need is the hinge point at the beginning, copies of the cowlings, and another air scoop. Instead, what's in the box are extra cowlings for different versions (which isn't a bad idea of course) that have not been released yet. Maybe less stuff in wings YOU'LL NEVER SEE and more stuff you can see.
The front canopy and the aft gun cover are fiddly in terms of fit...especially if you use an aftermarket instrument panel like I did. I had to sand a LOT off the top of the metal instrument panel to get a snug fit and yet still had gaps as you see above. Maybe I was off somewhere else in the model...but I spent 20 min holding all those pieces in place whilst the glue dried to make sure my gap was as small as it was.
The detail on the weapon systems is lacking...I think I'm going to replace the barrels w/brass ones.
Mr. Color paints are awesome...they mix well, I have not had a single piece come off on tape (I used an entire roll to do the blossom and splinter camo), and at 50-50 mix or slightly lighter i never get a stopped up airbrush. They work exceedingly well w/Mr. Color Leveling Thinner.
Most of the injector marks are out of sight but in the pics above you'll see a few...only ones that will really stand out are inside the cowlings and although I have not tried yet...look to be a bear to remove w/o destroying the other detail molded in.
All that said, I'm actually enjoying this build a lot...it's a challenge.
I spent an hour trying to get the swirl decal on and broke it at the end and my neck hurt from leaning over and so I gave up on that and painted one on. Easy though and I should have done it from the start. Took the spinner apart, painted it white, sanded it down, used flexible Tamiya tape (the white stuff) to create the swirl, and then painted it black. Afterwards had some touch up to do and sanded it some more and used some white and black paint to fix the errors. Turned out ok and after weathering it'll look decent.

Nov 9, 2022
Got the masks and painted the top and side insignia's, then semi-gloss (rattle can Mr. Hobby semi-gloss) and started the decal work. This will be a open-cowling version so those cowlings you see are just taped down. The thing that sucks with this model is you have to decide what version you want early on and it changes the way the wing attaches to the fuselage and the cowlings. Thinking back I should have chosen closed cowling and then used a bit of plasti-card to make the open one work.

Something I learned in this build airbrush-wise came about because of many mistakes trying to put the mottling effect in. What worked best for me was the following sequence:
Spray bottom and sides blue (only mask the cockpit)
Spray the top the two green and gray colors following the pattern but free hand (never painting a straight line)
Spray some light streaks and blotches along the fuselage using the two colors
Go back to blue, but thin it and use the blue to feather all the blotches so none of them look severe.
I did the nose-blossom after all that was done and did that with masks.
I masked the splinter on the wings, the insignia's/nose art, and to cover area's I didn't want paint on. The key for me was getting a solid paint-thinner mix that would flow almost dry out of the nozzle and using the trigger carefully.
Can't say enough about Mr. Color paints...not a single piece pulled up w/tape even after putting tape on it 10 min after I sprayed on something. I use a 40-60 mix (paint-to-thinner) and use low air pressure for most of my work.
Nov 11, 2022
Might be done by the weekend and another Model Notes section on what I've found out here at the end of the build.

Also picked up some Master Models brass MG 131 barrels...kinda hard to put them in this late so I couldn't get them in 100% straight...but the plastic ones in the kit are not that detailed.

Weathering starts...

Some of the "weathering" happens because when I do the base painting, I black-base and vary the amount of paint I put on top...so the shades you see are not weathering but just the way I paint. On top of that I did a full Flory Dark wash, then applied a flat top coat and now using a very thinned red-brown mix for the exhaust stains. I'm still going to do some post-shading on panel lines and then some oil washes and silver pencil and then a dust painting (very thinned buff). Might get done over the weekend!

I've done some panel lines and used a really thinned Tamiya Buff (100-to-5) sprayed over all but the windshields to age and wear all the paint and decals and to fade the paint in places. Also seals in some of the weathering. Getting there.


Nov 12, 2022
So a few good things and one damn it. The weathering is probably as good as I can get it right now (I'm still learning and not sure I want to do any oils this time) with just the airbrush. I'll add chipping later with a pencil.

But what's a pita is after I removed the masks from the front windscreen you can see the so called crystal clear glue that holds the armored glass onto the front canopy. I'll probably pull the gun sight out and then the armored glass and clean it up but I could also bust it up by doing that. So going to sleep on it.

I also have serious issues with how cheap the open canopy and cowling "hinges" are portrayed...they are just slabs of plastic…why didn’t they mold some nice hinges?

That's just not right is ZM spends all this time on beautiful inside detail that'll never see the light of day and doesn't add better detail on the outside. There is room for some decent mod makers to come up with better bits and PE.
Last thing I did was to add a dust layer to parts of the underside that could pick up dirt...and at the same time accidentally put my fingerprint right behind the wheel well...oh well.

There's so much to love about this kit and then there's frustration. The model doesn't have cowling support braces so it's close to impossible to get the cowlings in place (there are two tiny attaching points on the engine). So I taped the cowlings on, cut some plastic dowels to fit, and glued them in place on the cowlings while the support end rested on the actual brace point you see online (and the 1/48 Tamiya) and allowed them to dry. Fragile...but it looks so much better with those braces.


My theory here is they based this on a rebuilt warbird and the support braces were not in place when they did their work...or the rebuilt bird used better hinges. Maybe someone here knows if the later models didn't need the braces.
Nov 12, 2022
Wheels on and working on the aerial. The wheel to axel connection is VERY weak...will probably have to slip some super glue in there.

The aerial is EZ line, the springs are .010 lead wire wrapped around a .020 to get the look and then carefully pulled off. The triangle thing is a radio knob off an old resin radio I'll never use with a hole drilled in it to pass the EZ line through. I use super glue to attach one end and then place the components and super glue them in place. The last thing I do is super glue it to the opposite connection point with a tiny bit of tension.


I'll finish this all up by tomorrow and try and get some decent shots. Something about aerials on aircraft always make it better looking by a exponential rate for some reason. I won't have my Erich Hartman figure ready...but I'm ready to move on to either Zoukie-Mura "Owl" or the GWH P-40.

Little more detail...I couldn't make the spring smaller so it's a bit large...but these canopies had a restraining wire to keep the canopy hinge from breaking when someone accidentally pushed down on the open canopy.

Nov 13, 2022 Finished!!
Messed up the navigation lights so I'll fix and add them later and it's a bit hard to take a cool pic of this with both engine cowlings up like some Cormorant drying his wings out after a few dives...but I'll get beauty shots tomorrow for the finish.


