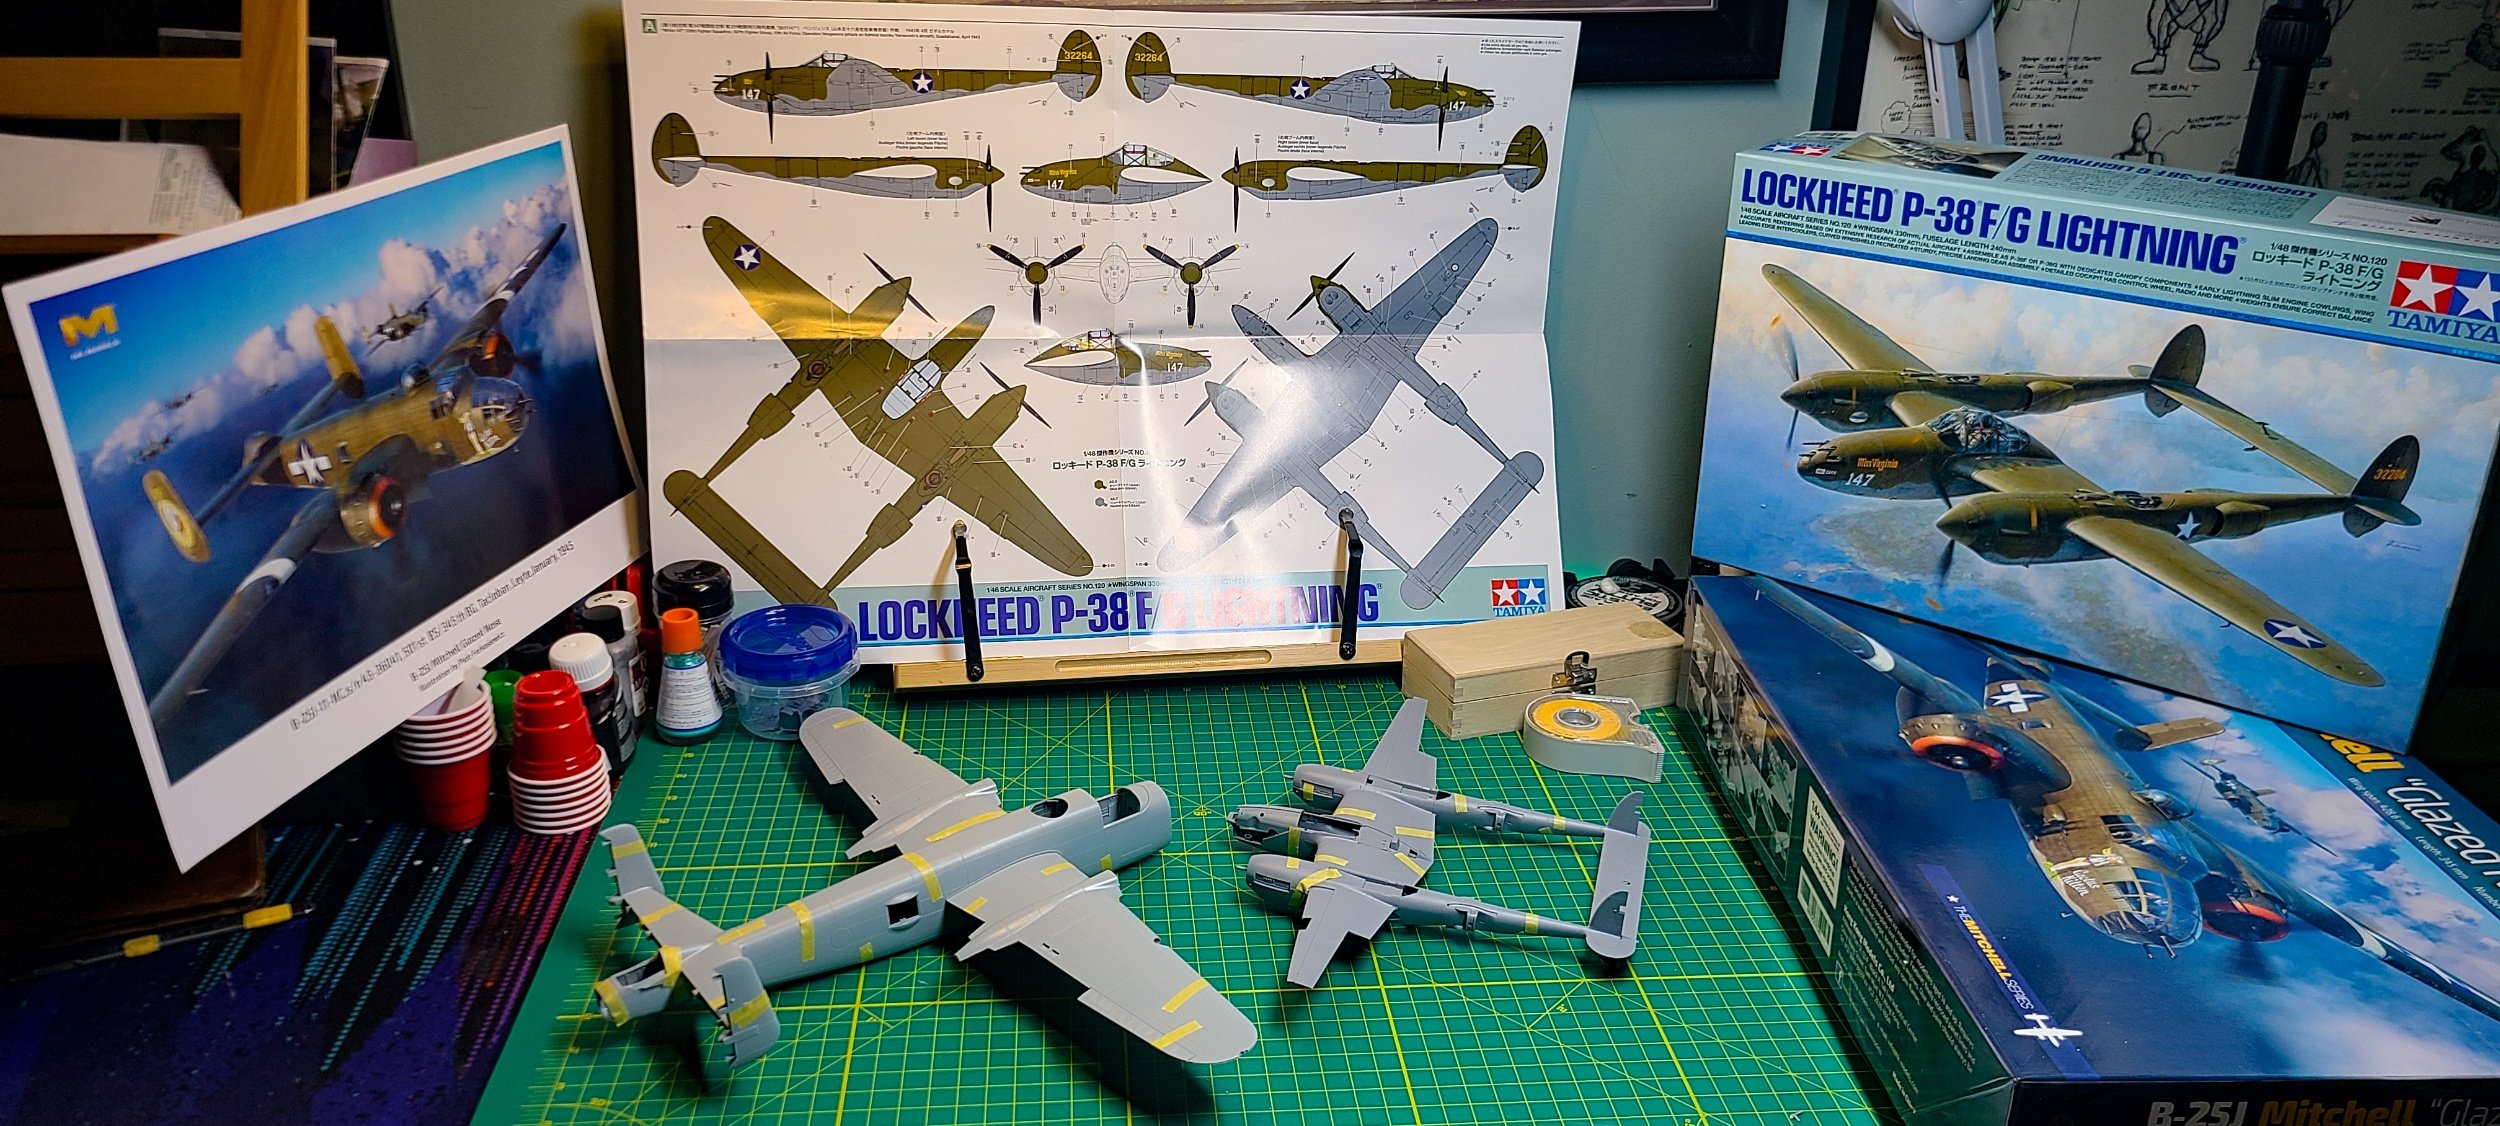
Zoukei-Mura 1/32 He 219 Uhu

So I bought this right before COVID went crazy at a sale where a model shop here near IAD was changing owners. At the same sale, our local IPMS club set up tables and local folks brought all their models they wanted to sell/swap. I saw this on one of those tables and they sold it to me for under $100...including all the extra PE you see here in the pic. At the same sale I bought the Tamiya P-51 I just finished a few months ago and a ZM HO 229 I haven't started. All three for about $250. So I got lucky.
So far with this...it's not as polished as the BF 109 Zoukei-Mura just released and that's understandable given this model came out a while ago (2013?). Their injection process on this one isn't as clean as the more recent BF 109.
As to the actual plane. The He 219 is an incredibly interesting subject to research. First off there’s actually a real version sitting at Udvar Hazy just a few miles from my house for inspiration, and it was a WW2 airplane well ahead of it’s time. To quote from Heinkel He 219 A-2/R4 Uhu (Eagle Owl) | Smithsonian Institution (si.edu)
“The He 219 has been described as the best night fighter operated in World War II by the German Air Force, the Luftwaffe. It may have been the best night fighter of the war. Only the American Northrop P-61 "Black Widow" shares the He 219's unique status of being designed for night operation. The He 219 was fast, maneuverable, and carried devastating firepower. It was the only piston-engined Luftwaffe night fighter which could meet the fast British De Havilland "Mosquito" on equal terms. Advanced features included cannons mounted to fire at an oblique angle, the first steerable nosewheel on an operational German aircraft, and the world's first ejection seats on an operational aircraft.”
So this should be a fun build and one I'm going to go through a lot of paint...


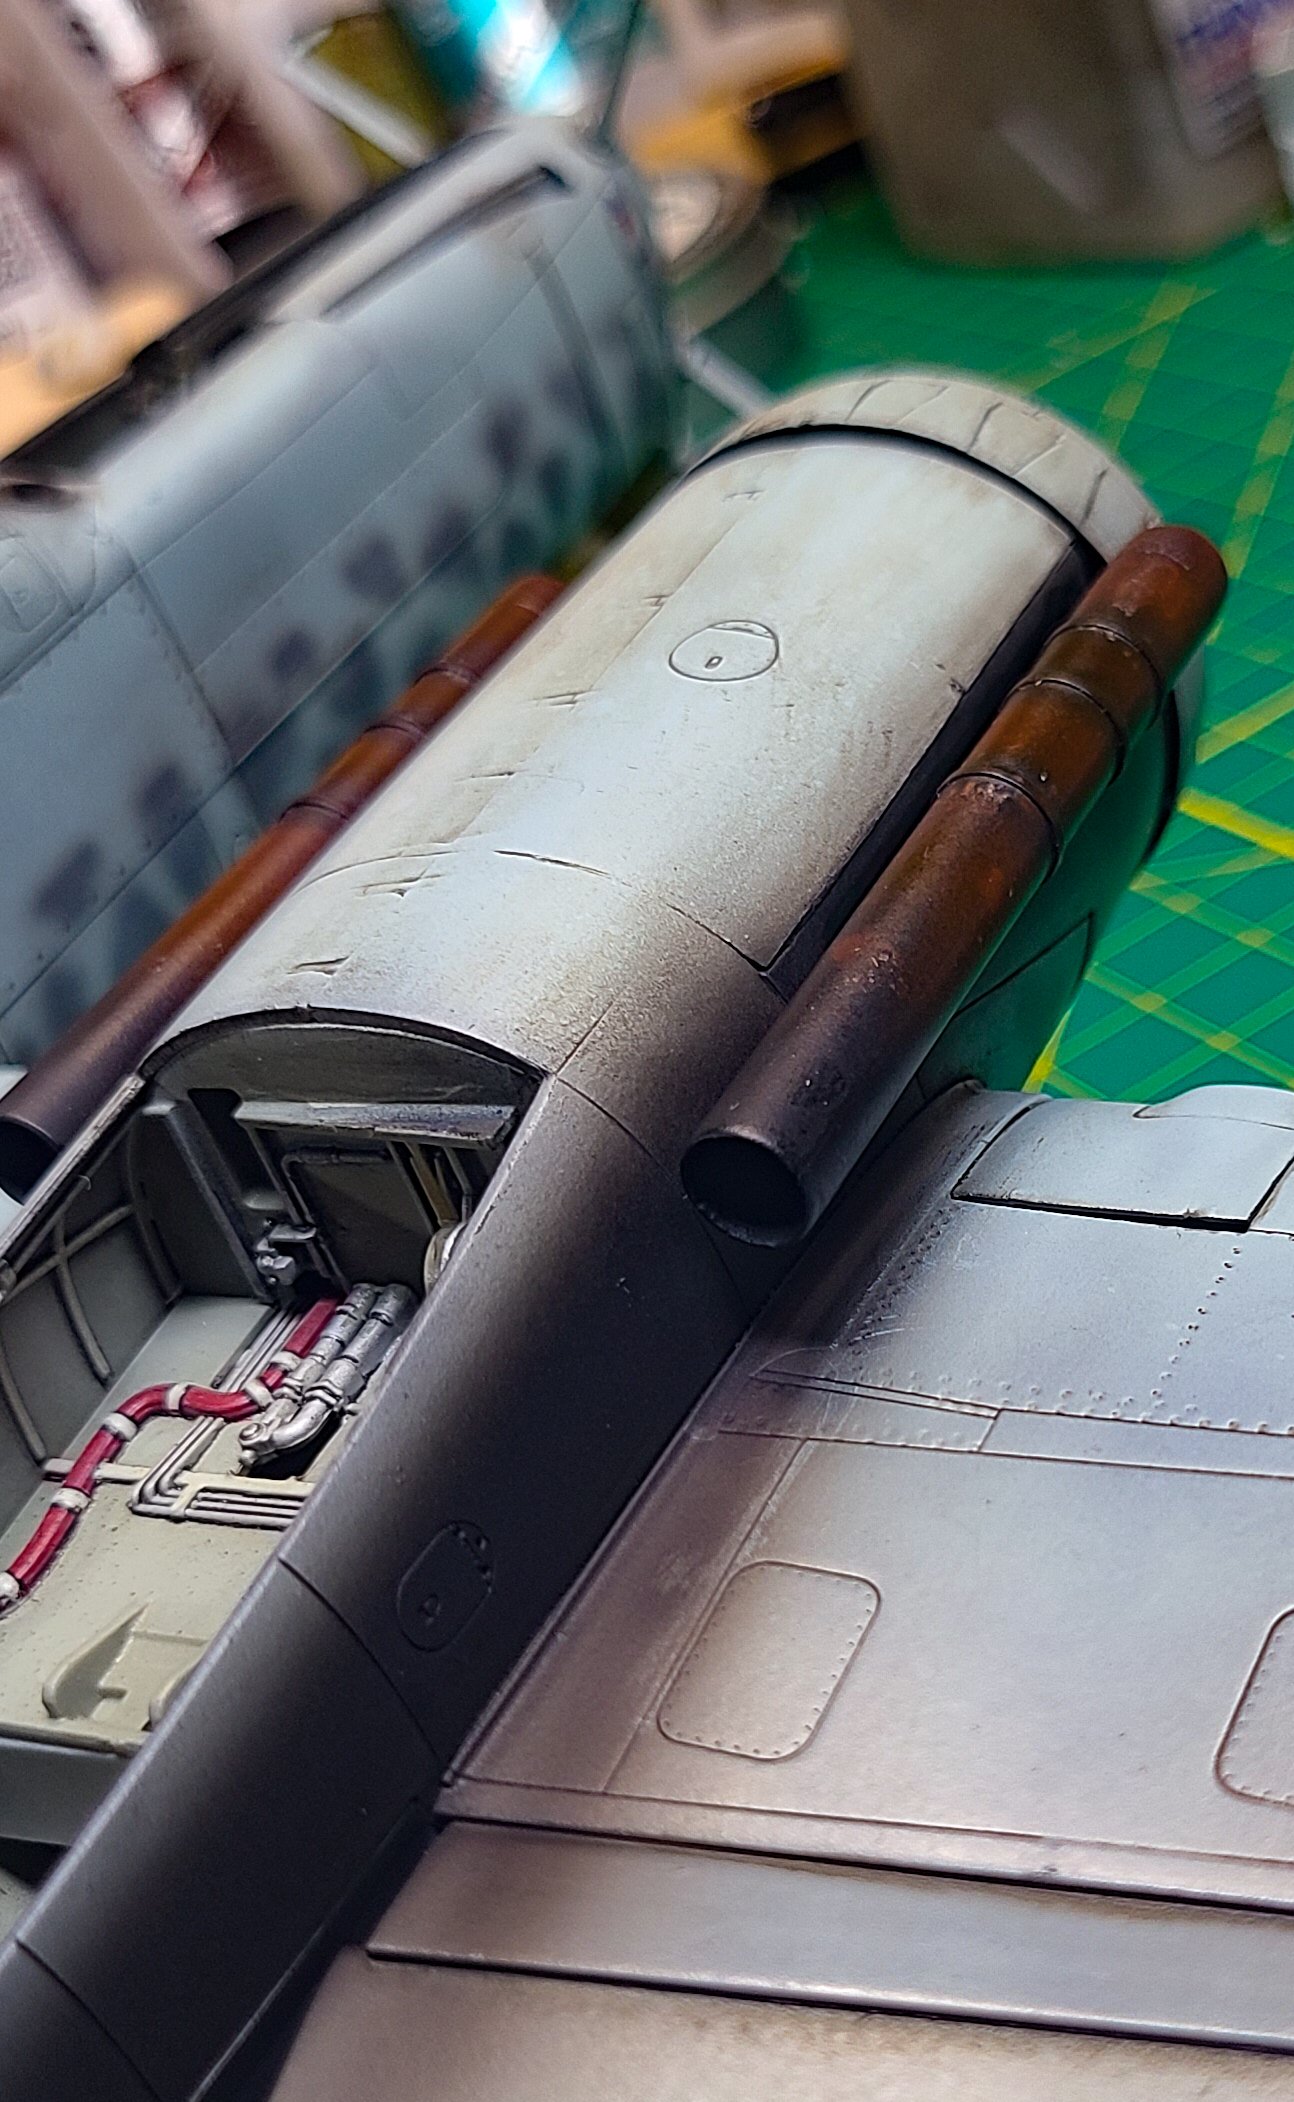
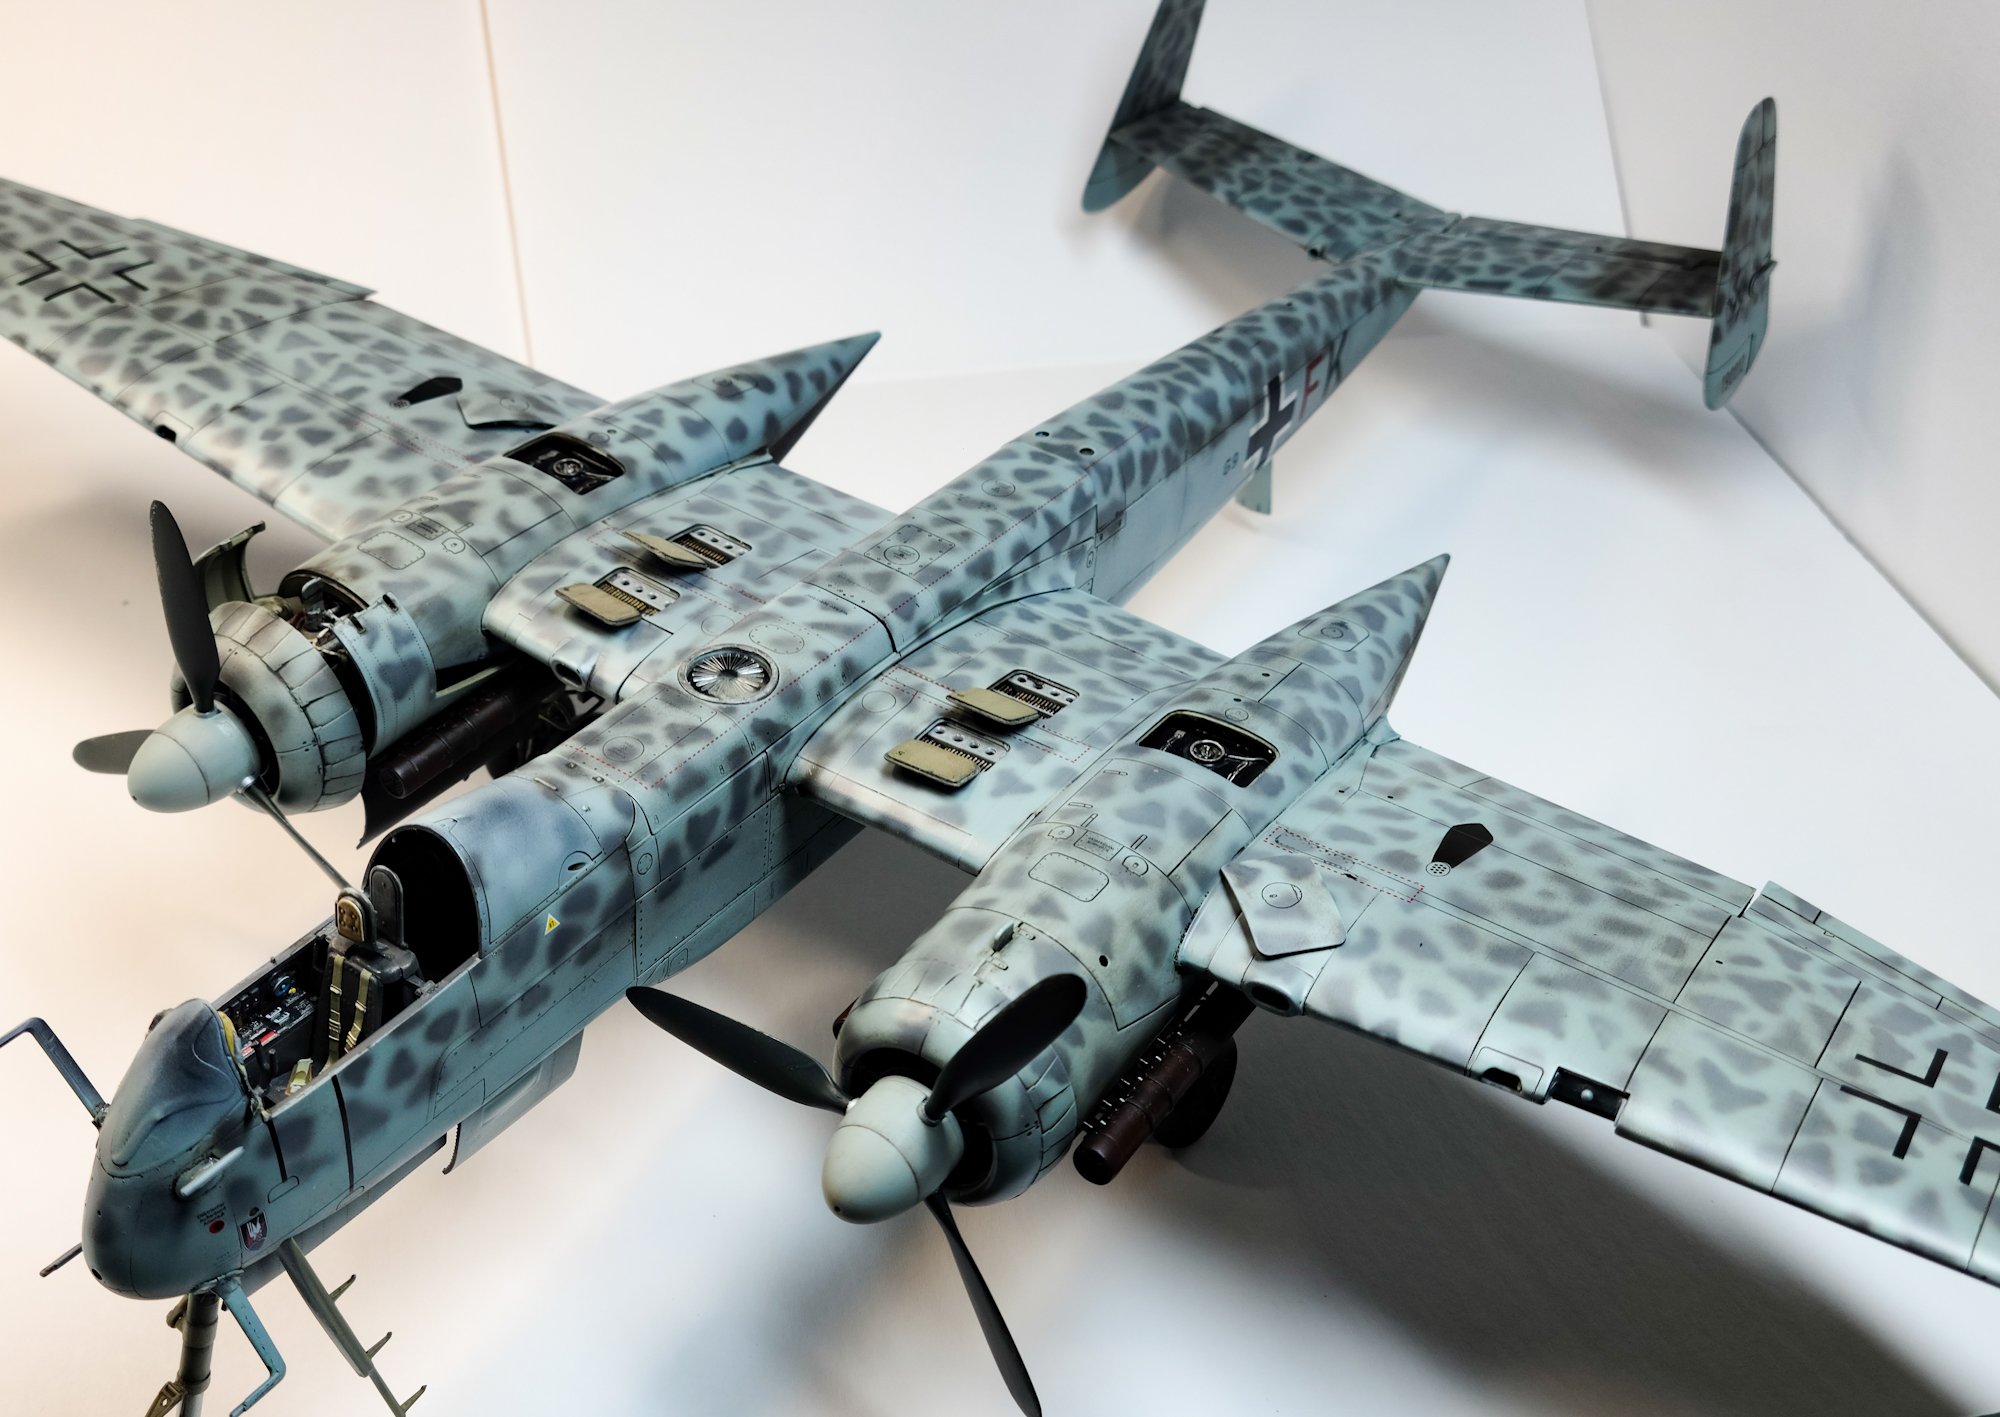
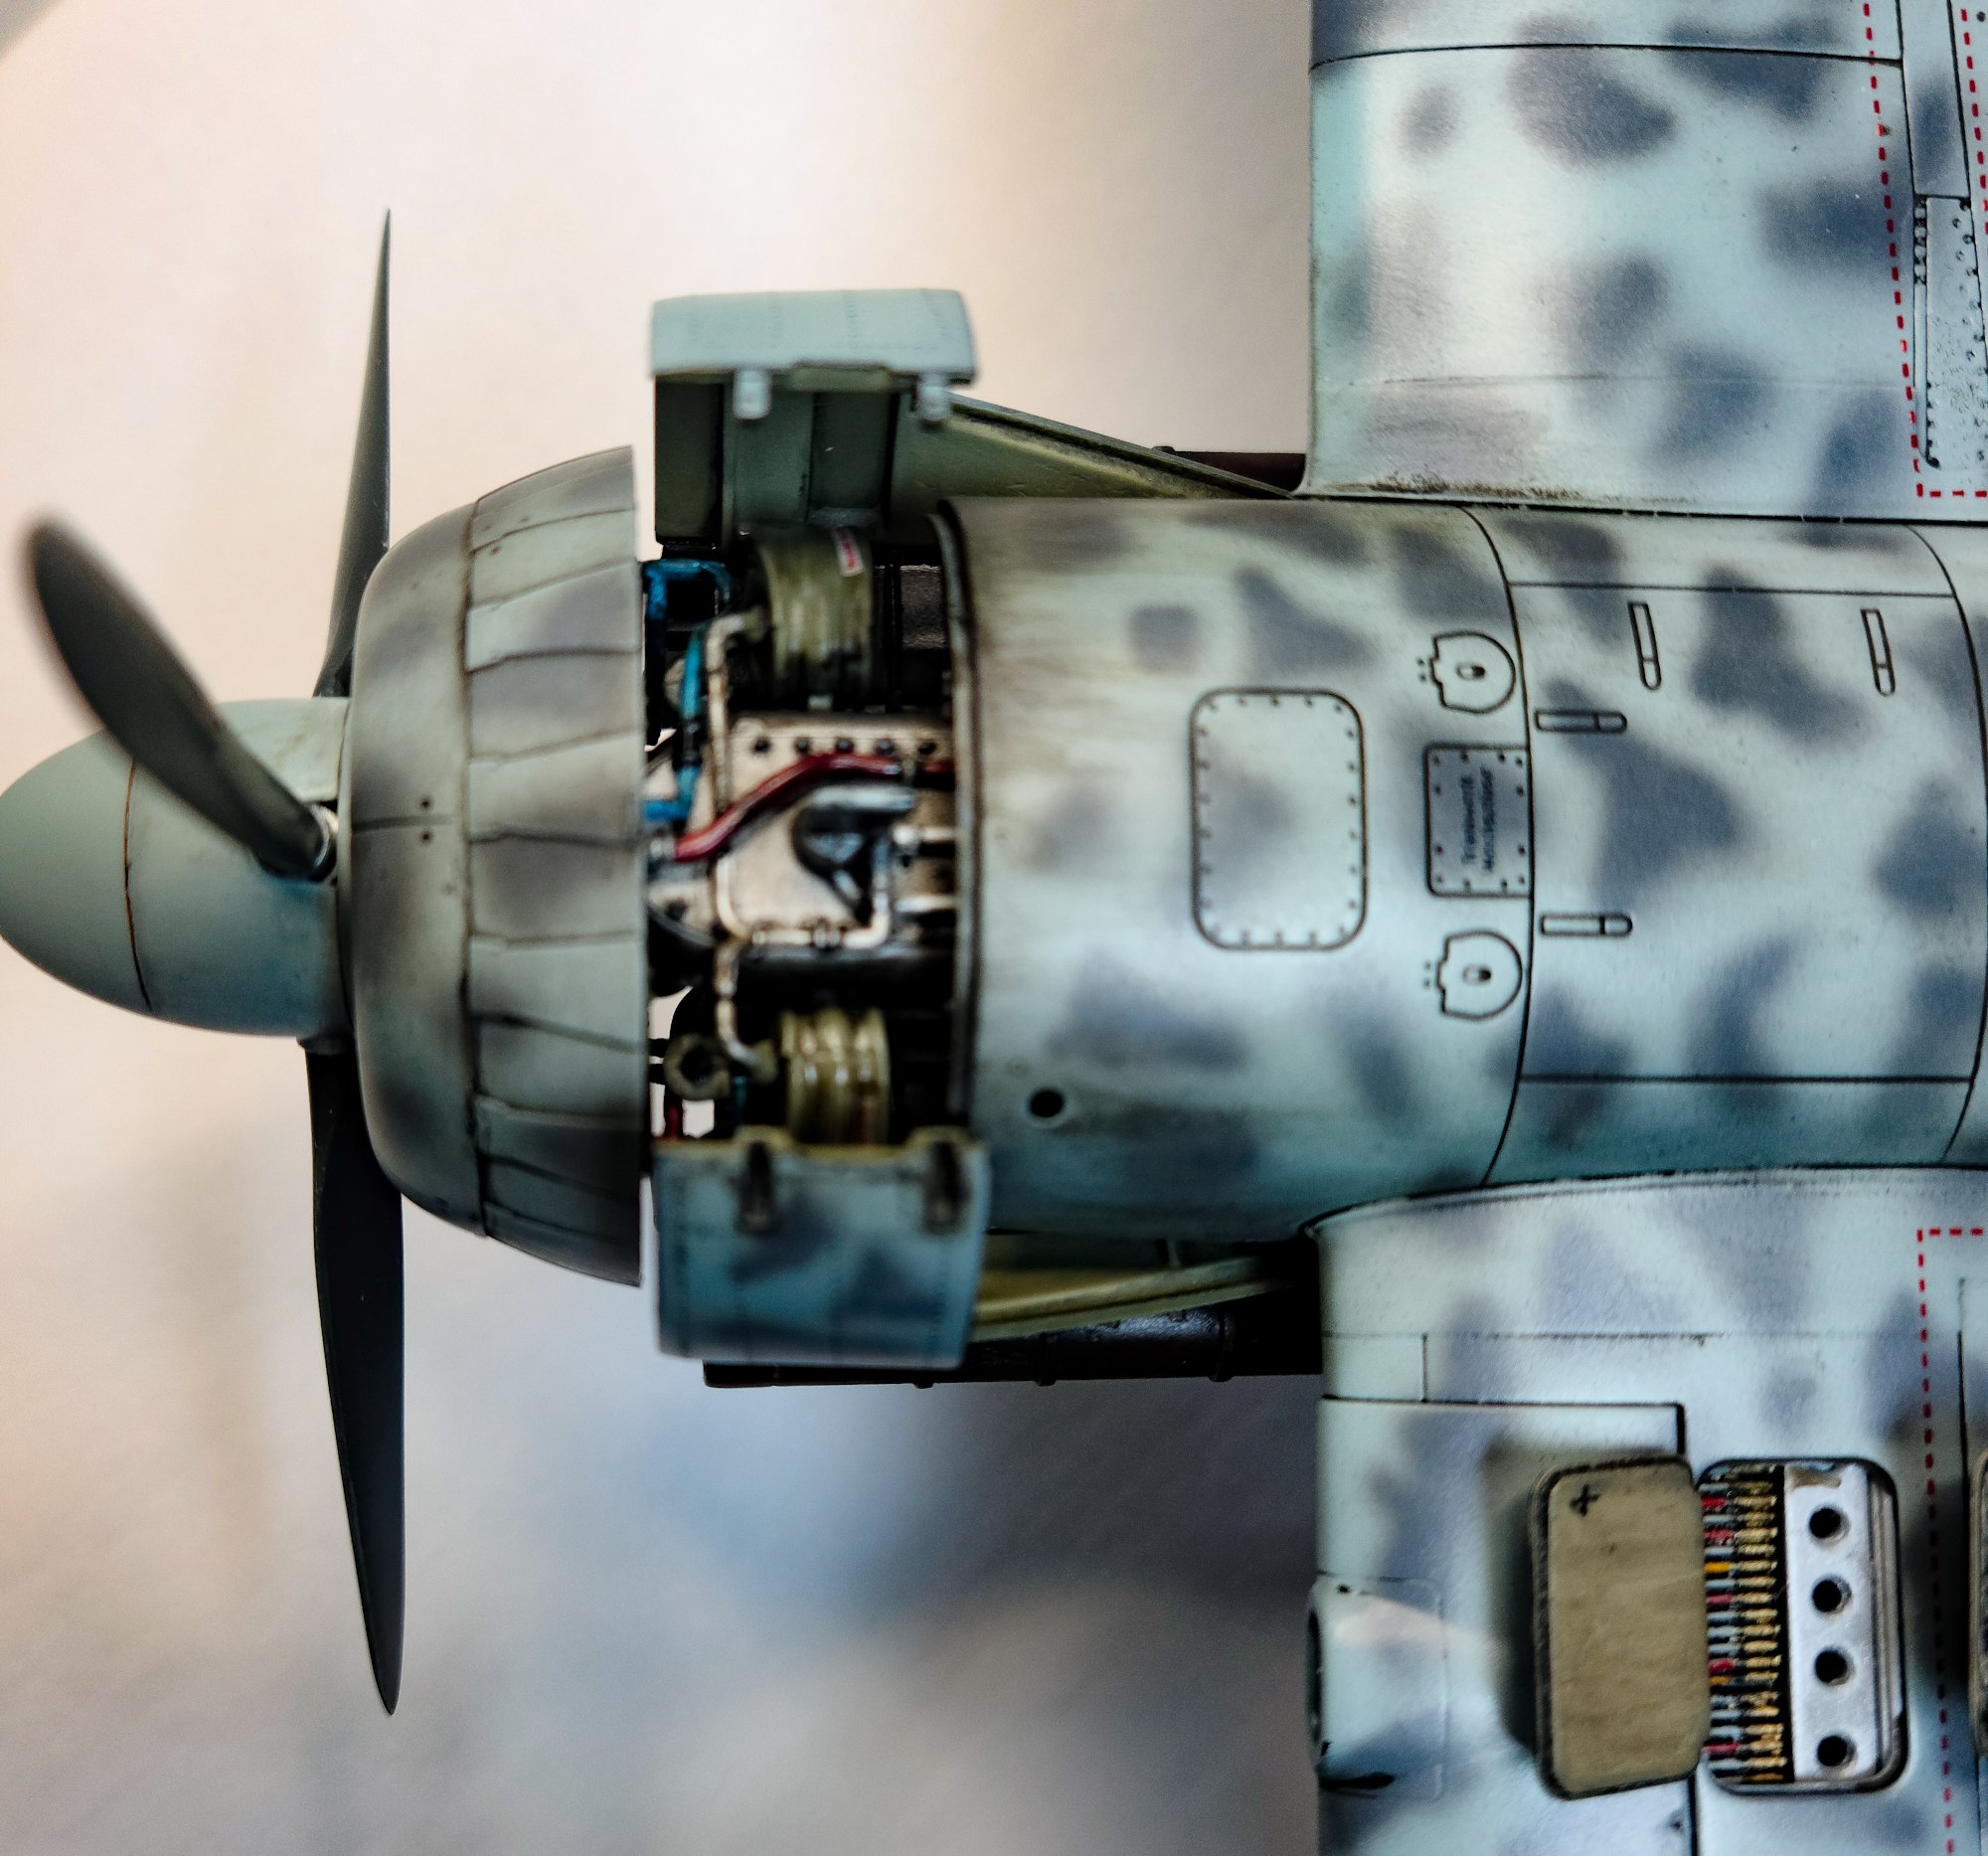
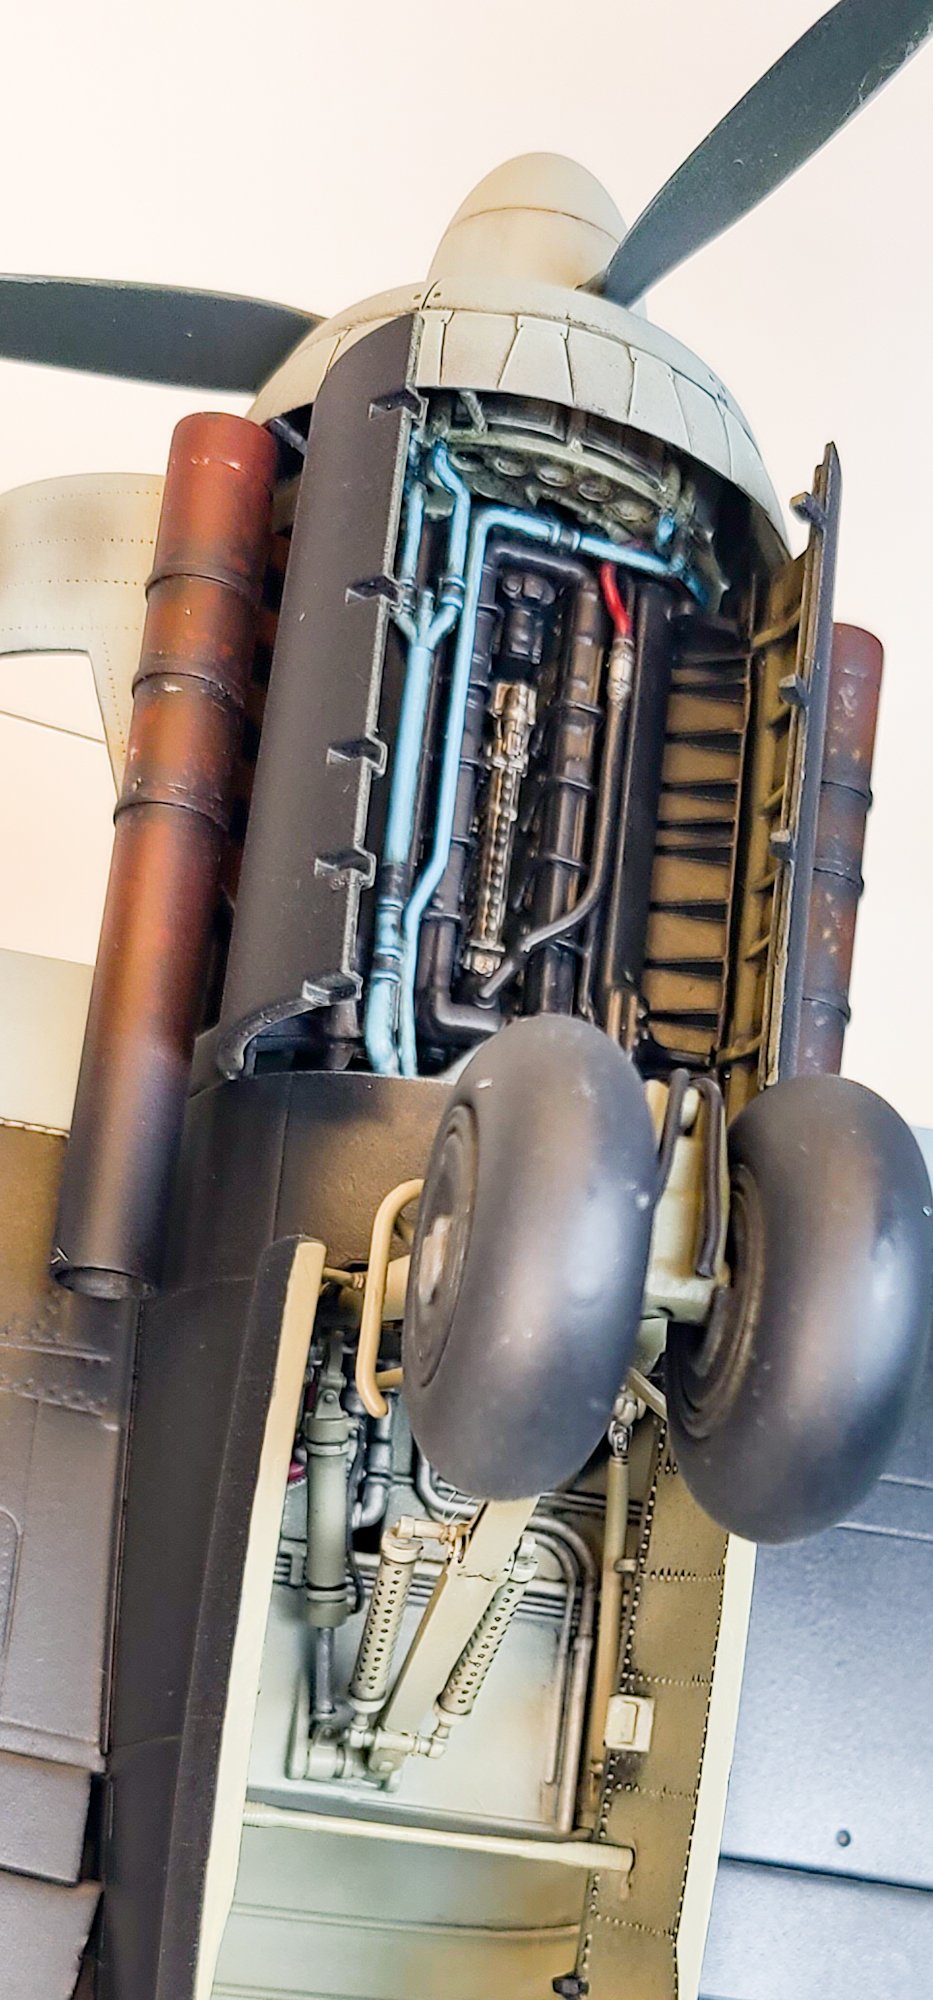
It's such a iconic-looking aircraft...almost too modern...like the Tiger cat. But I have to say, the plastic in the kit is average at best and the small pieces are full of flash...FULL OF FLASH...plus each engine is beautifully detailed but as far as I can tell, once you finish it's all hidden...about 60 parts per engine...I'm going to keep building them out and see if there's a way to show off at least one of them.
You can see all the razor cuts I tried to make in the oil and water cooling tubes to remove the flash...but this is about 38 parts...still have 23-24 more to go.

I think it'll be easier than the BF-109 if only because this will be my third ZM kit and they tend to use similar techniques. It will take longer because there's more flash on the smaller pieces and more parts because of the two engines and the landing gear. I saw a few video builds and at least one complained about fit issues, so we'll see.
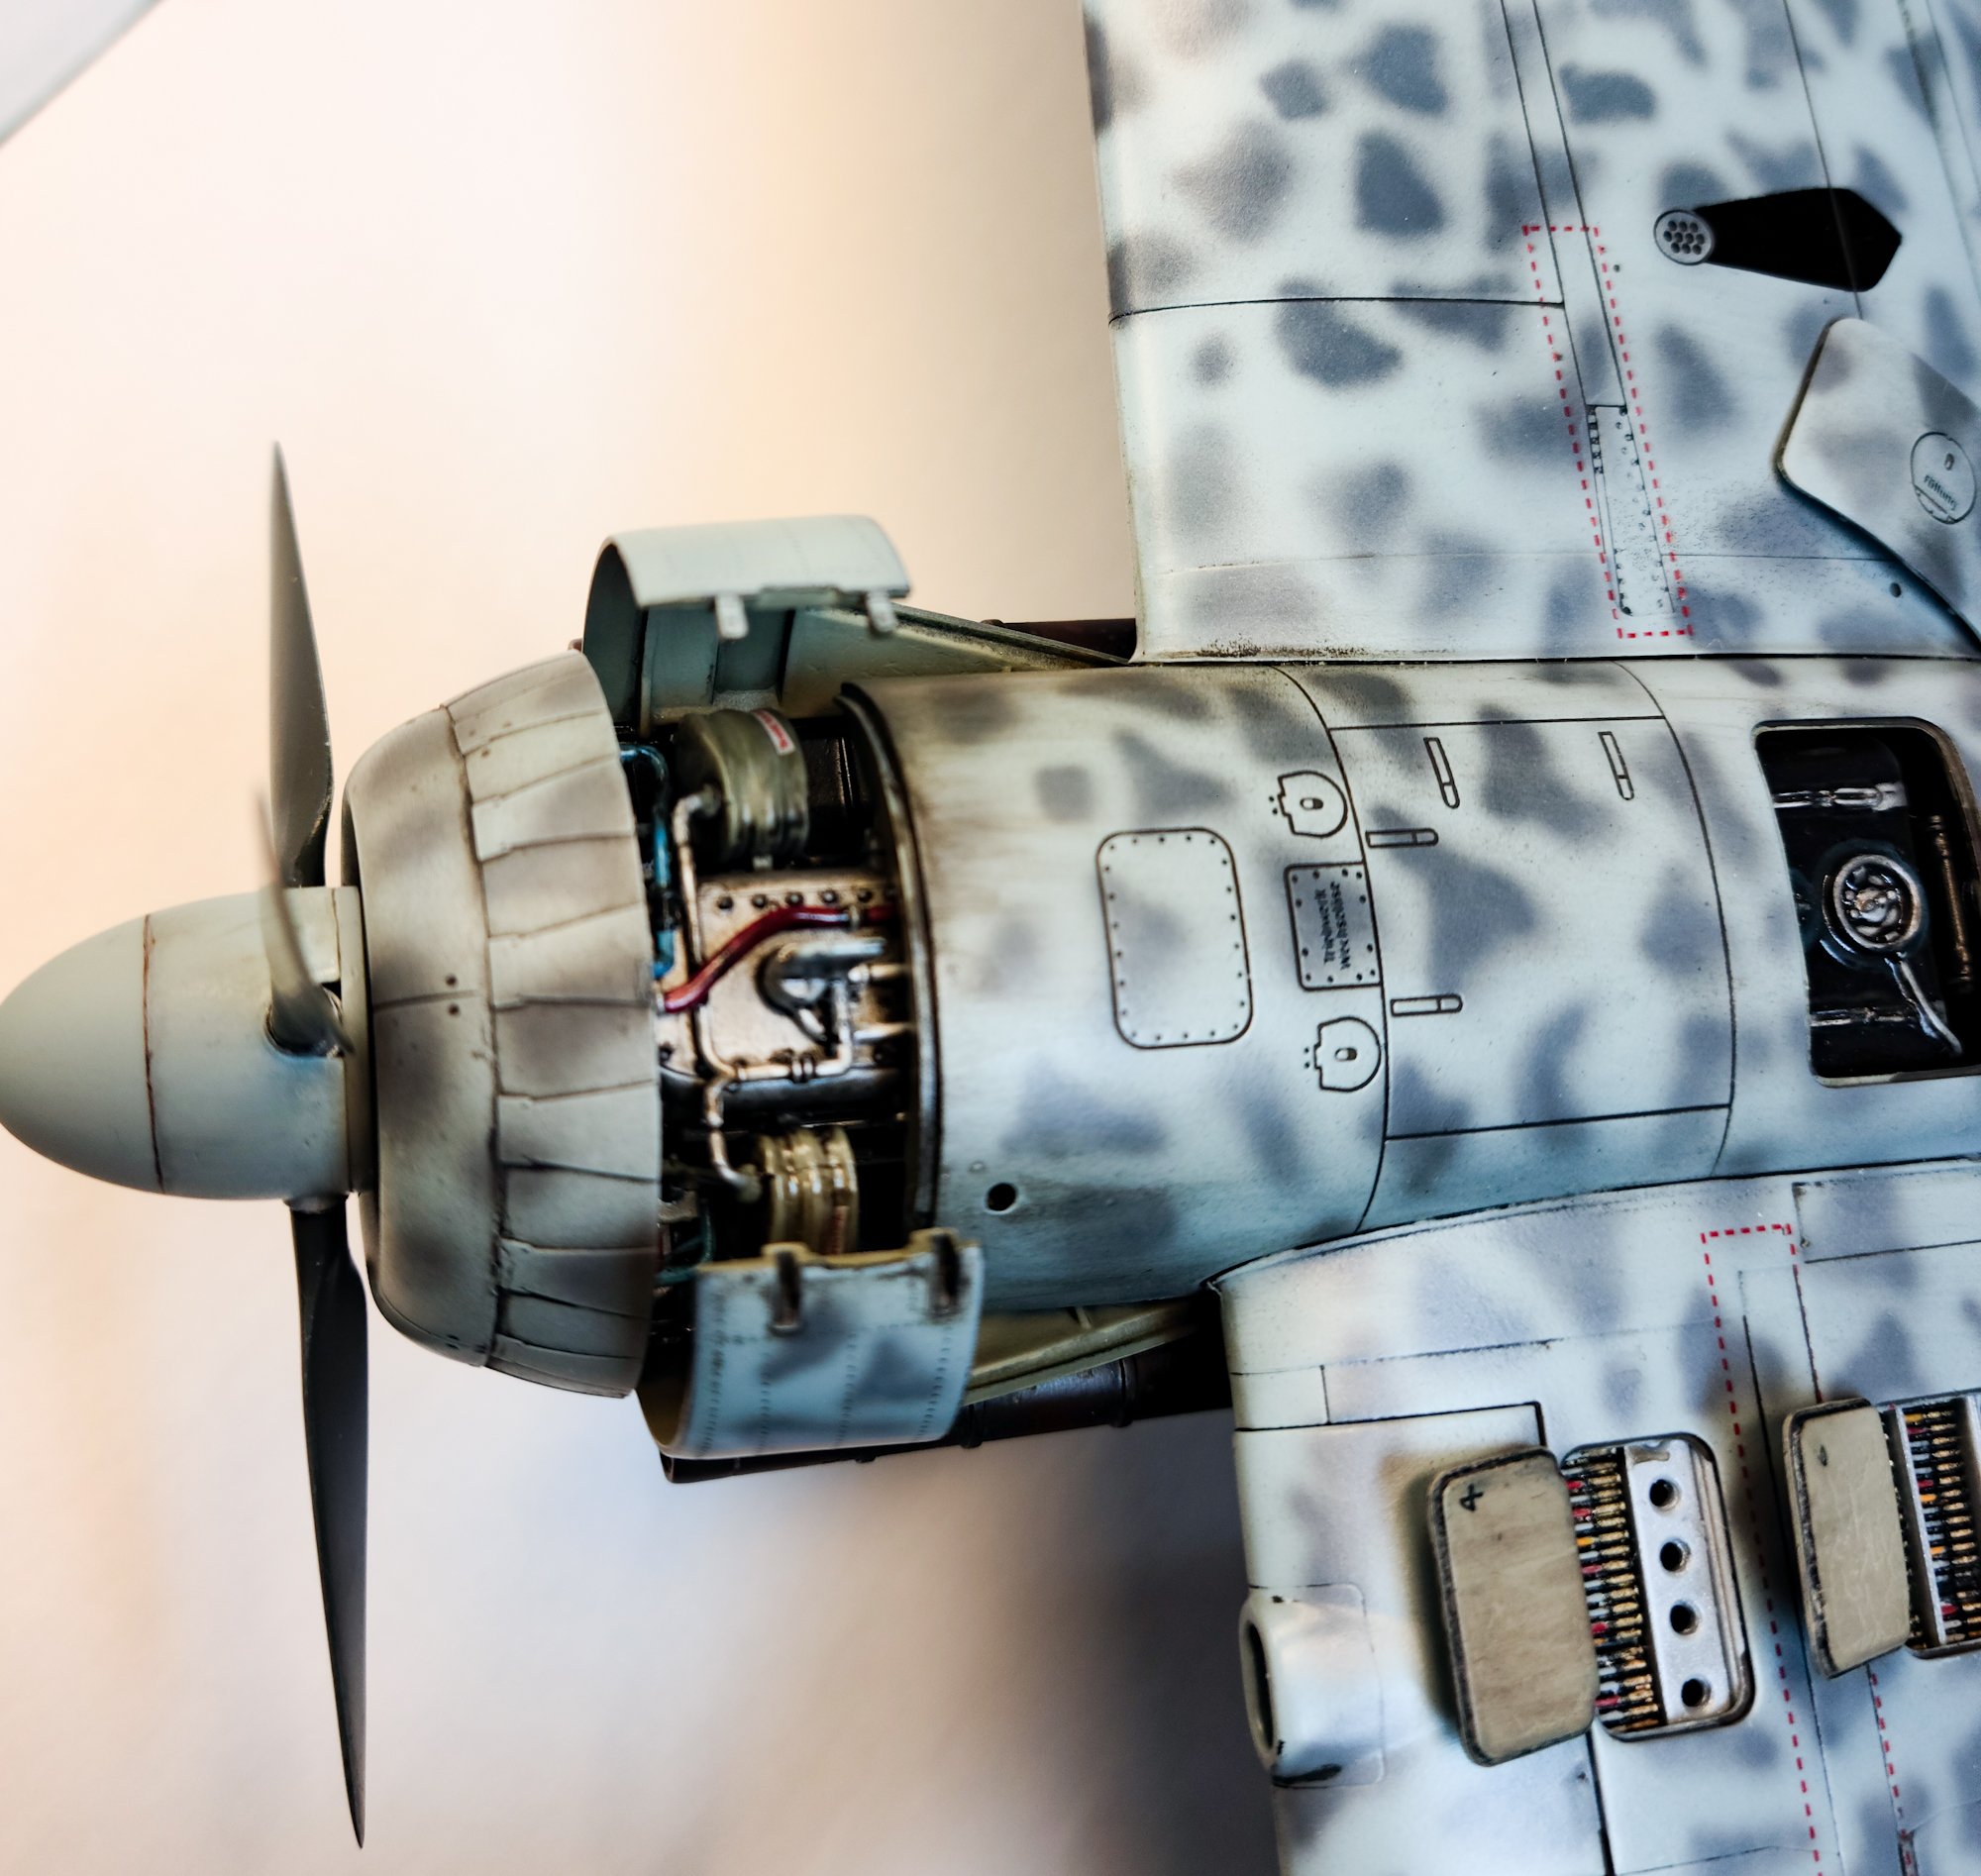
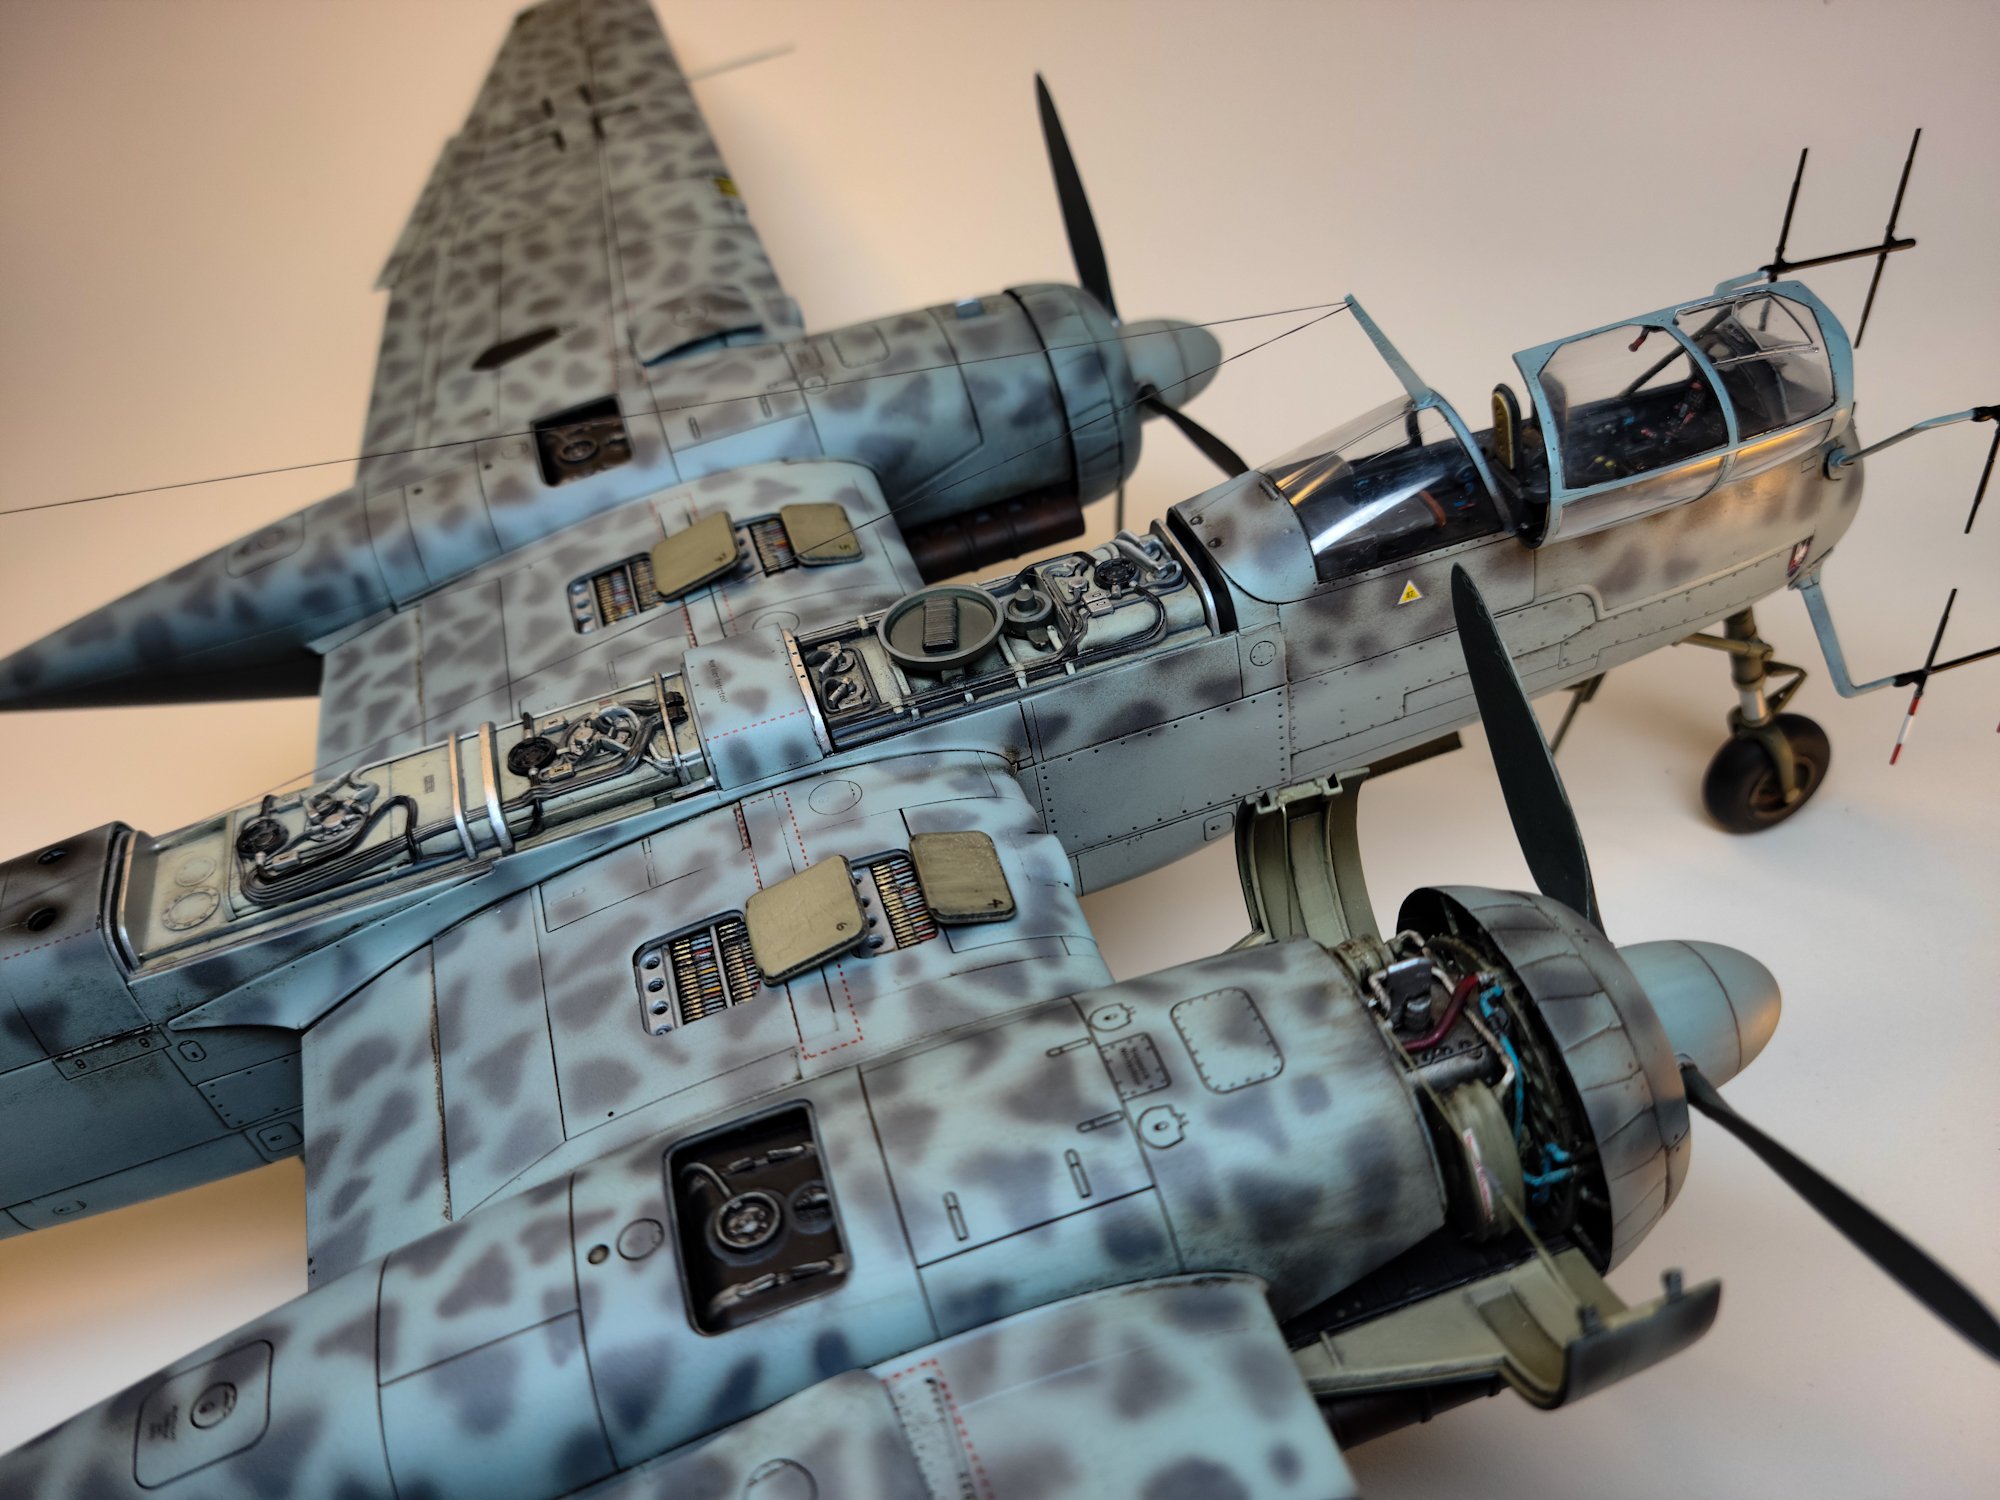
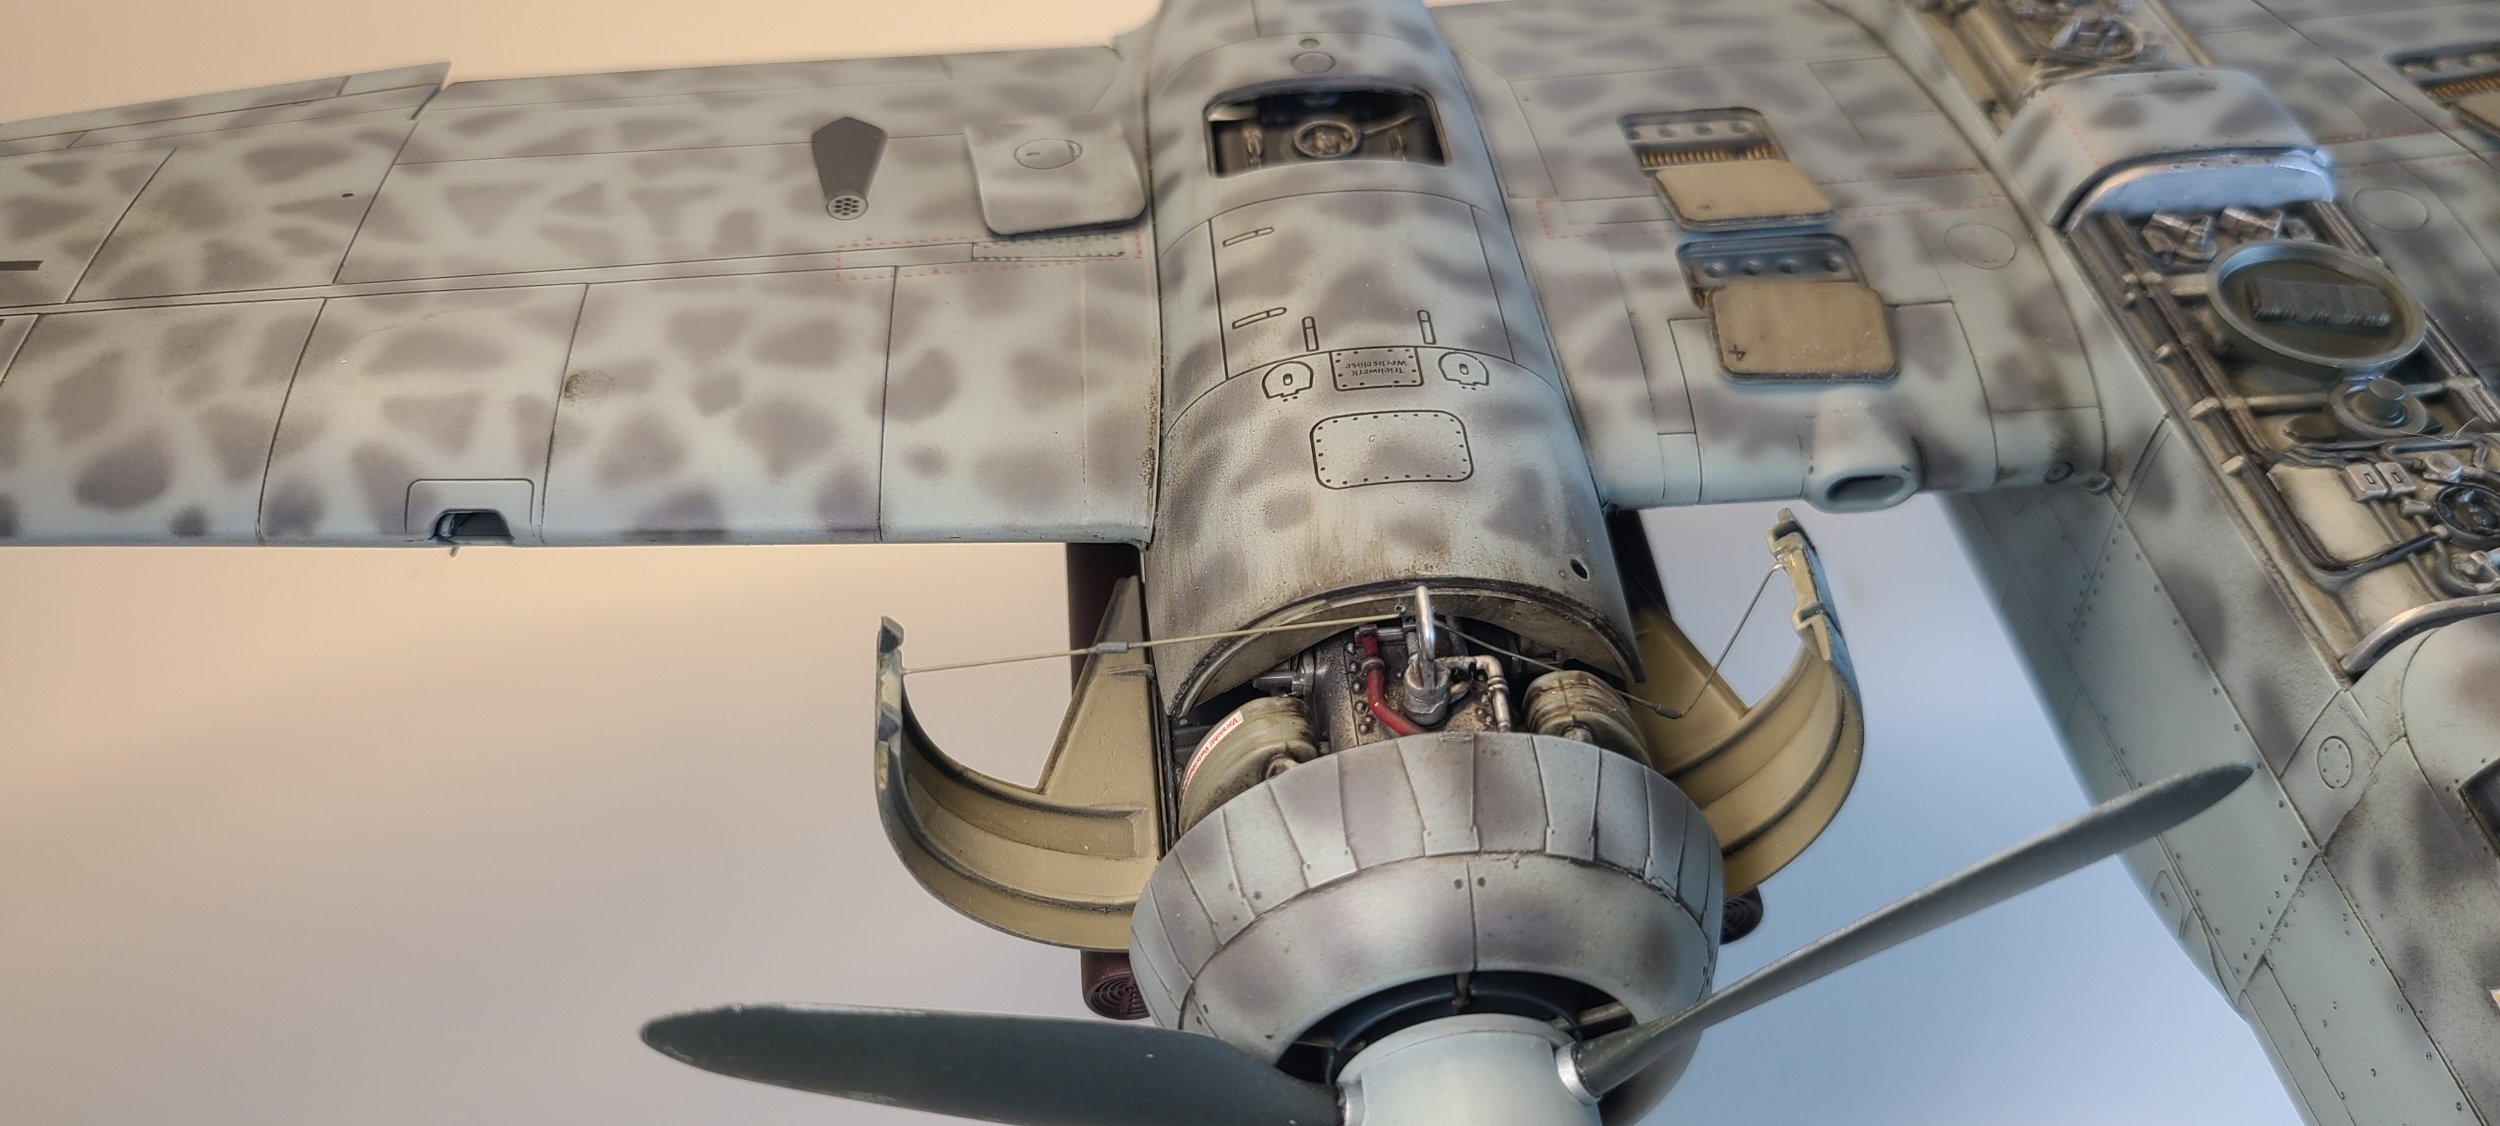
Here I’ve done the basic work on both engines. I’ll display one w/open cowling doors.

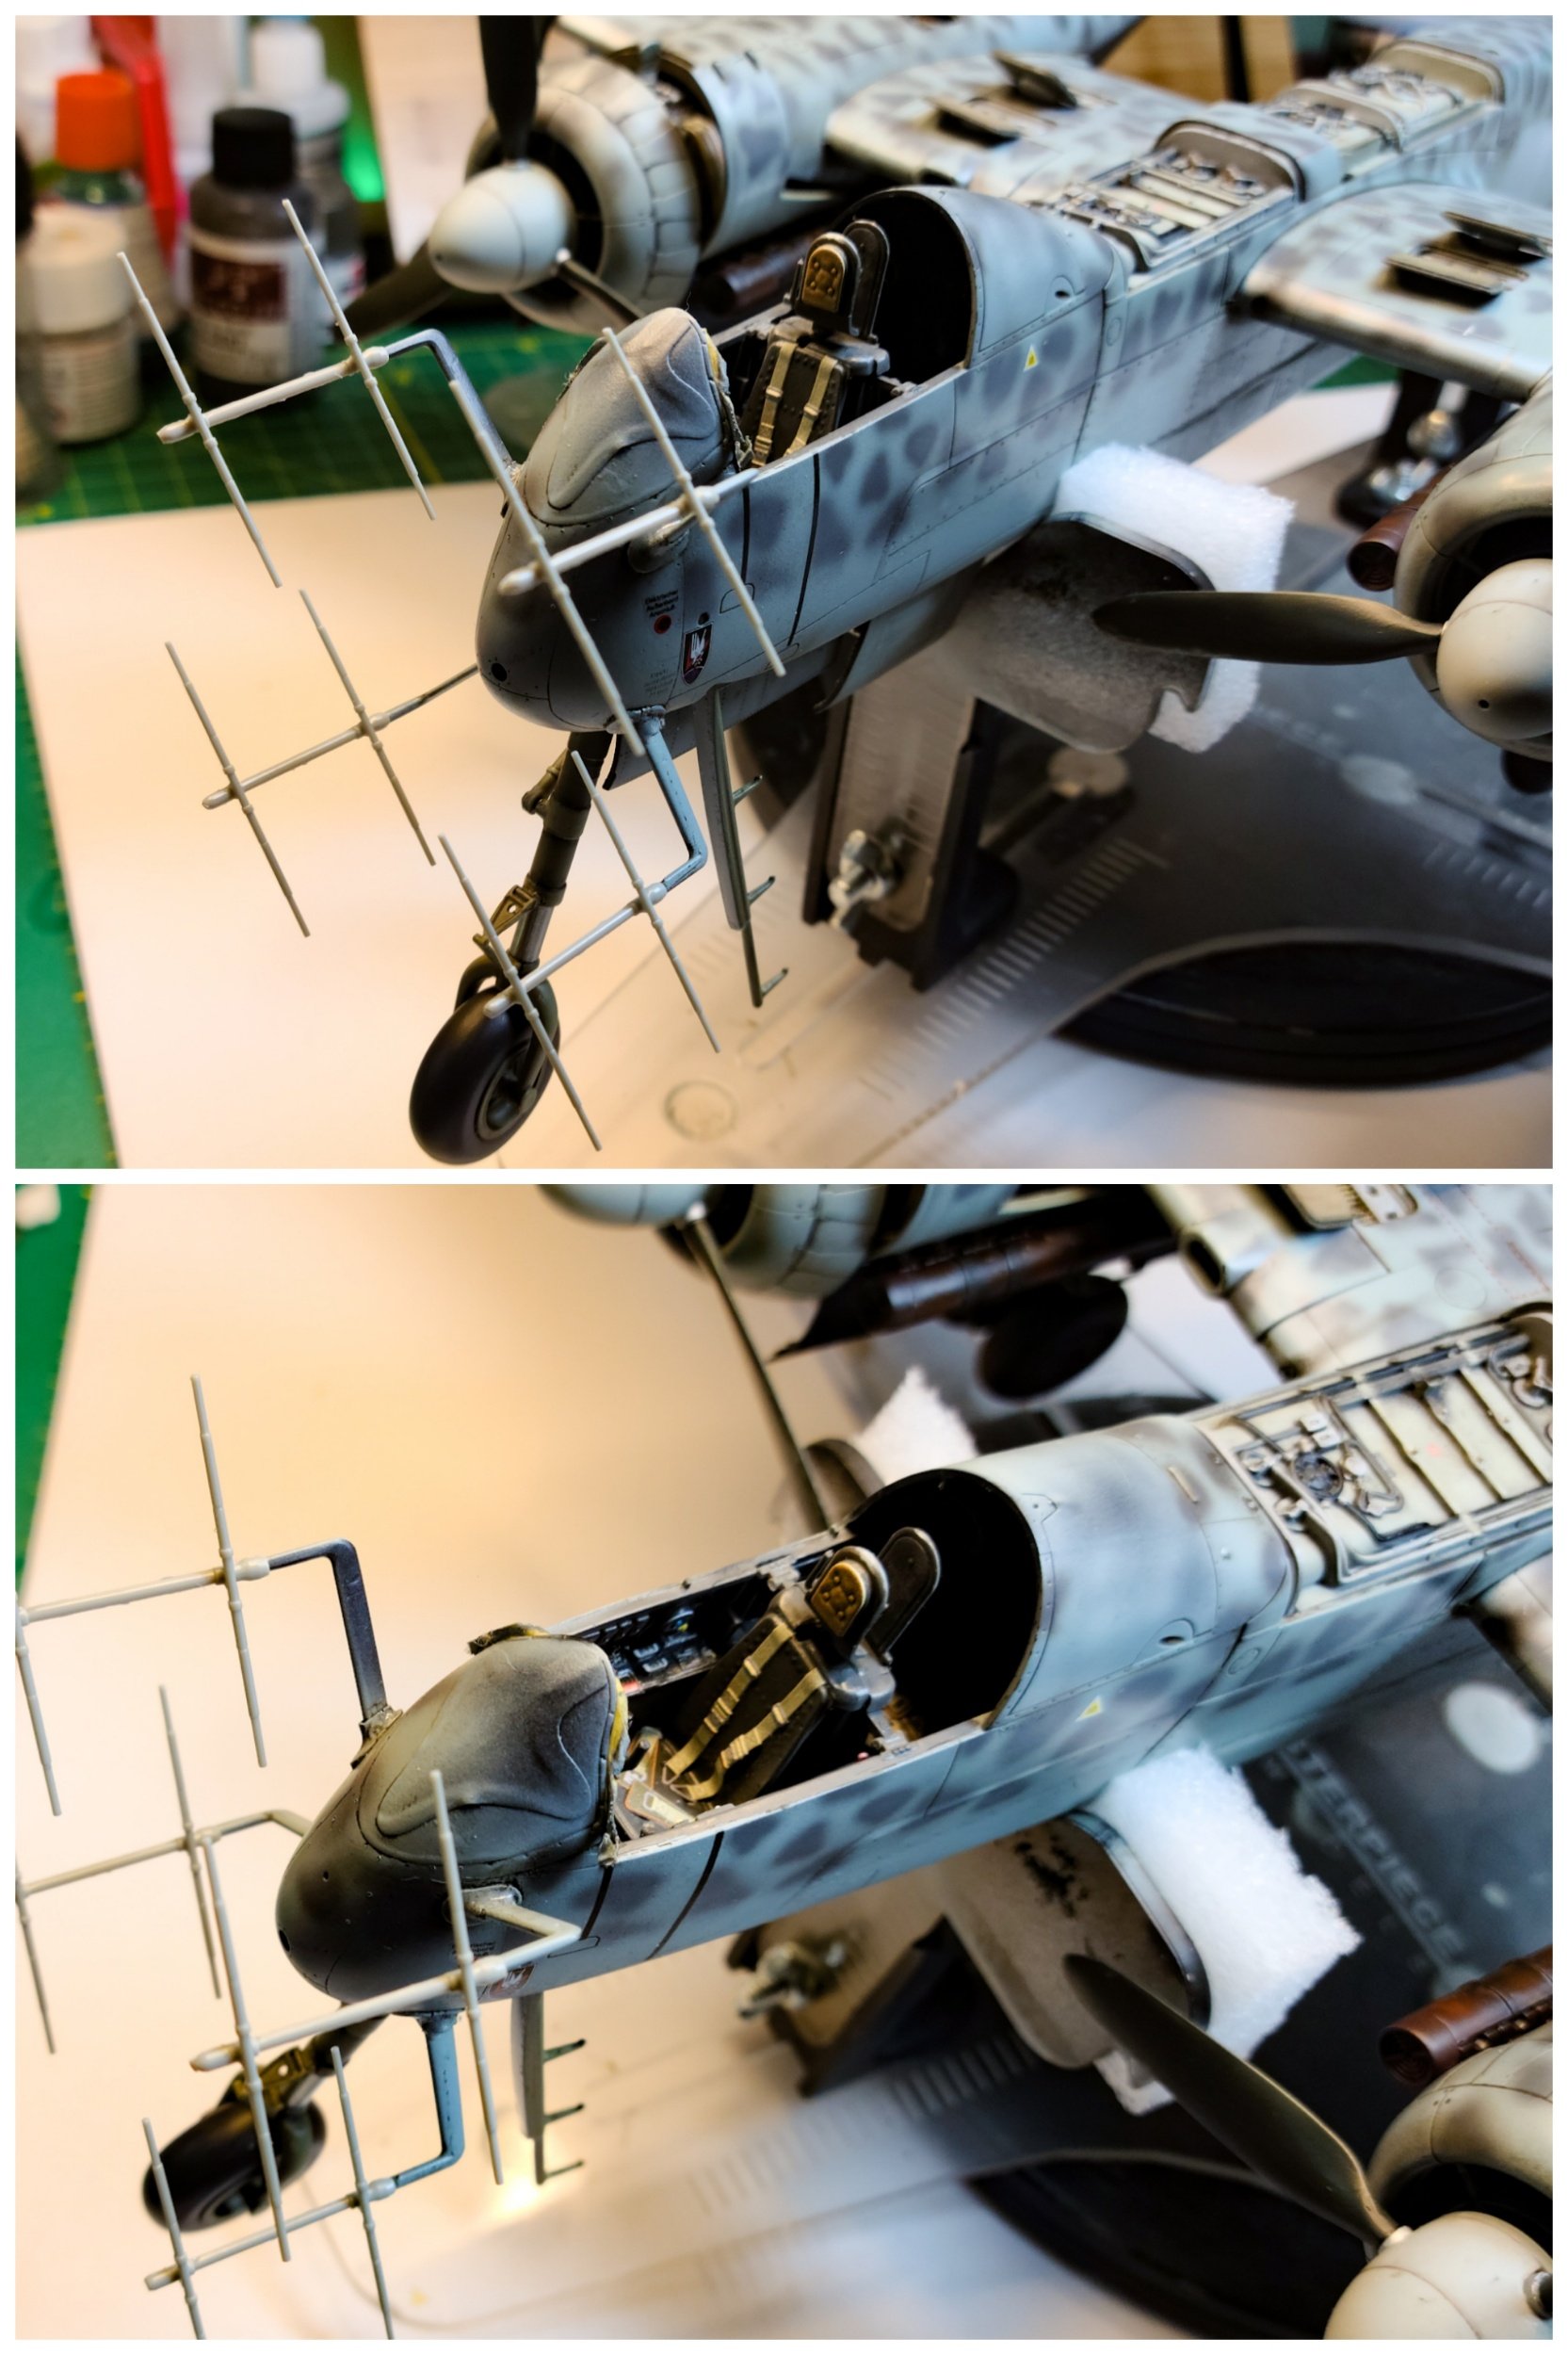
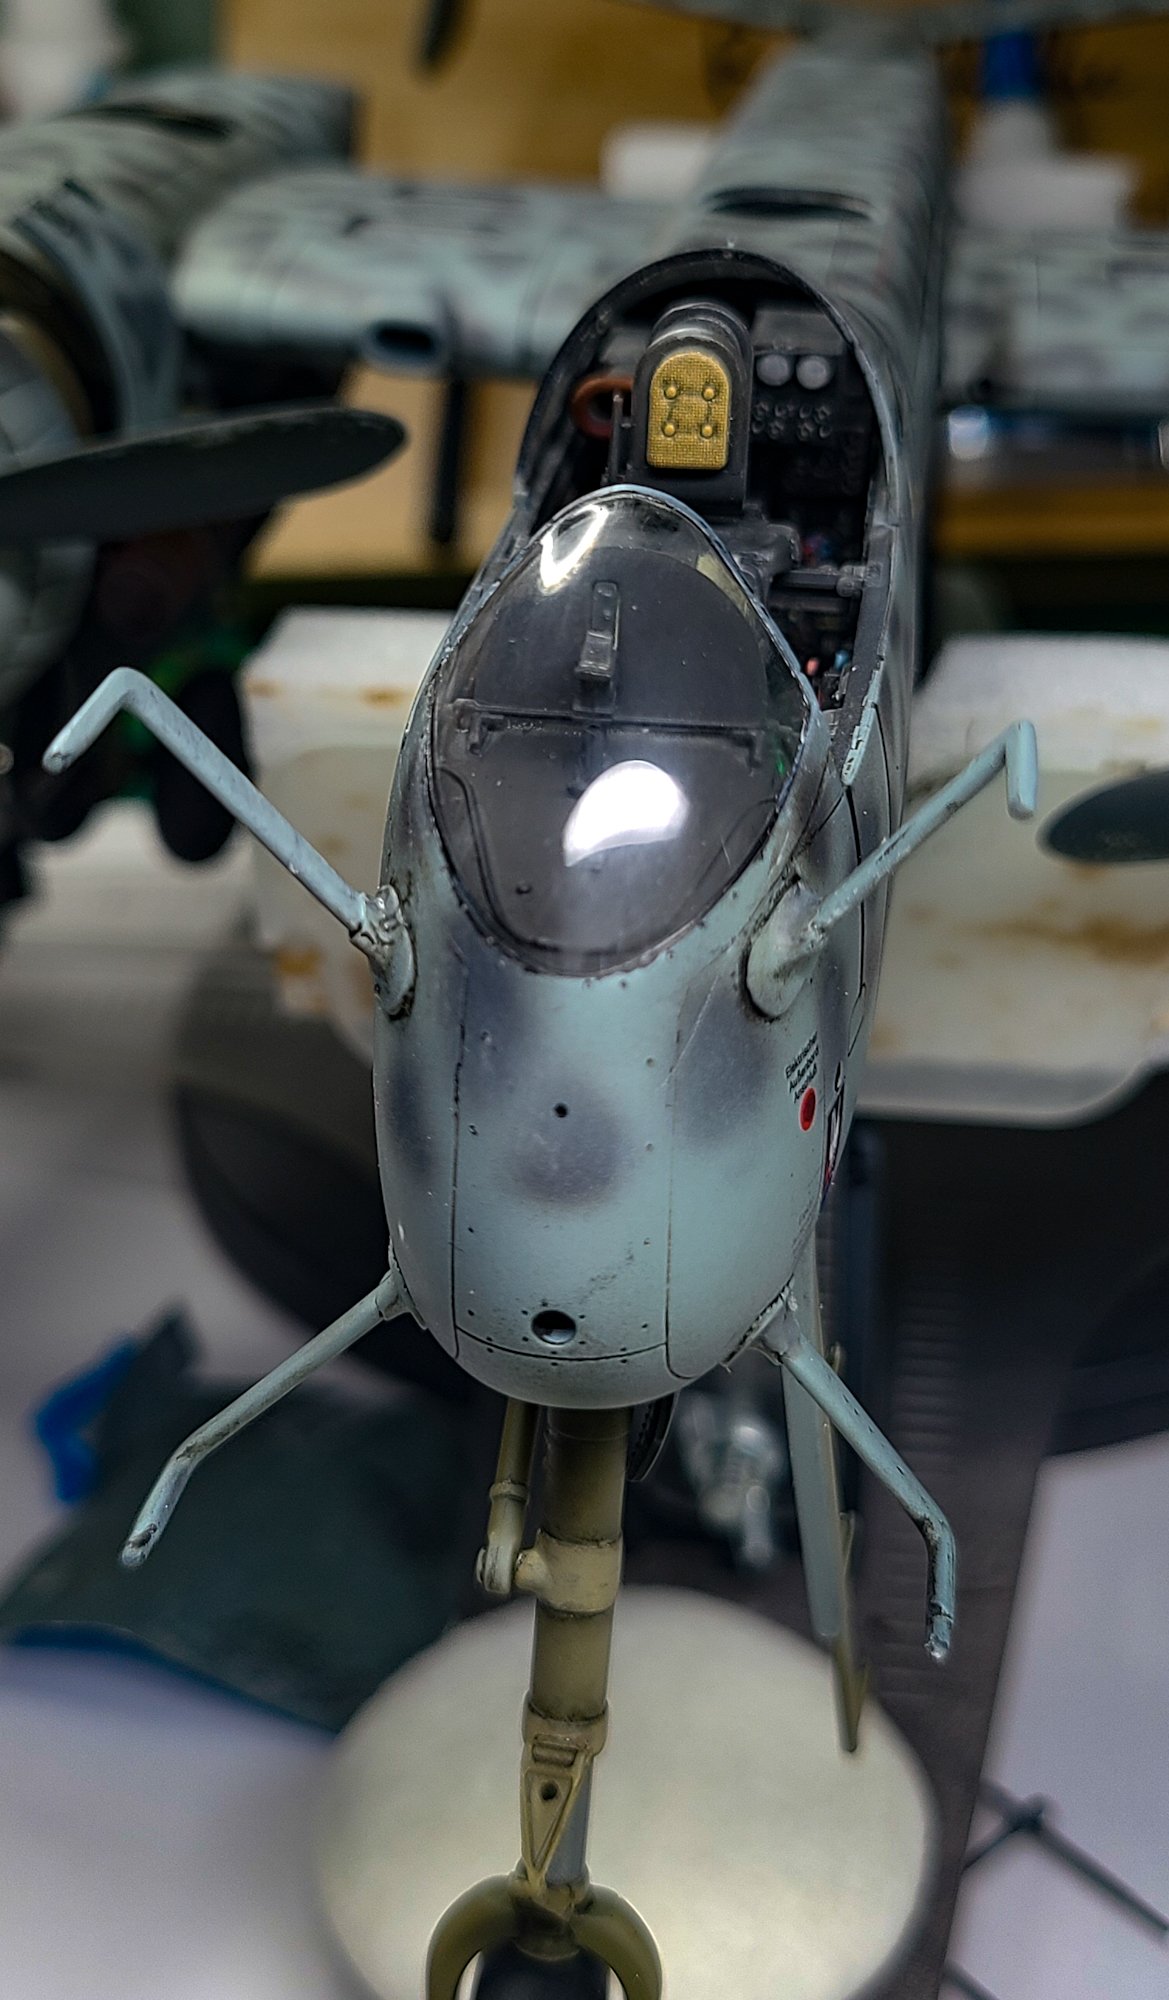
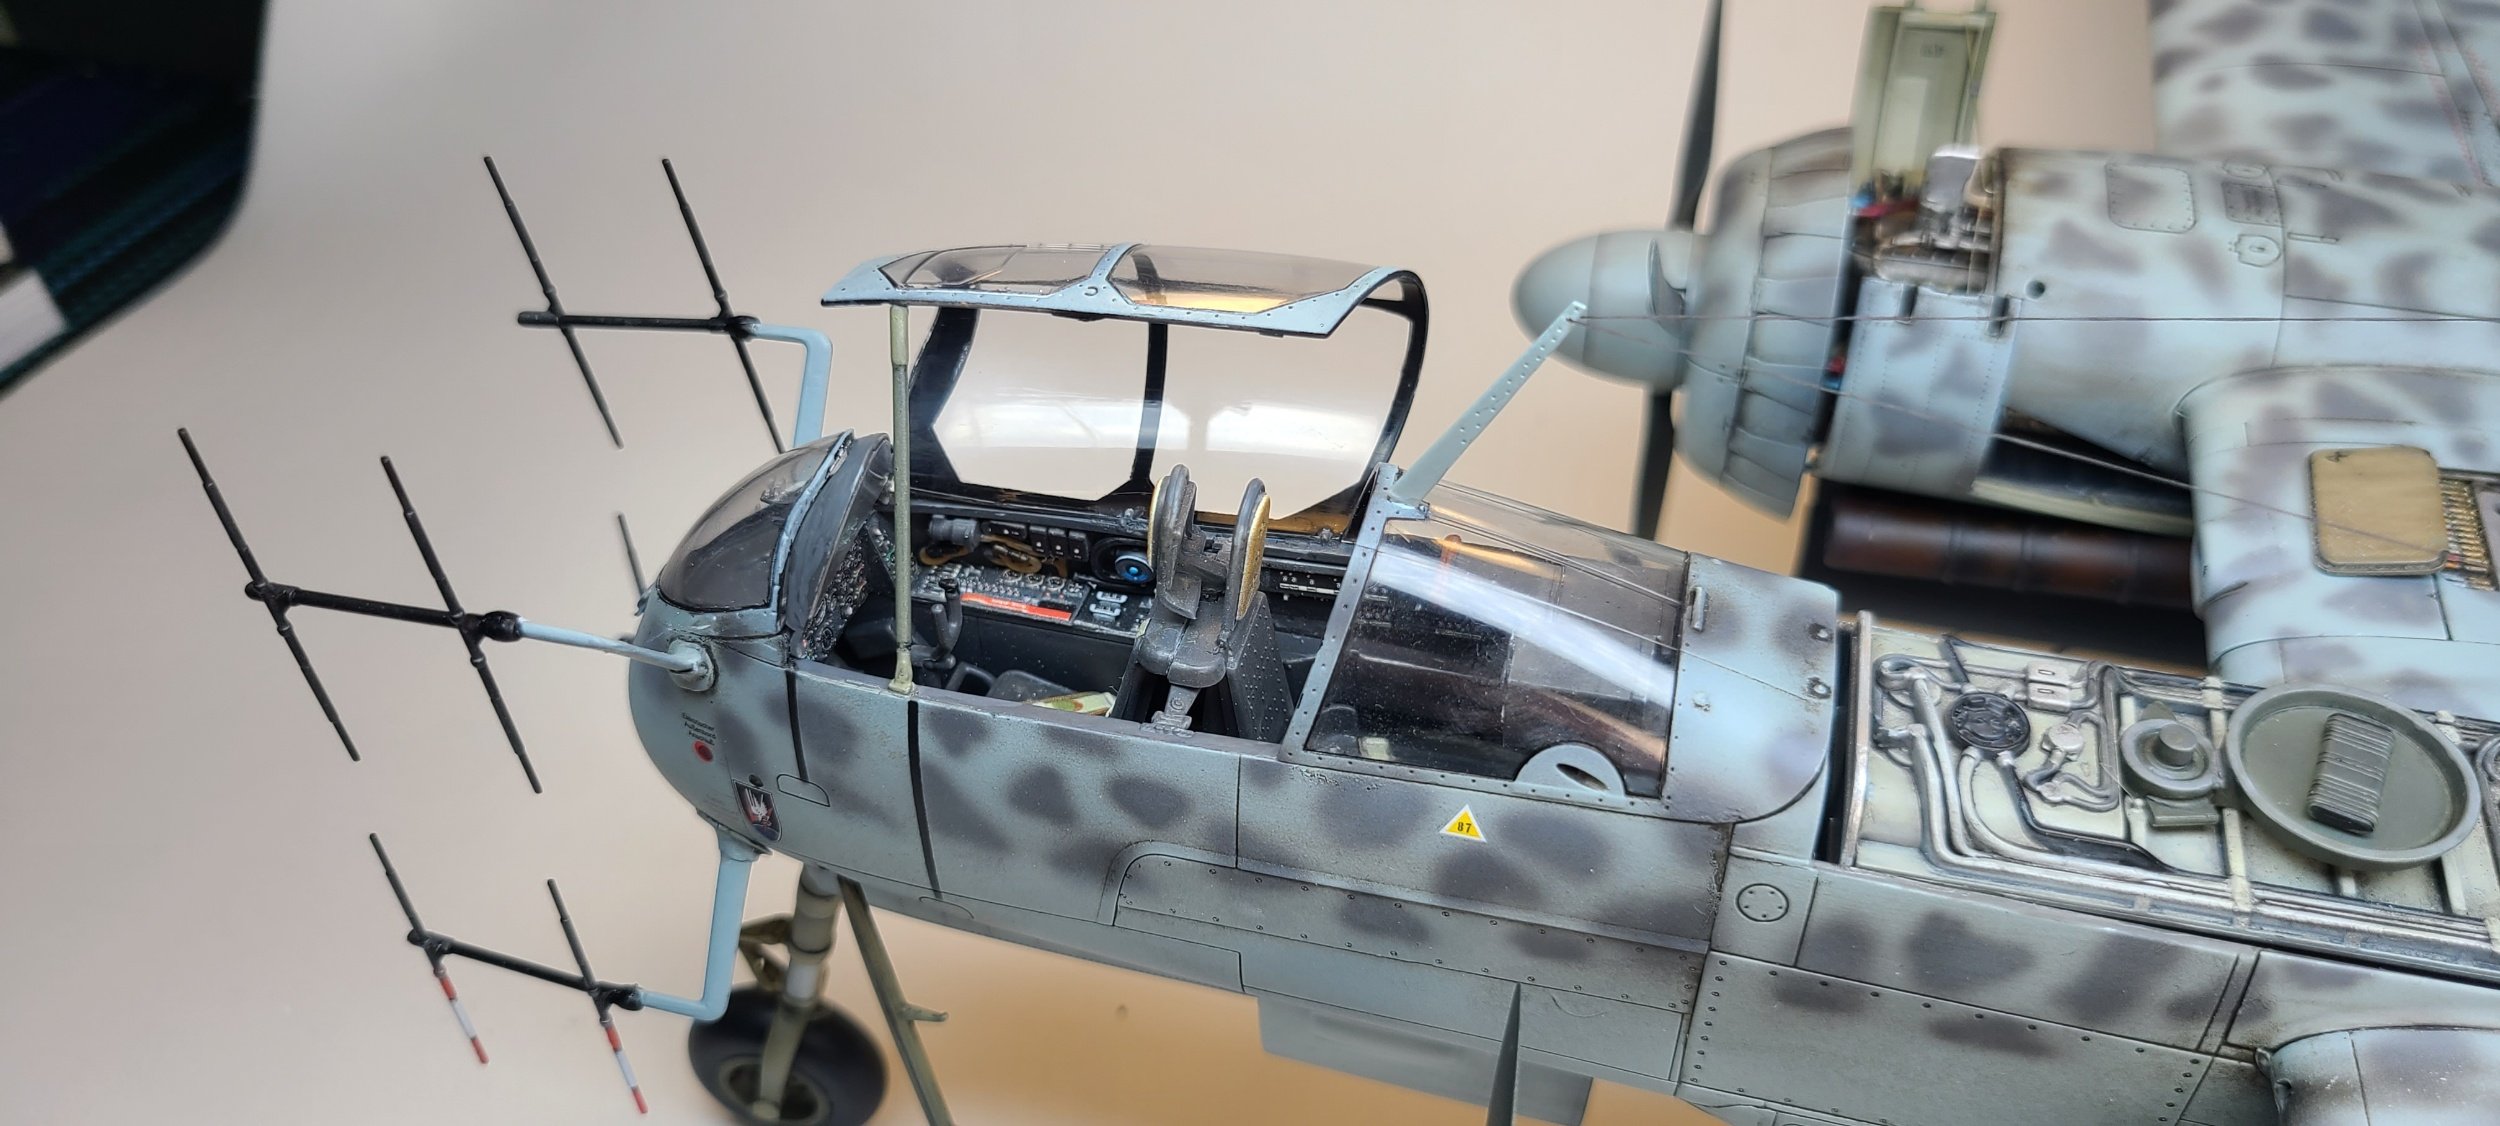
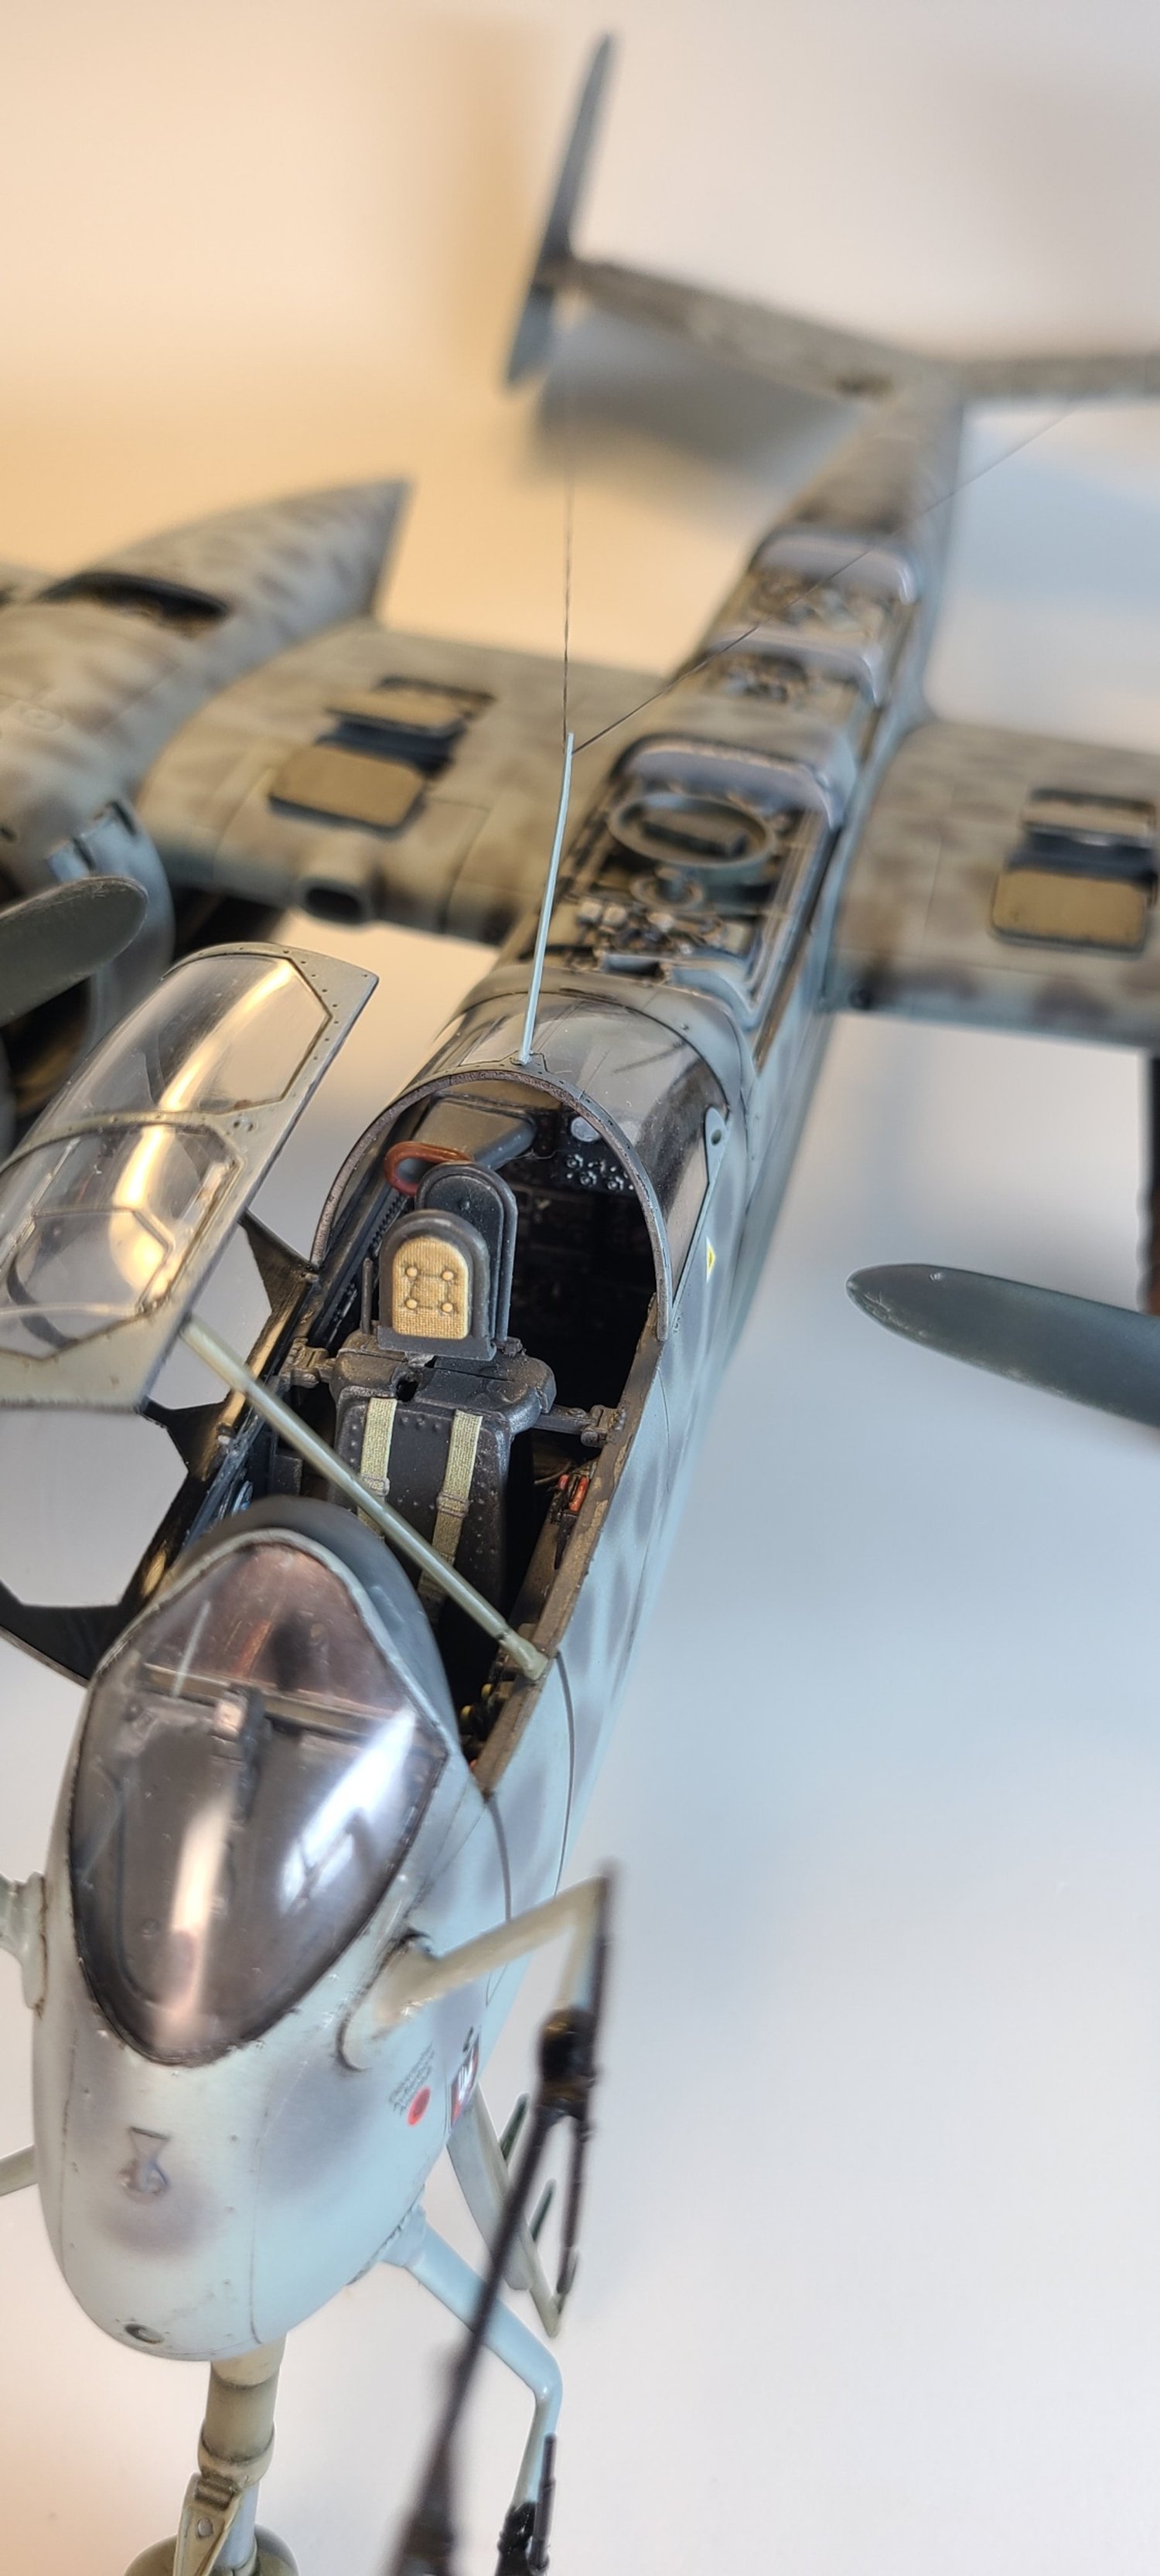
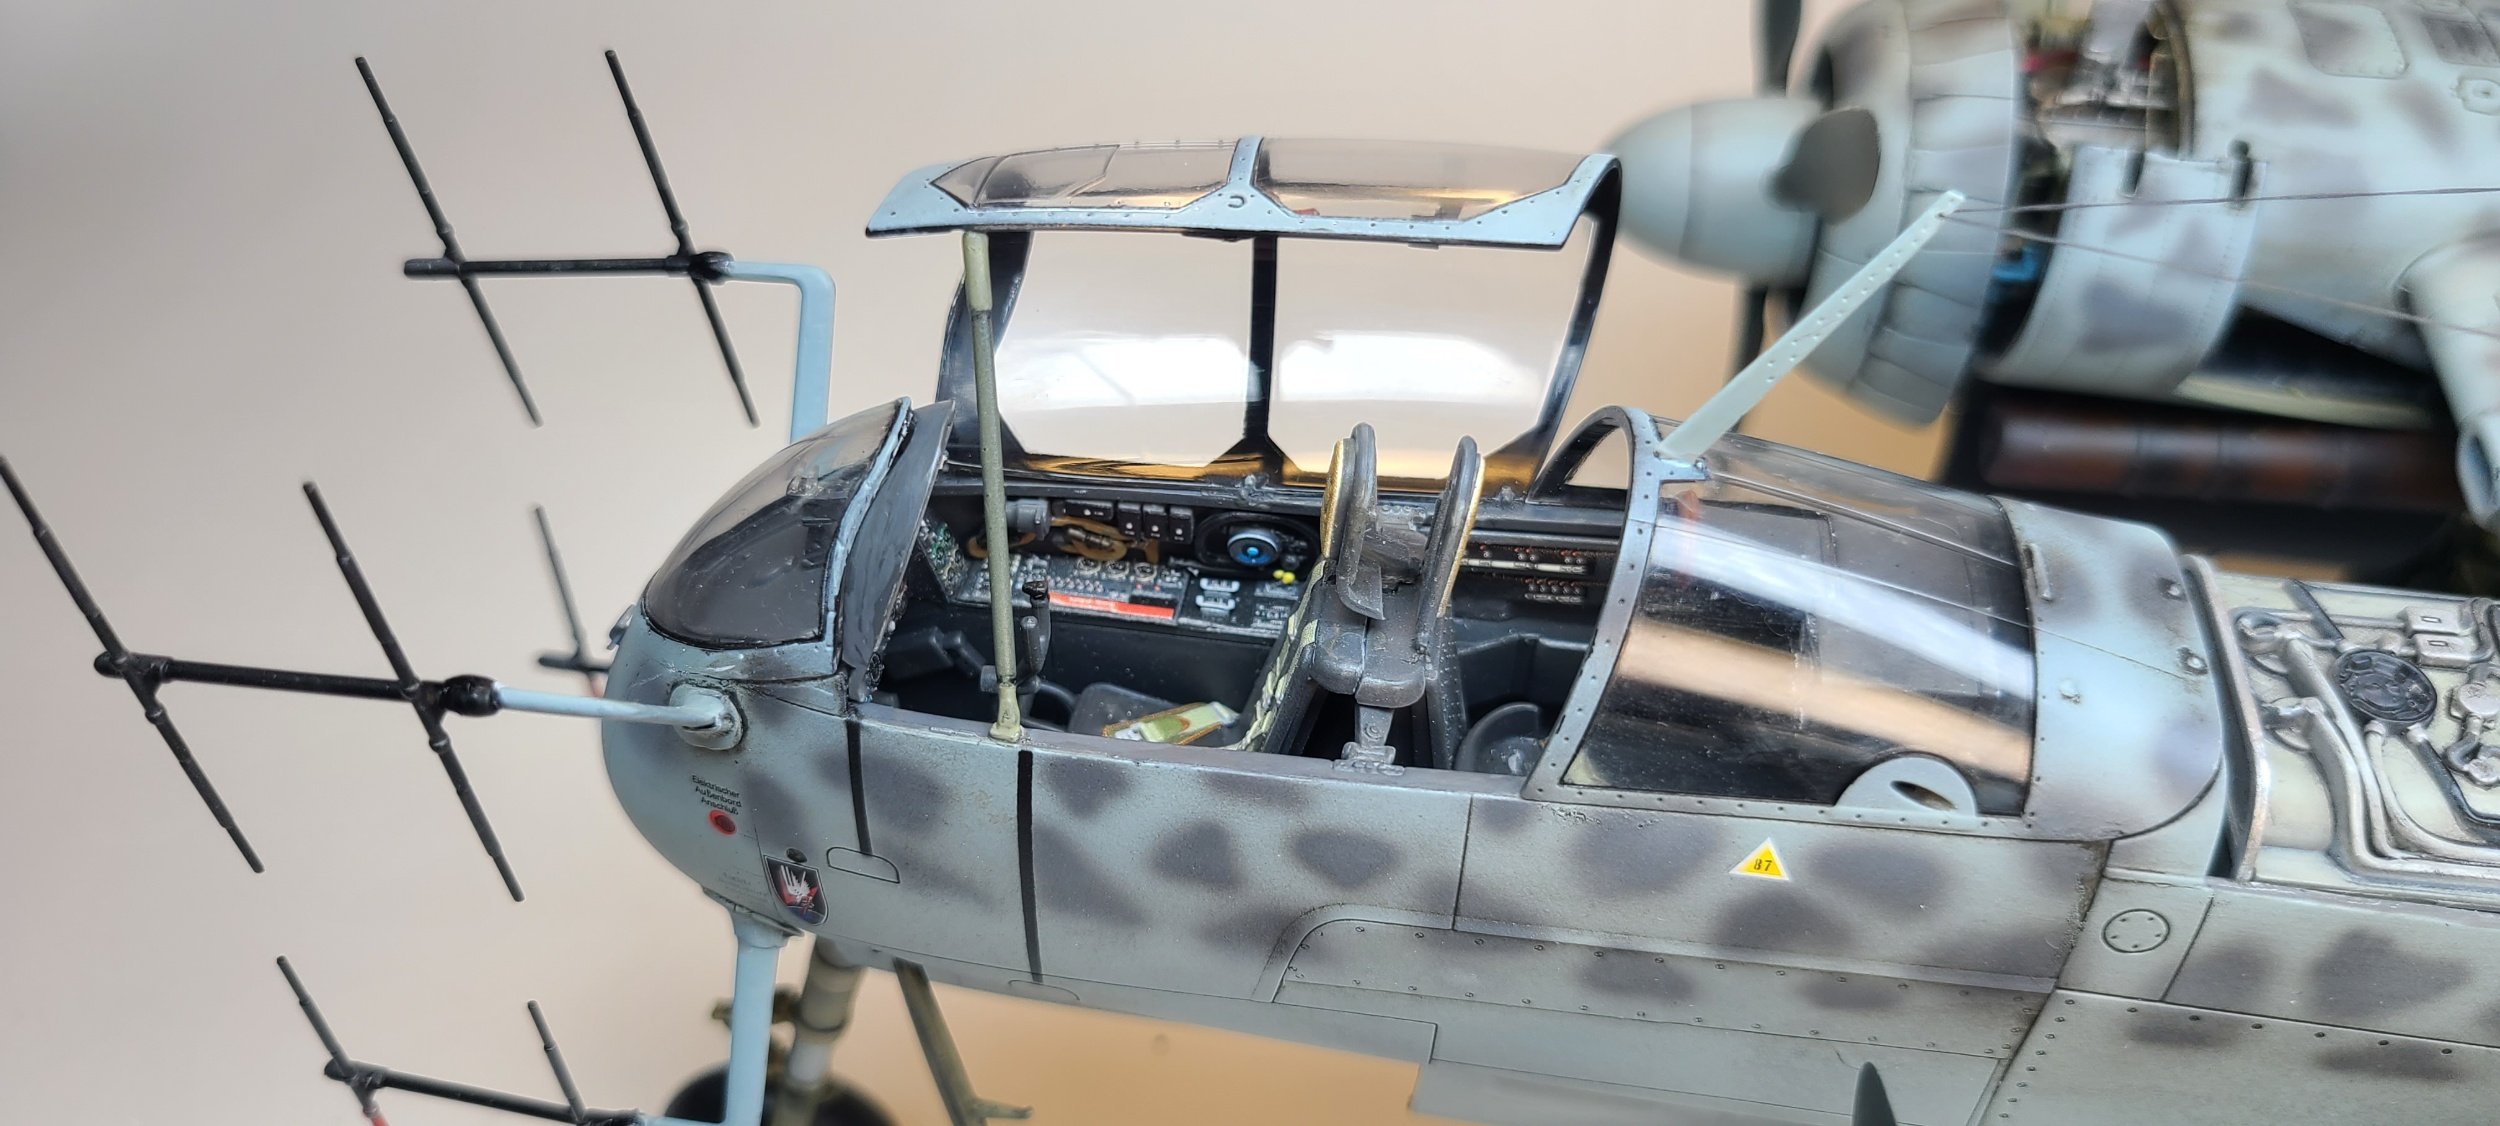
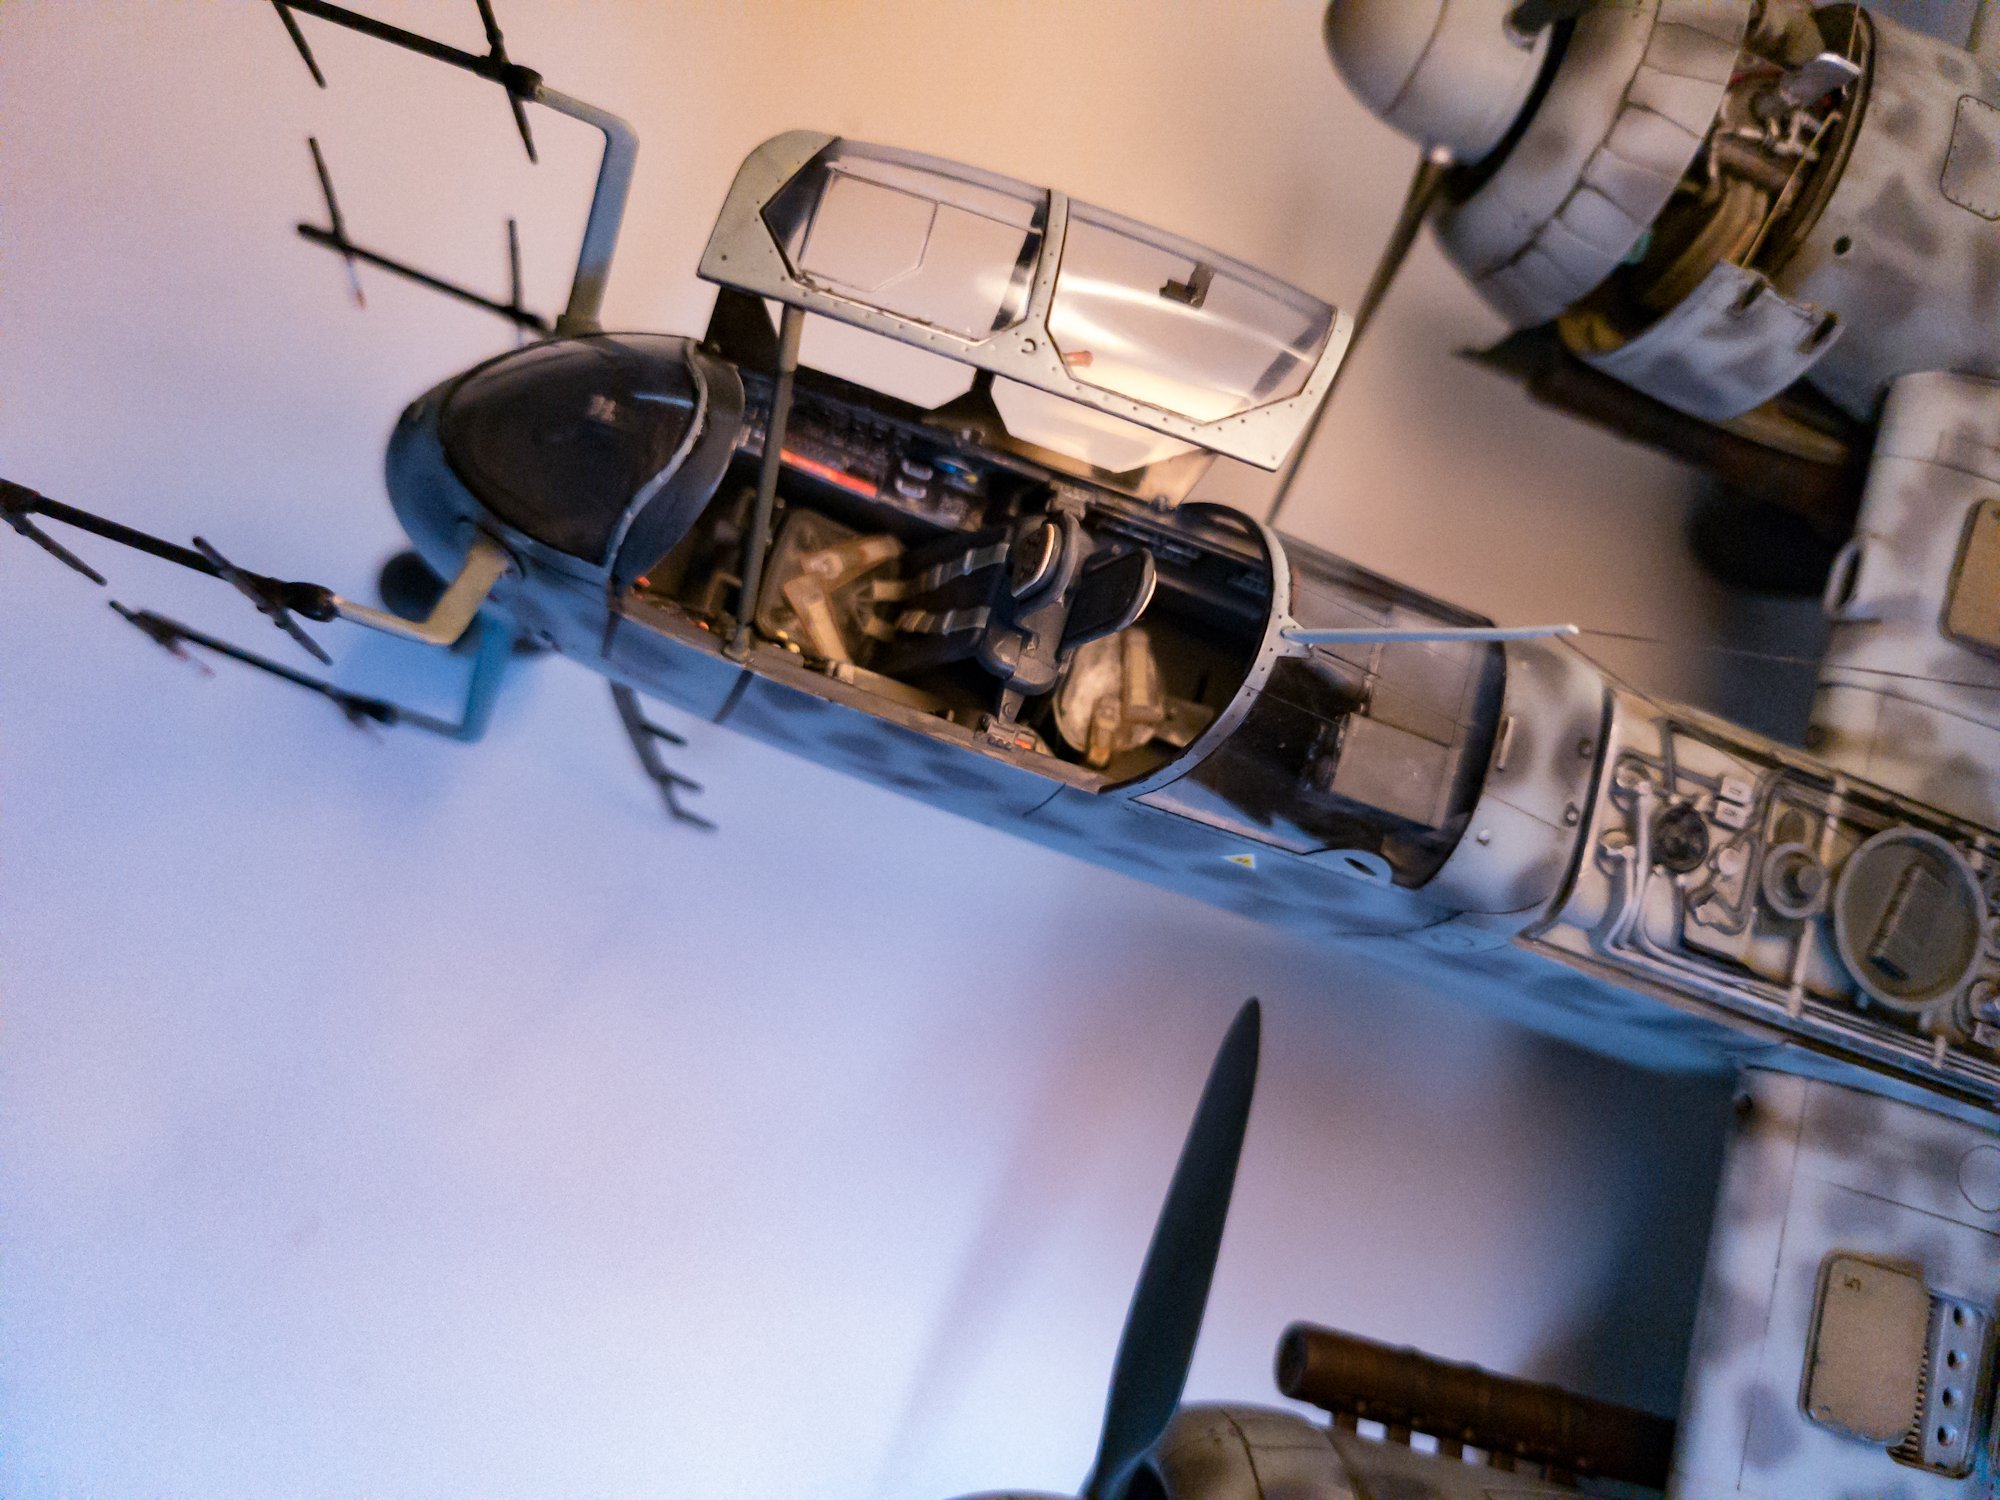
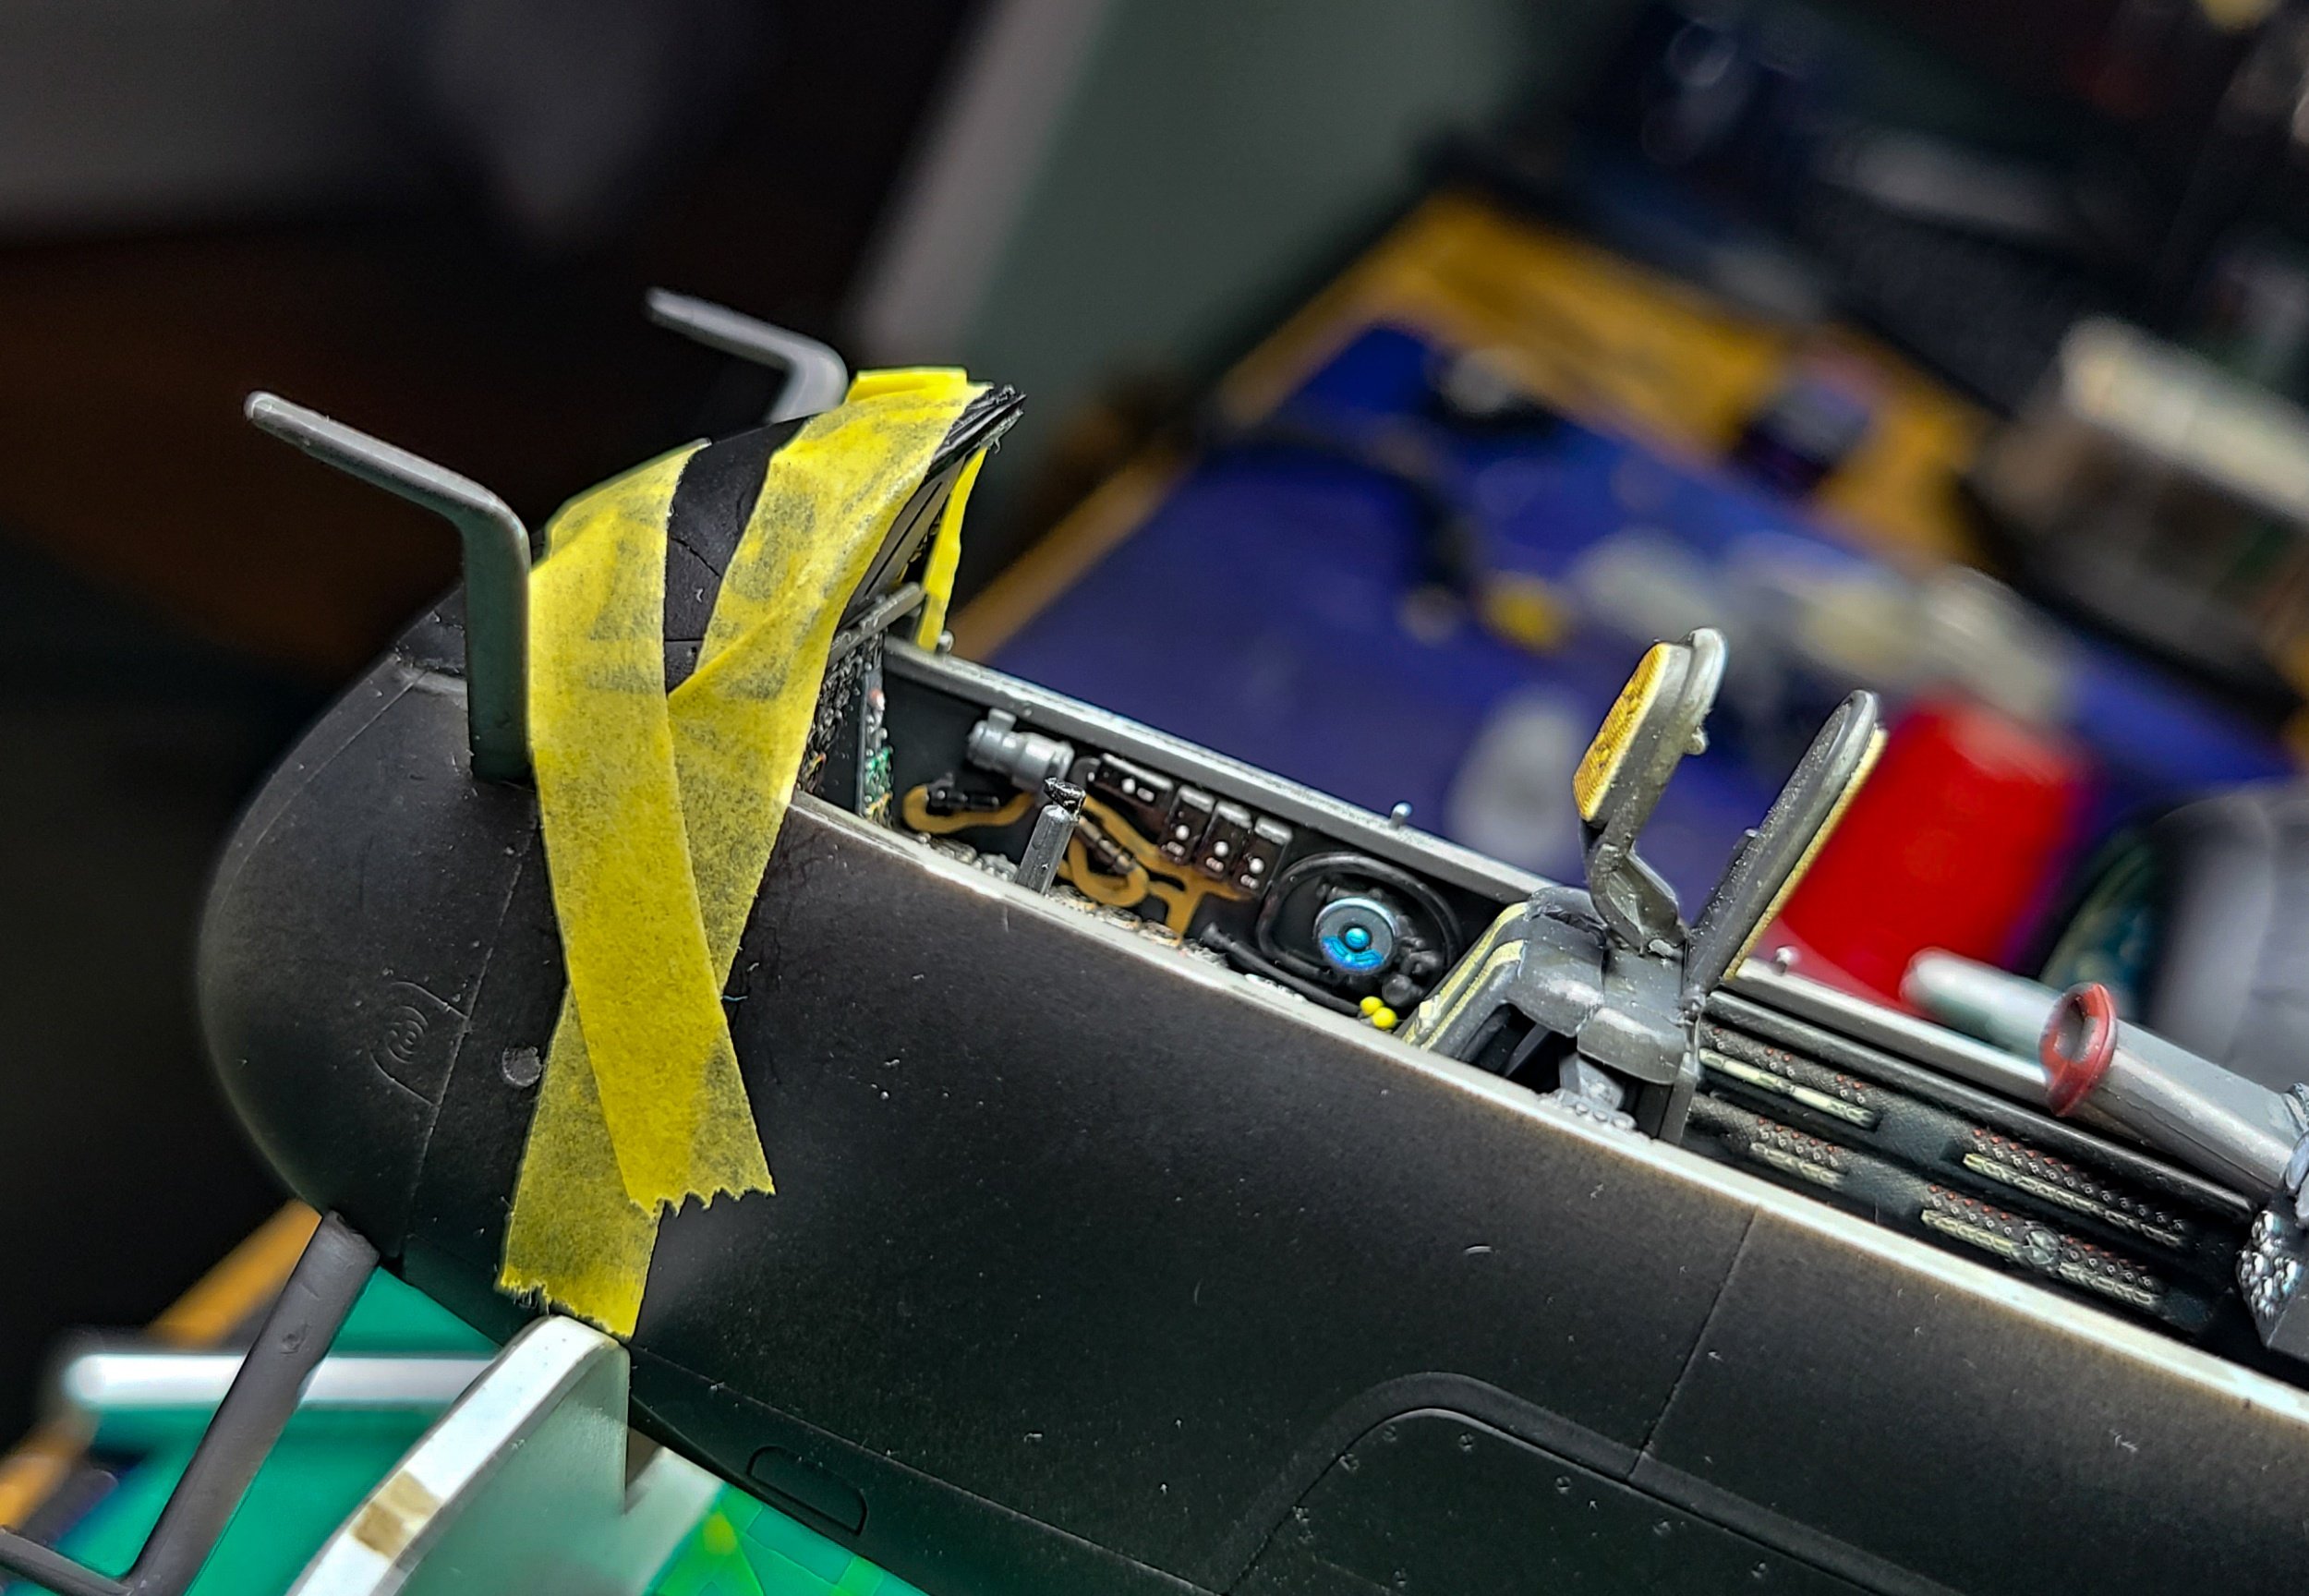
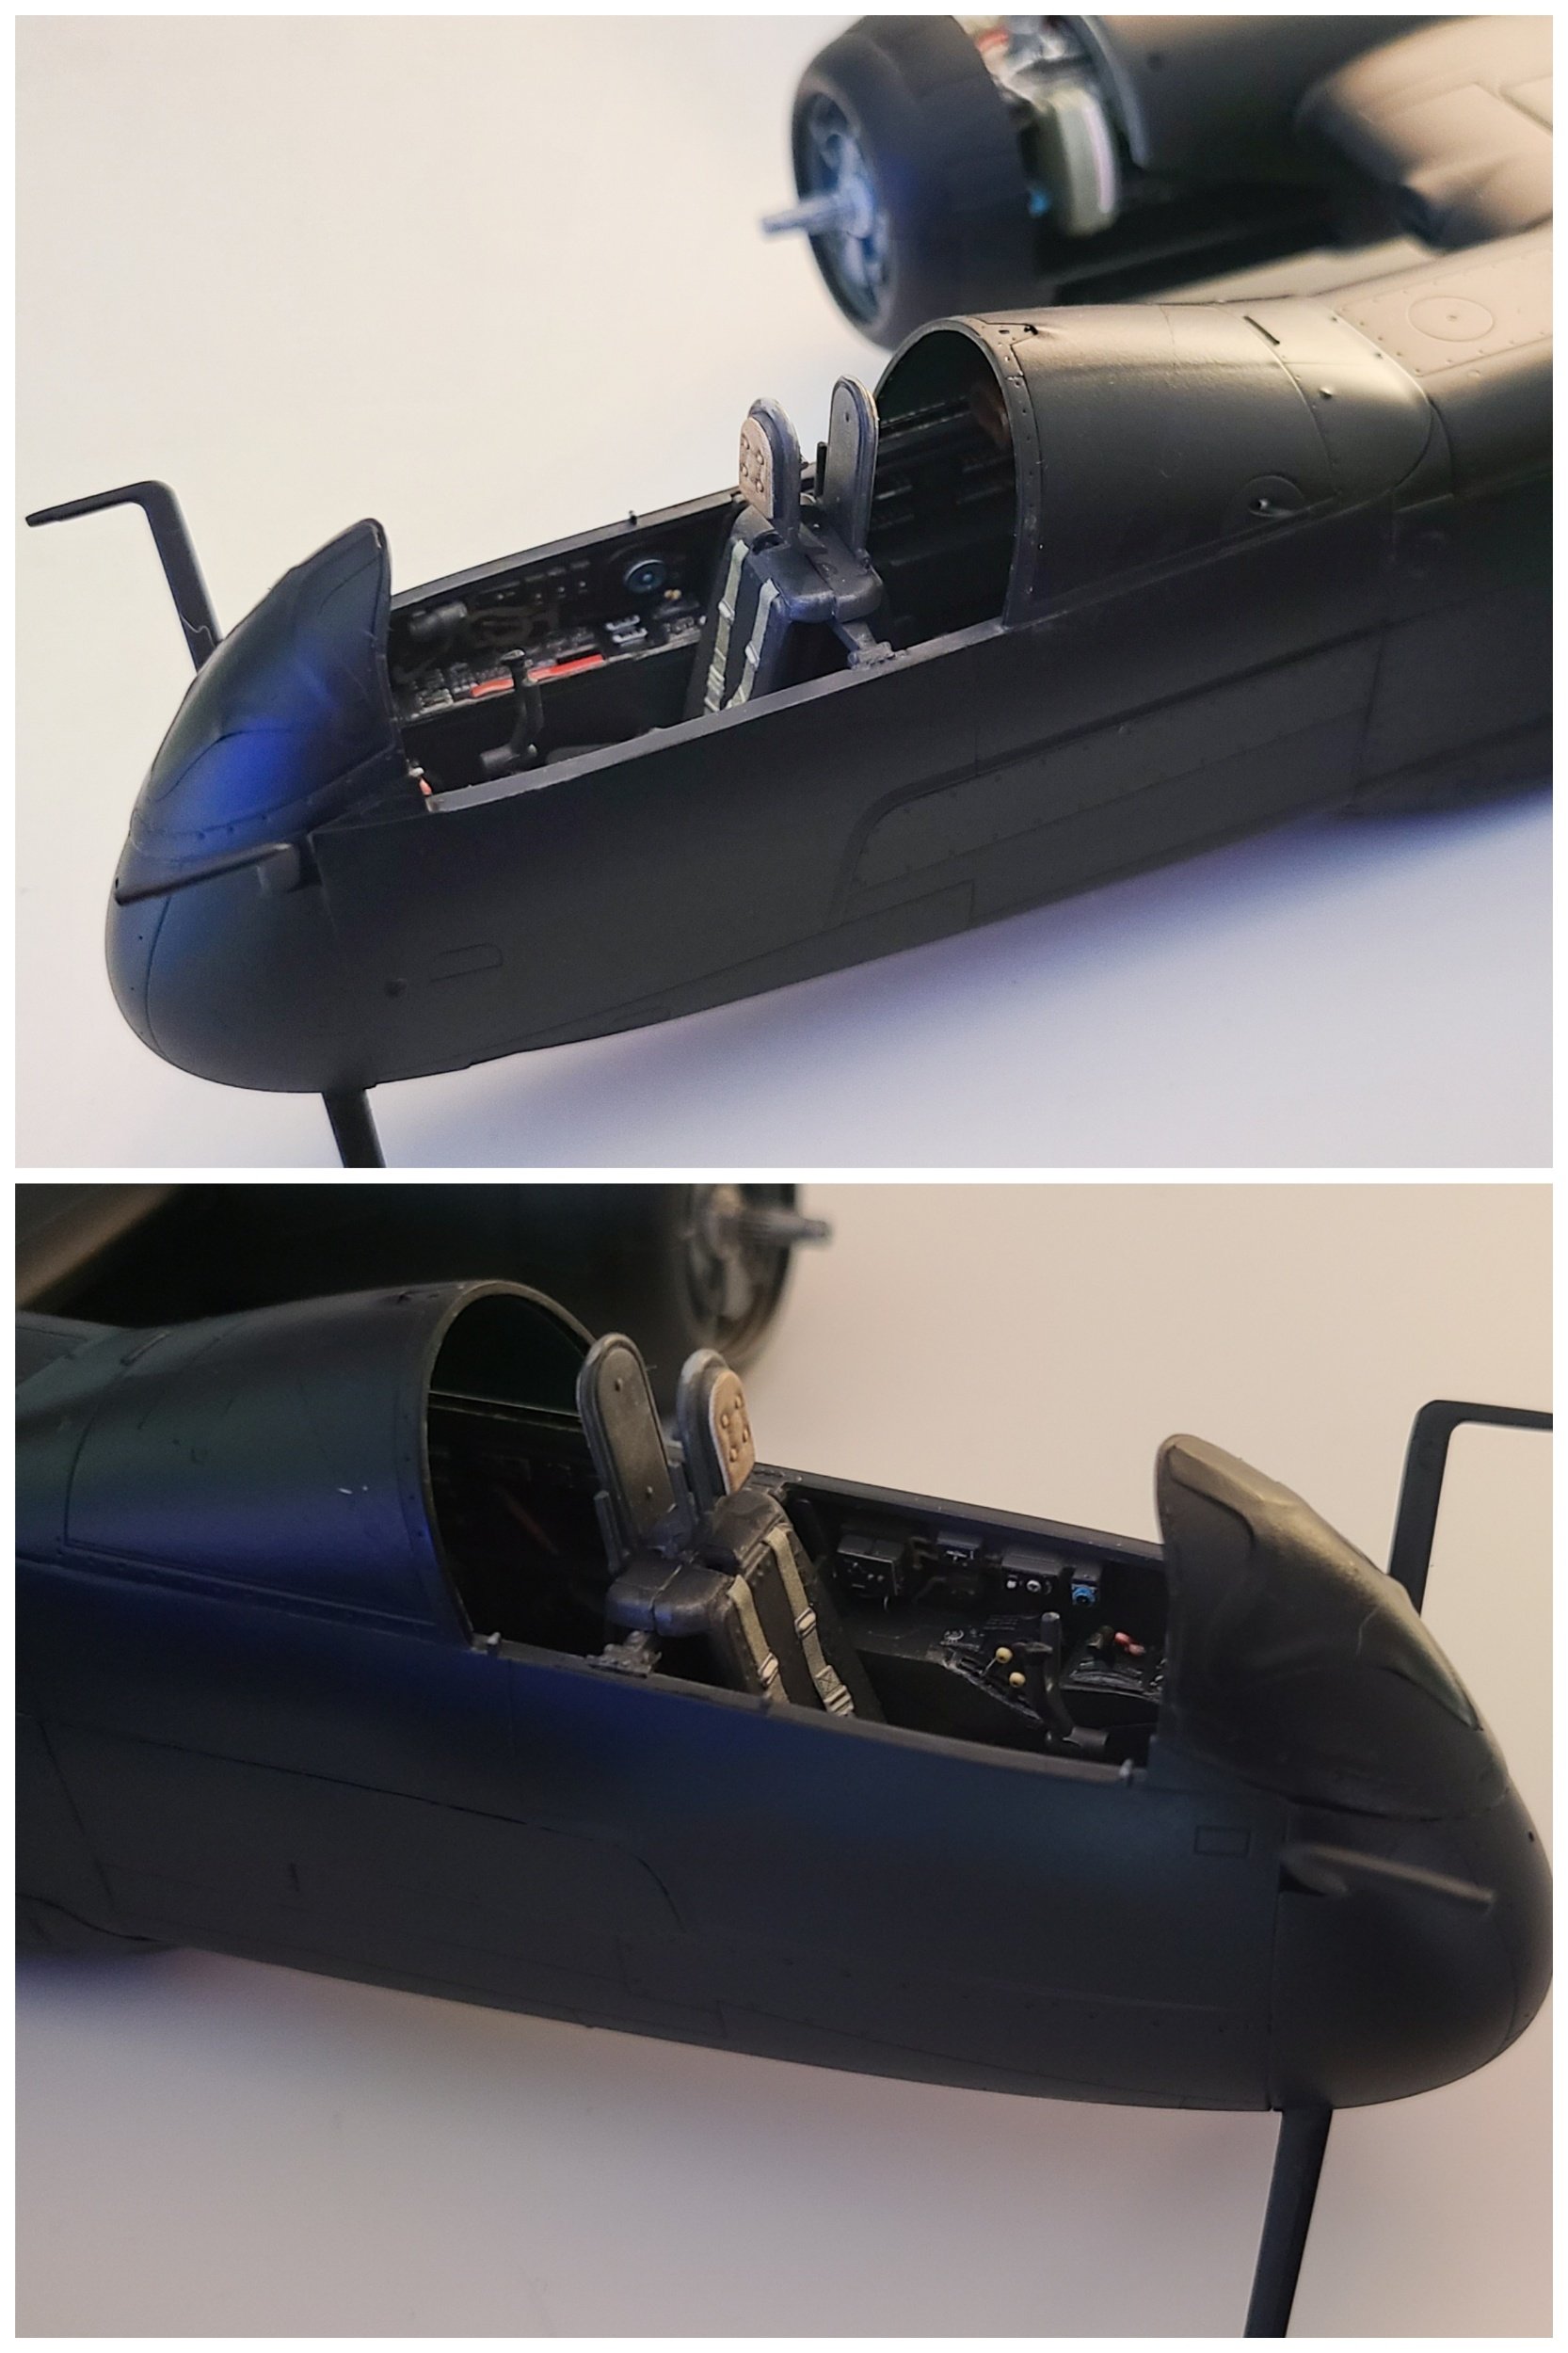
The cockpit goes together nicely, and you really can't go wrong with Quinta vinyl decals. I'm also not super-weathering this...it's too pretty. Still working on some details but almost done with the cockpit assembly.

So what I've read and seen with this kit, like the BF109...you can get fit issues. The nose here doesn't fit perfectly together so I'll be doing some minor plastic removal...but it's coming along nicely.

A few things...I knew going in this had been reported as a difficult build and I concur. Once again, like the BF109 it's a fit deal. I've never had as many fit issues with Tamiya as I do here. Partly my own fault in some cases, in others it's soft plastic and...as far as I'm concerned...bad engineering.
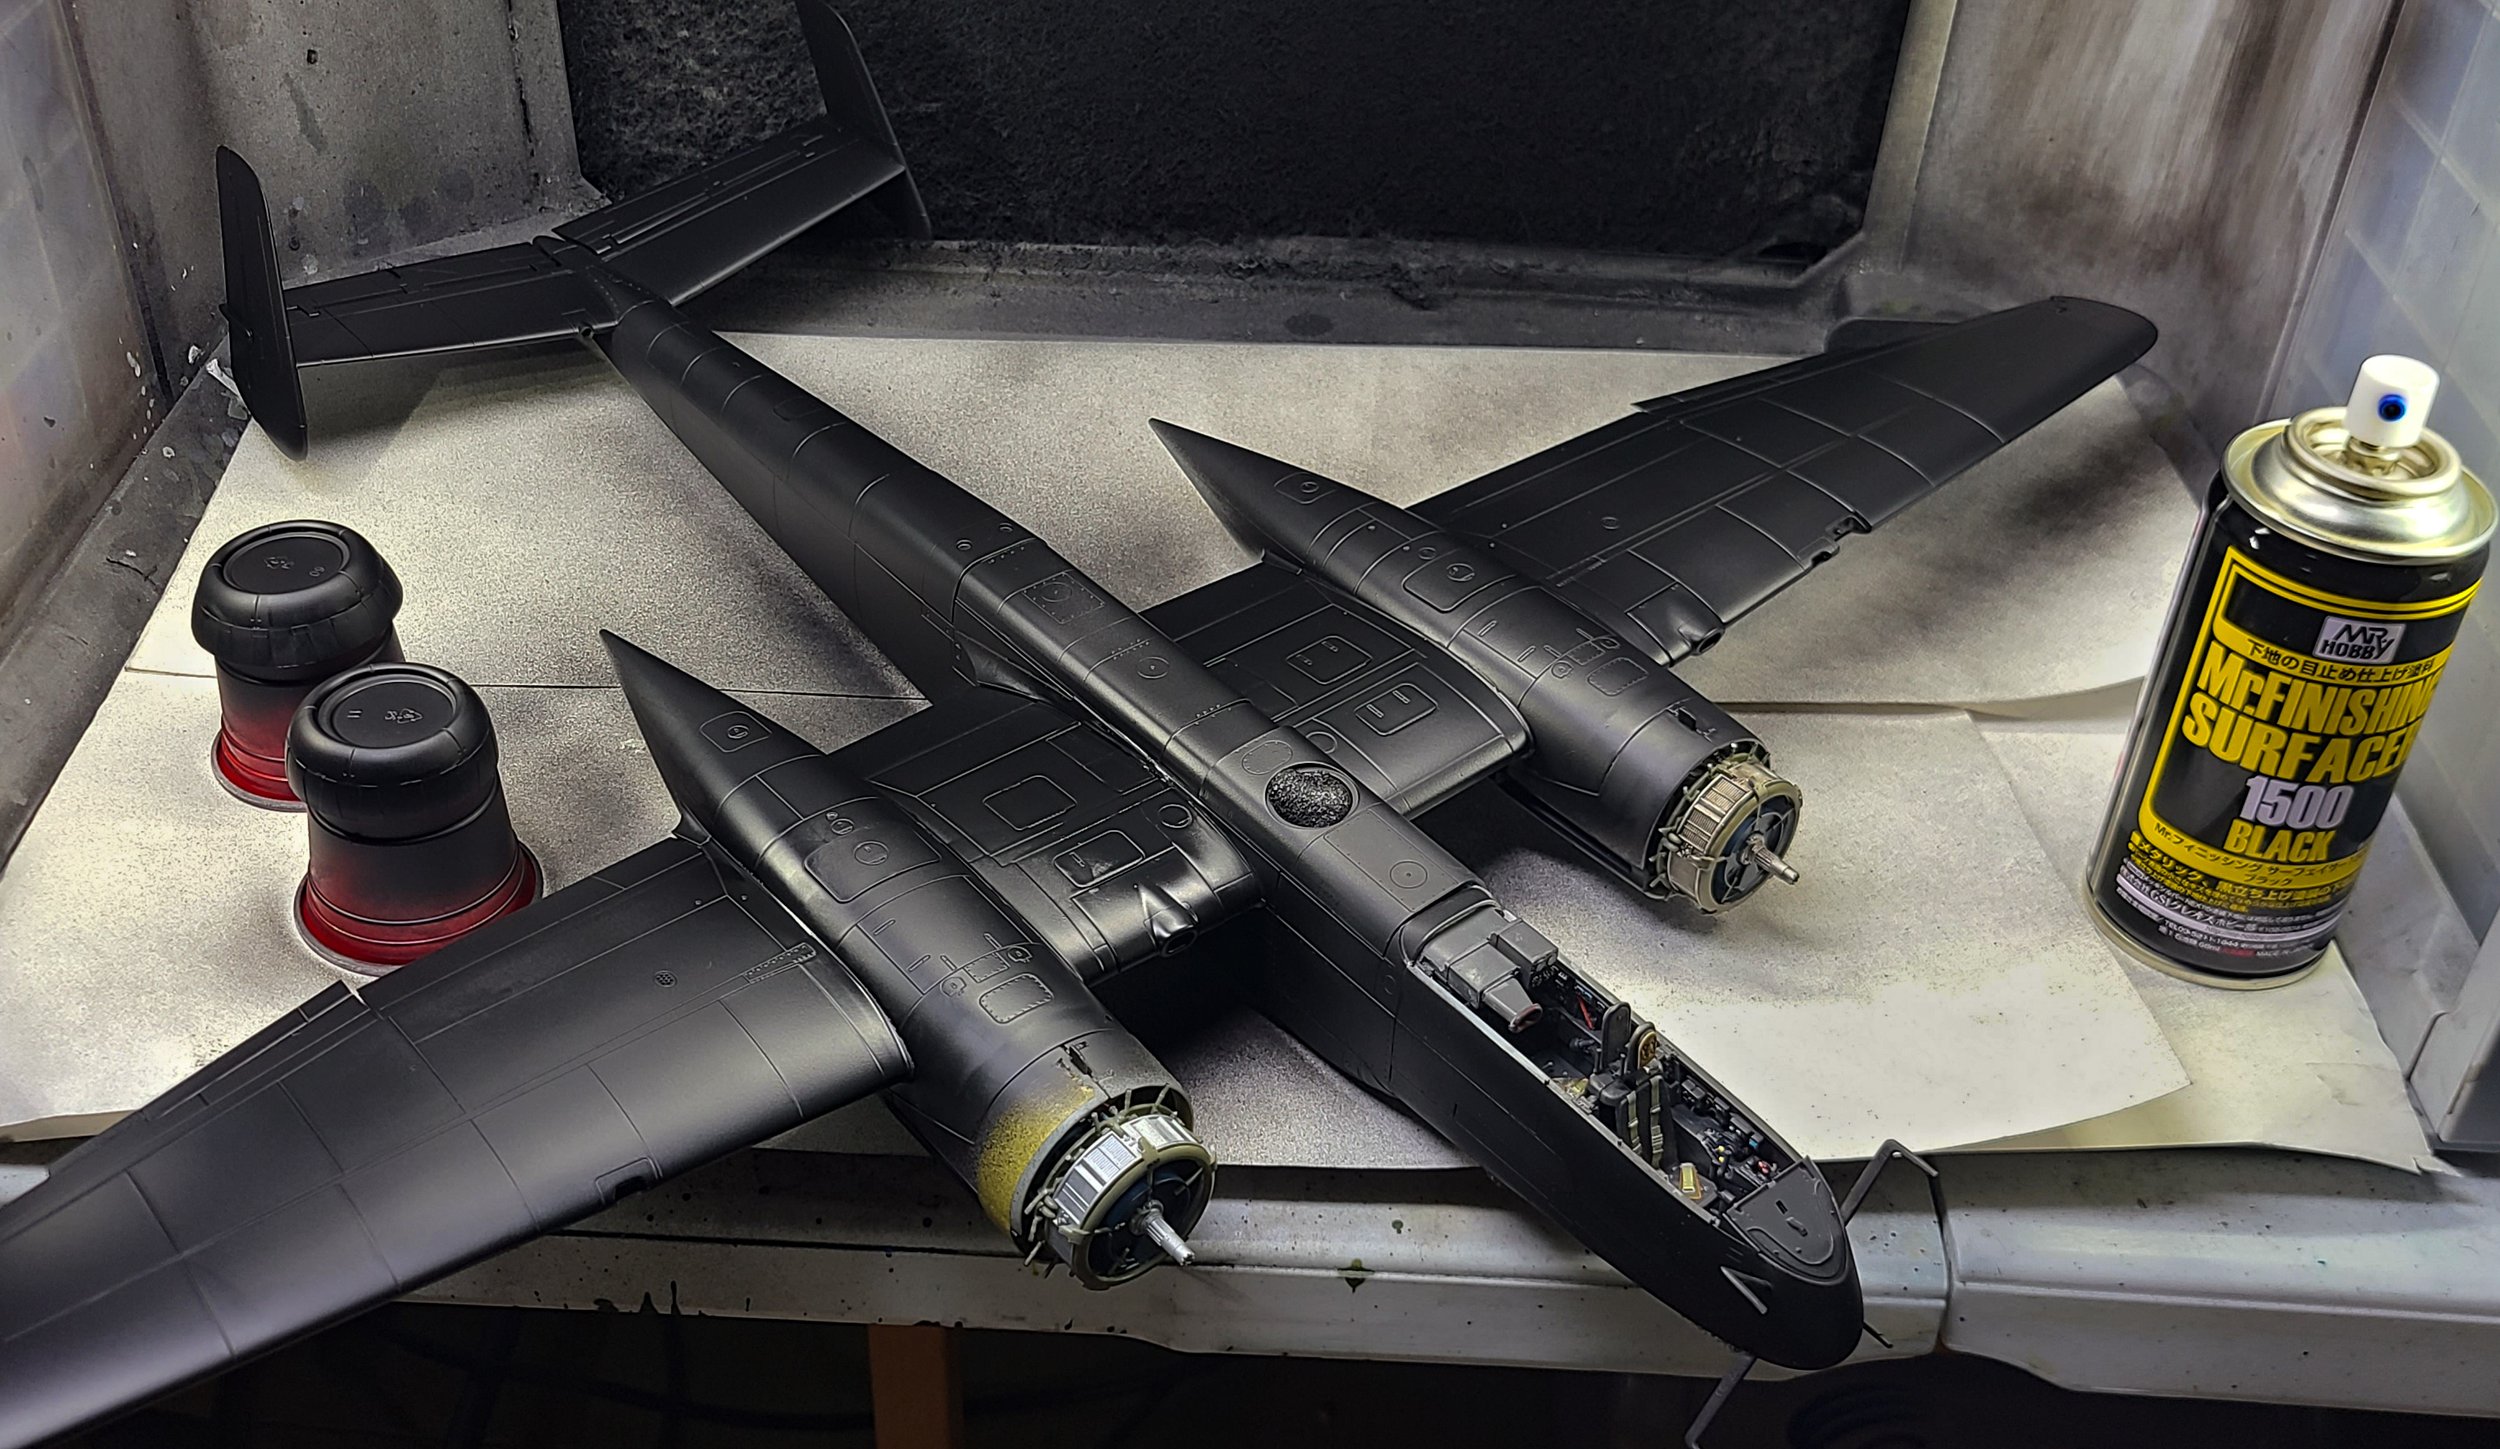
So here's the fuselage and interior wing structure w/engine nacelles on...almost all of this is dry-fit and taped up. I still have more bulkheads to put in but as I put these pieces in place and used tape to hold them it was clear at least one of the fuselage half's had bent. I'm heavily taping things in place to get to a point where everything lines up...but there's always a lean to one side no matter how many pieces of Tamiya tape I use. Could be after a few years some plastic stretched out a tad. Don't know. But also ..you can't possibly line up all these bulkheads without taping and gluing them in place regardless of what the instructions tell you to proceed. The good news is glue and super glue can force a straight line.

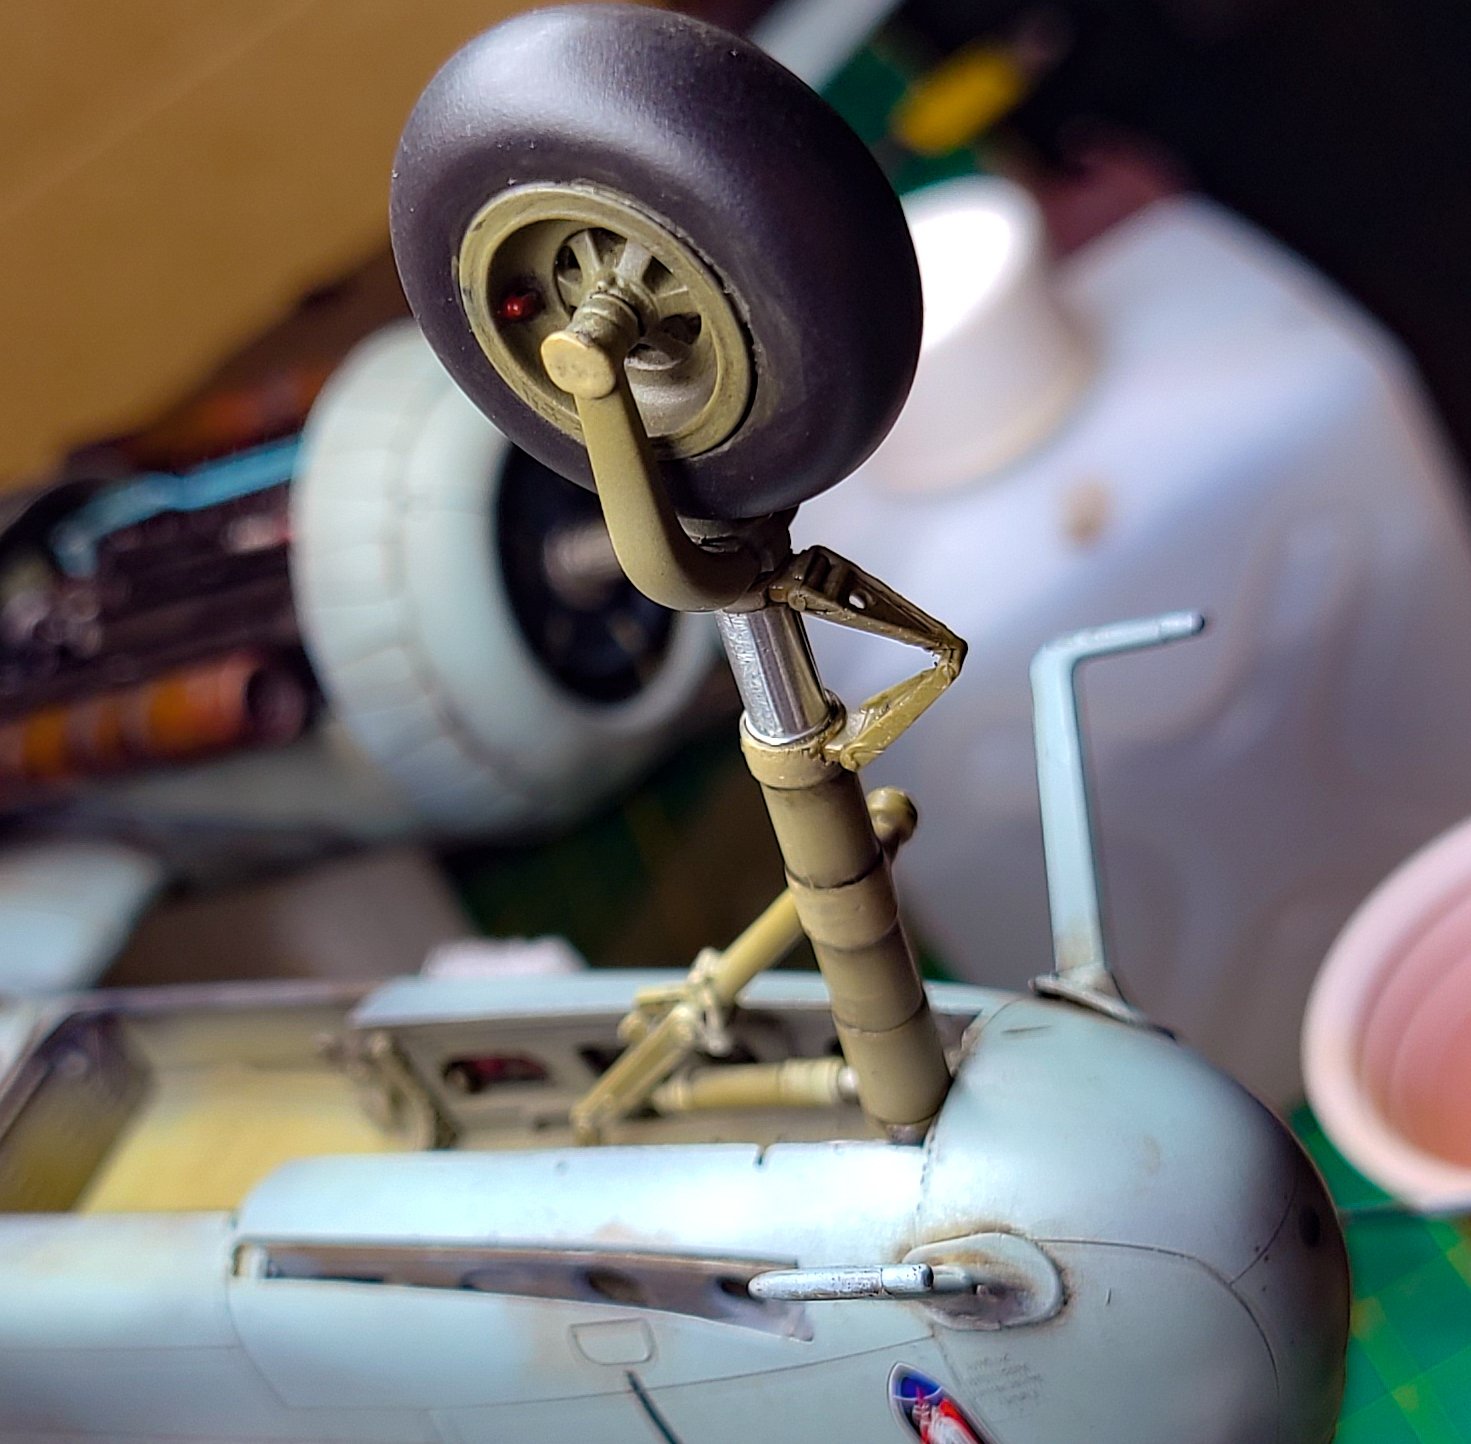
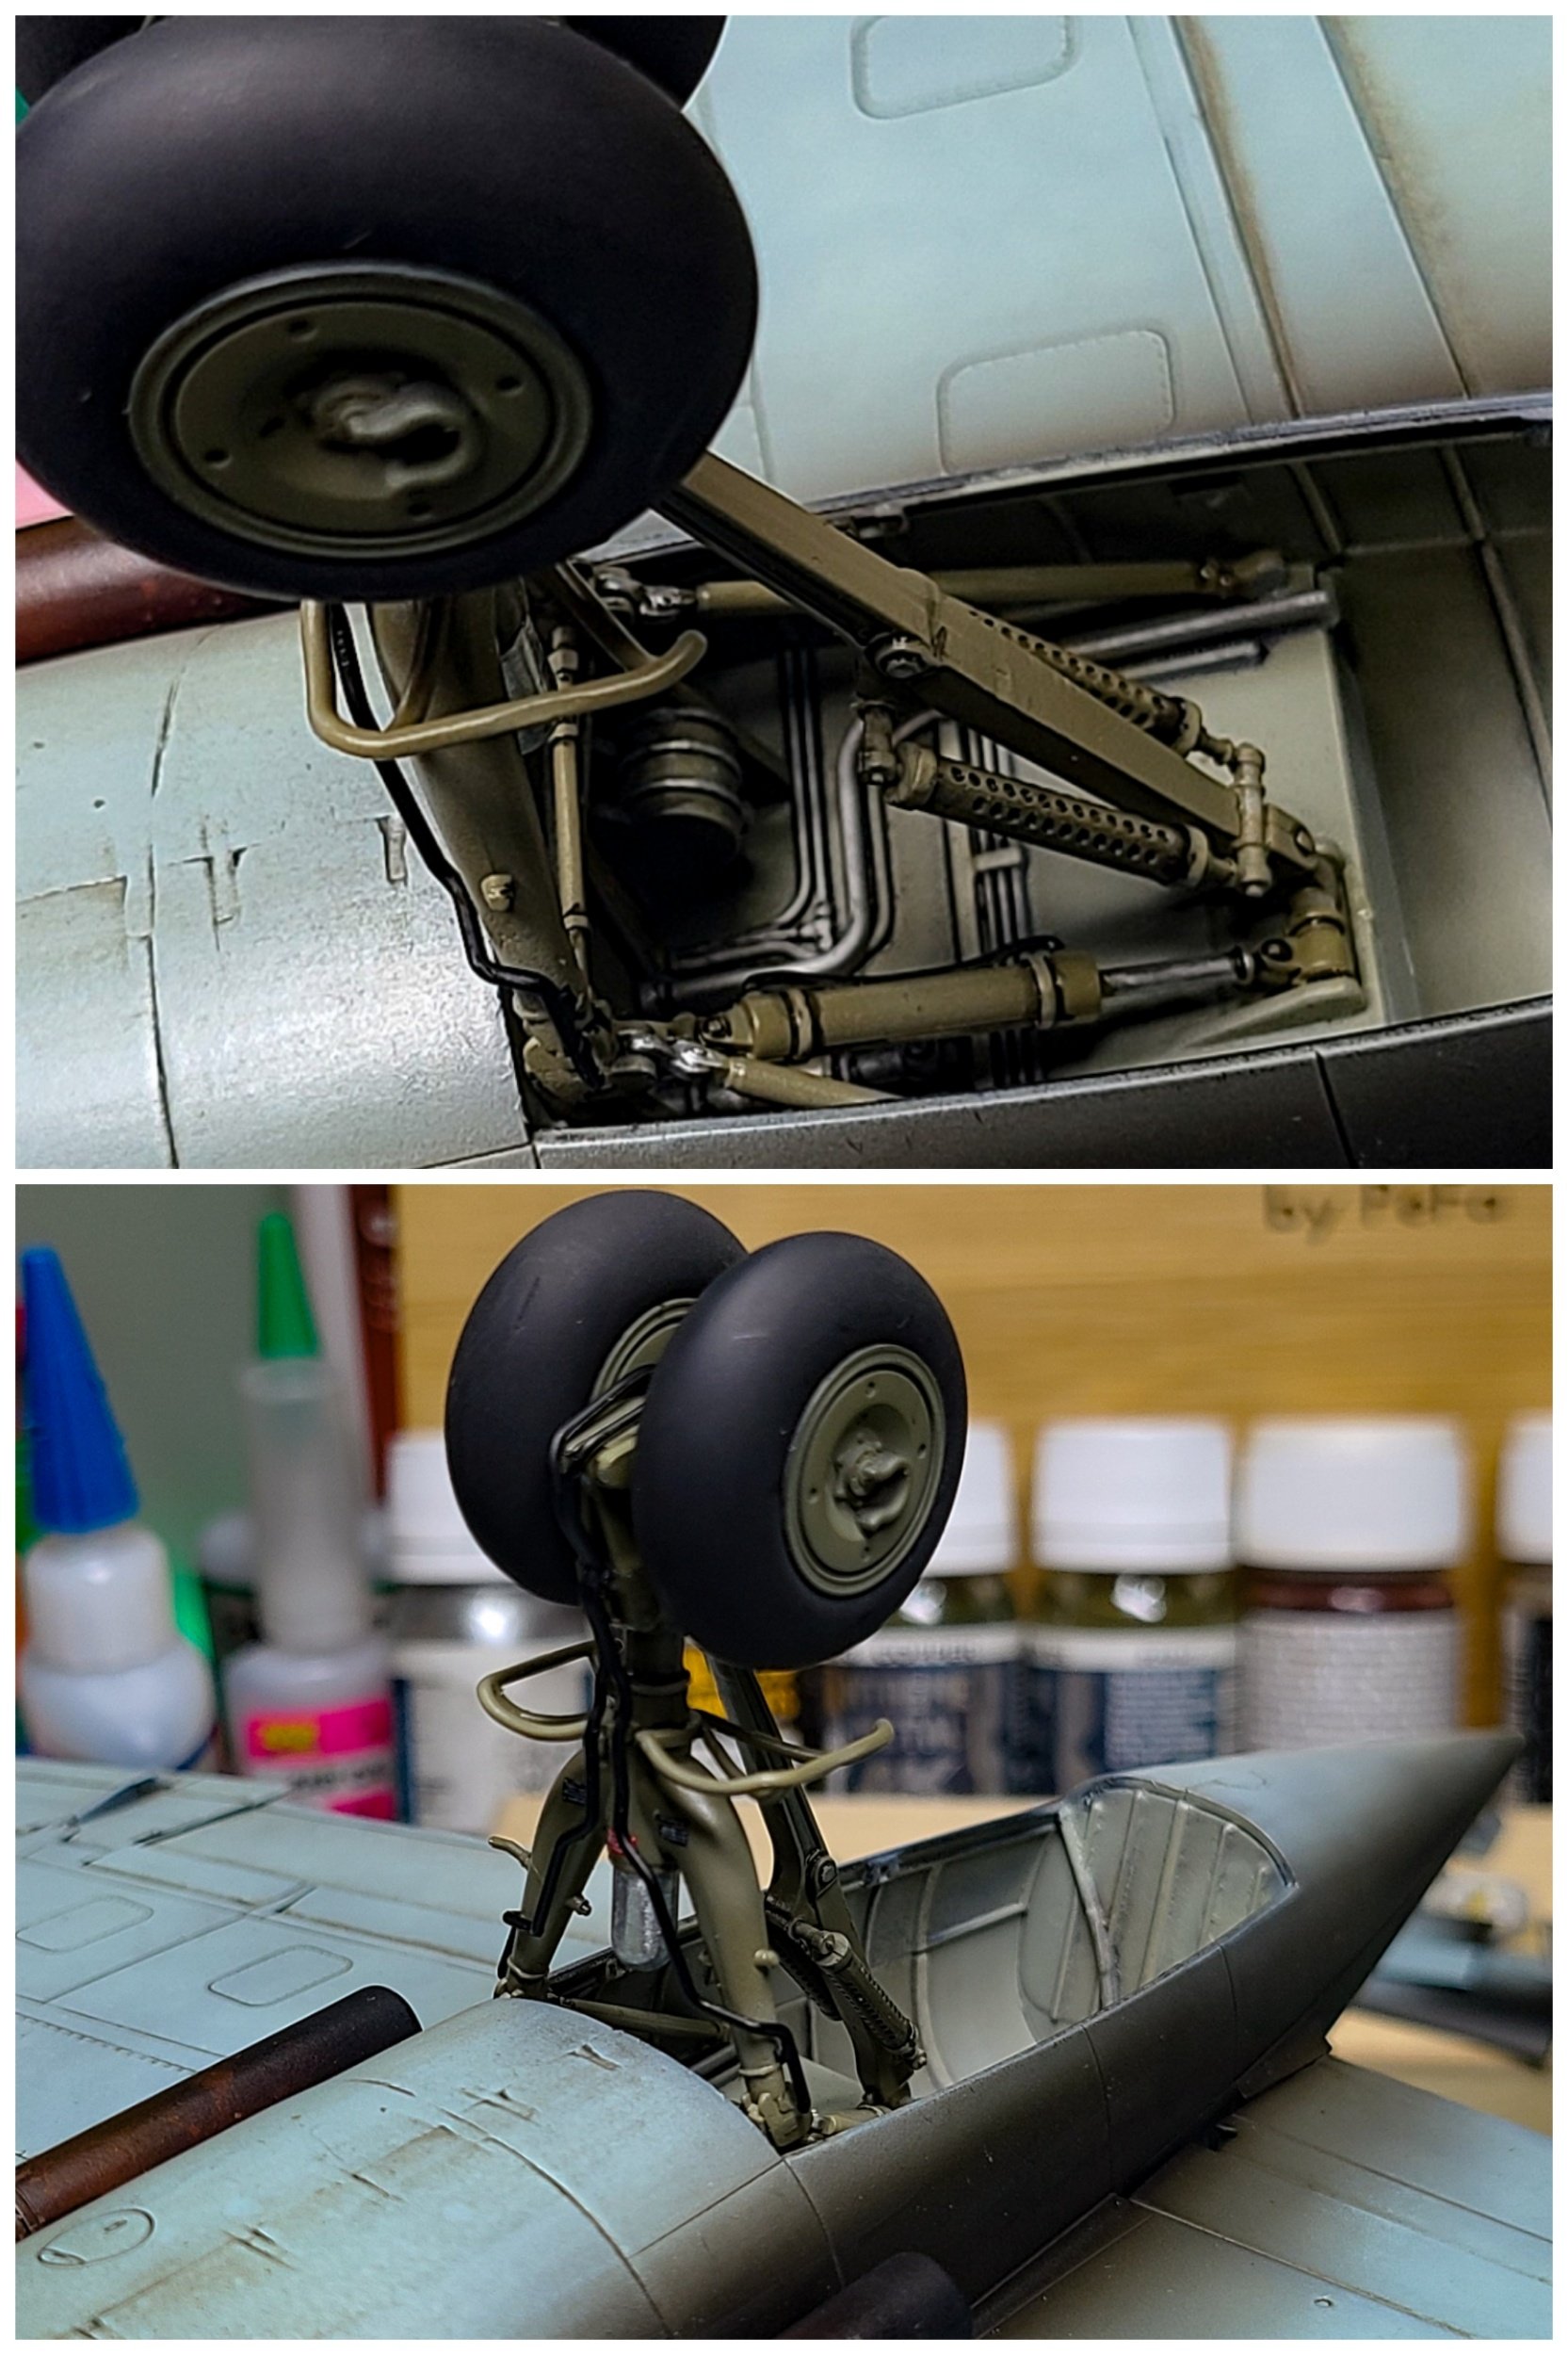
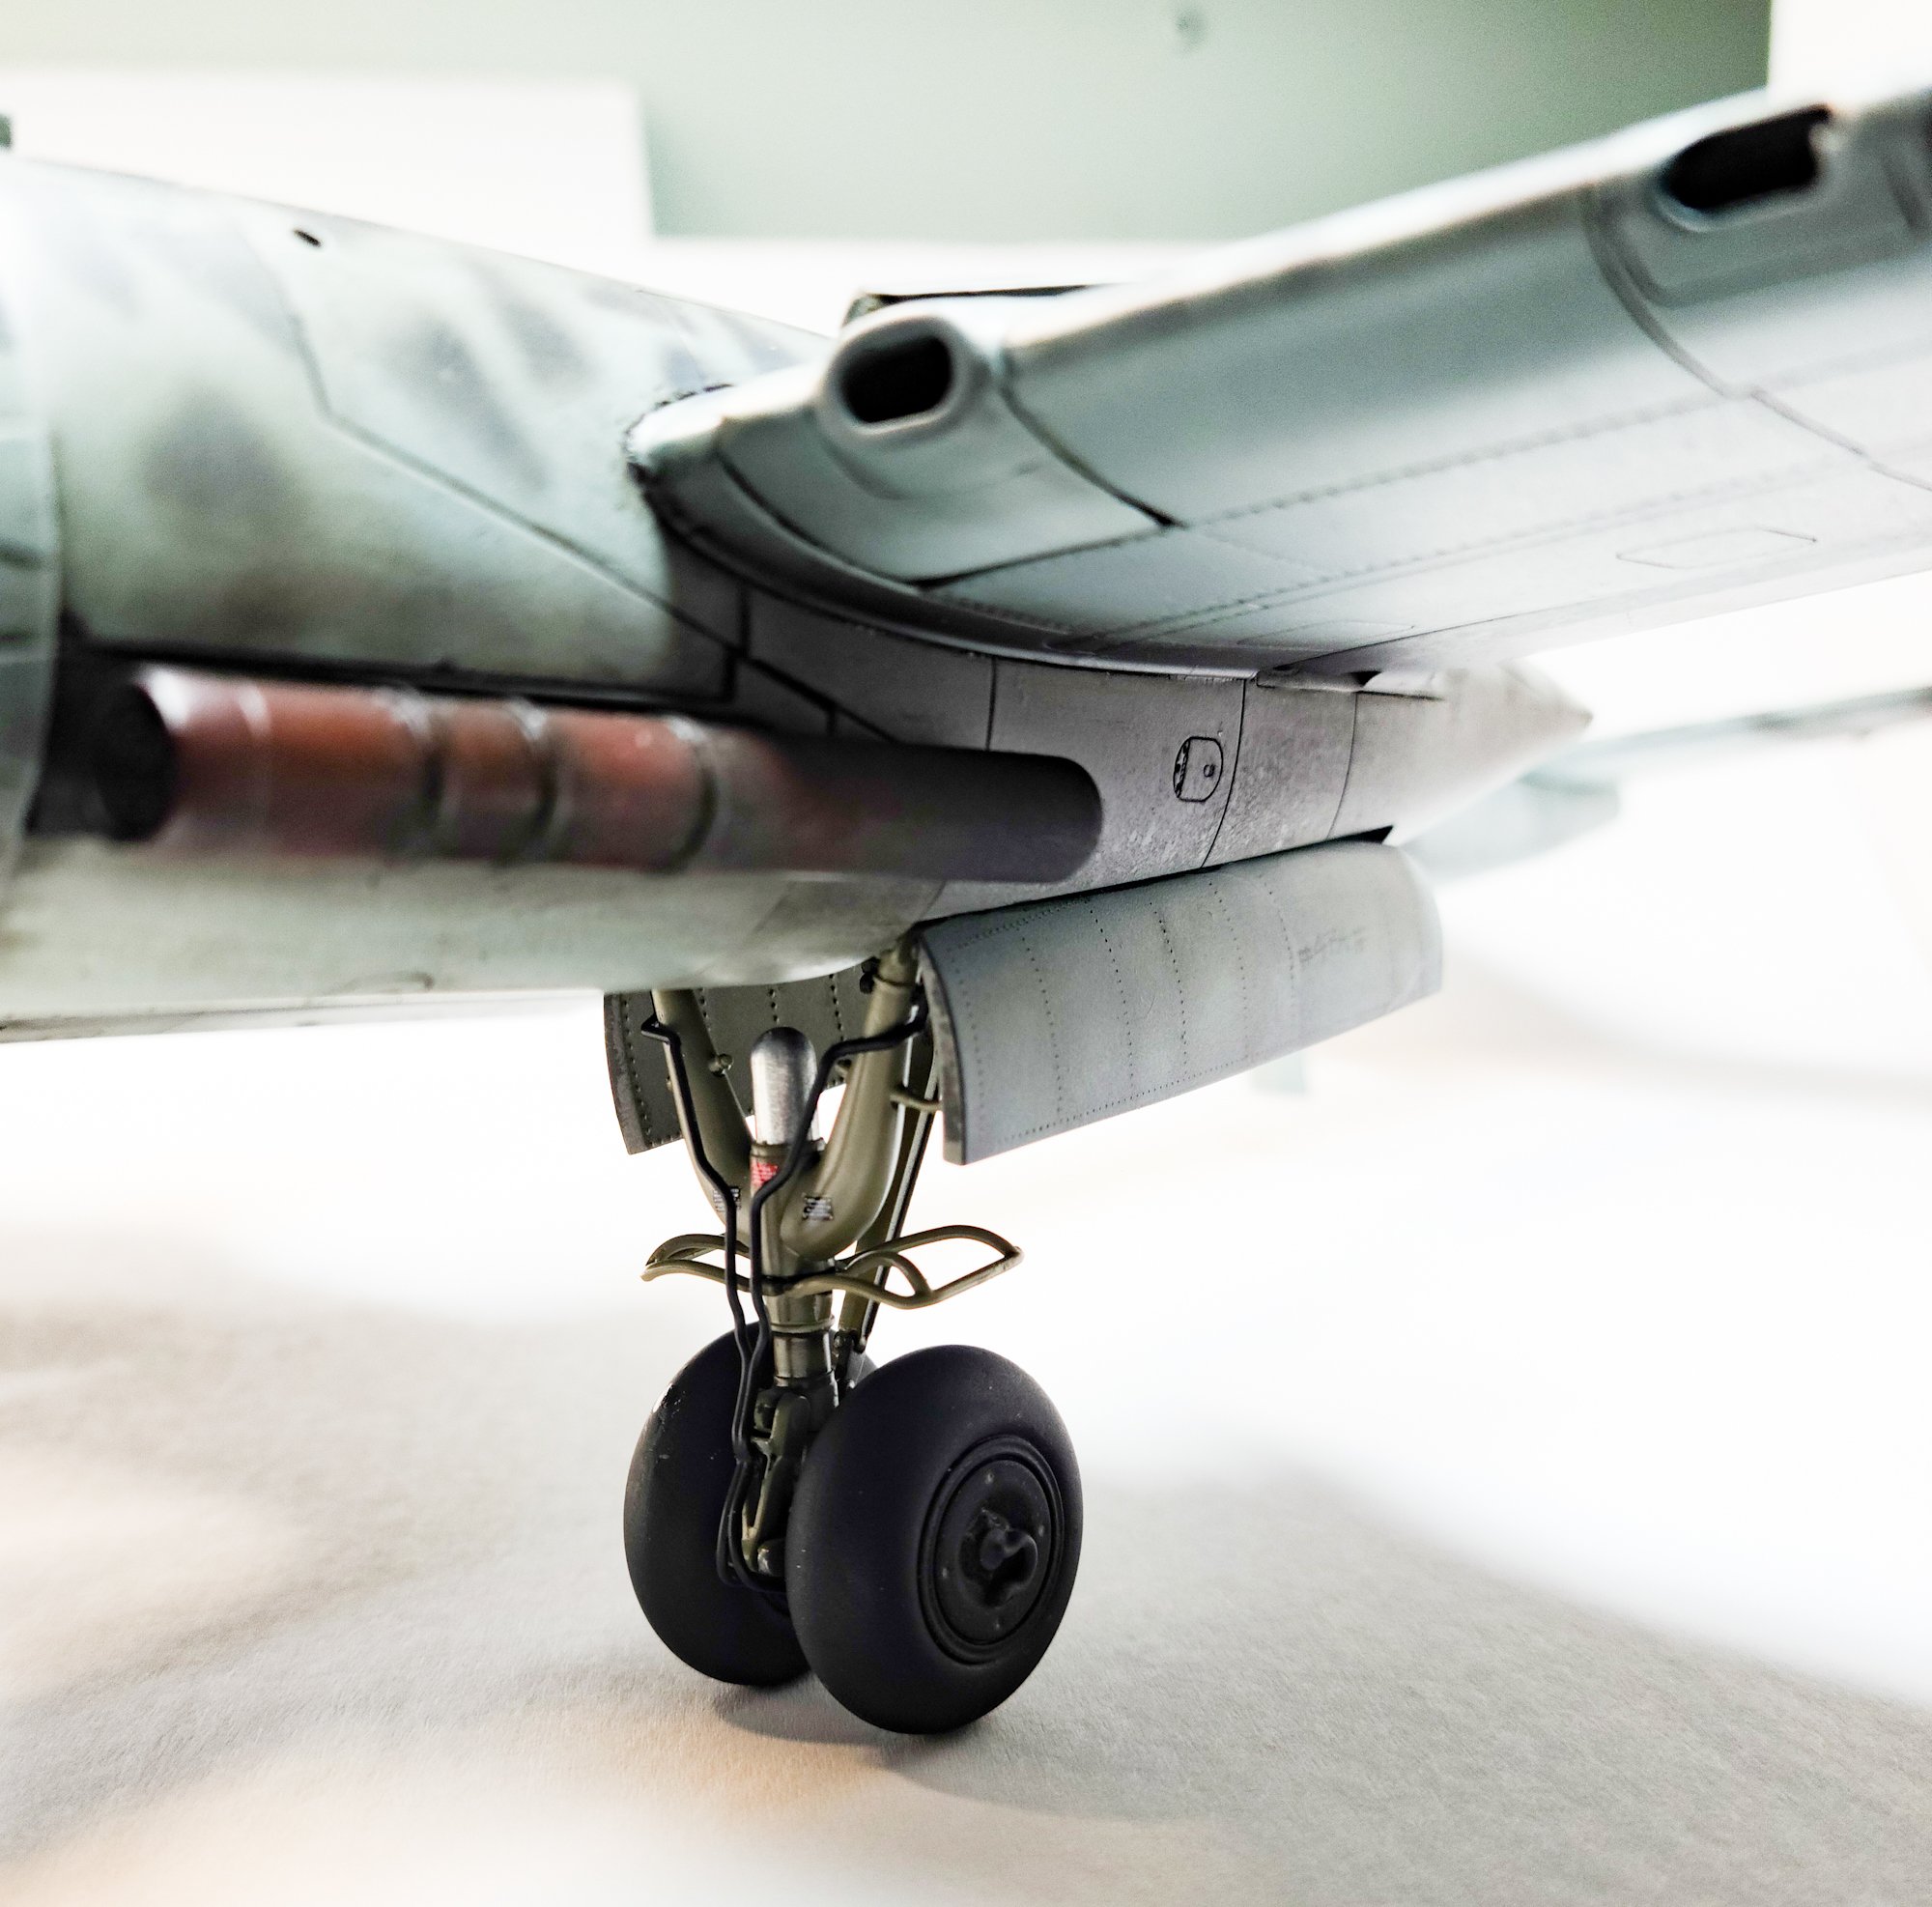
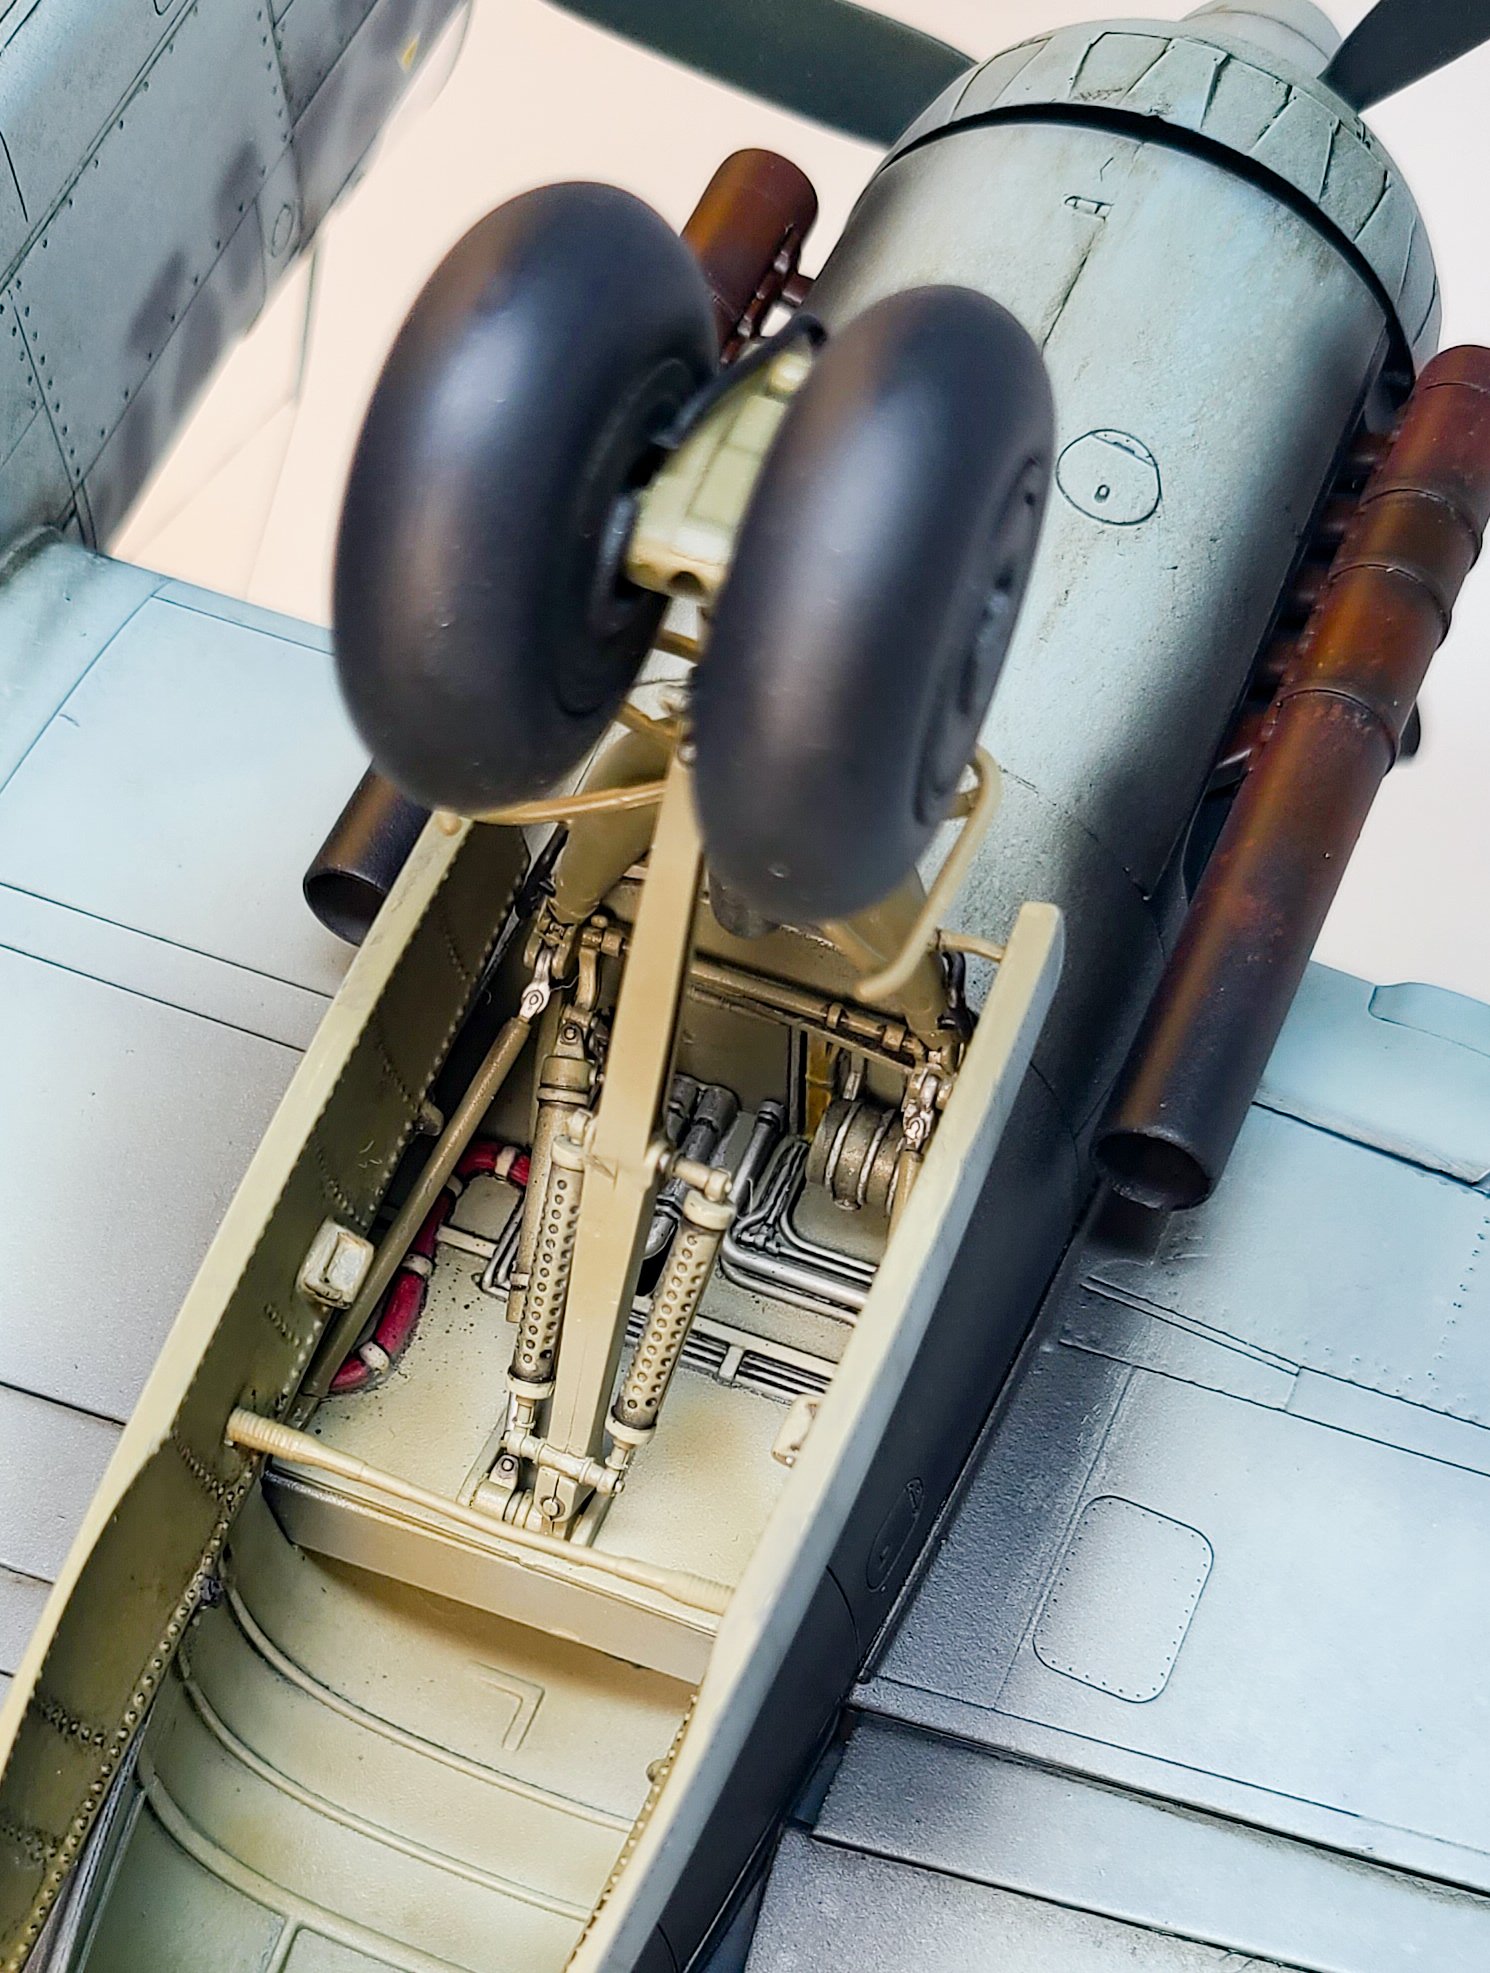
My plan is to have the cockpit opened, build it so you can show the engines open and/or closed and the belly guns as well. That and the landing gear is very detailed and sophisticated and that shows up really nice in other builds. Believe it or not there's even a jump seat in the back of the fuselage for someone to crawl in there before takeoff and work on the upward firing cannons or the radios...it has a wood floor not unlike what you see in a B-17. I did find a similar "review" to how I feel about the kit up at Finescale. He speaks of fiddly panel fits, etc. If you want to build this kit...be prepared for a ton of flash fixes, fiddly fits, and fixing mistakes...but it's still a cool build w/"looks" potential if you can pull of a decent camouflage finish.
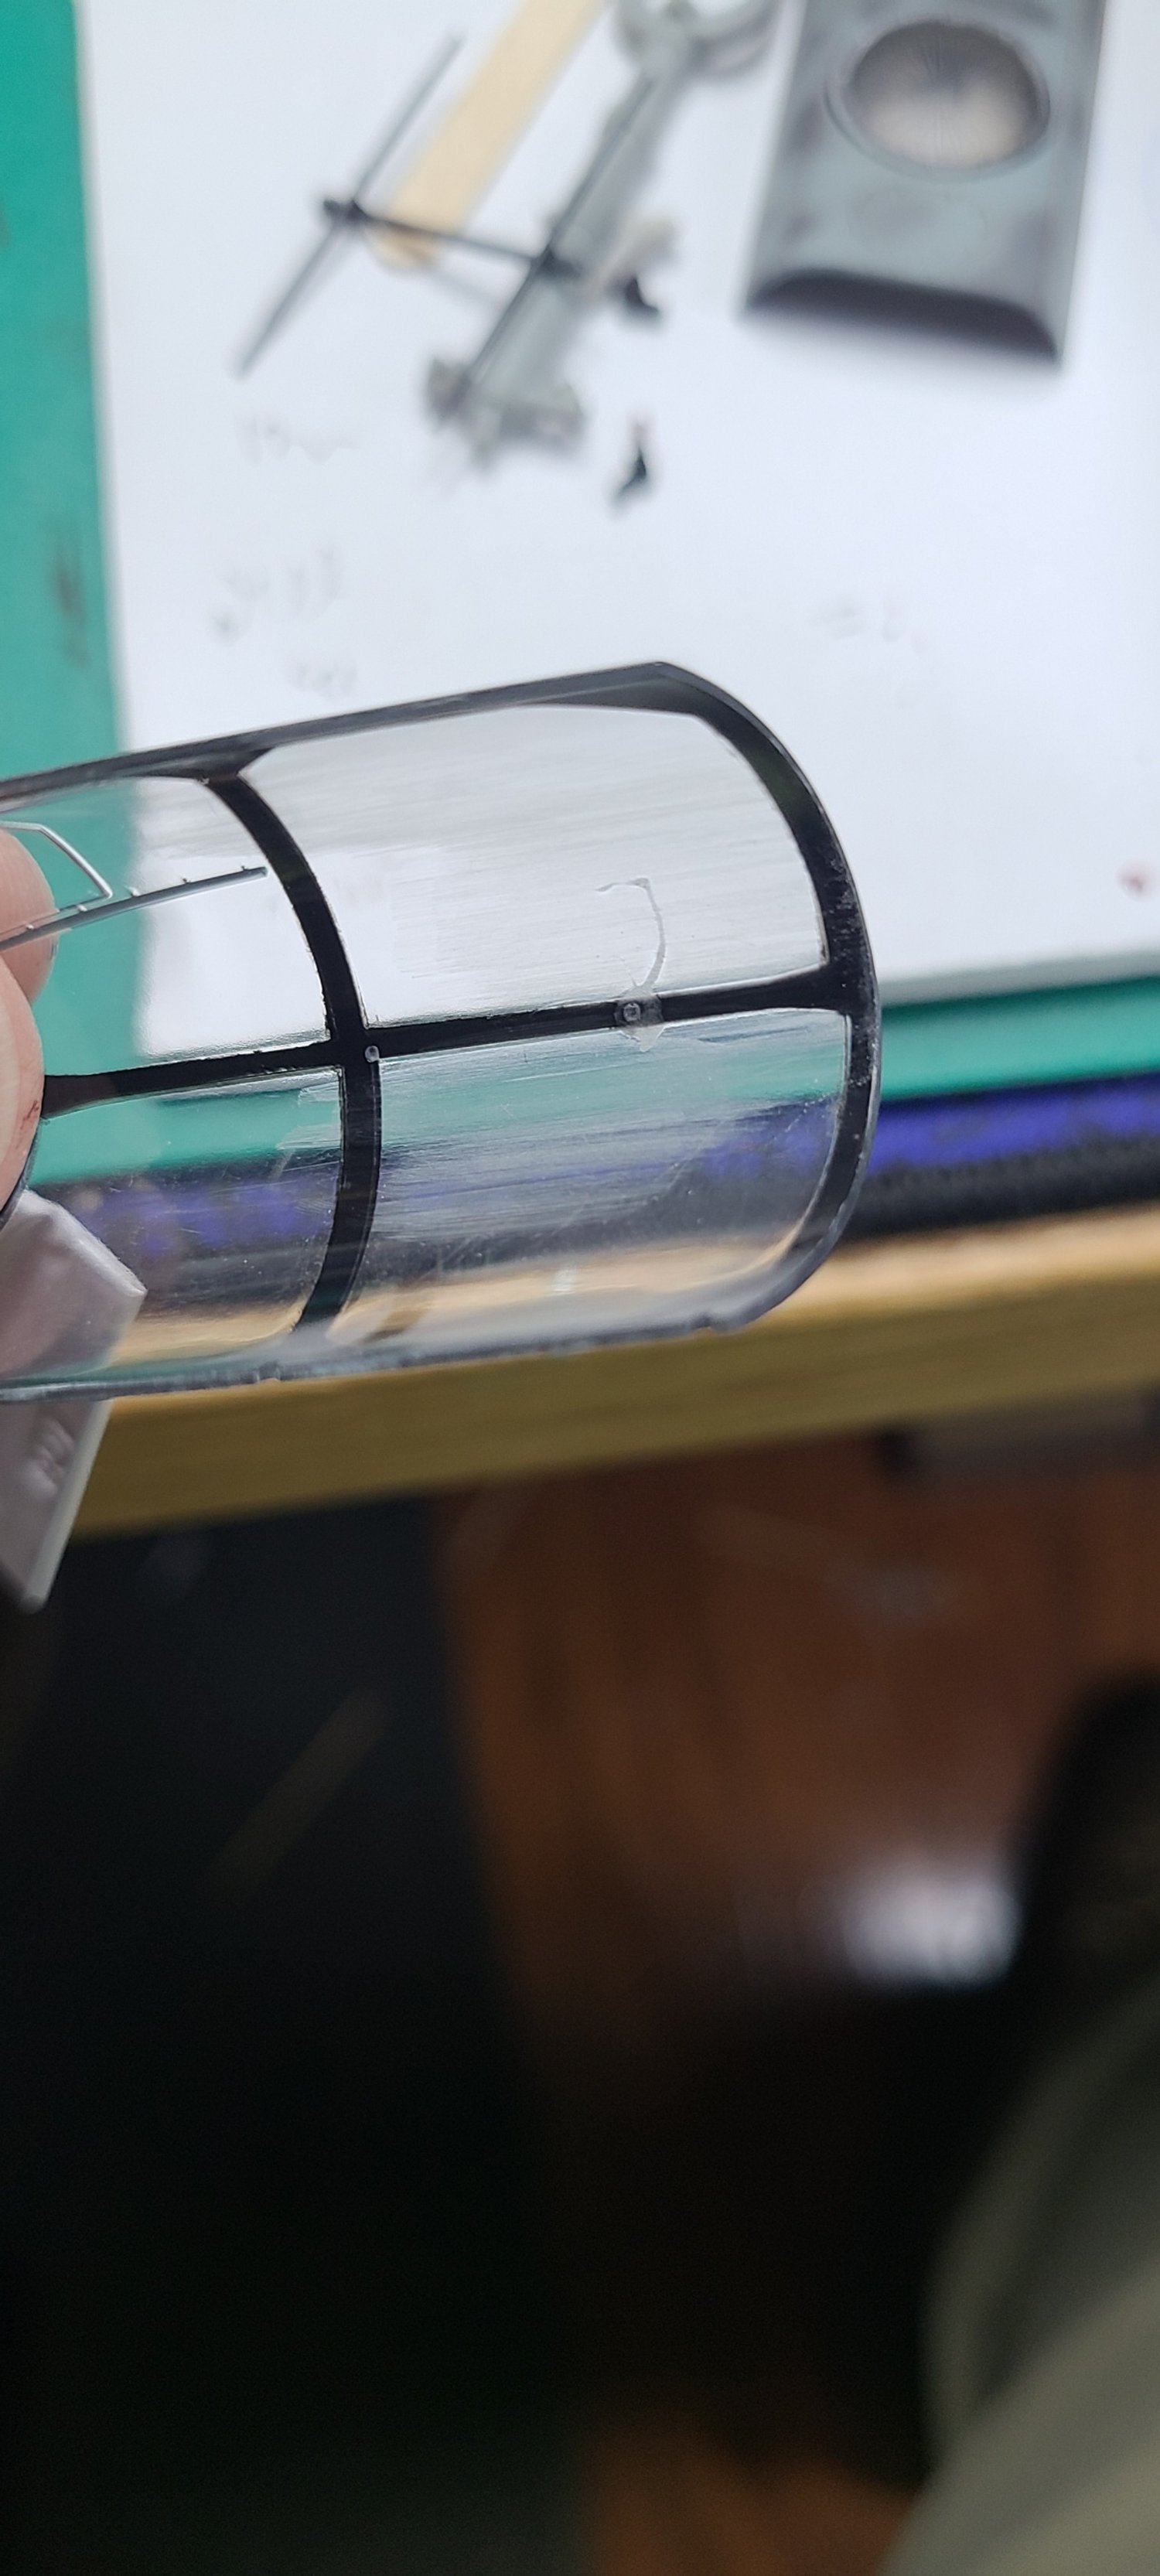
So I get back to the house and want to remove the seam lines on top of the fuselage so I put a little zap glue on the seam lines w/my glue-looper to fill them in/level them out, and put a bit of insta-set on top to set it and only then do I discover instead of insta-set I had accidently picked up another bottle of insta-zap and pored a ton of super glue on the seams and tried to wipe it off...so i basically melt part of the top fuselage and get some fibers glued in from the alcohol pad I was using. Watched a few videos and did some sanding w/sticks from 400-7000 and got lucky...mostly worked.
So top frame minor disaster, second frame after about 10 minutes of sanding and third frame after some Mr. Surfacer 1500 to see what else I need to do. I can see a need to clean up some scribed lines and a bit more sanding/filling on the models center seam. Another disaster averted.

One thing w/this model I've had to do is dry-fit EVERYTHING....I've spent hours dry-fitting and sanding, fiddling, etc. to get this to a point I feel I can use glue. It is, beyond a shadow of a doubt, the most fiddly model I've ever built. While dry-fitting I've found there are better ways to put the engine nacelles in than the instructions state, I found a bad mistake in the tooling of a seam line in the tail section that makes you think you're not centered up, and I've spent more time making sure stuff will work ahead of glue.
It is going to look cool if I can pull off a decent paint job. Sean at Primedmodelworks basically states it was a bad experience making it...but it looks great when finished. Feel the same so far.
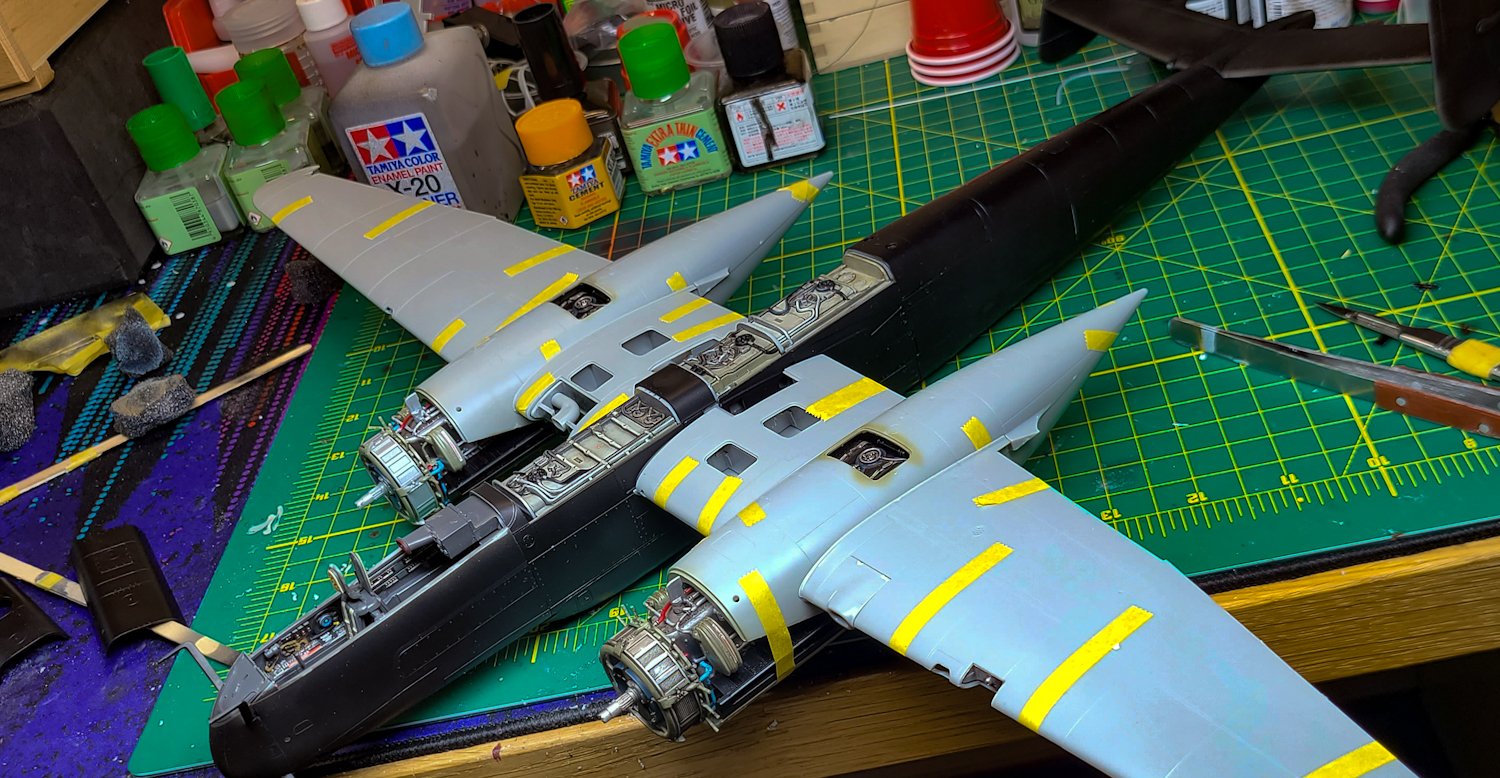
Nothing in the wings is glued (other than the engines themselves)...this is all taped and dry-fitted to make sure I've got the right lines, fits, etc.


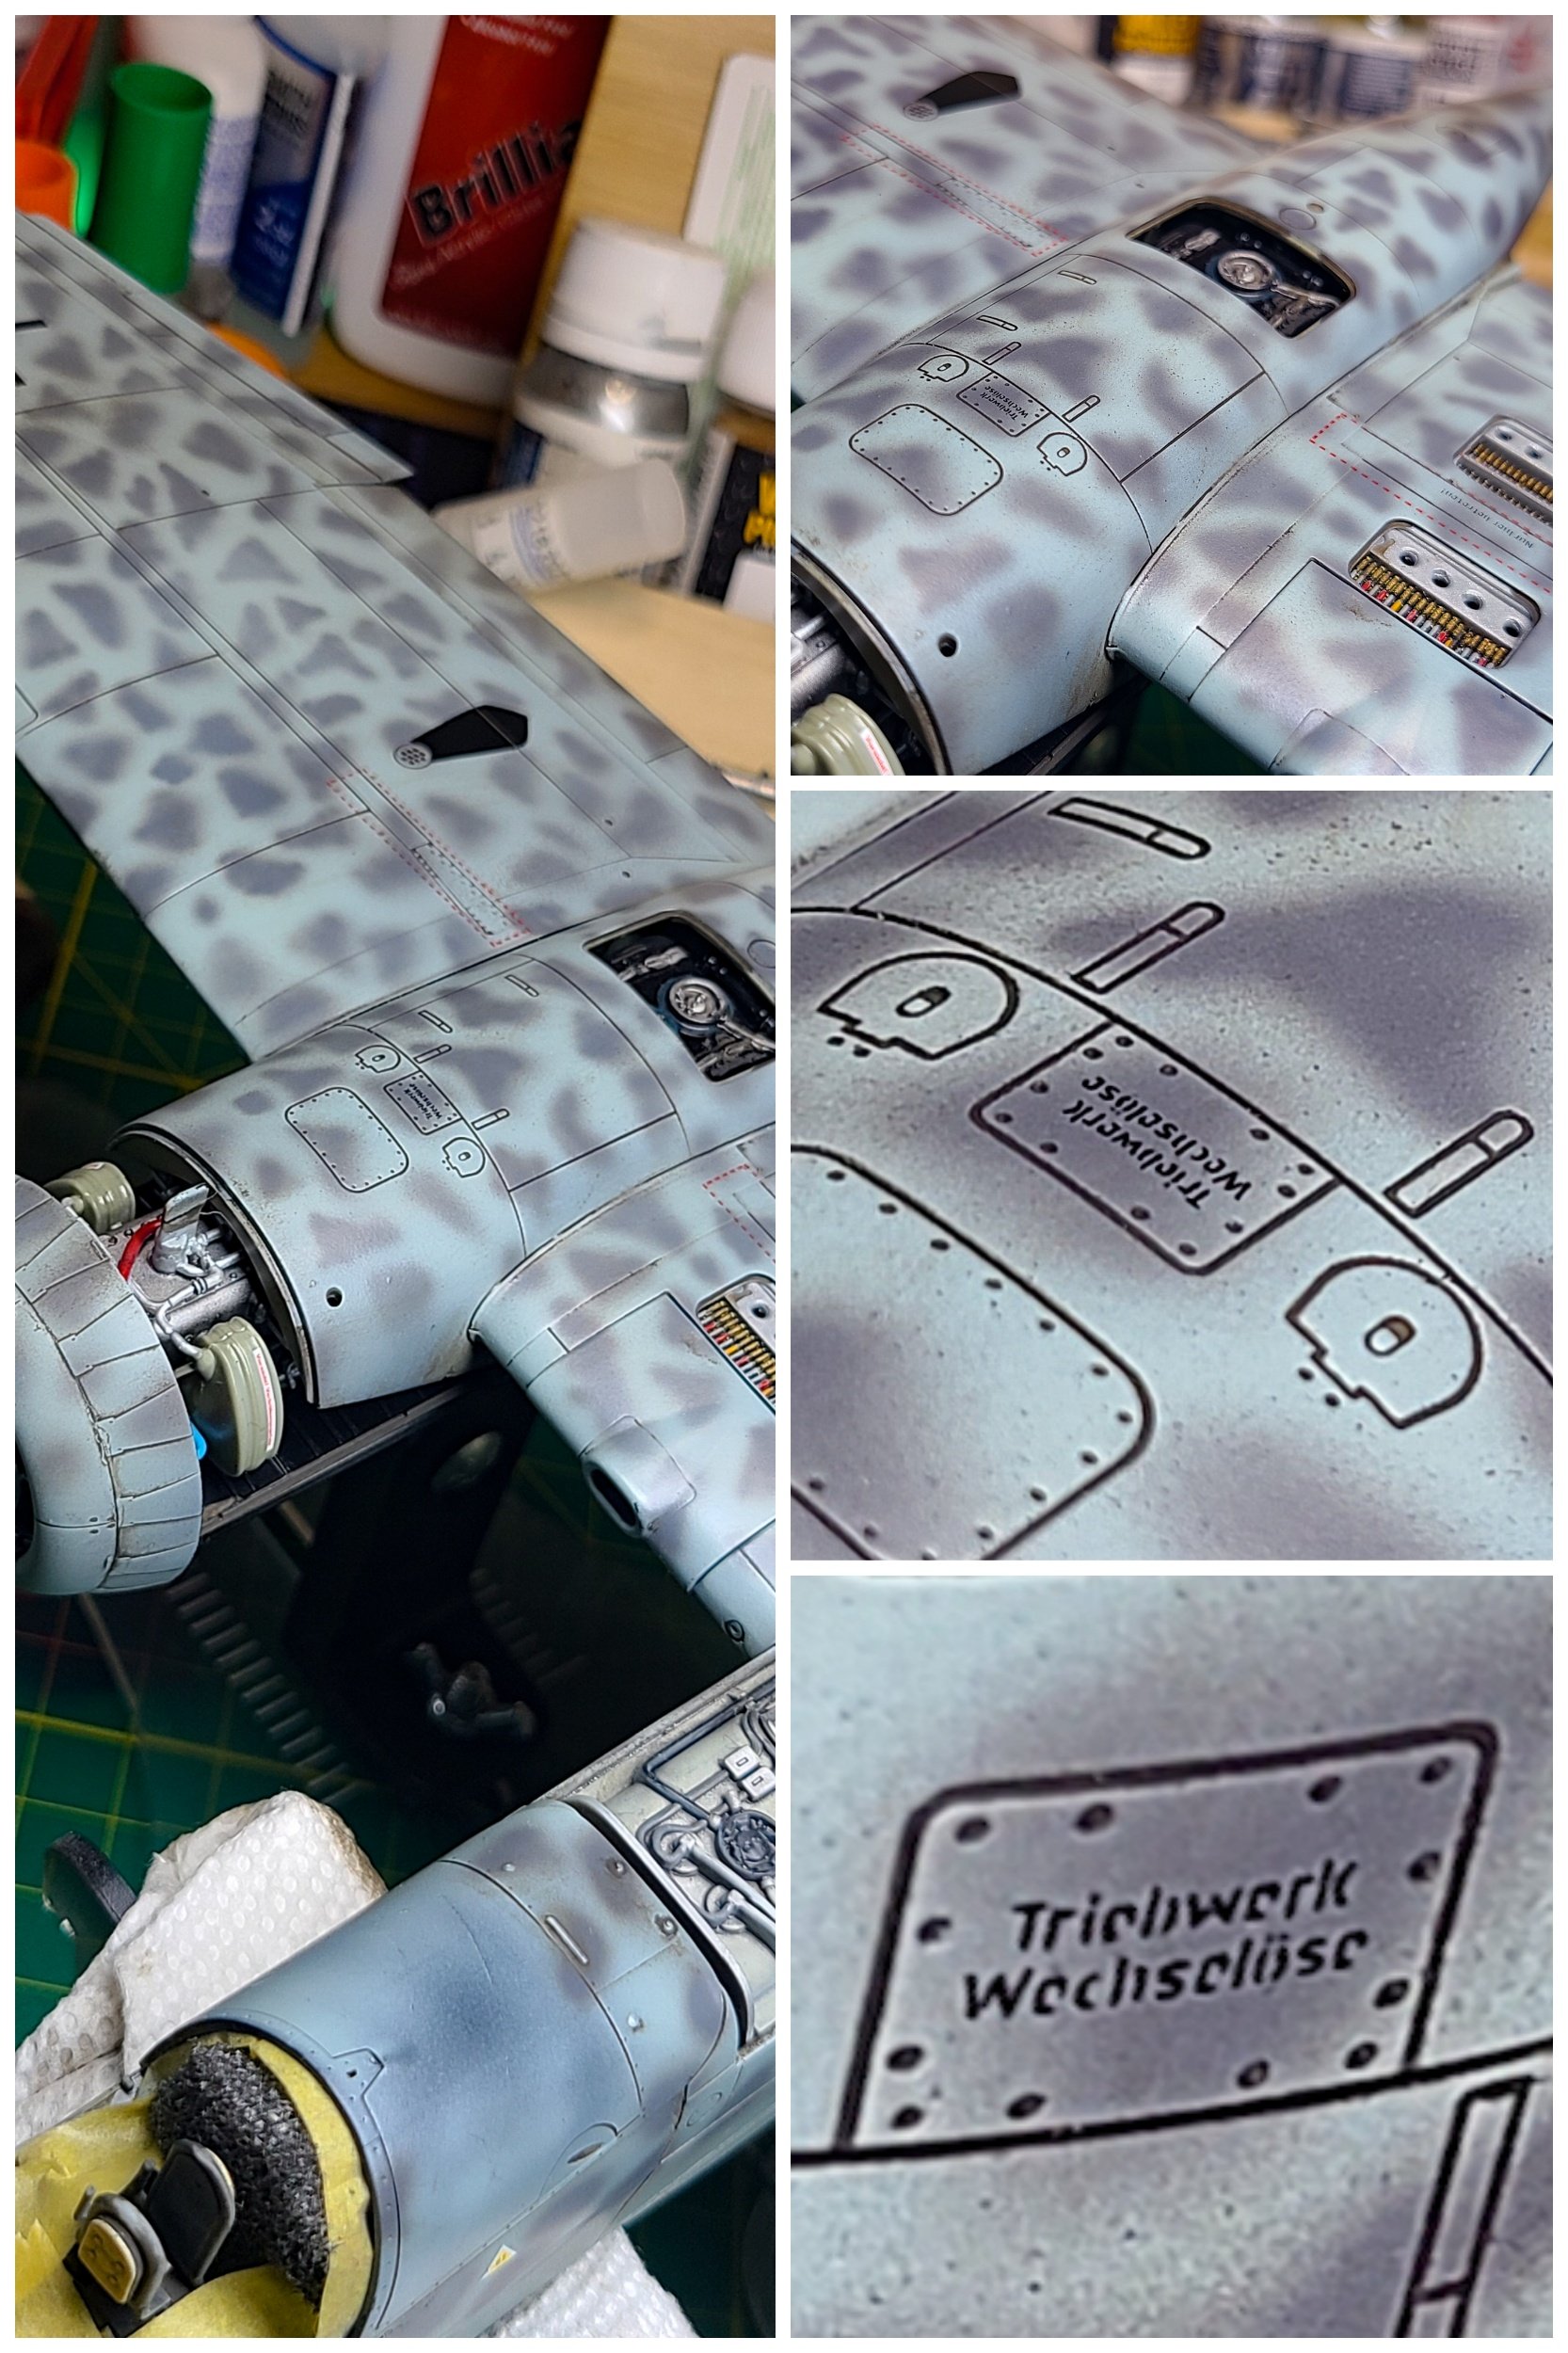
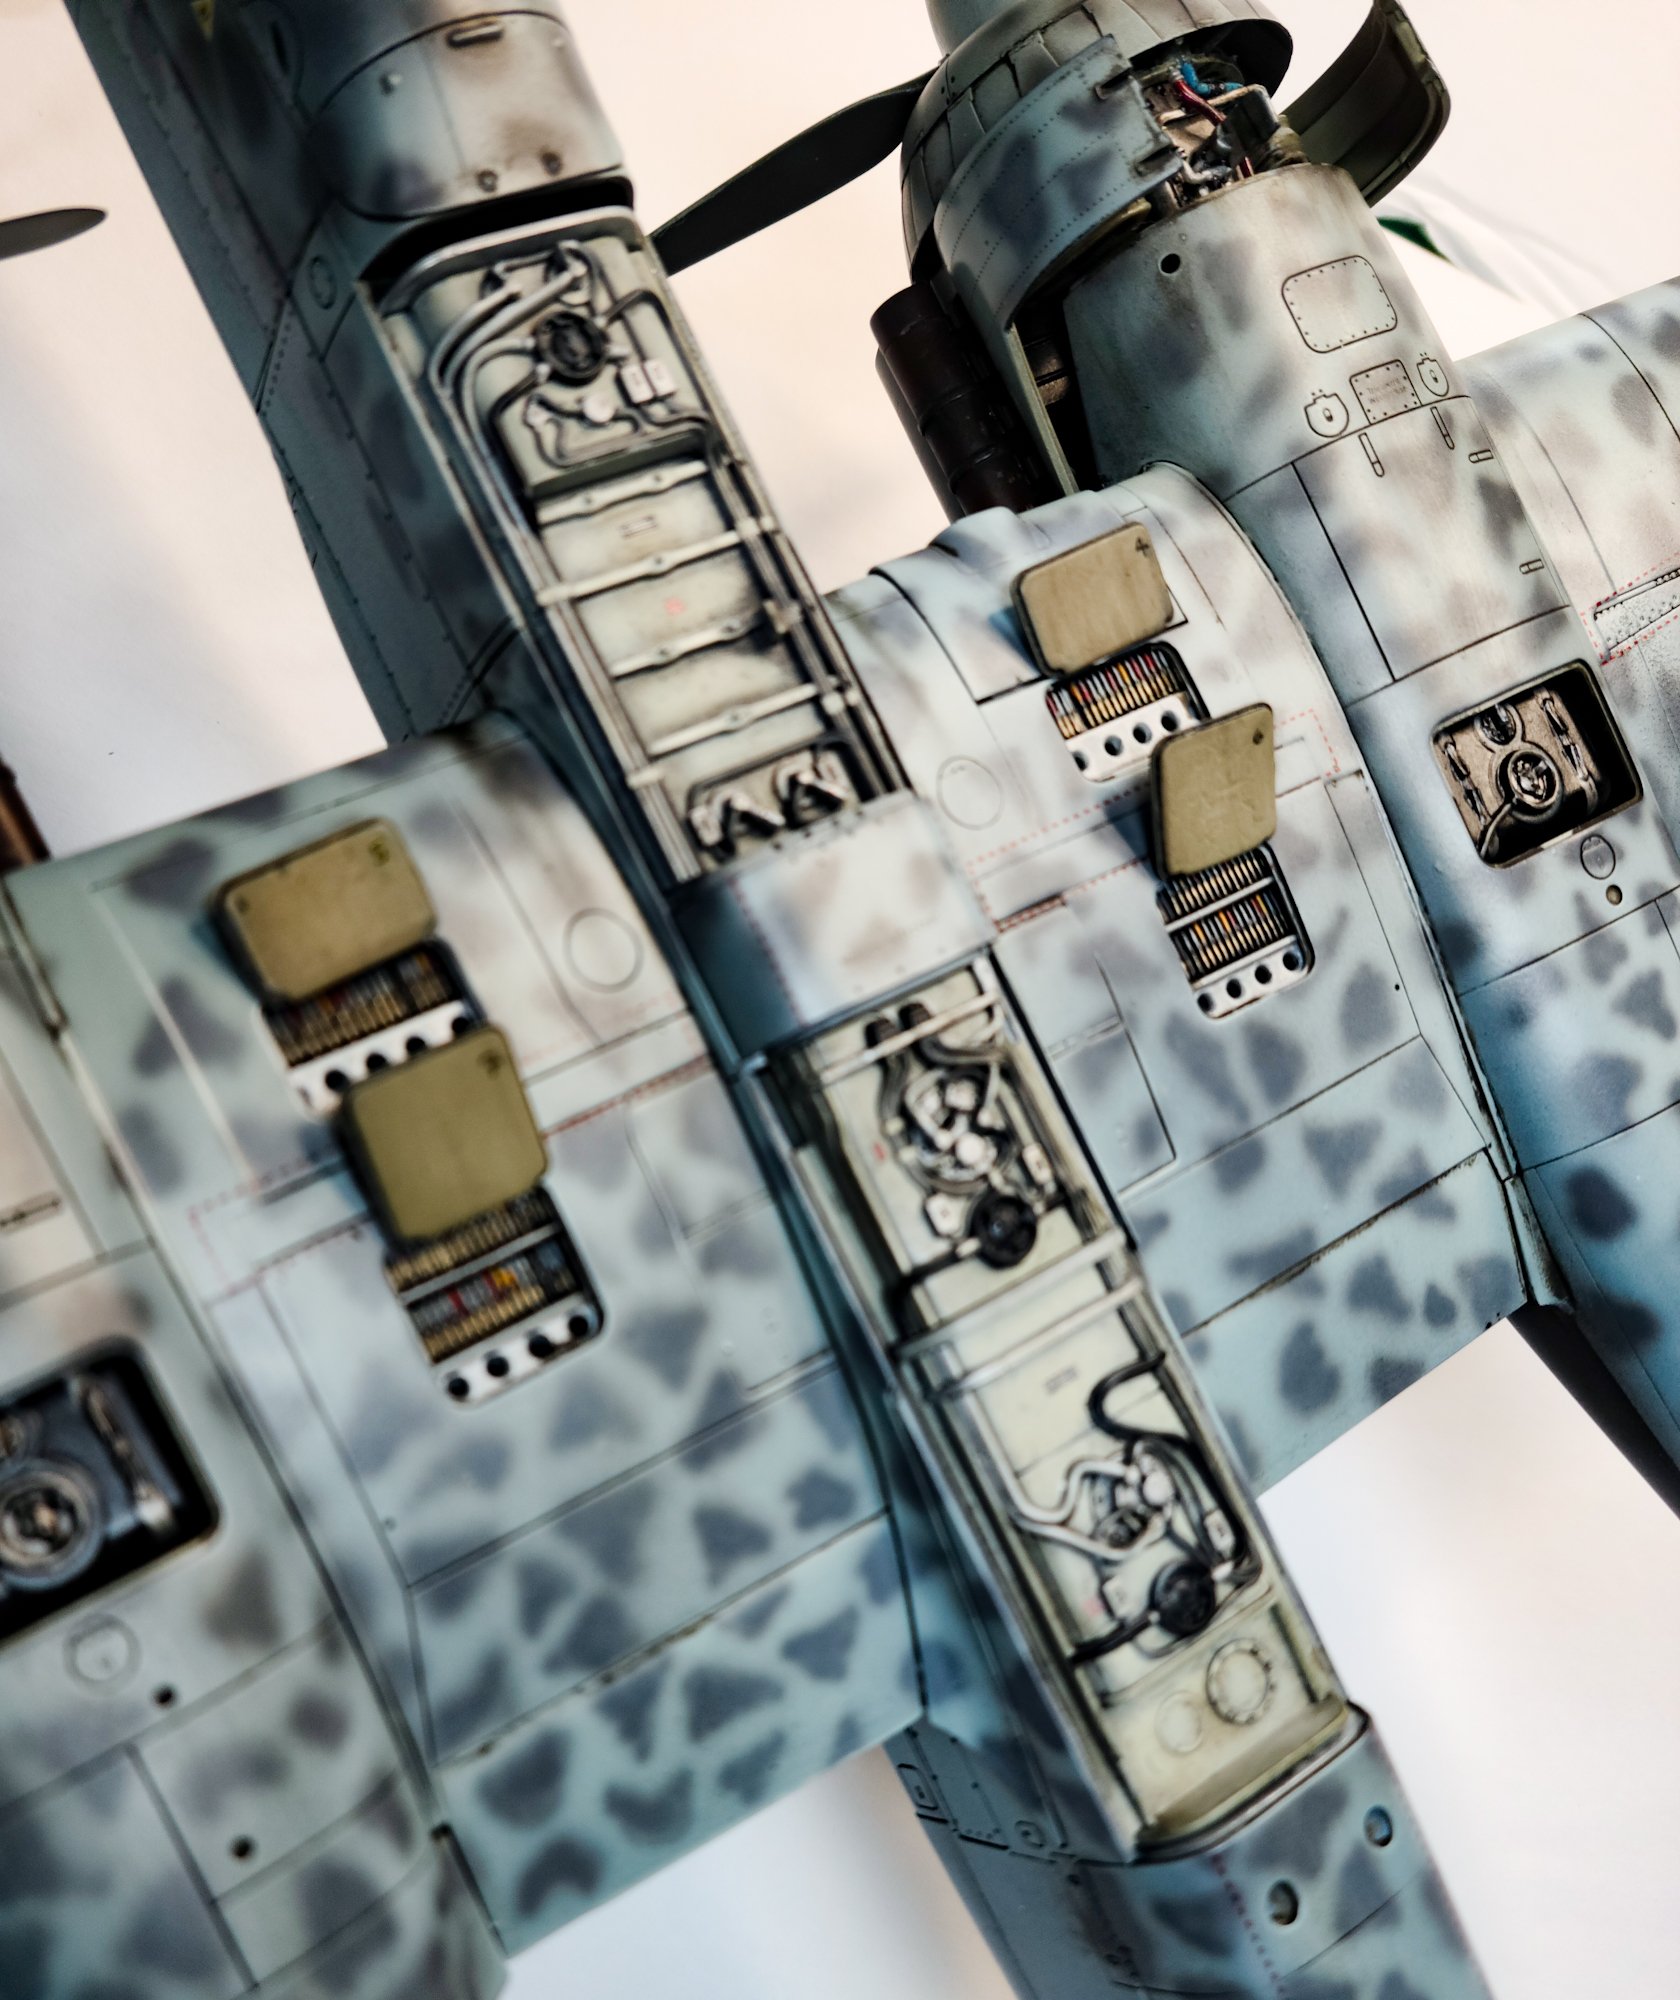
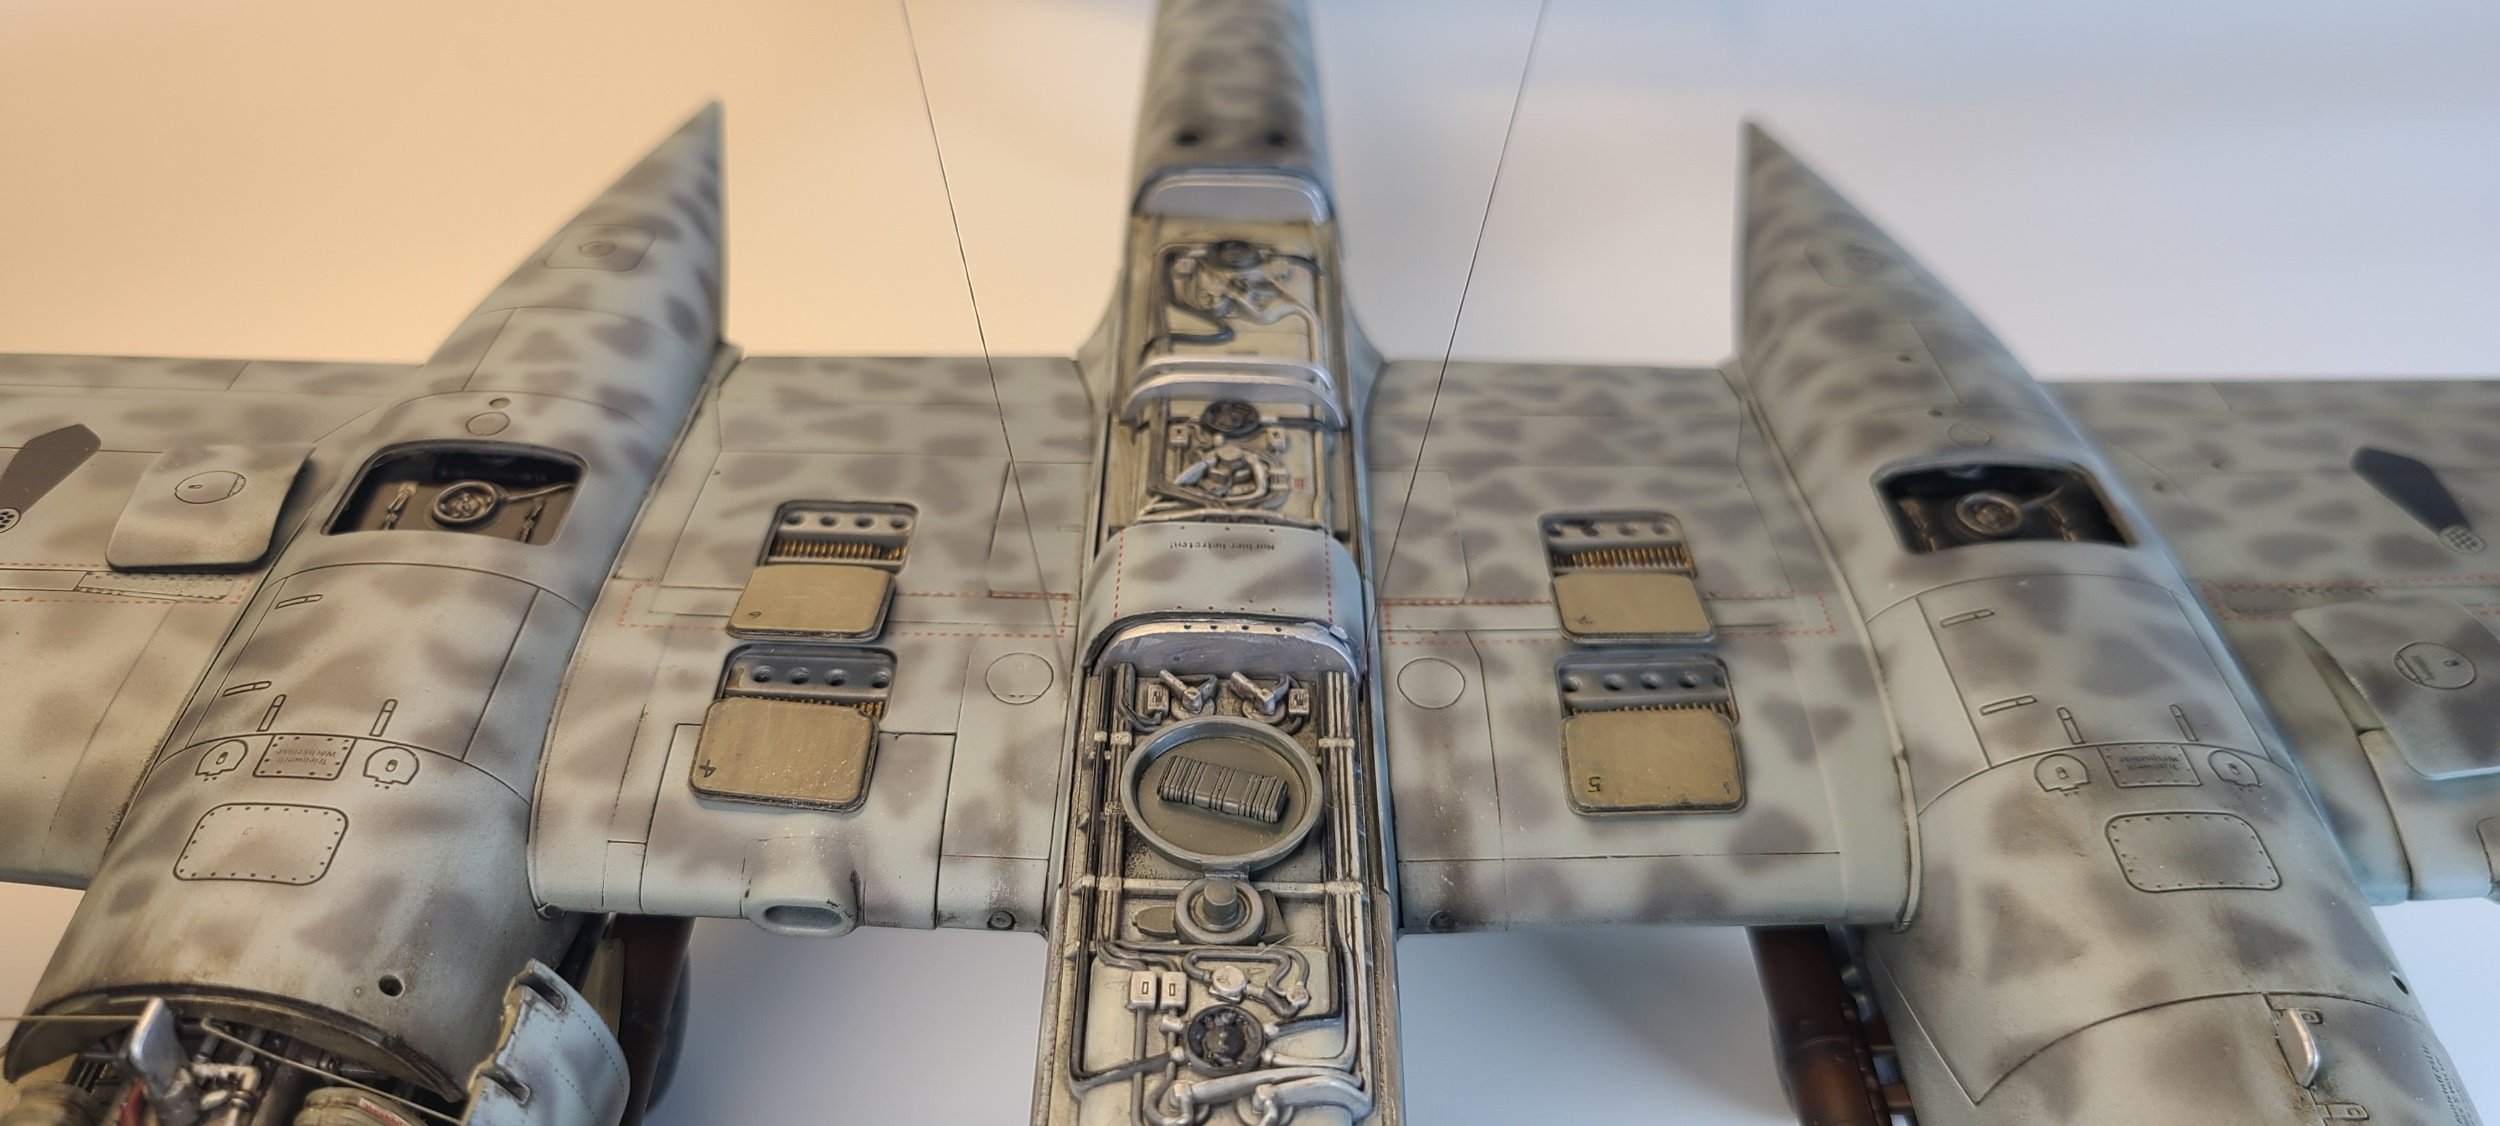
Just some detail painting on the fuel tanks...I think I'd rather have separate pipes here like they do on the engine (everything here is molded) but the detail is good and with some liberty on weathering you can get a decent effect. I still need to add some more washes and it's still really messy compared to the pics I've seen, but it'll look better once the exterior camouflage is applied and the wings/hinges/doors installed.

Working on the engine nacelles...just weathering for now. RLM02 base with mixed in whiter shades for the raised ribs and panels plus Tamiya washes (black and brown) and a flat matt finish. The nacelles are another sore point...lots of flimsy parts needing to be supported by the wing spare and the instructions are not showing you the best ways to put the nacelles together. Best to put the lower parts together first with the back bulkhead in them rather than in the top half of the nacelle. Also carefully fit the support panel for the landing gear...it depends on a solid glueing to the firewall and side panels of the nacelles. Also seemed to be missing some bulkheads to completely close off the engine compartment from the wheel well...probably think you'll not see it so not included. It's one more fiddly area in an already fiddly aircraft build.

"Small steps Ellie...small steps"
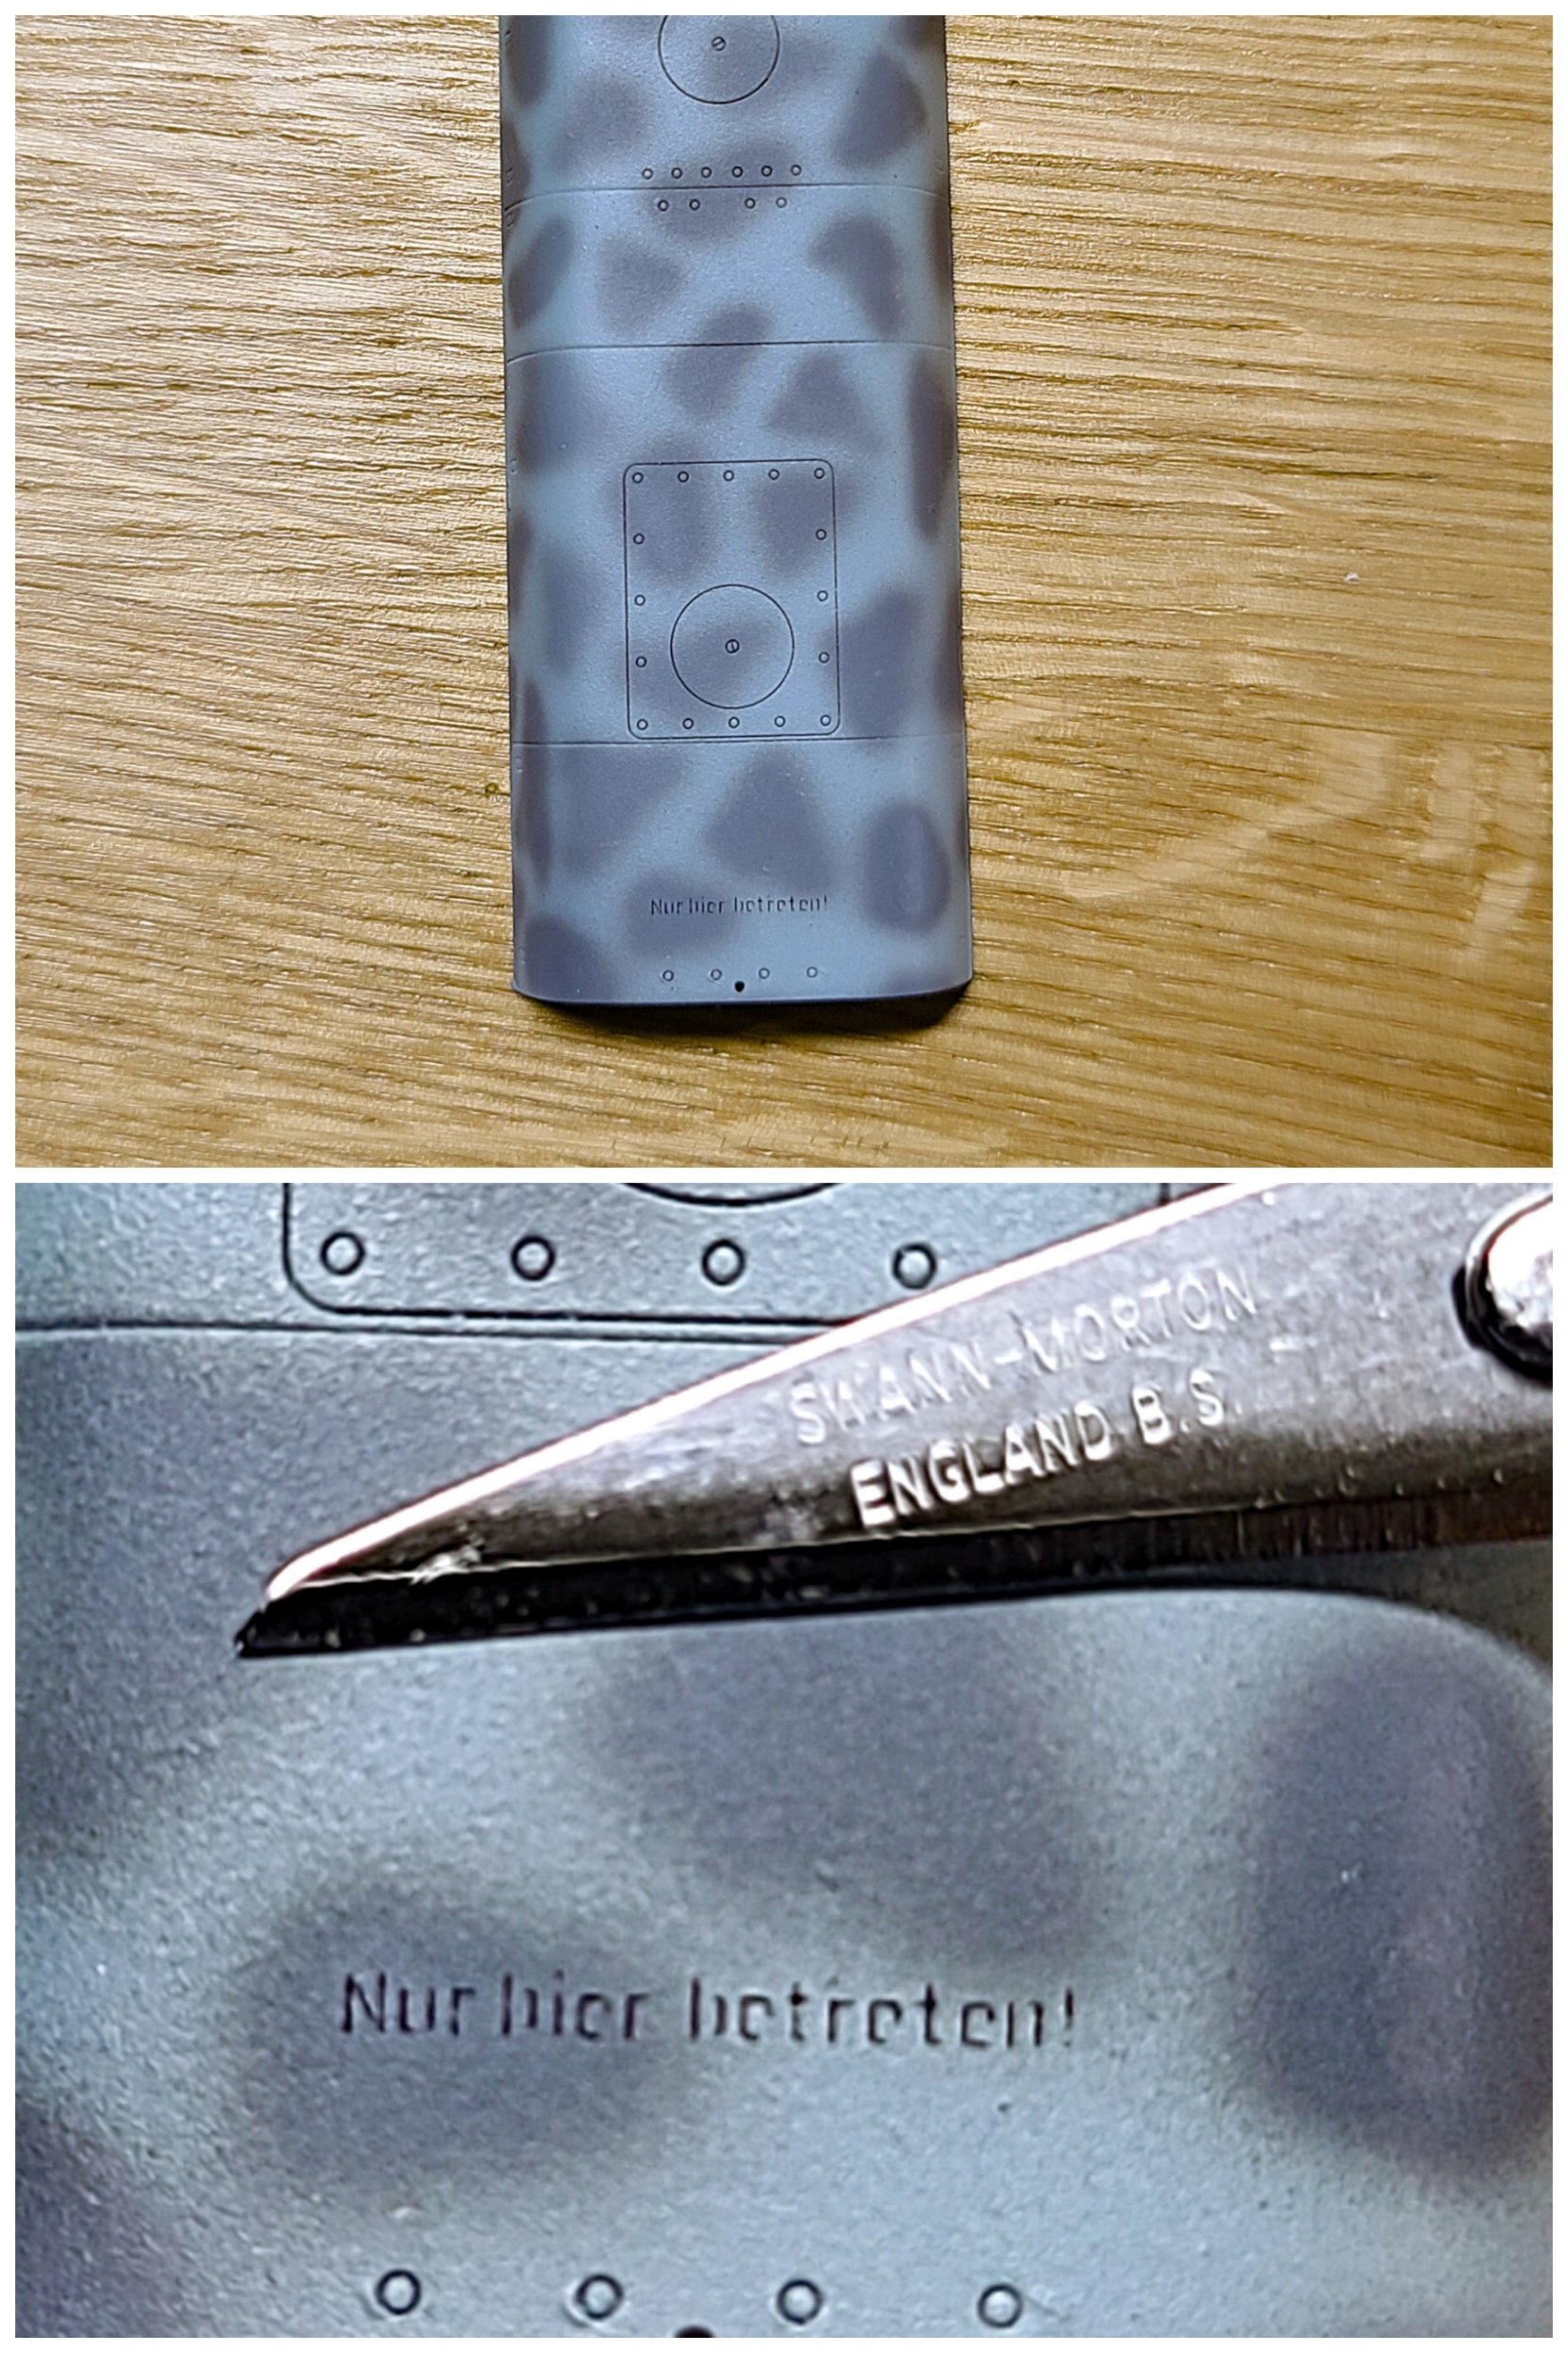
Other than a thumb print on one of these nacelle bulkheads and some pen work, they are pretty much done (sloppy but getting better...I sprayed dull coat on before the panel line had dried so you can see separation in the paint. I'm not going to redo these. It's a one-foot view now 😉
BTW....this is how I work...crap everywhere.

I've glued the engines and engine nacelles on the wing frame...the wing skin here is just taped on. I'm doing a ton of dry-fitting and taping this model...enough tape to do three or four easier ones. In this case I have to tape up the nacelles super-tight when gluing and have to do some manual clamp work as the compound curves and the weird way Zoukei-Mura built this mean that normal clamps don't work on it...so hold it I am. Spent about an hour gluing it. I also cut the top fuselage cover (over the fuselage fuel tanks) into three pieces so I can glue down the part over the wing root and leave the others to be removed for show-n-tell. One other thing...the damn engines have these cowling flap actuators and they're thin and small and I've already broken five or six of them and lost a few...and as I go on the model is going to be more difficult to handle...I think there's going to be some more swearing and some Mr. fix-it DIY work here at the end. Oh, and did I say it's a lot bigger than I thought (even though I'm eyeing a HK 1/32 B-25...).
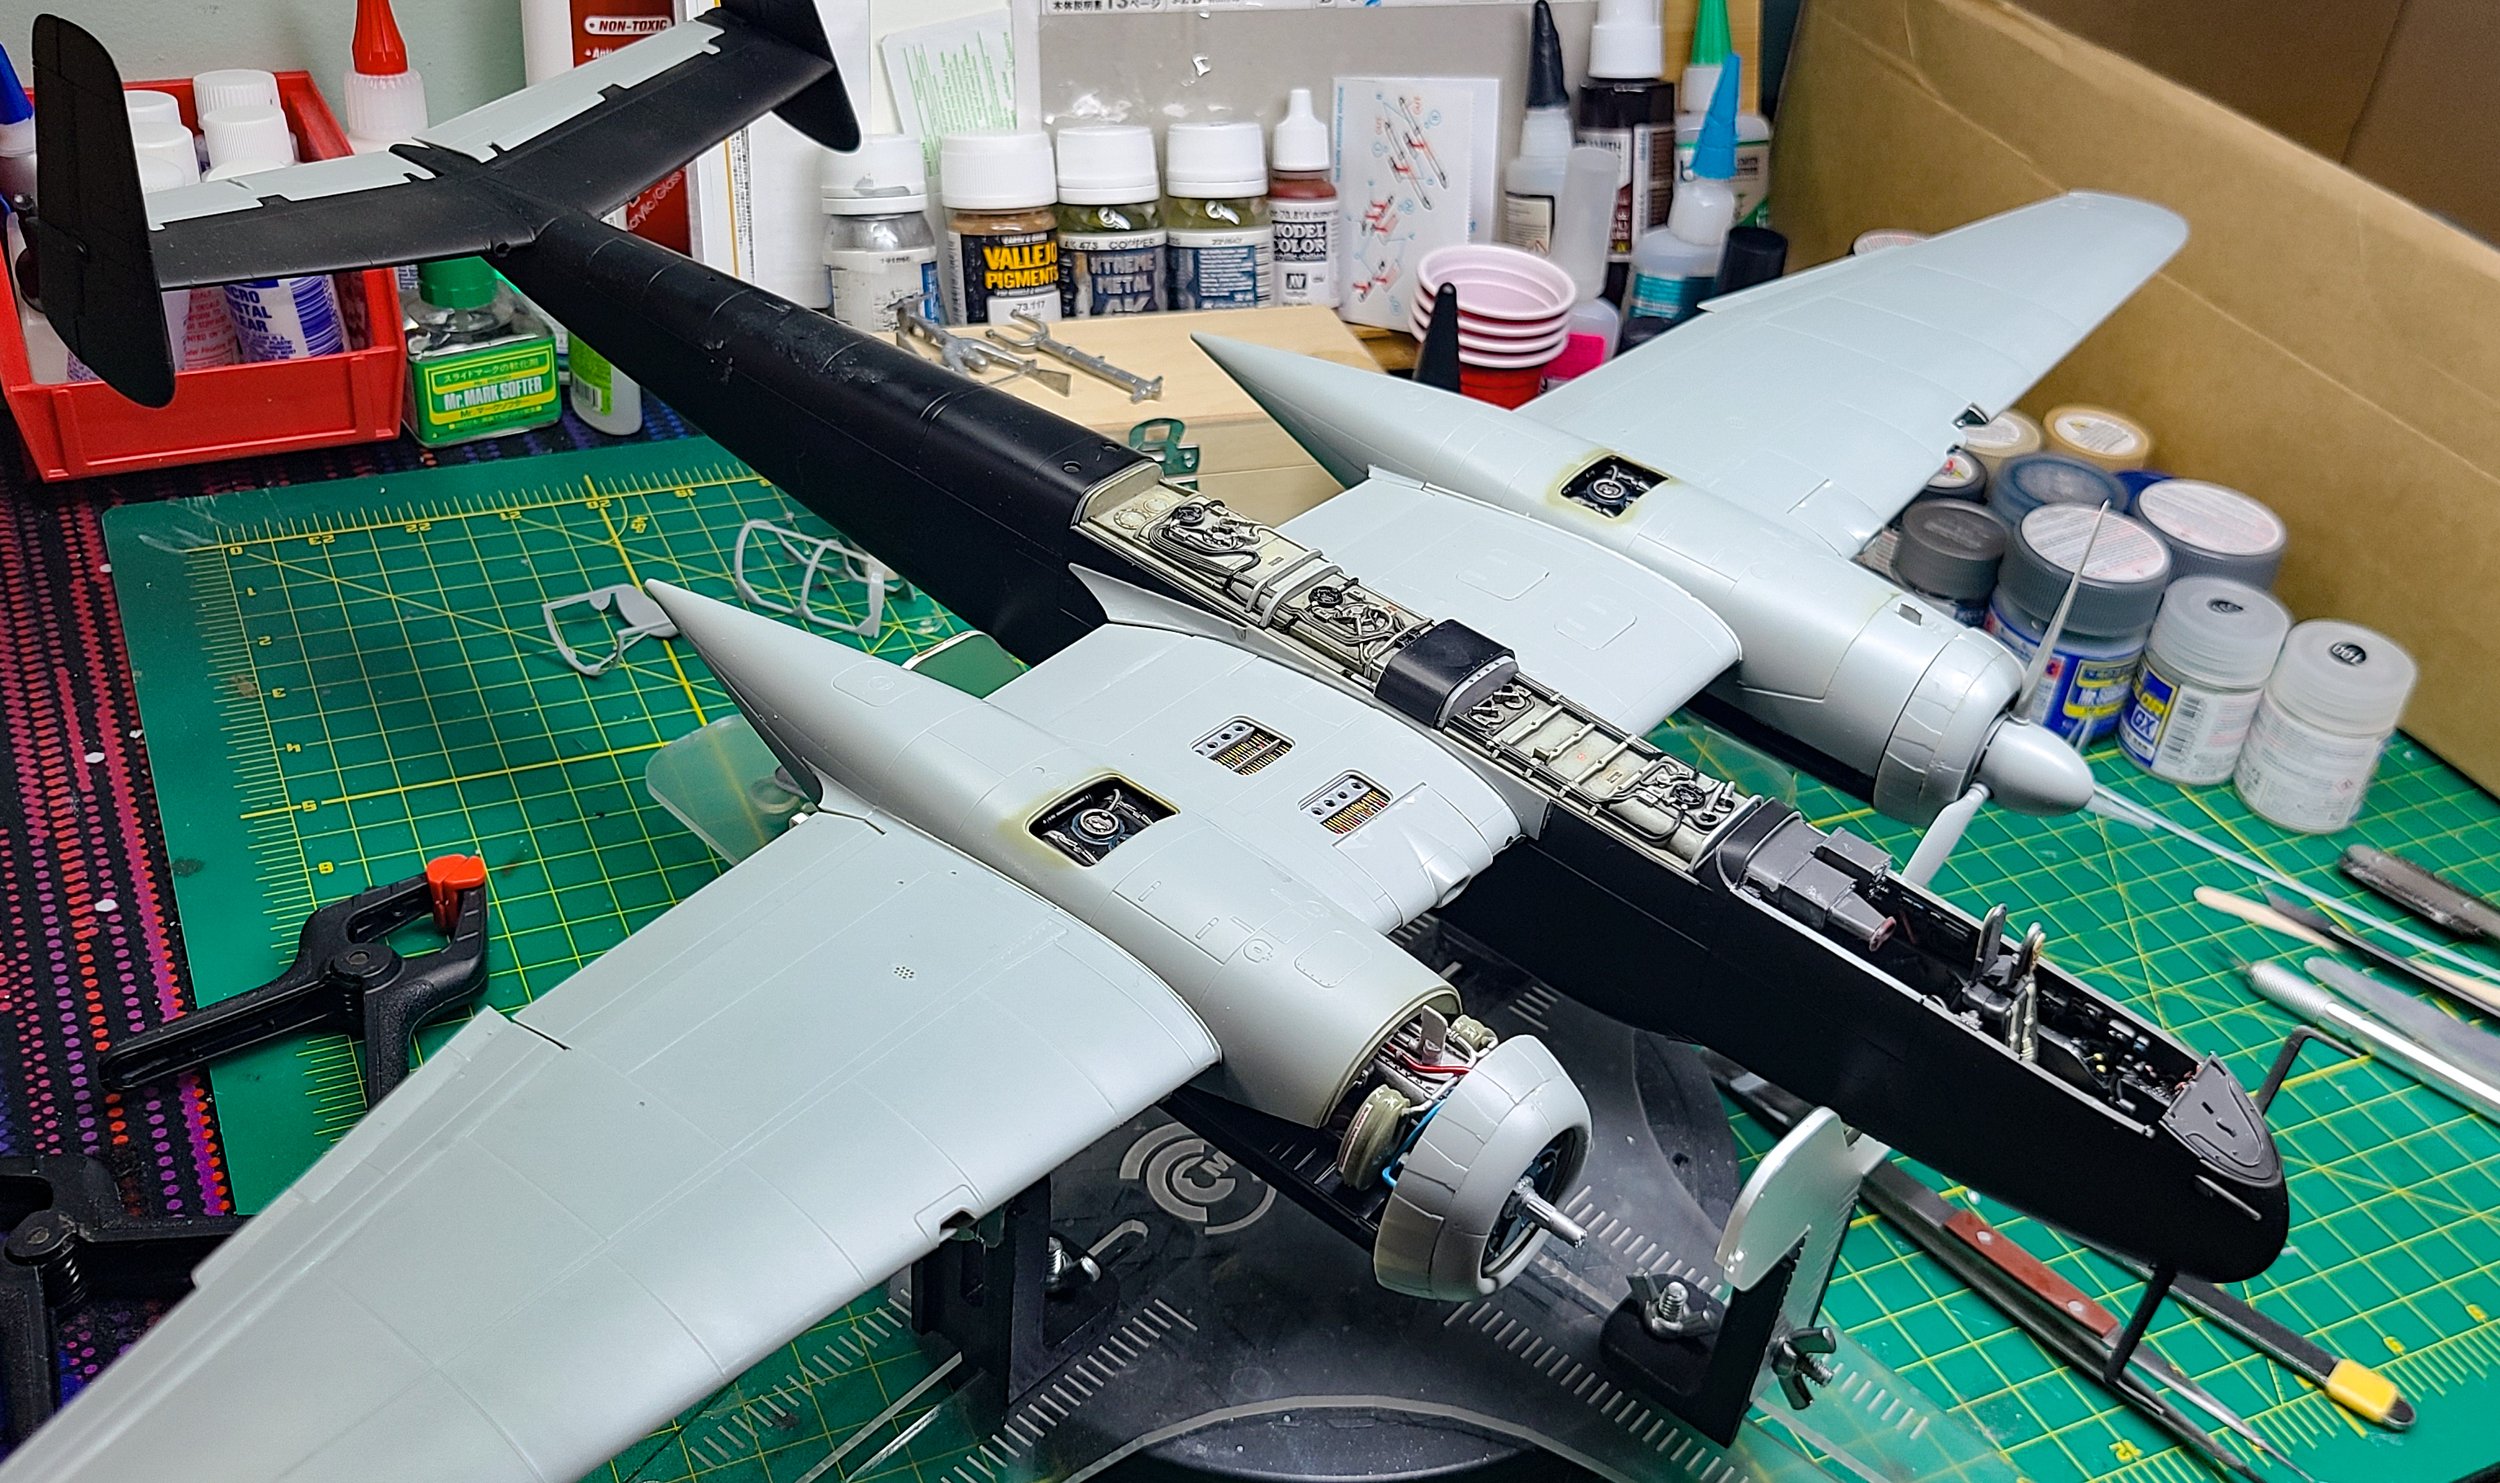

The entire model is a fiddly mess...Zoukei-Mura tends to engineer their models like Legos...instead of two fuselage half's it's a series of interlocking panels and sections. Instead of one engine nacelle to slot the engine and landing gear in it's another series of 10-12 panels and sections. So, as I described above it requires a lot of dry-fitting and more precision than my patience sometimes provides. That leads to a solid amount of frustration...it's why I took about year to finish my Hs 129.
I can't deny the finished products look great and I understand why they build in the accuracy the way they do, but it sometimes causes more problems than the effort may be worth. On the Hs 129 I gave up at times and just glued in all that detail and closed it all up. On the BF 109 I had a hell of a time getting things lined up properly and had to do the open engine version because I'm pretty sure the panels wouldn't fit right on the front end after small mistakes I made in the cockpit and engine.
That said it does force you to get better at your modeling skills or failure is an option.
The most fiddly of fiddliest models ever made. That and in the middle of securing the wing in the fuselage I broke the wing spar somewhere...
Long story short I took a week off to do yard work and stay out in the elements and away from Tamiya Thin Cement and various paints and when I came back I started putting the pieces together to get it to the paint stand. The wing and fuselage have never been perfectly built (by me) so there were some hidden modifications I made to get things to line up fairly straight (copious glue/plasticard/etc). Things looked good and I left it to dry. Came back and there was a solid 2-5mm fuselage tilt to one side as the wing didn't glue on true. As I slowly bent it back to a position where I could plasticard it in place, the port wing gave way and started to fold up. I stopped what I was doing (doh) and carefully held everything in place. I poured more plastic and superglue in place where I thought the spar gave way (couldn't see the break) and held it together for 10 min (also glued my fingers to the fuselage so sanding is in my future). I then glued the wing fairings in place (more stability), glued the flaps in the up position AND gluing them to the fairing and after a day...things seem OK. Hopefully this is the "major" glitch of the build. Time will tell when the entire weight of the plane is on wheels.
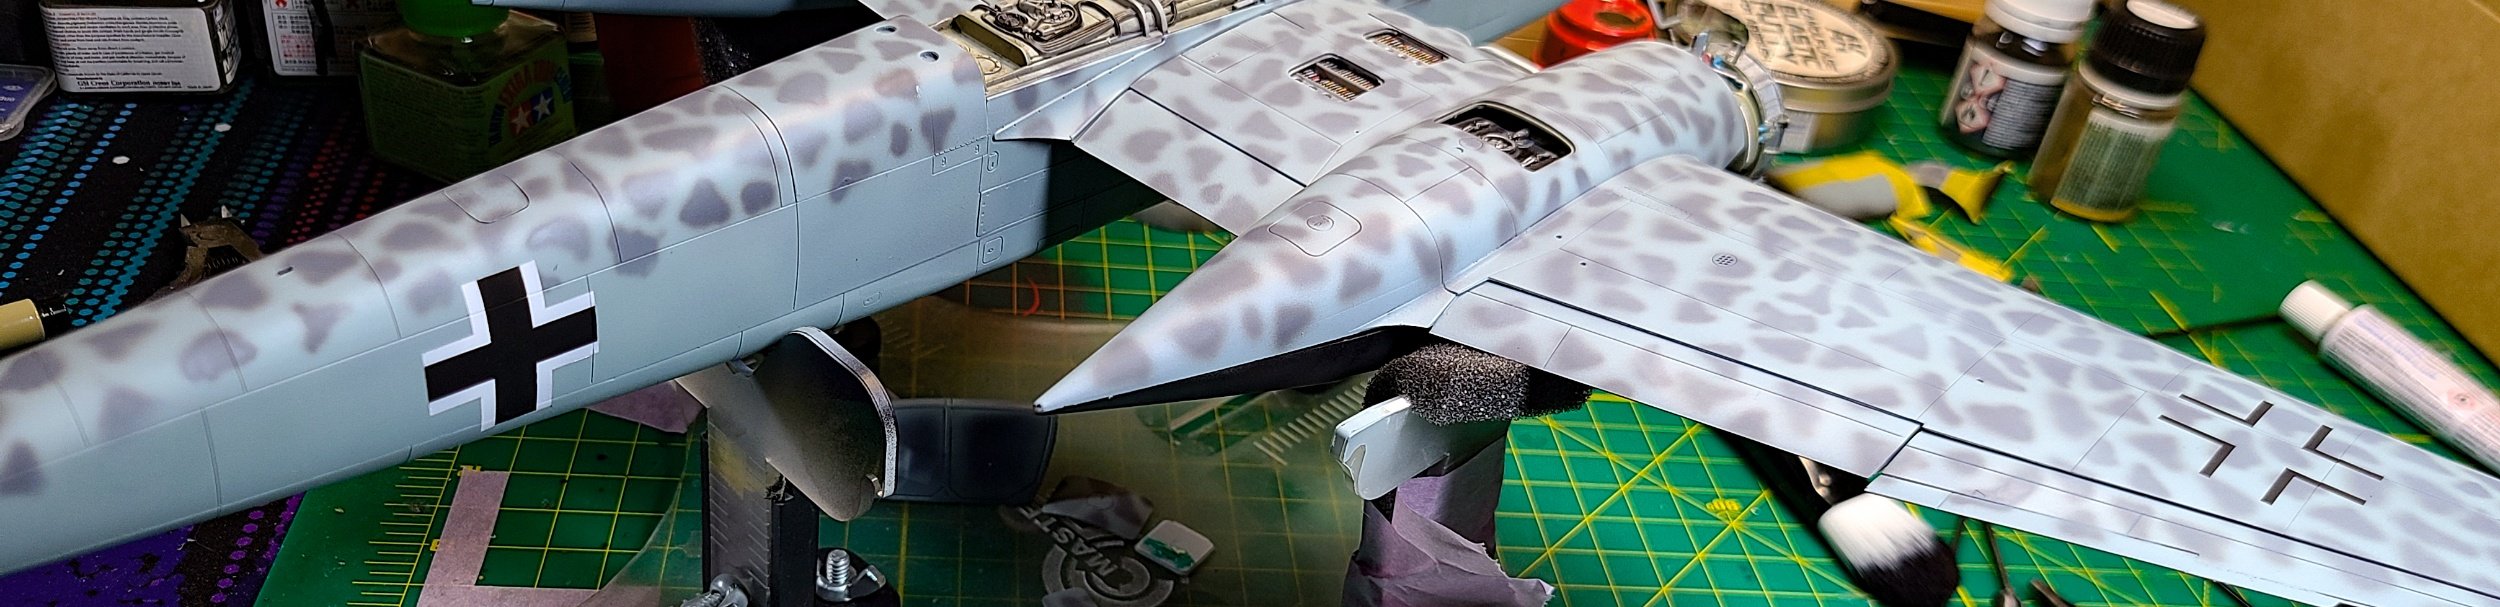
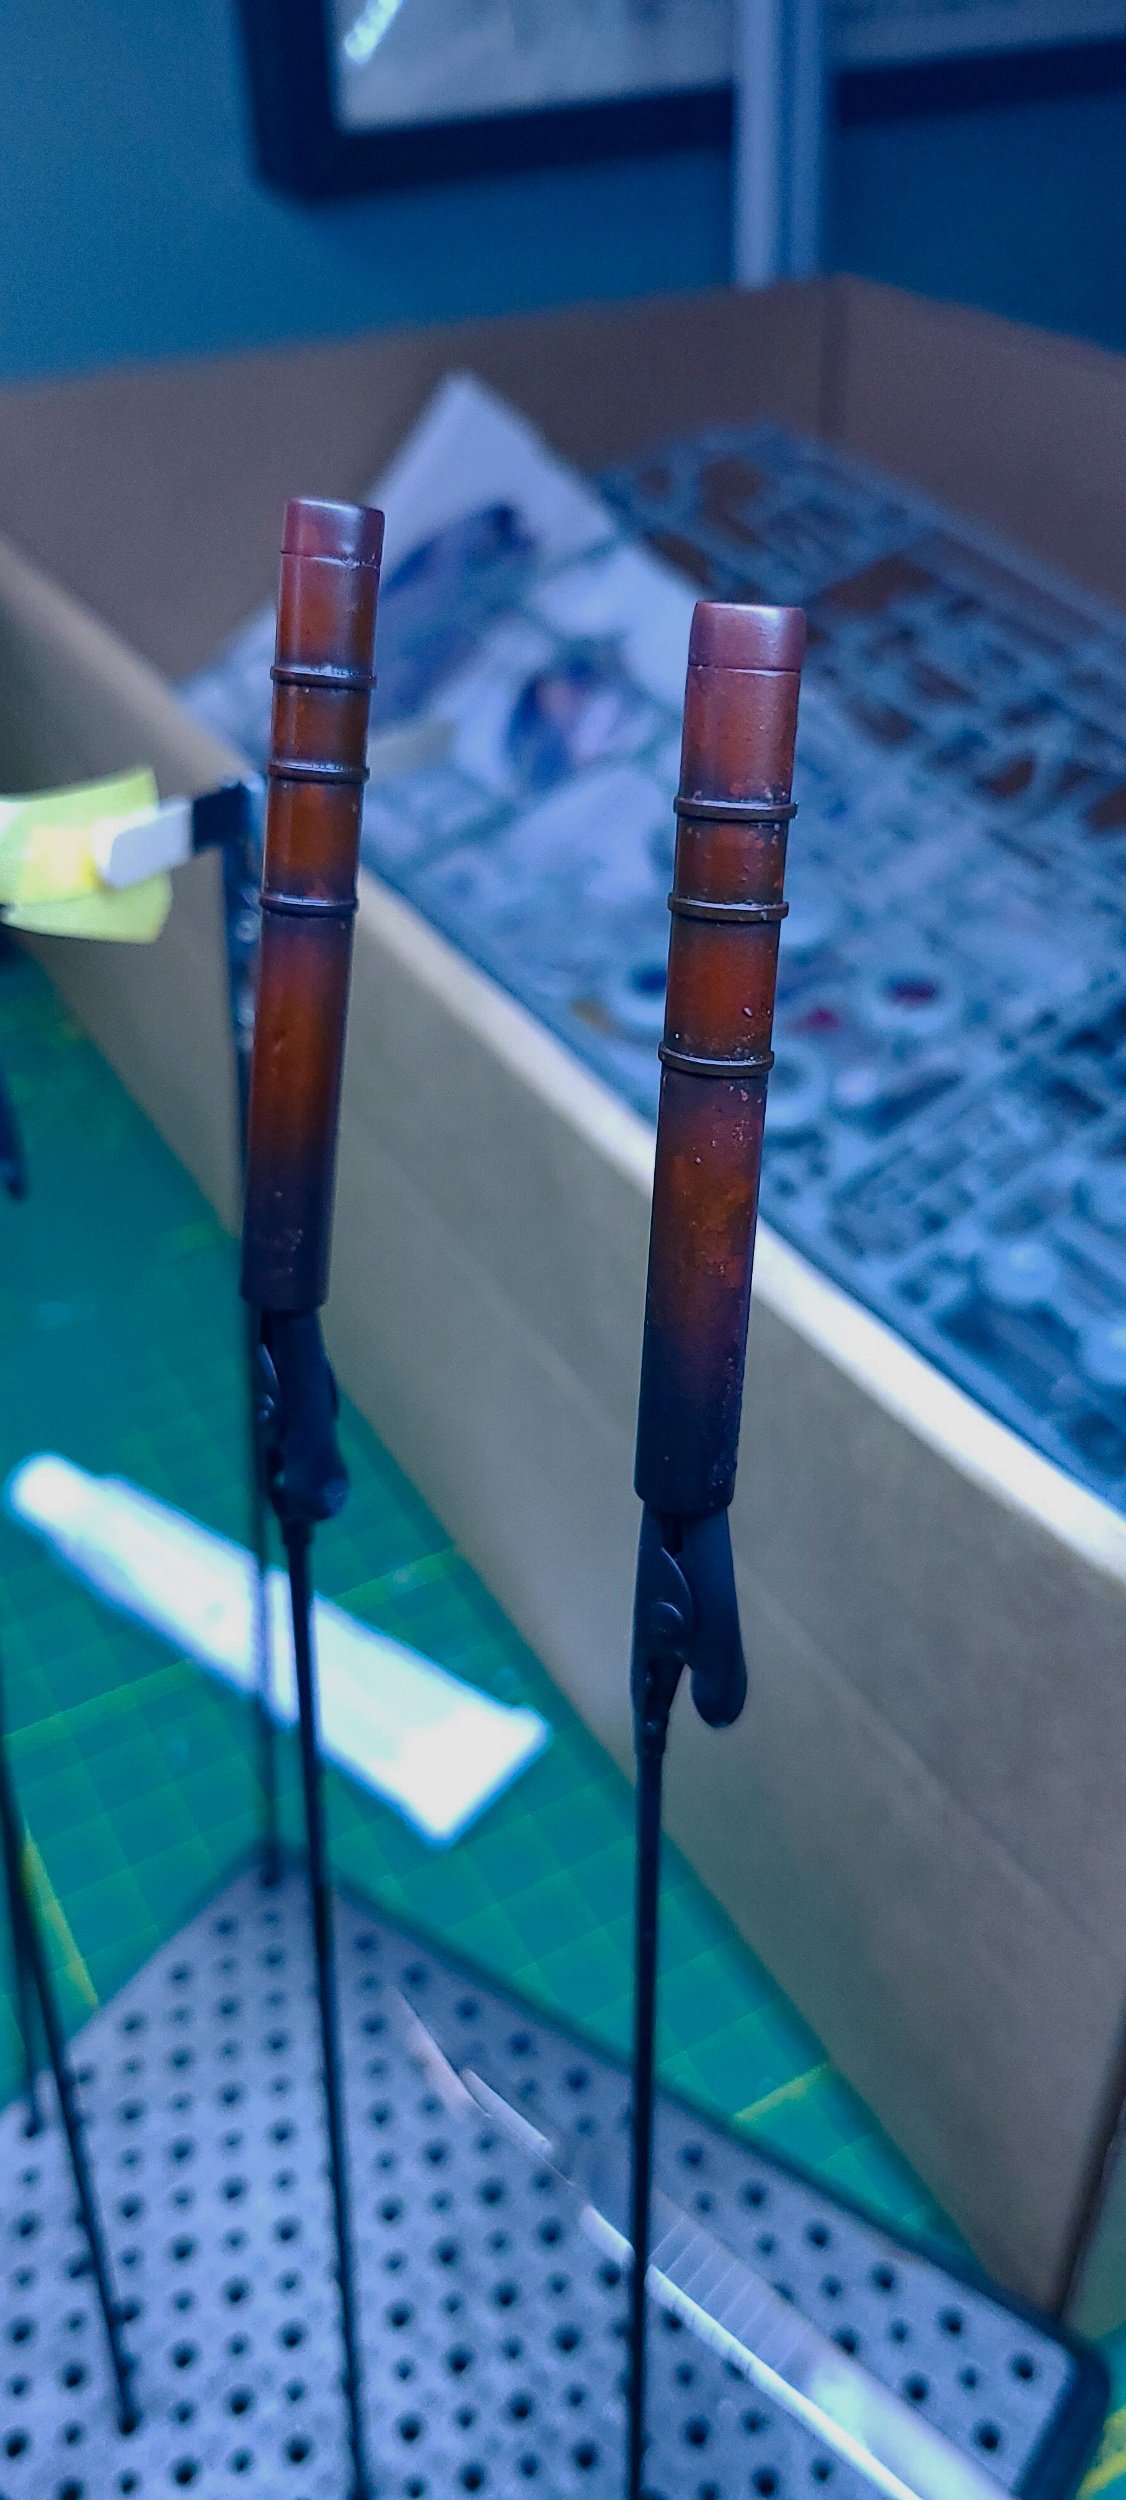
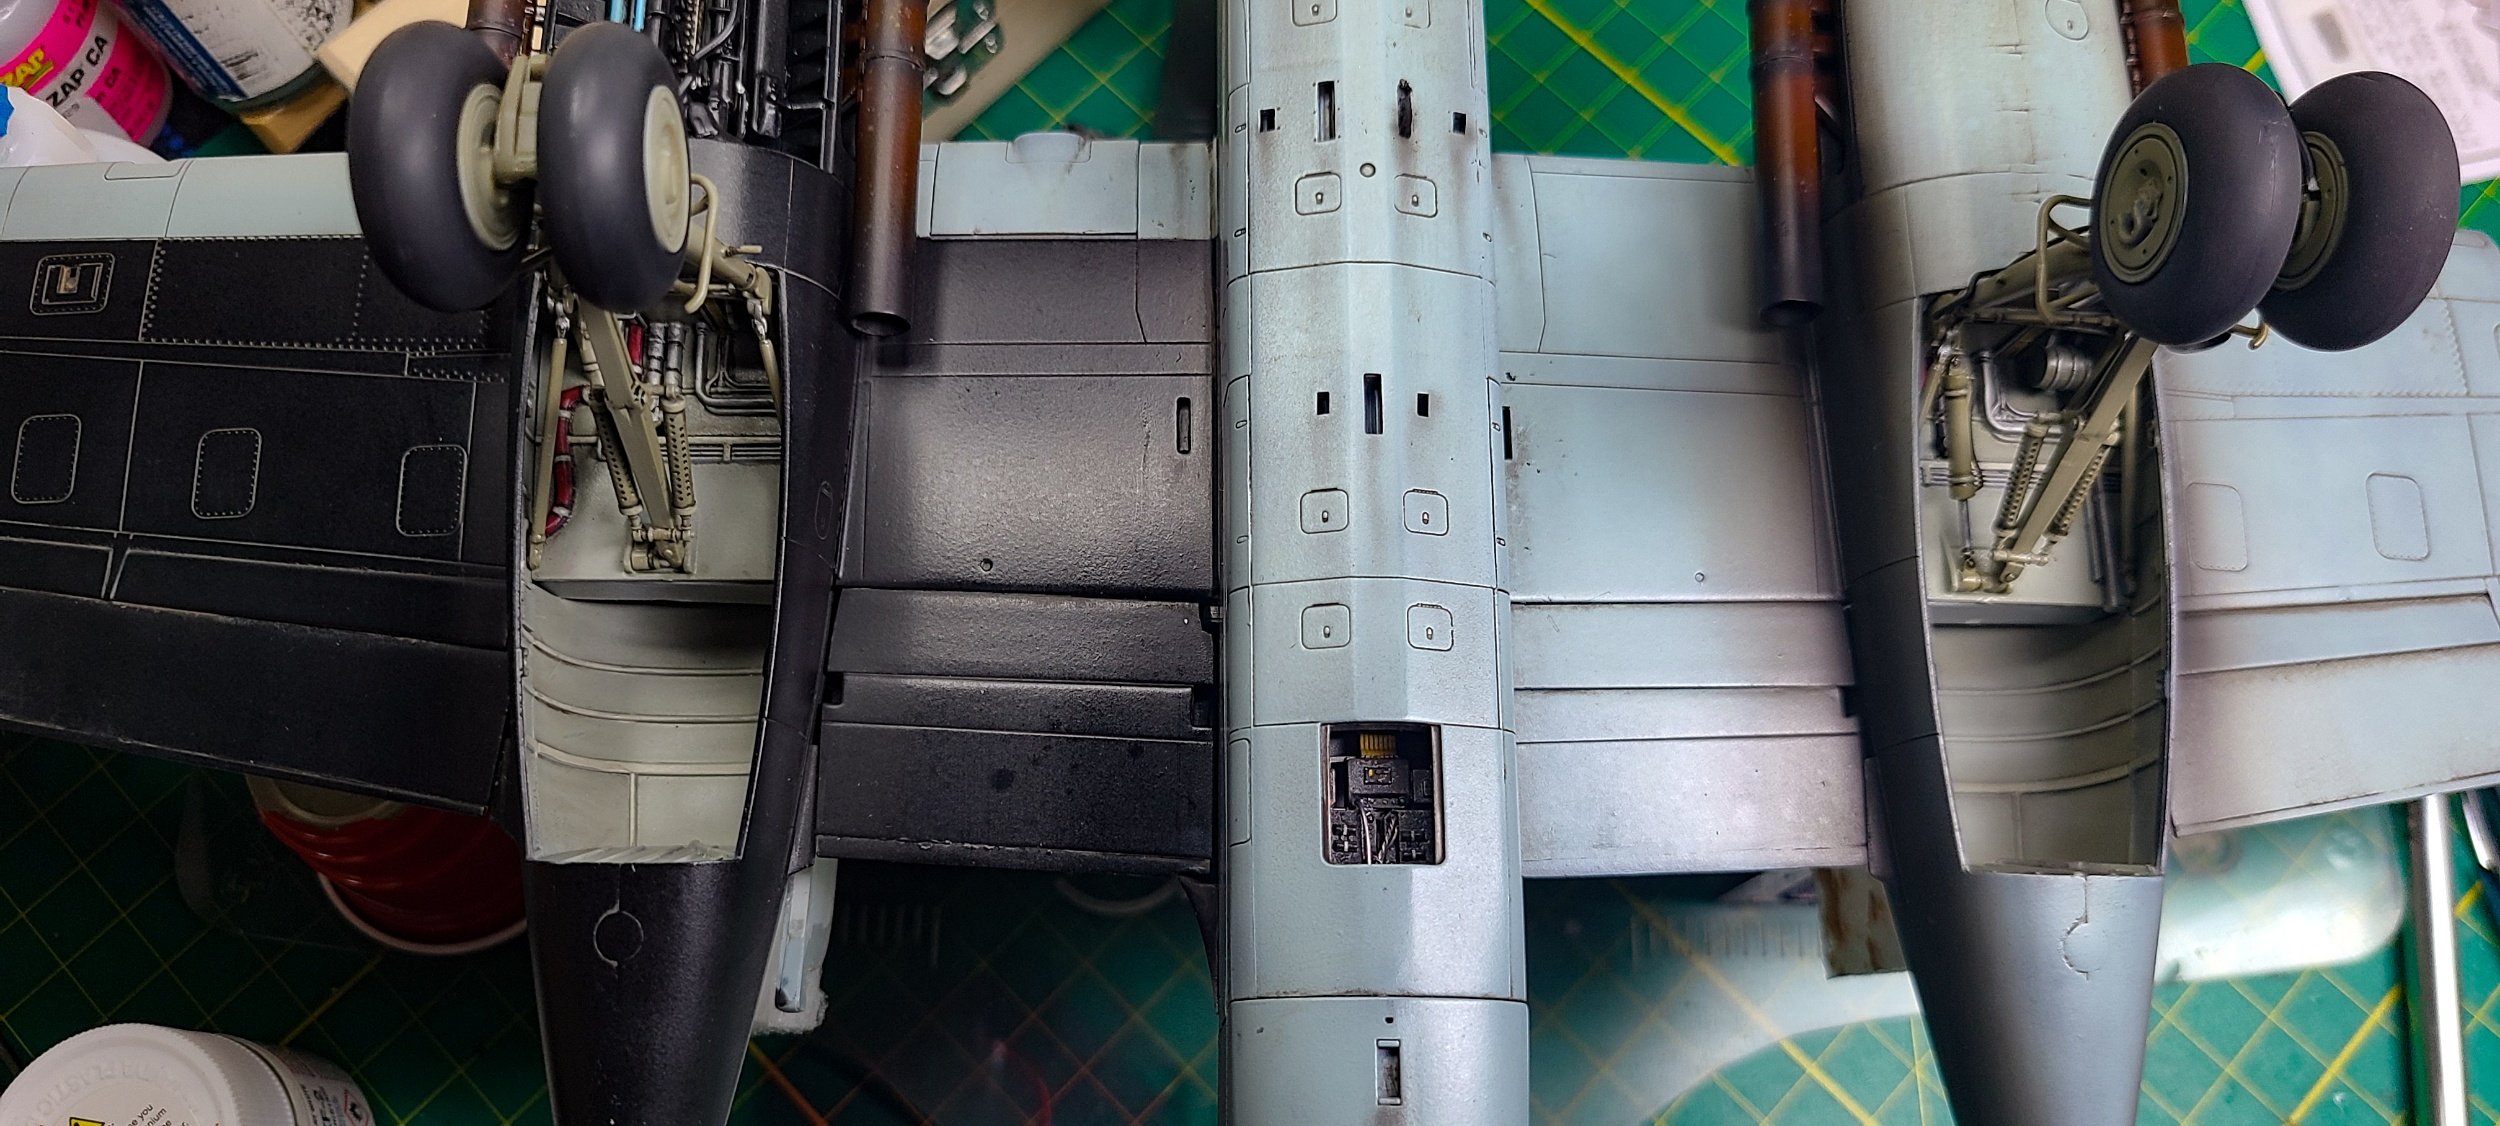
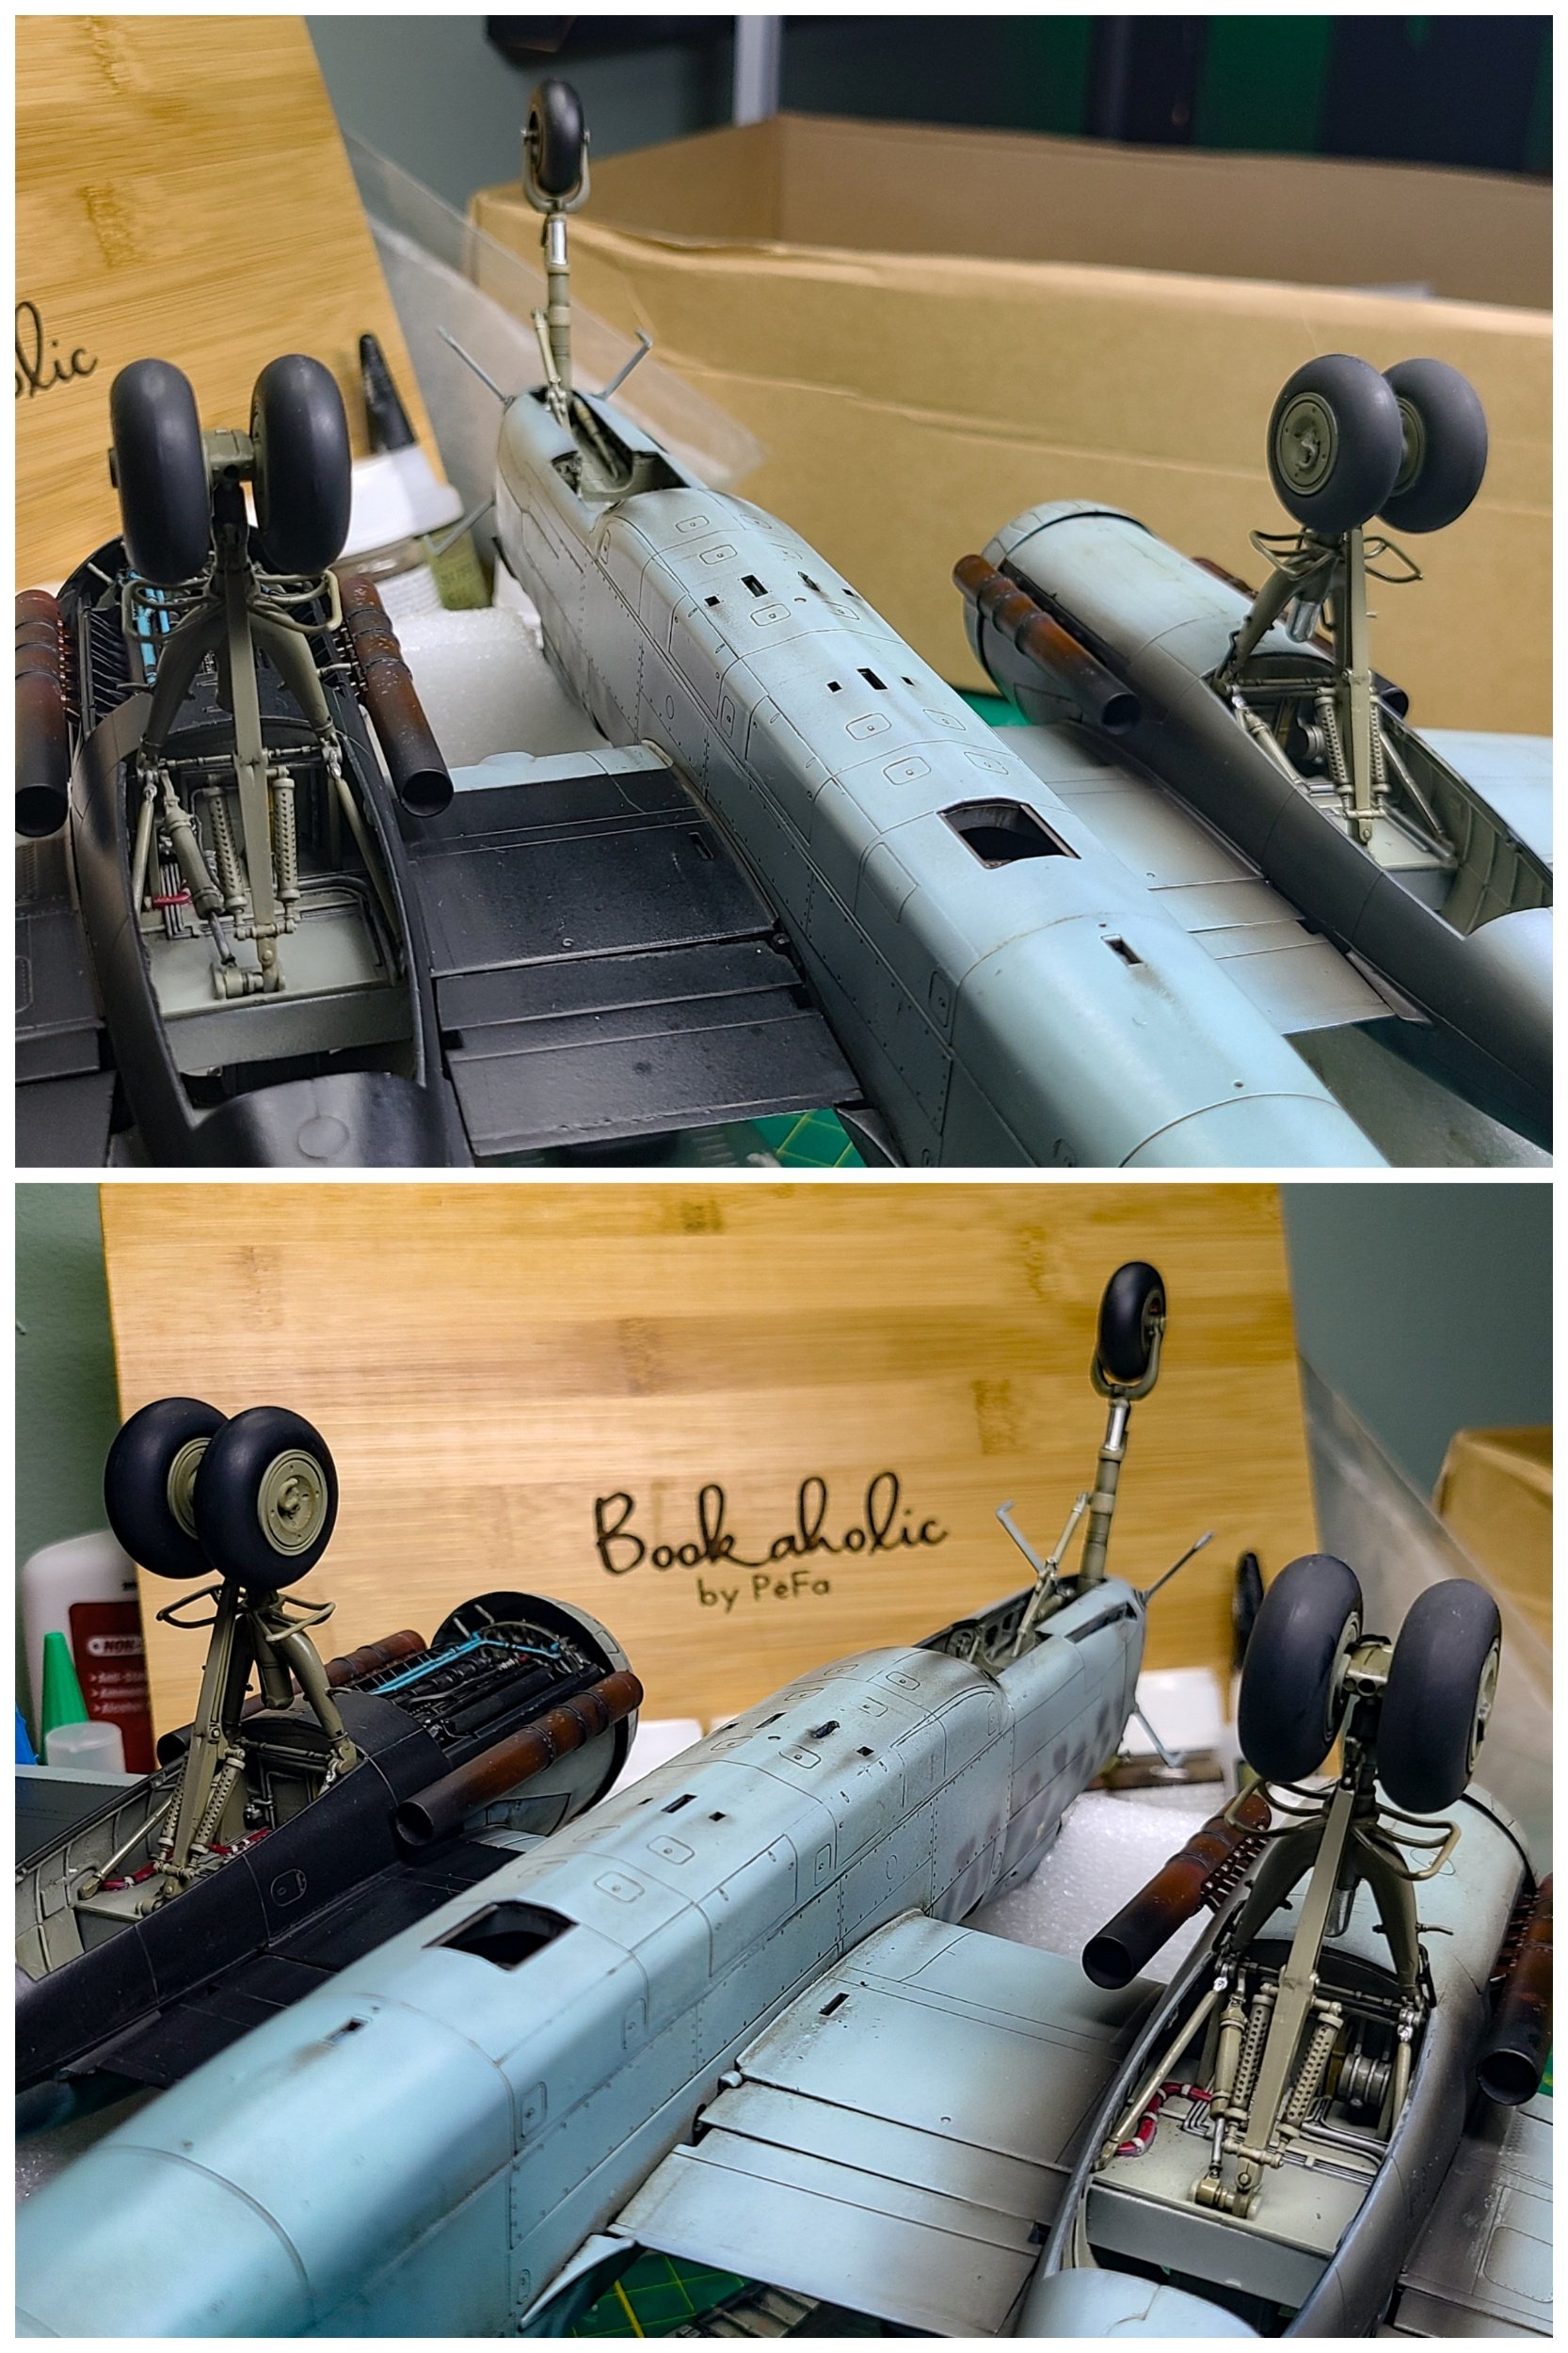
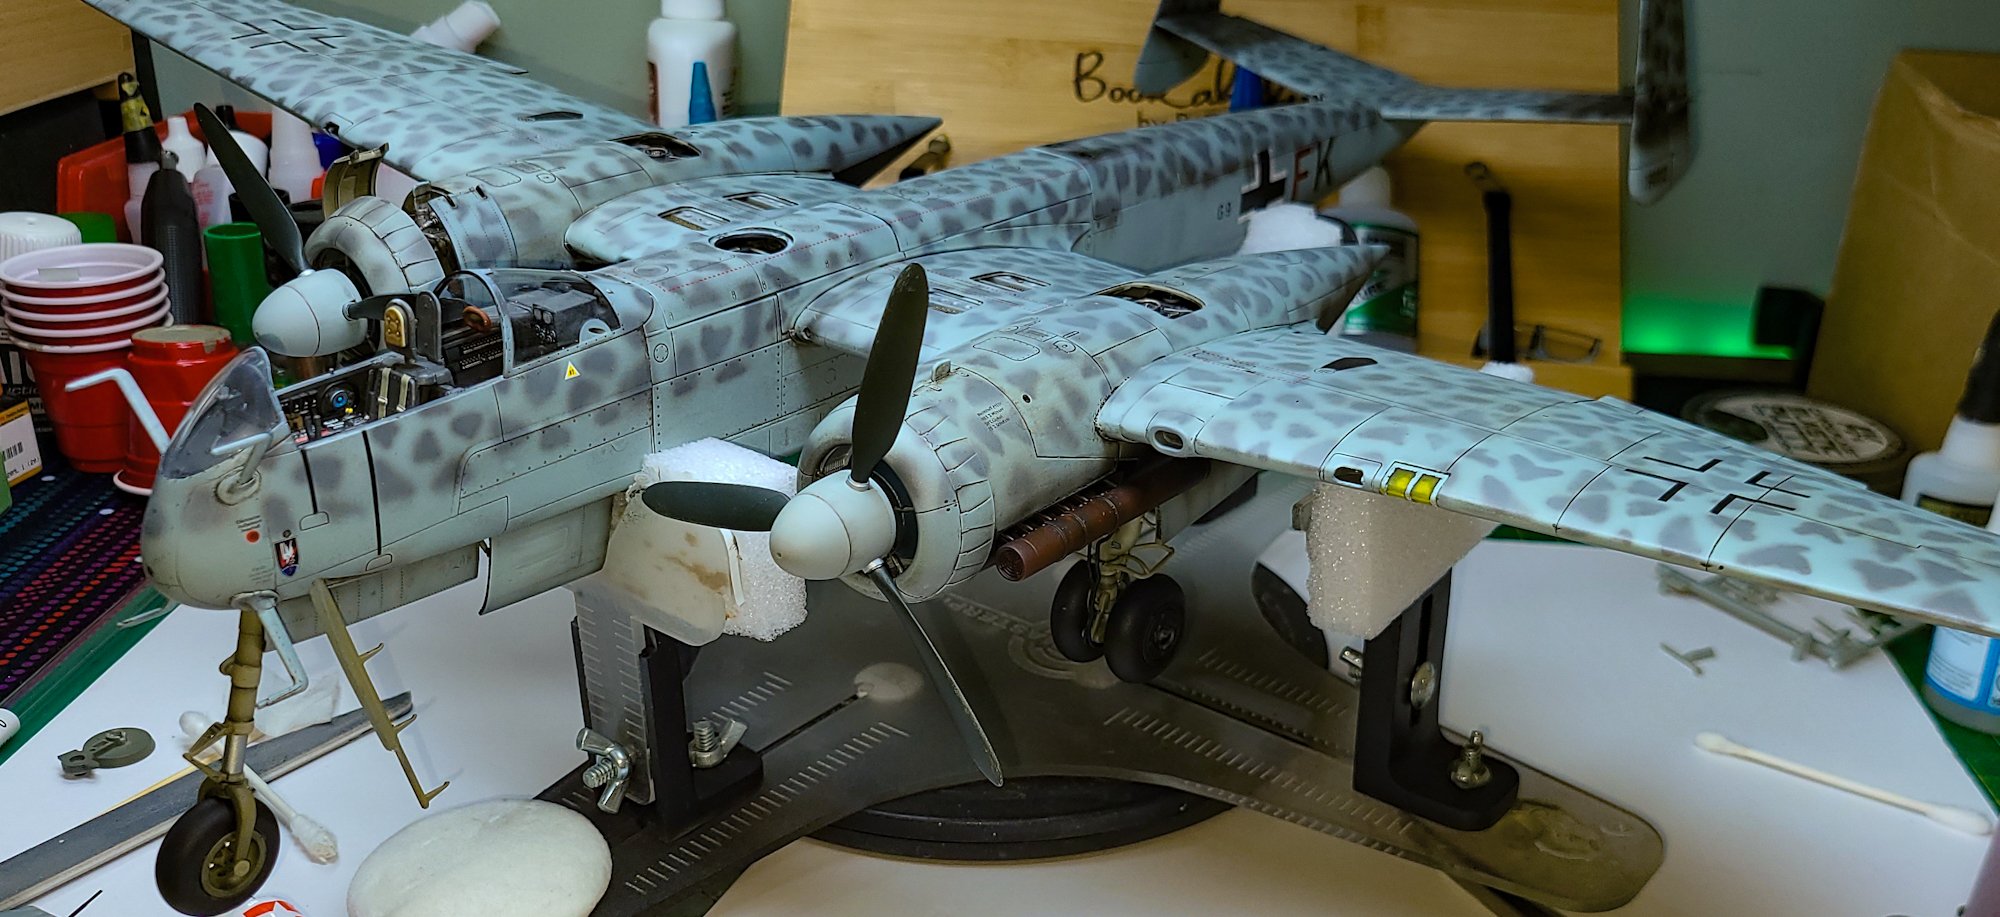
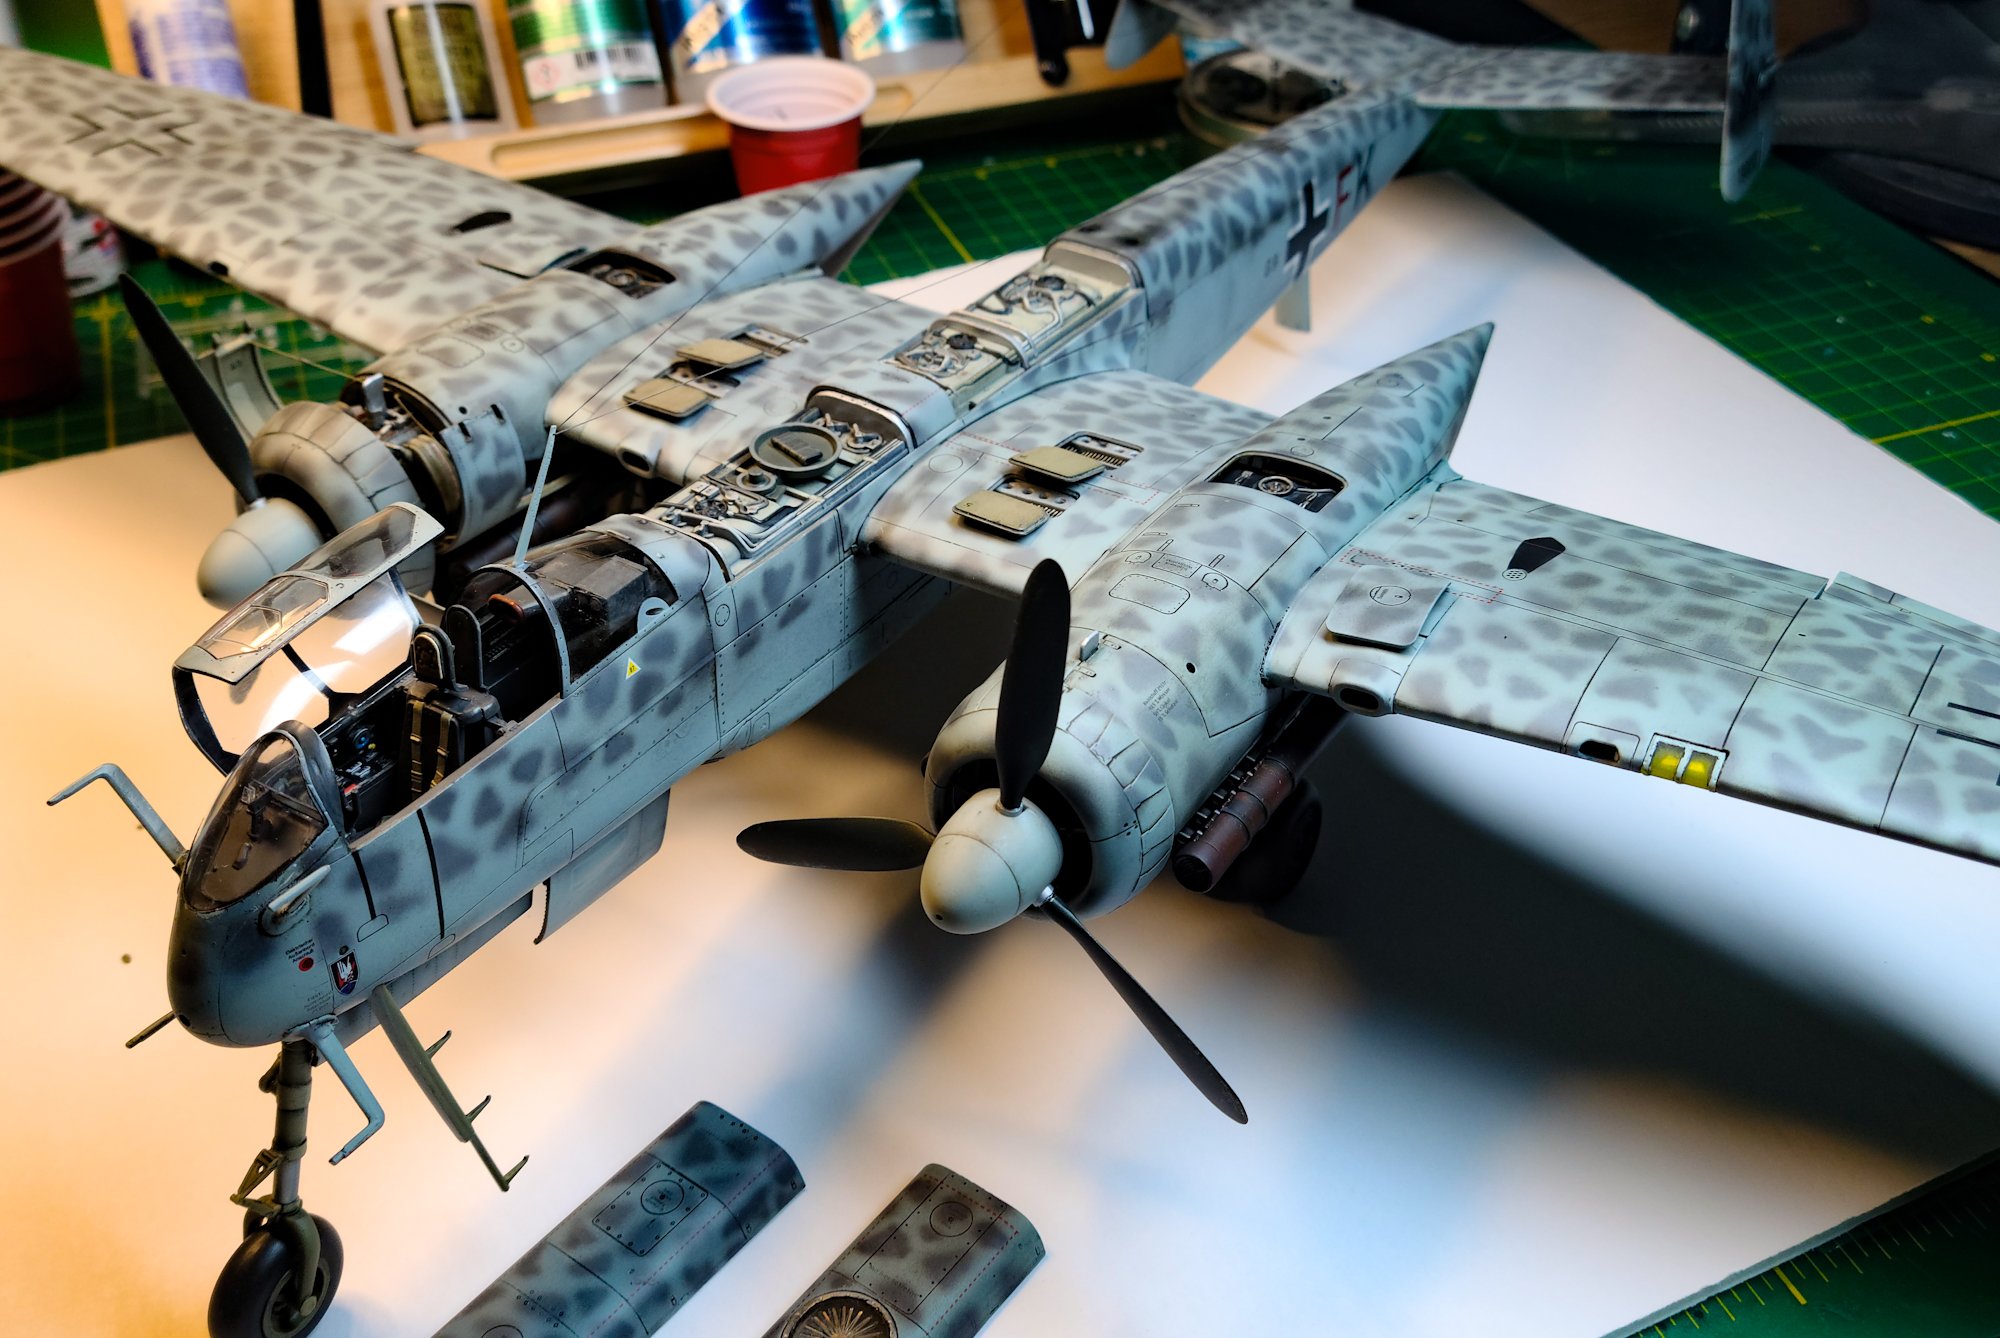
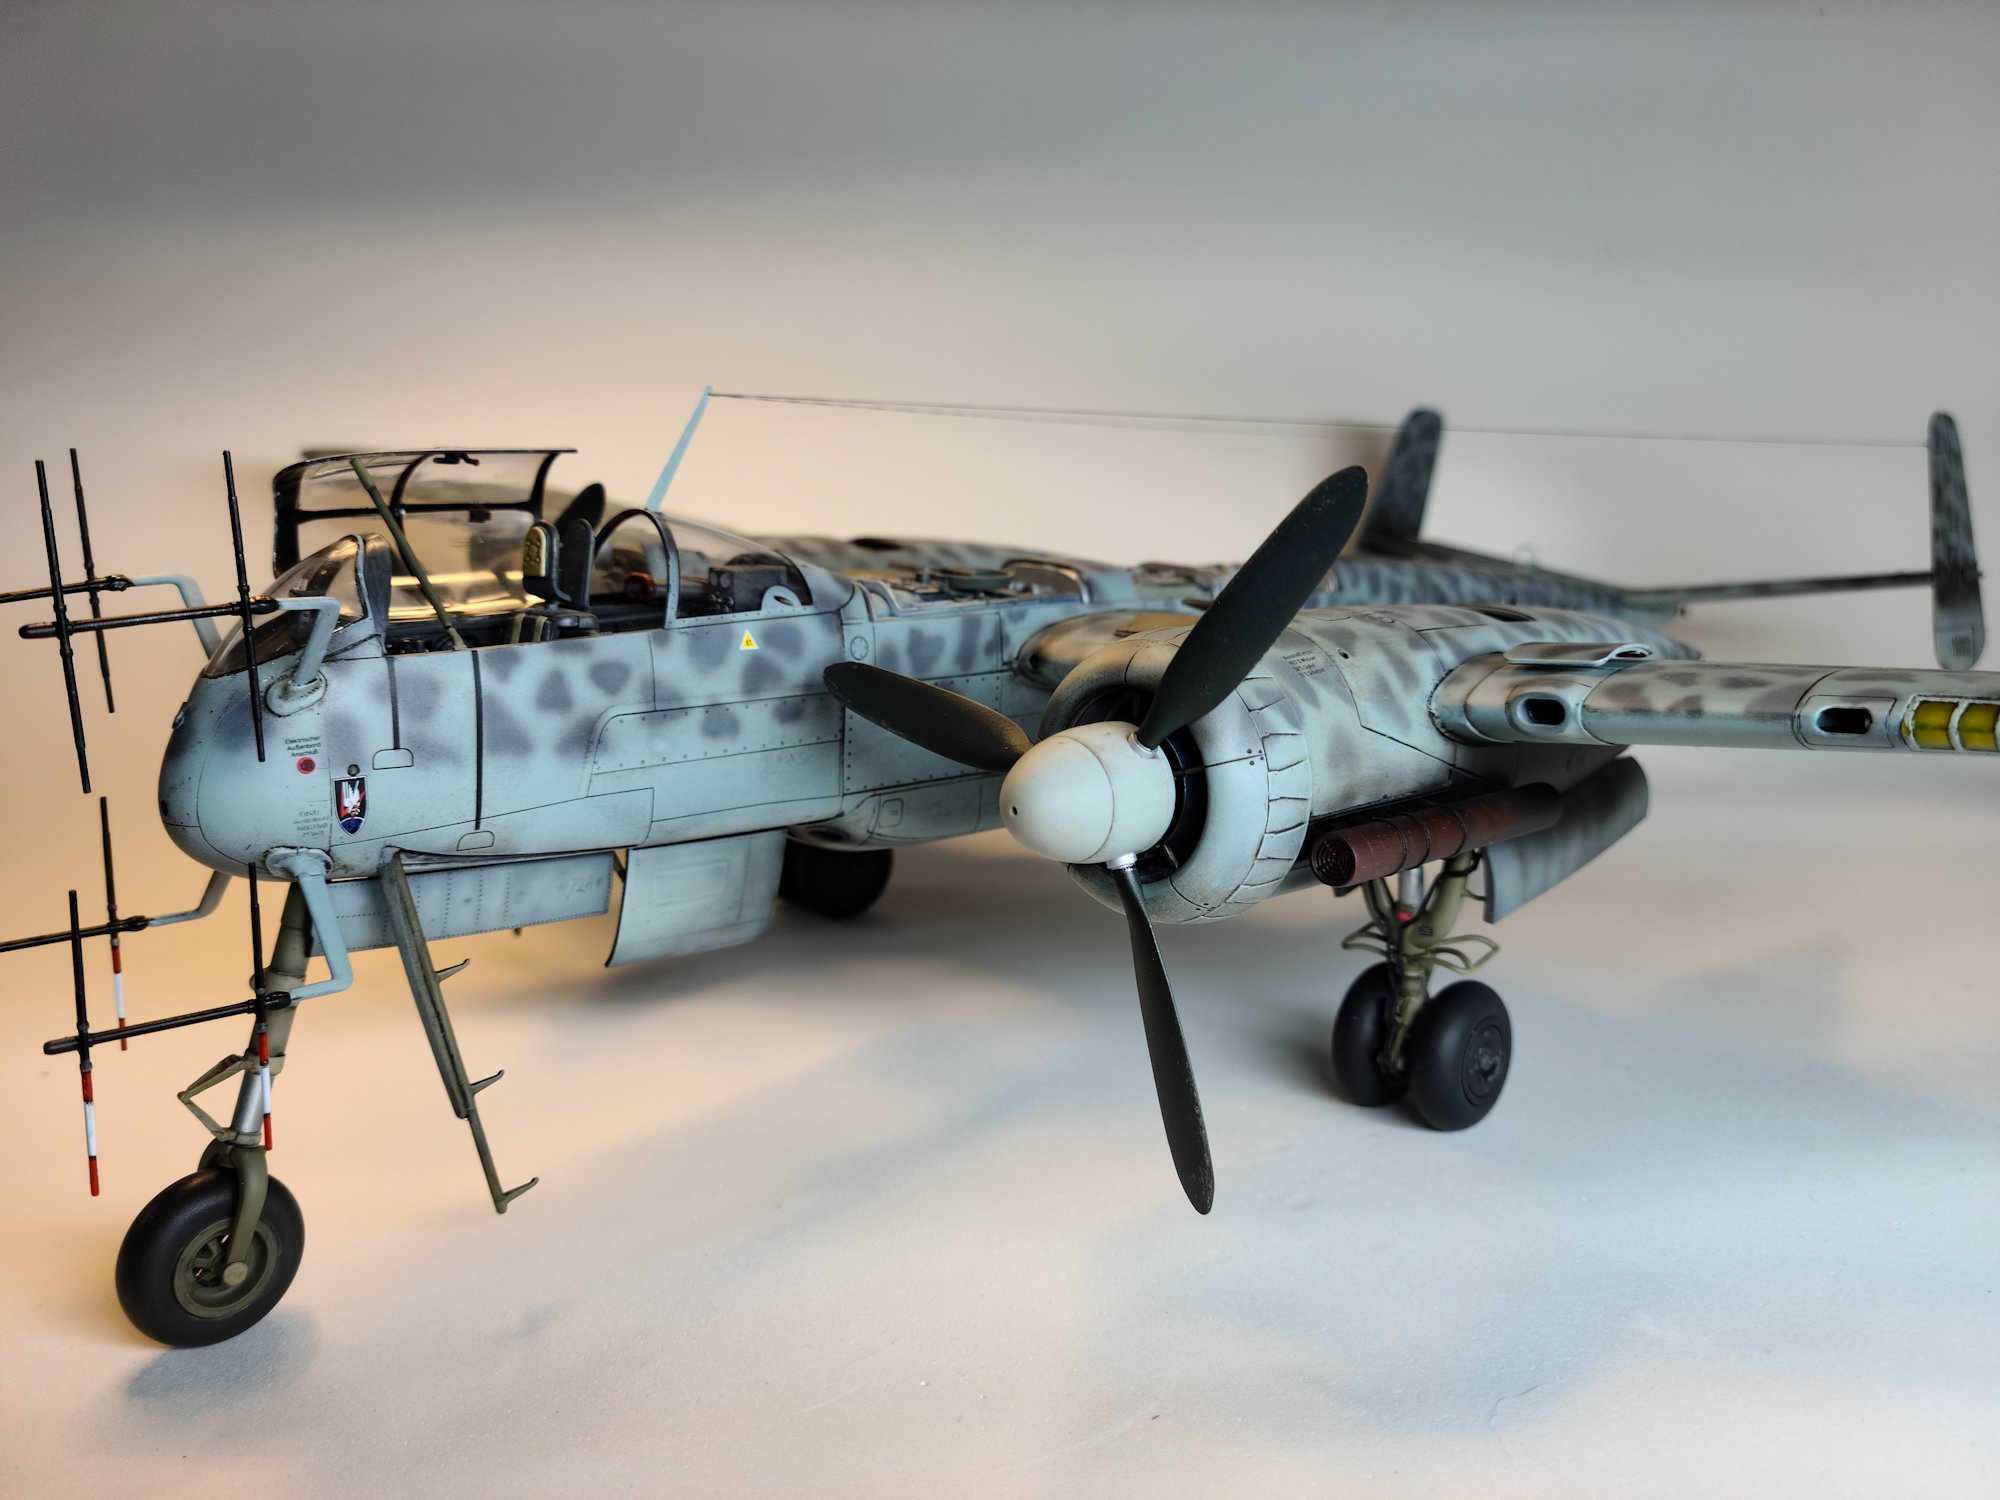
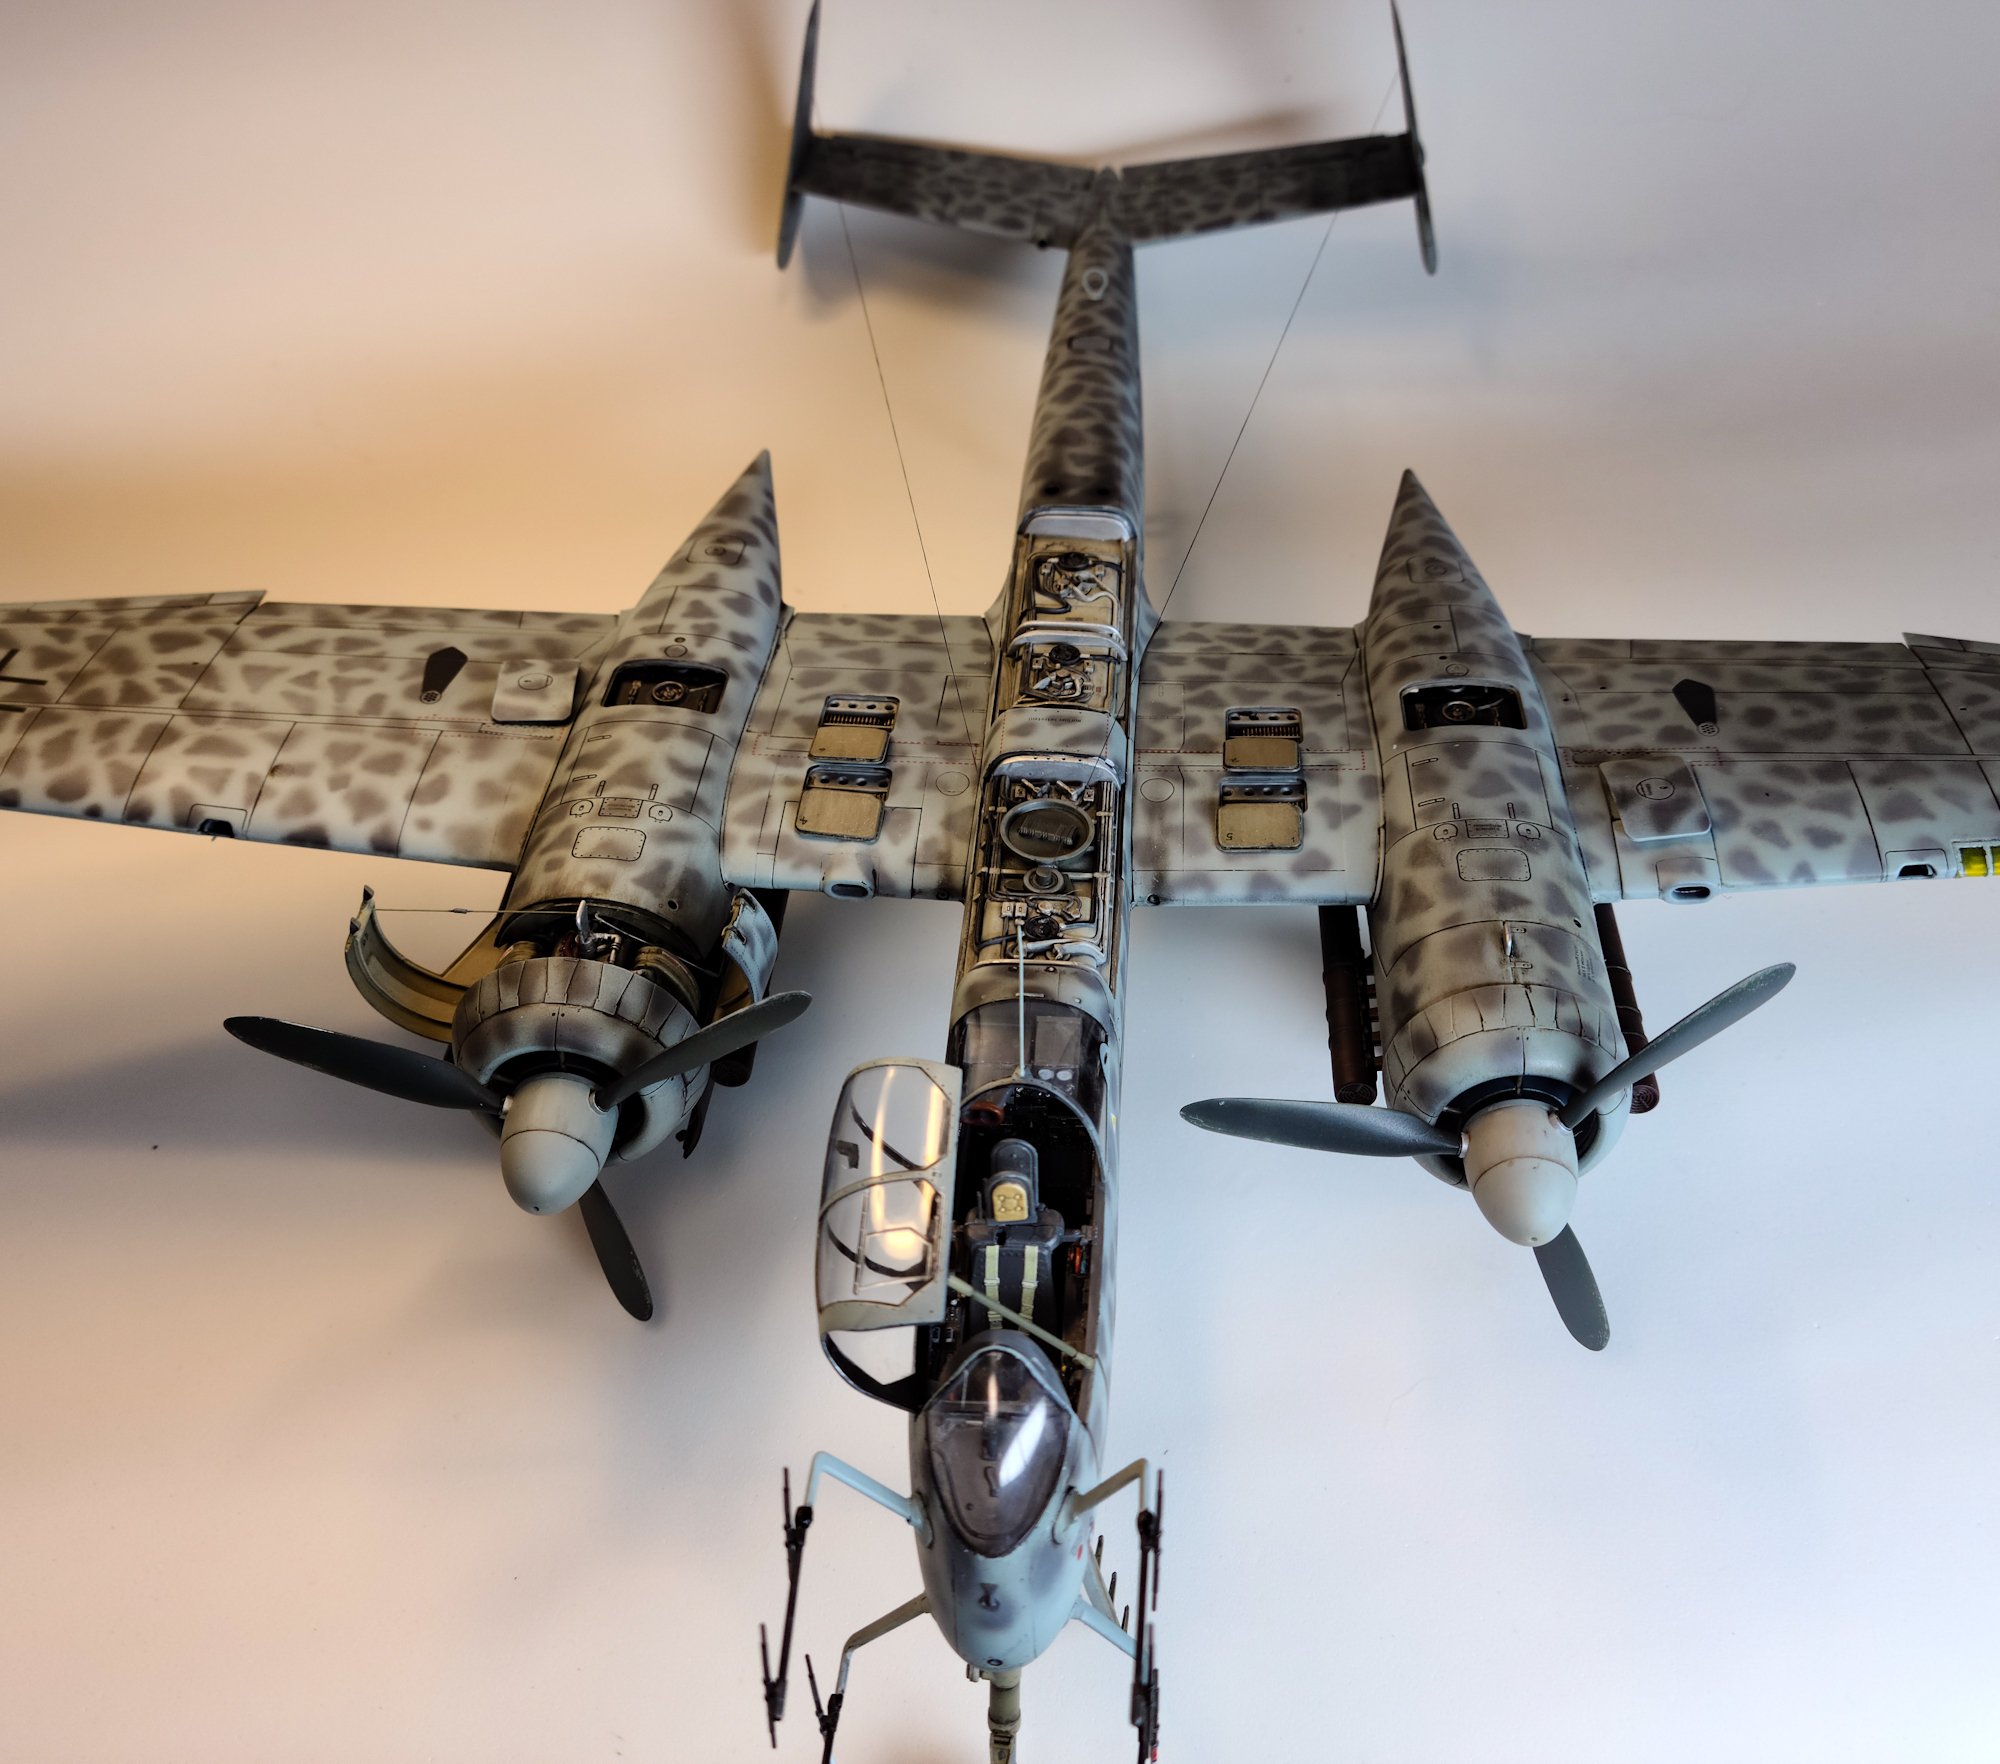
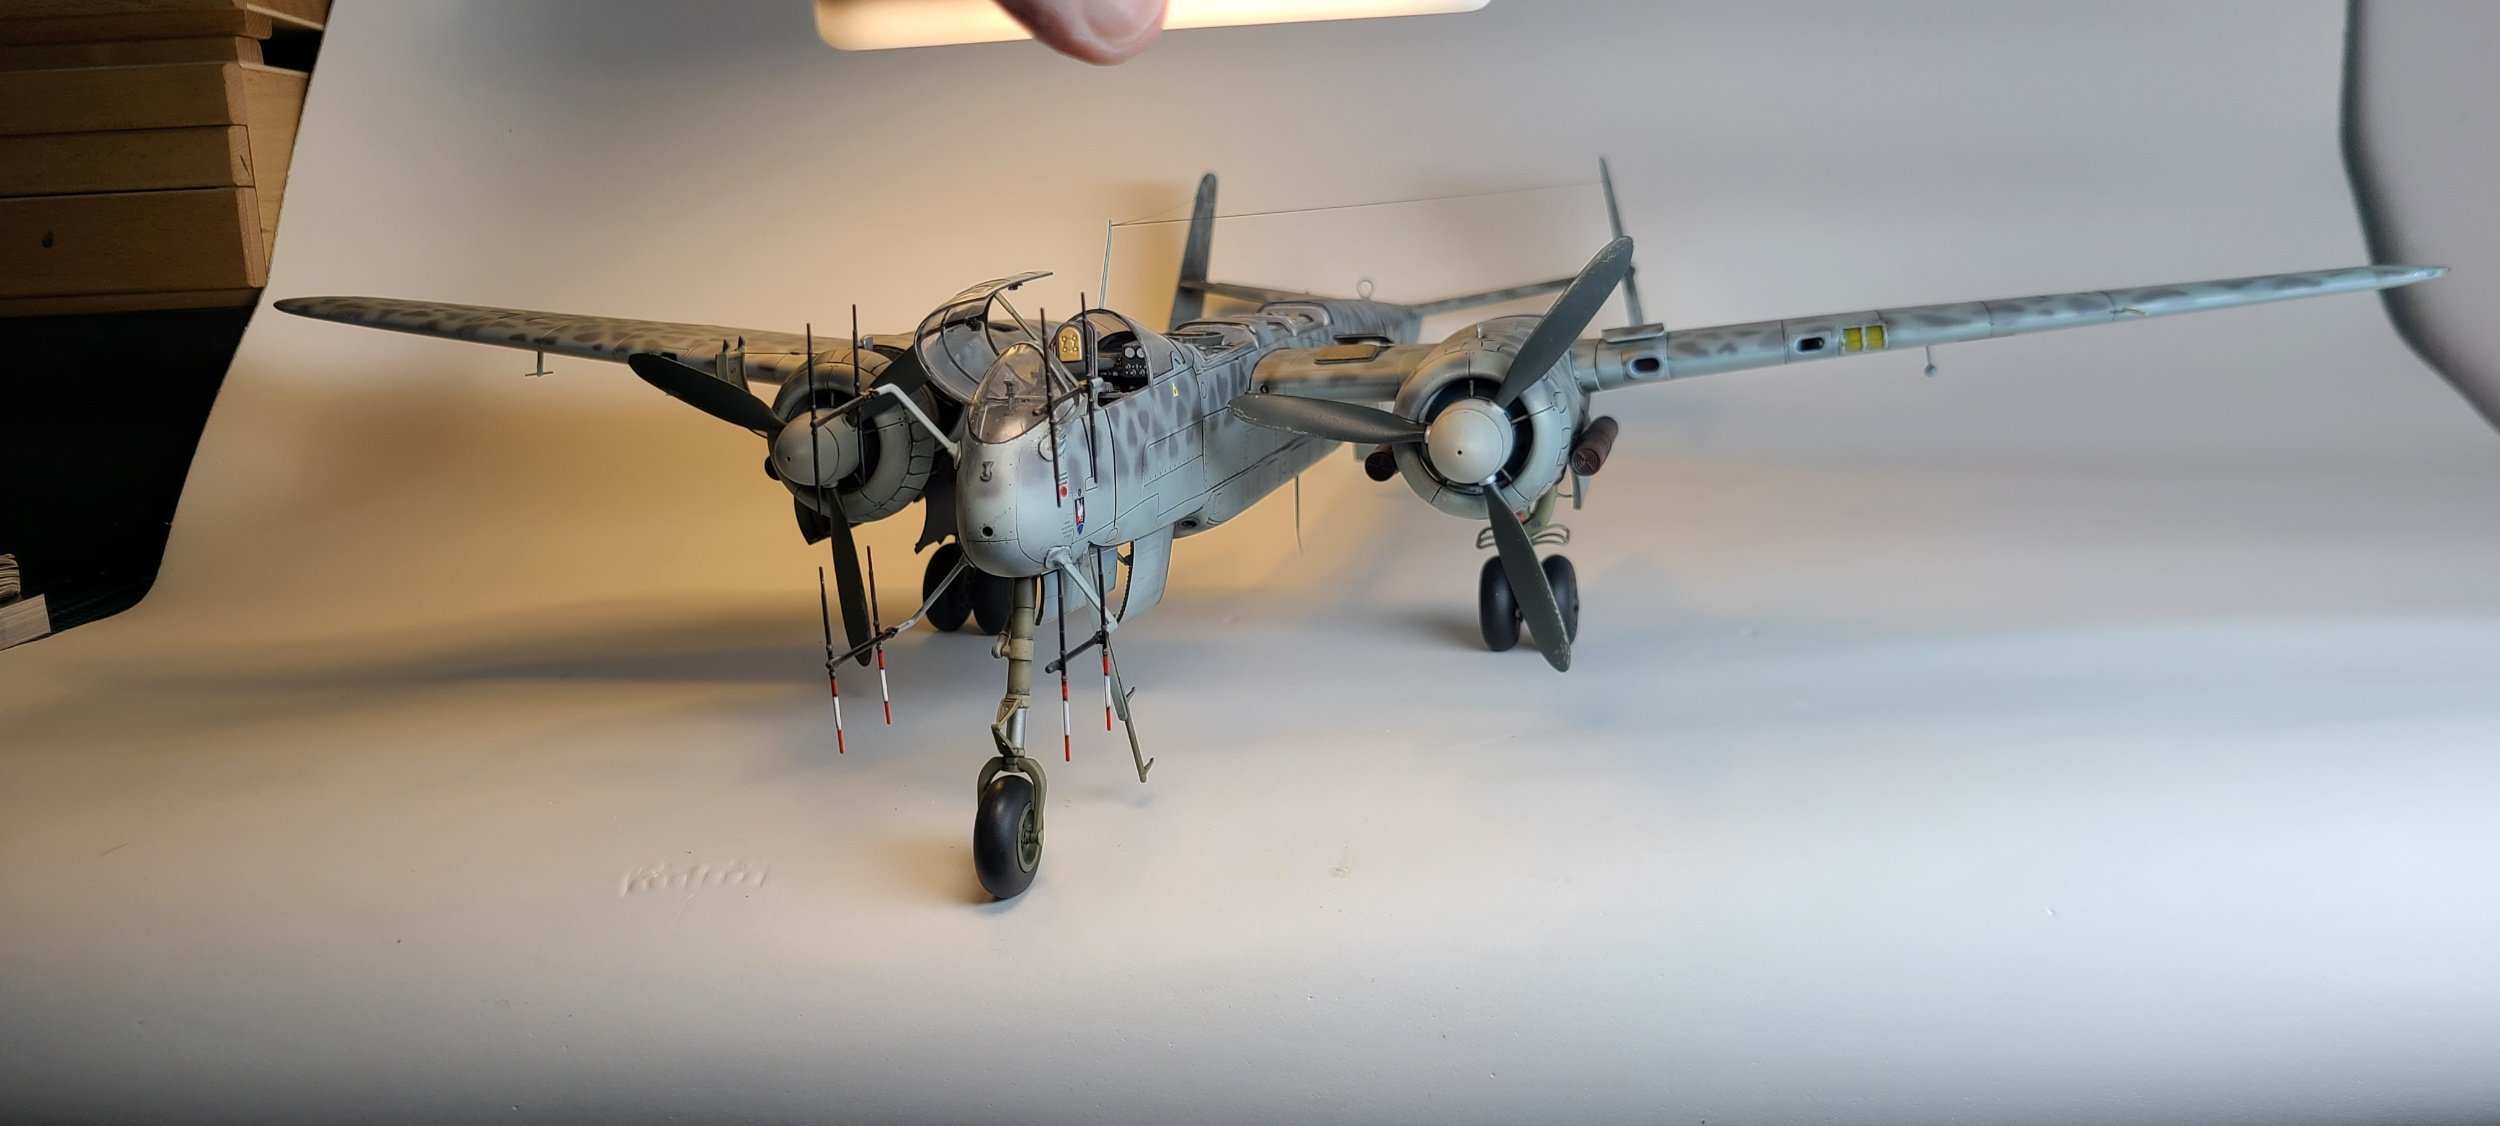
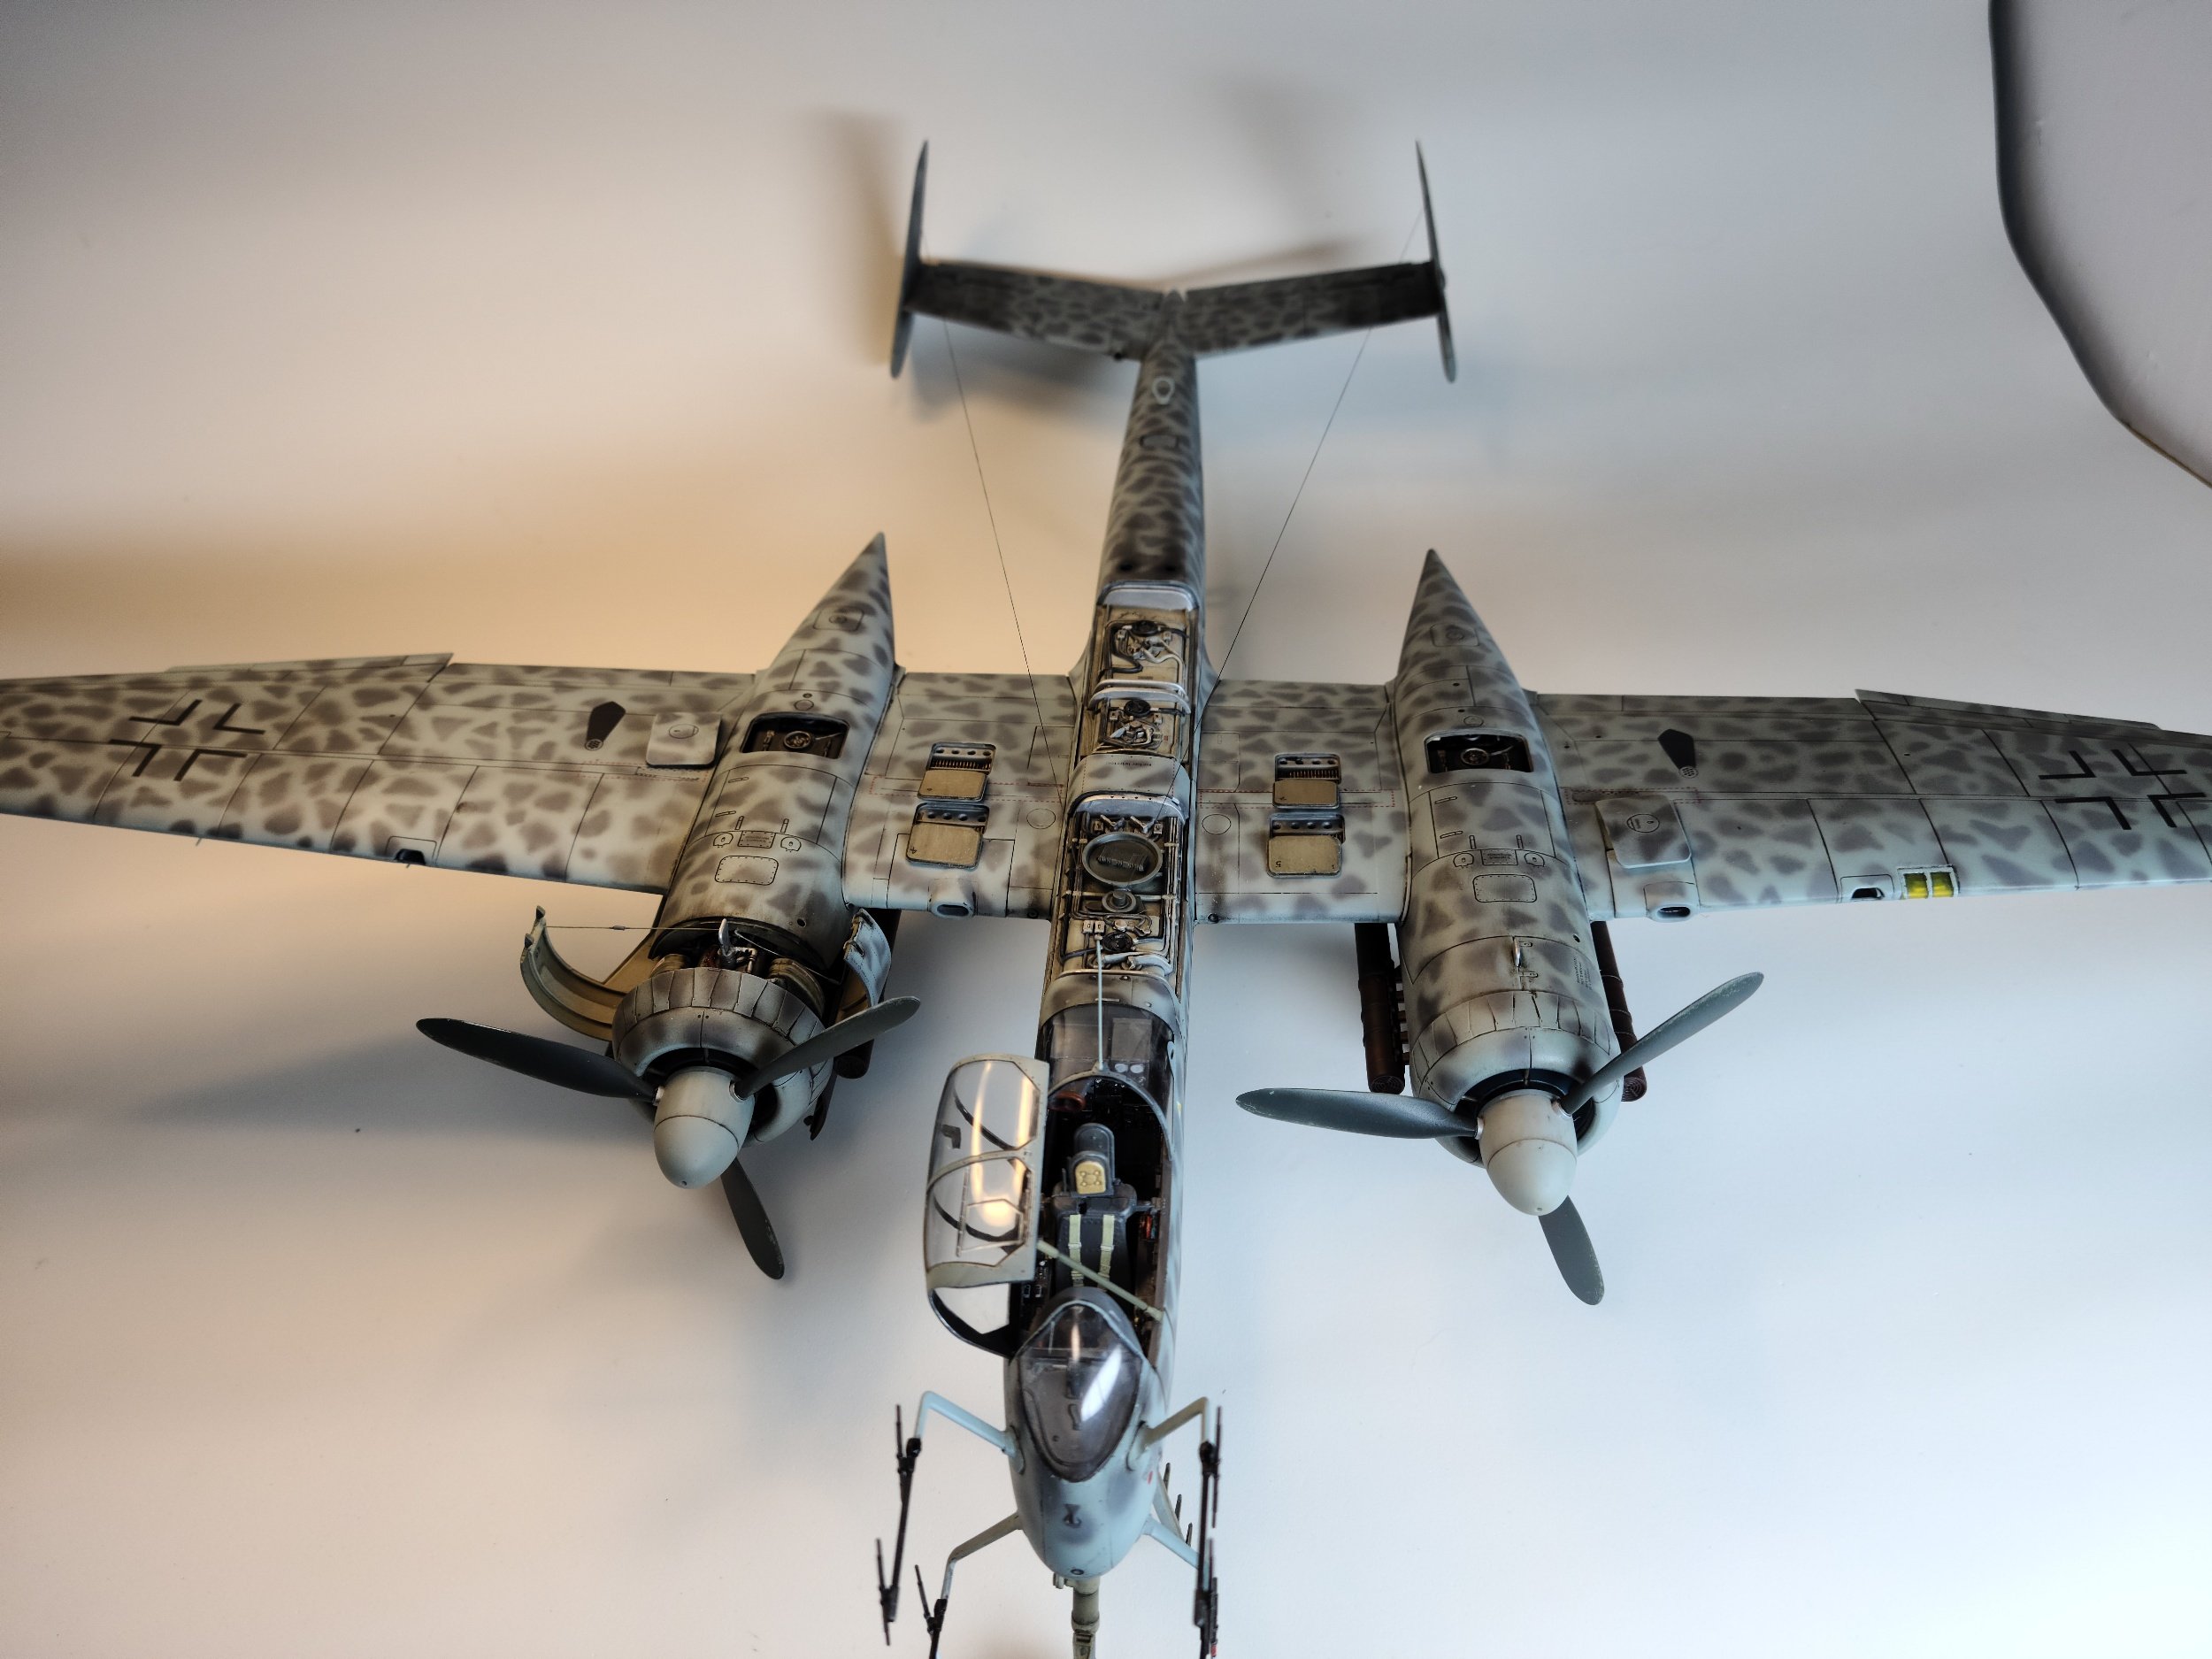
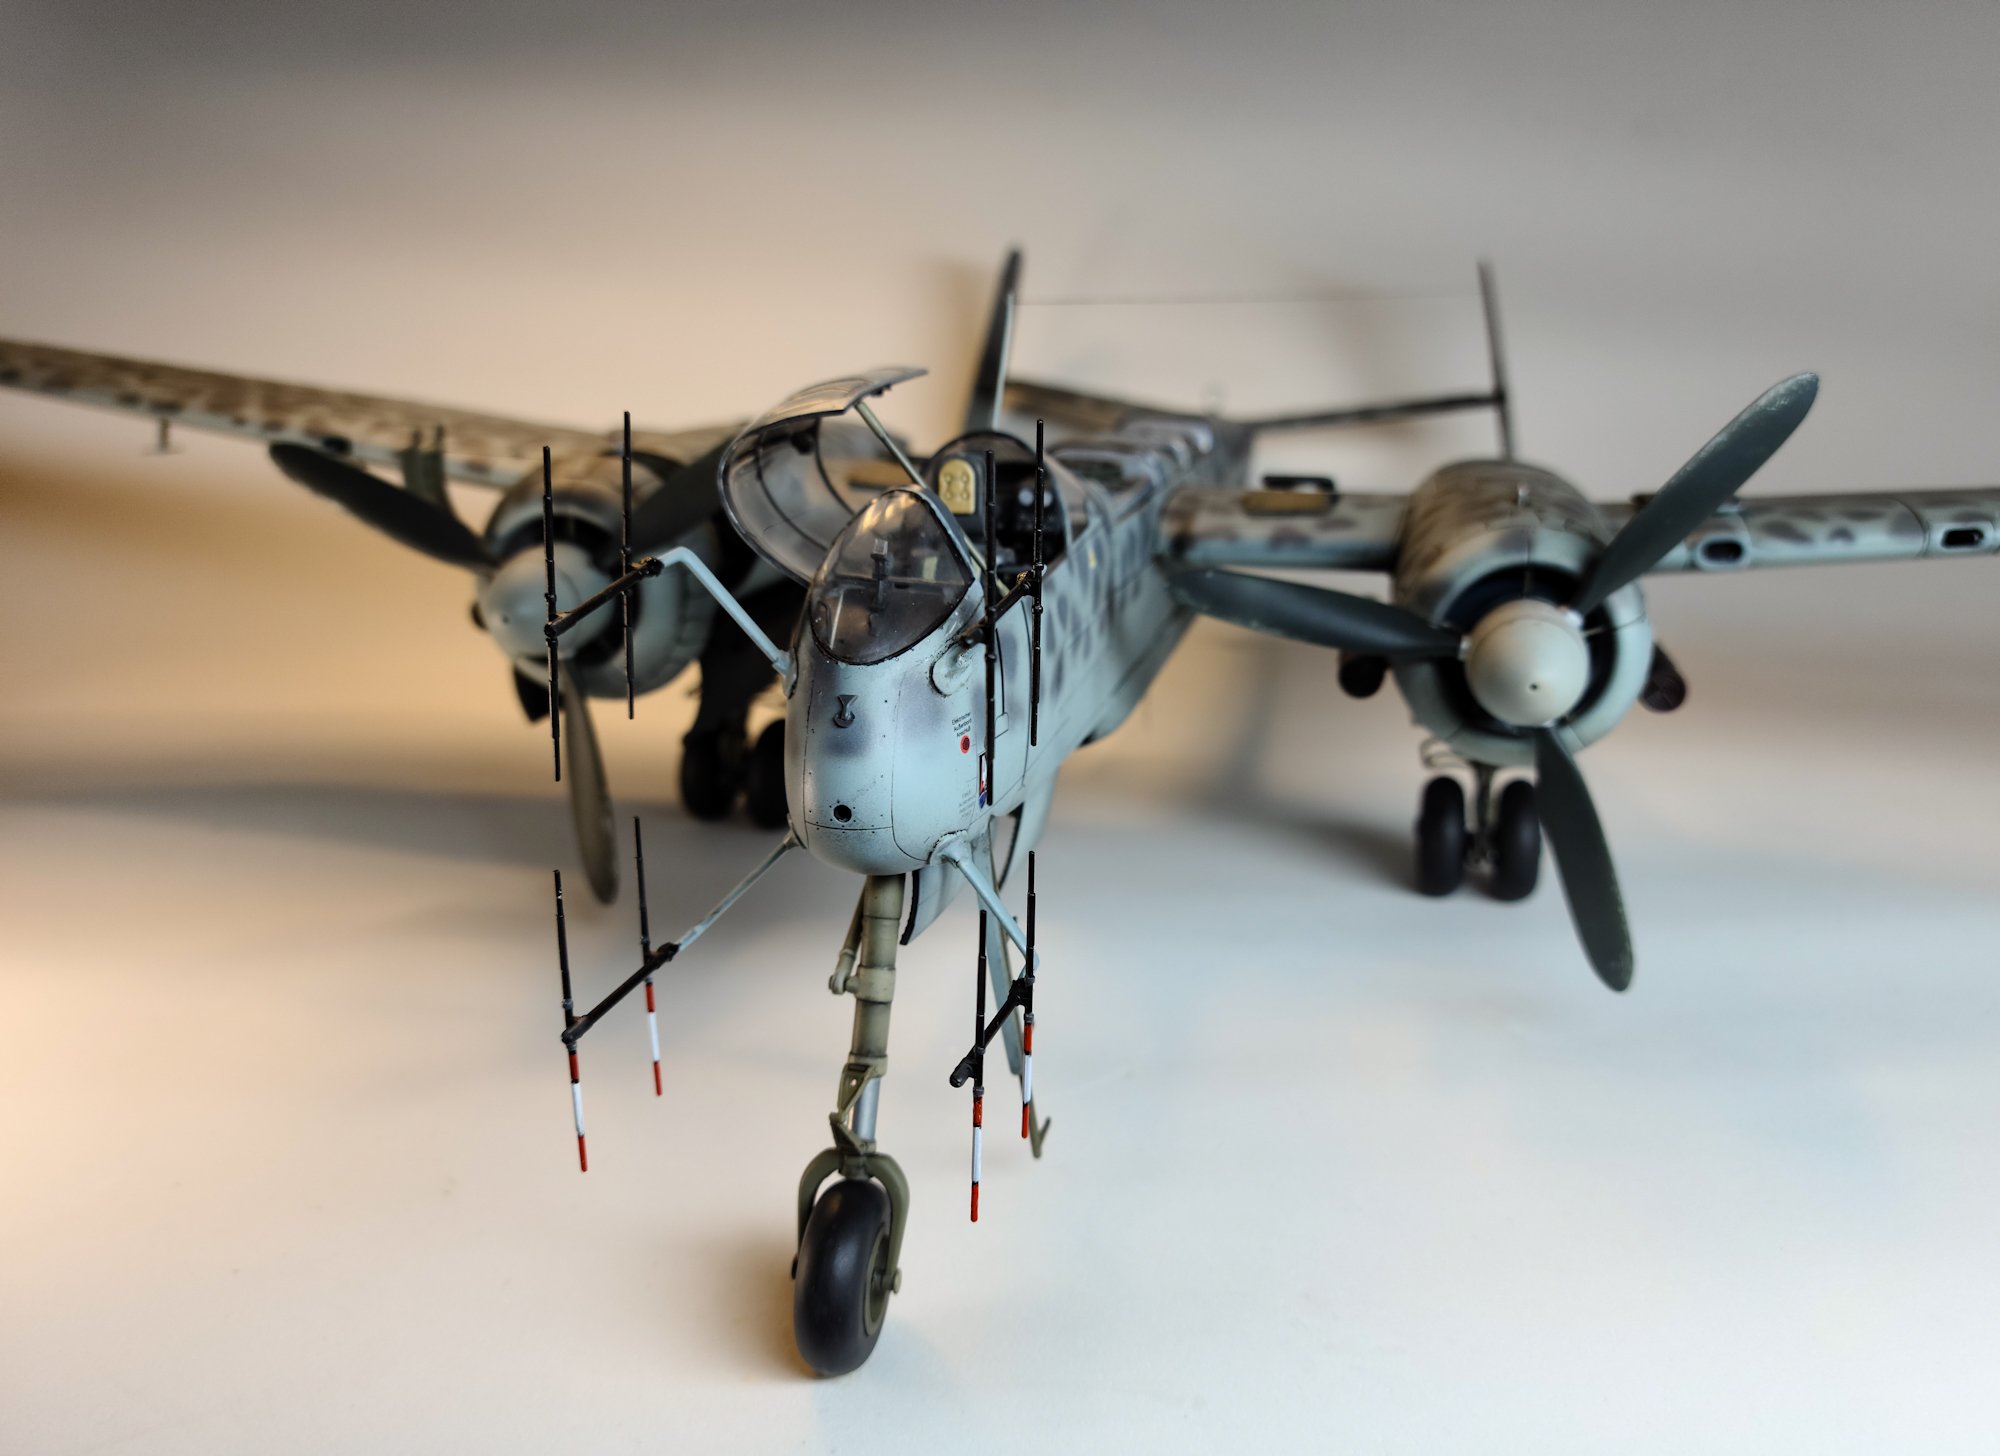
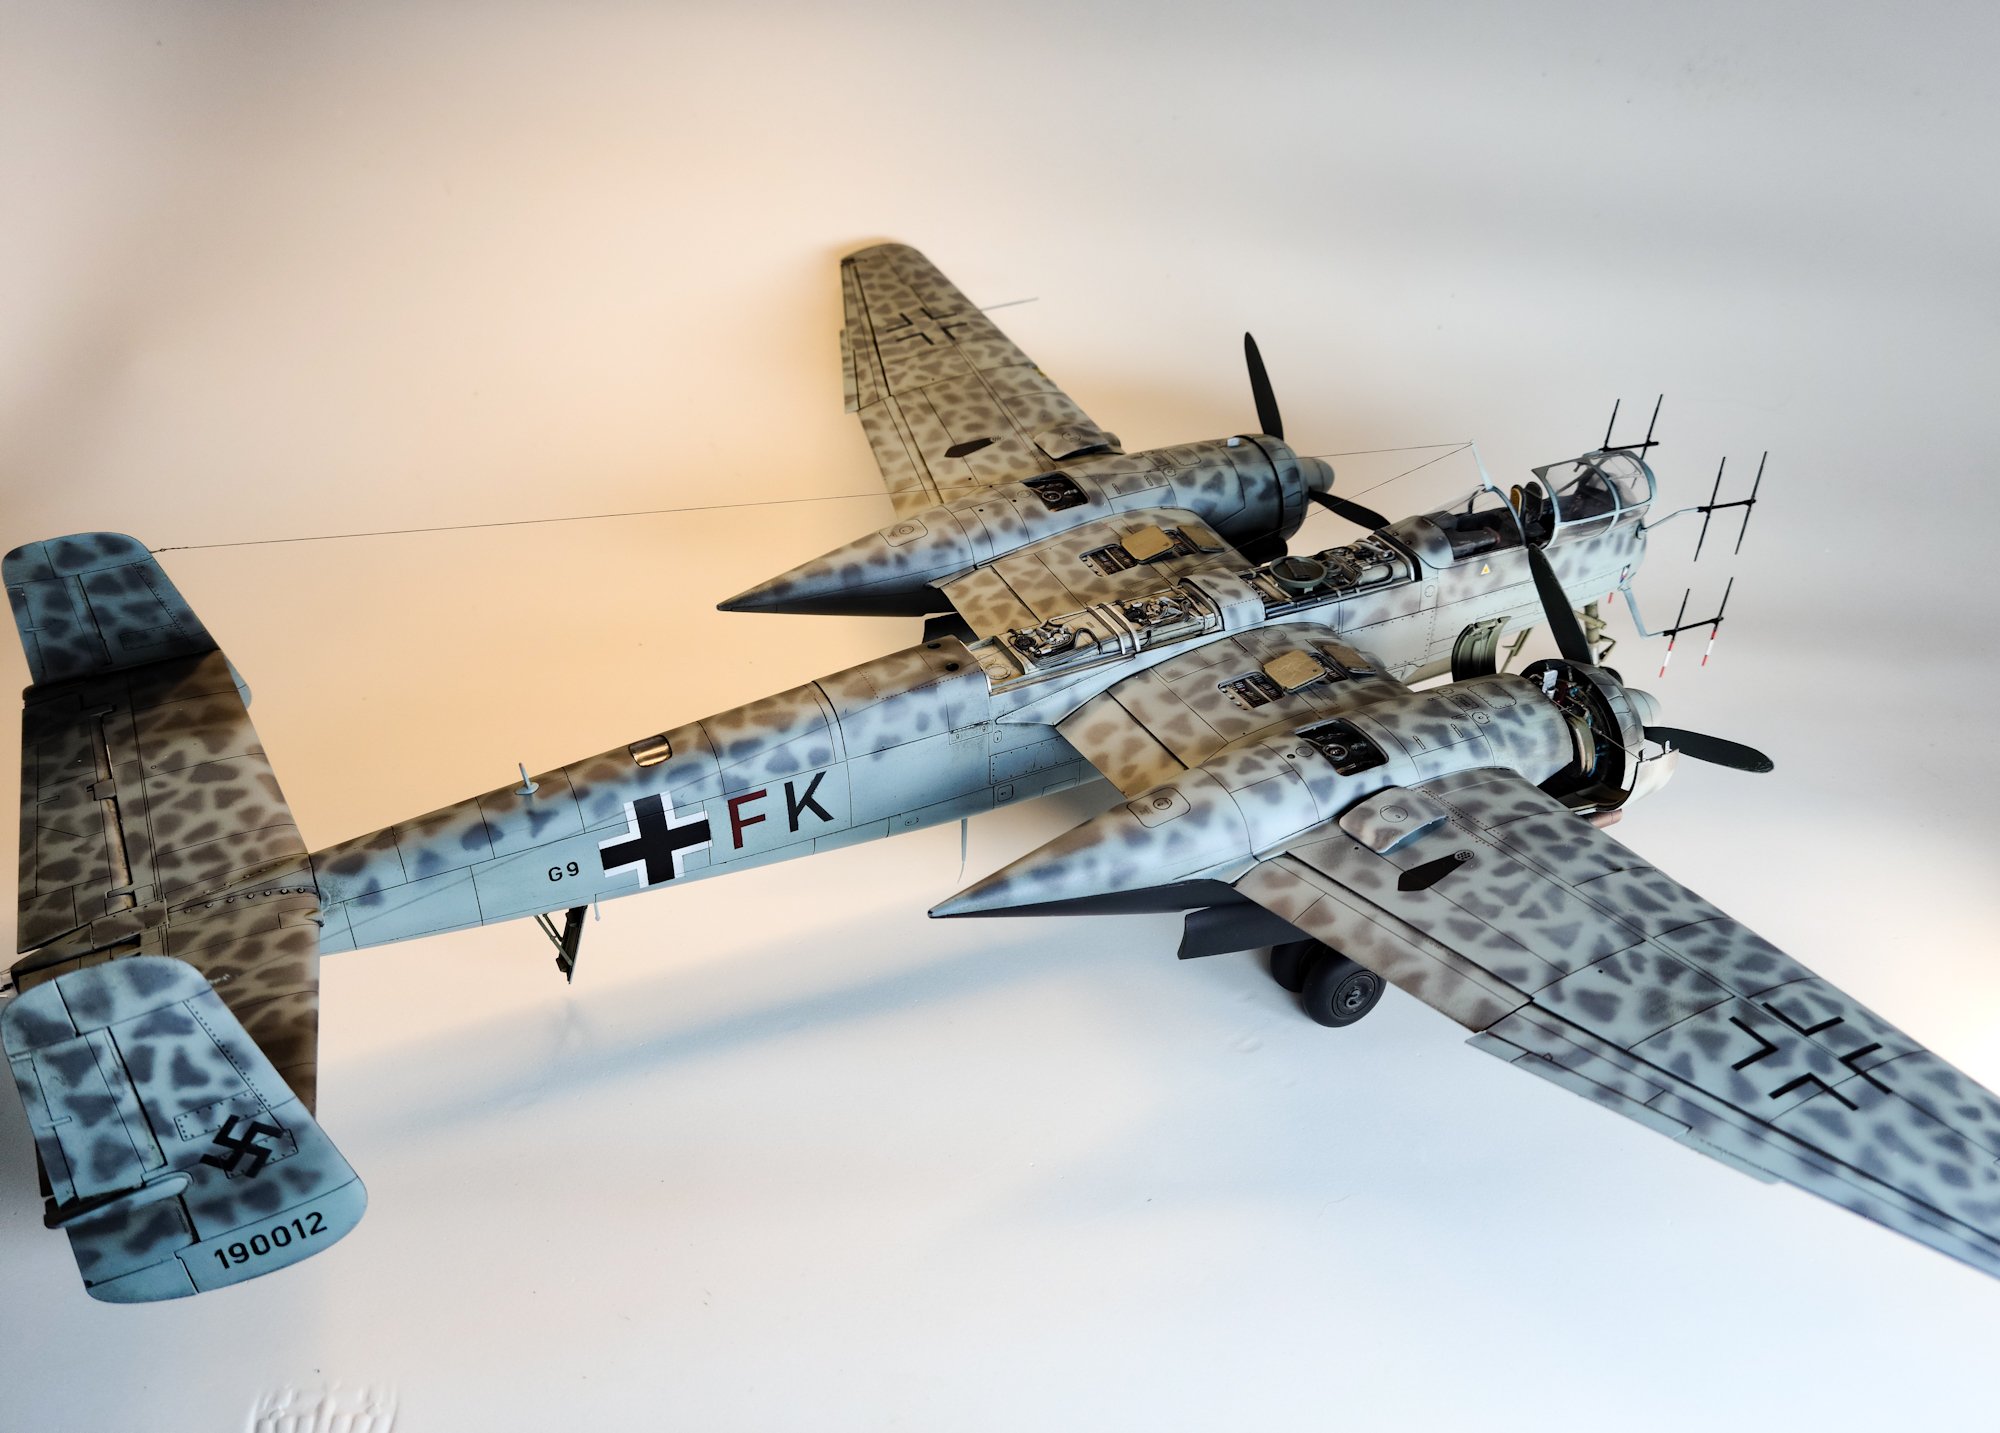
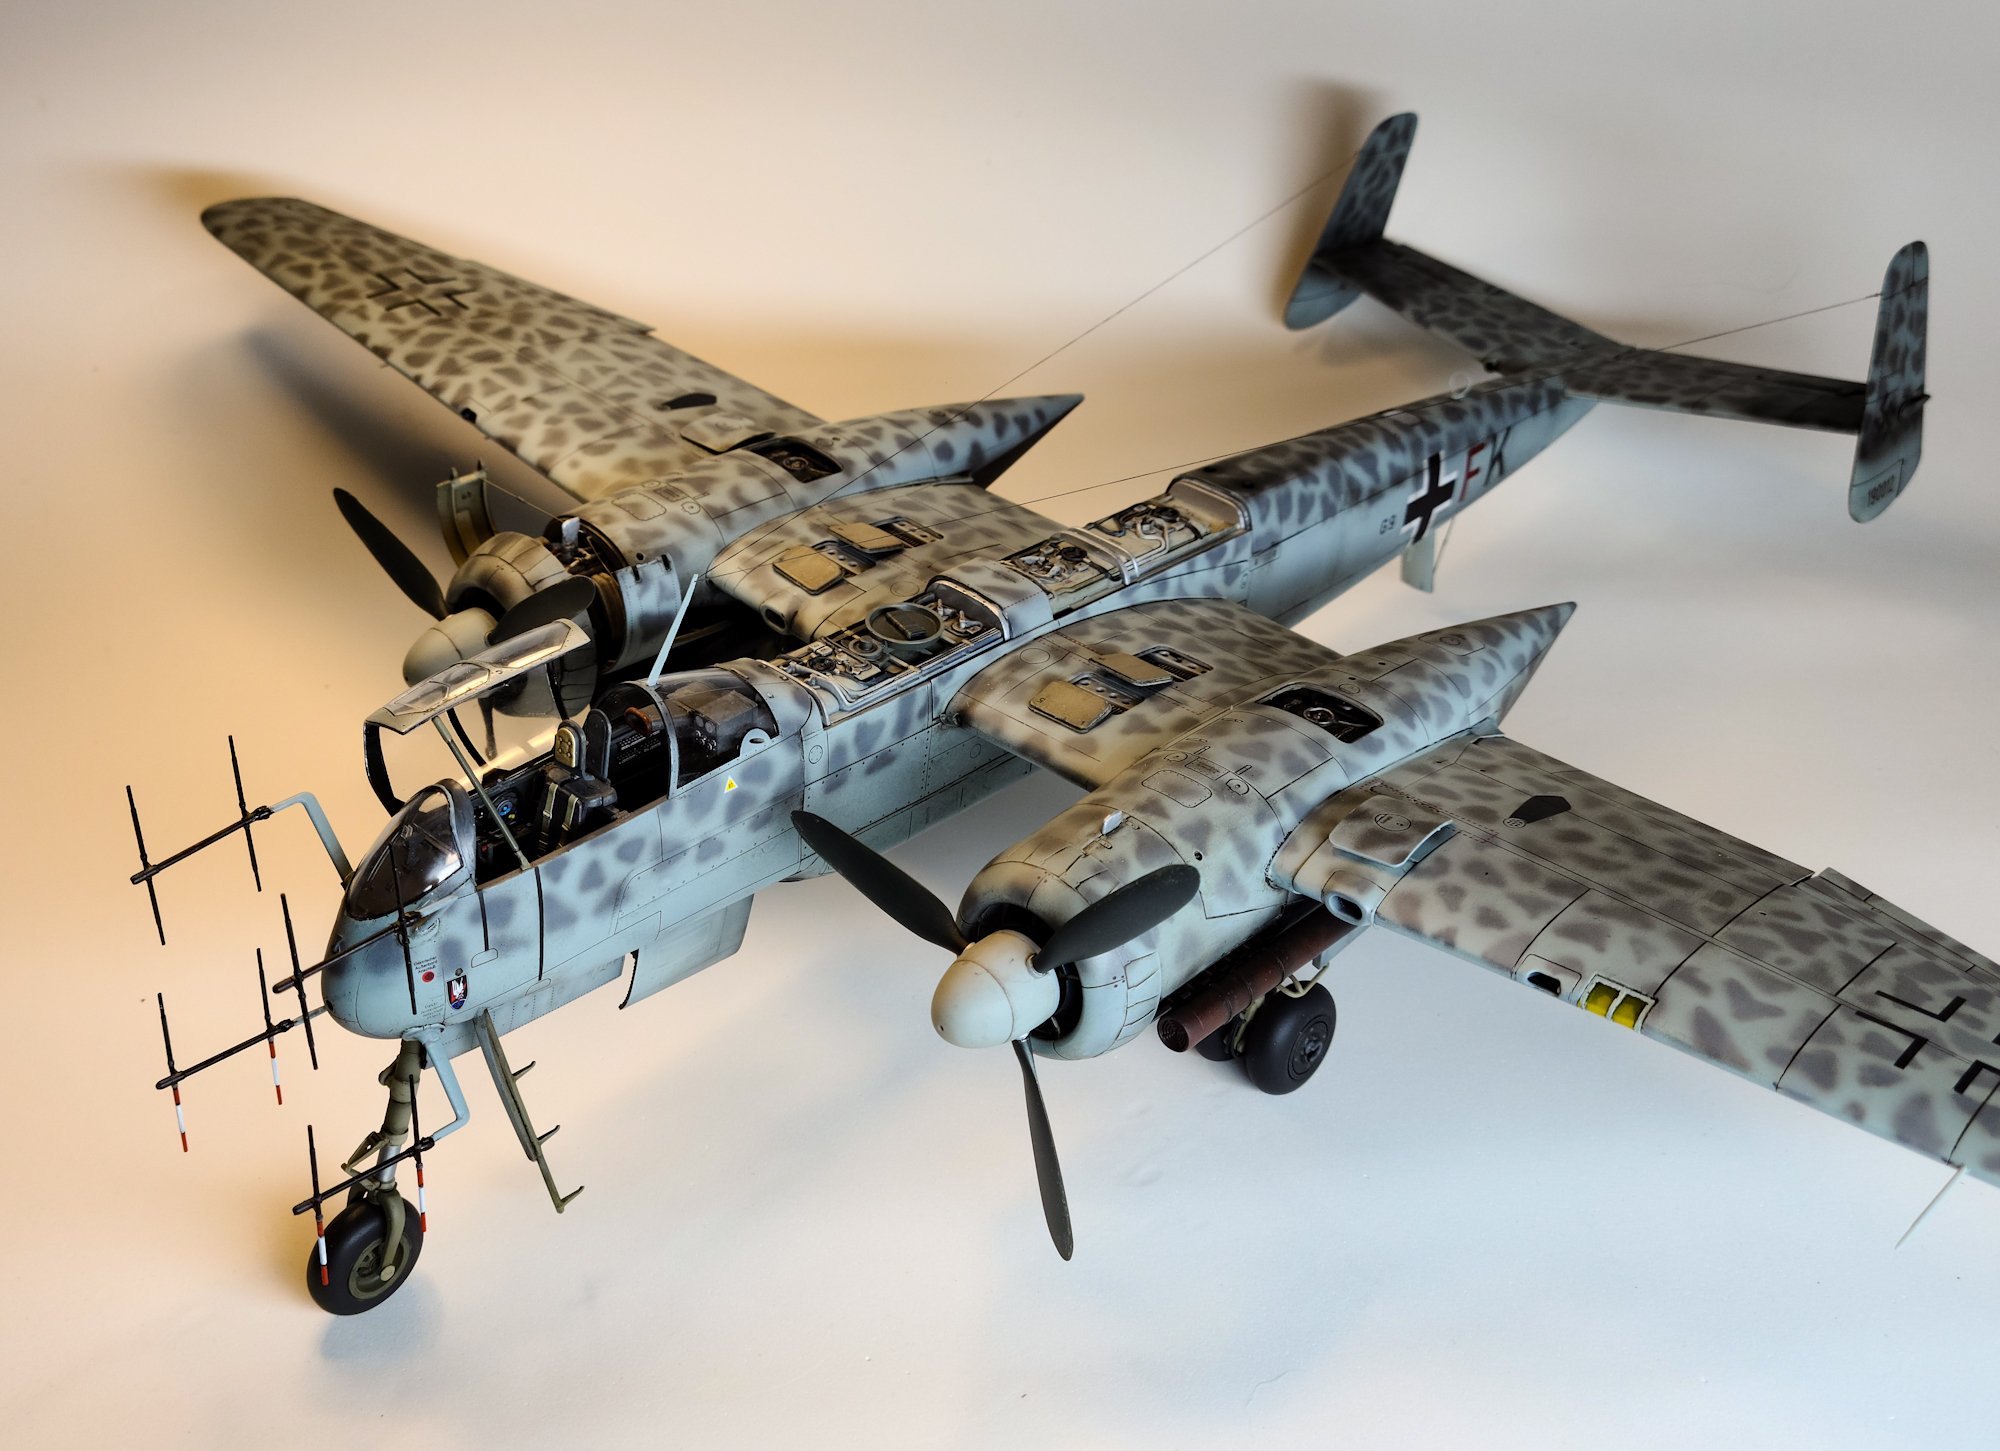
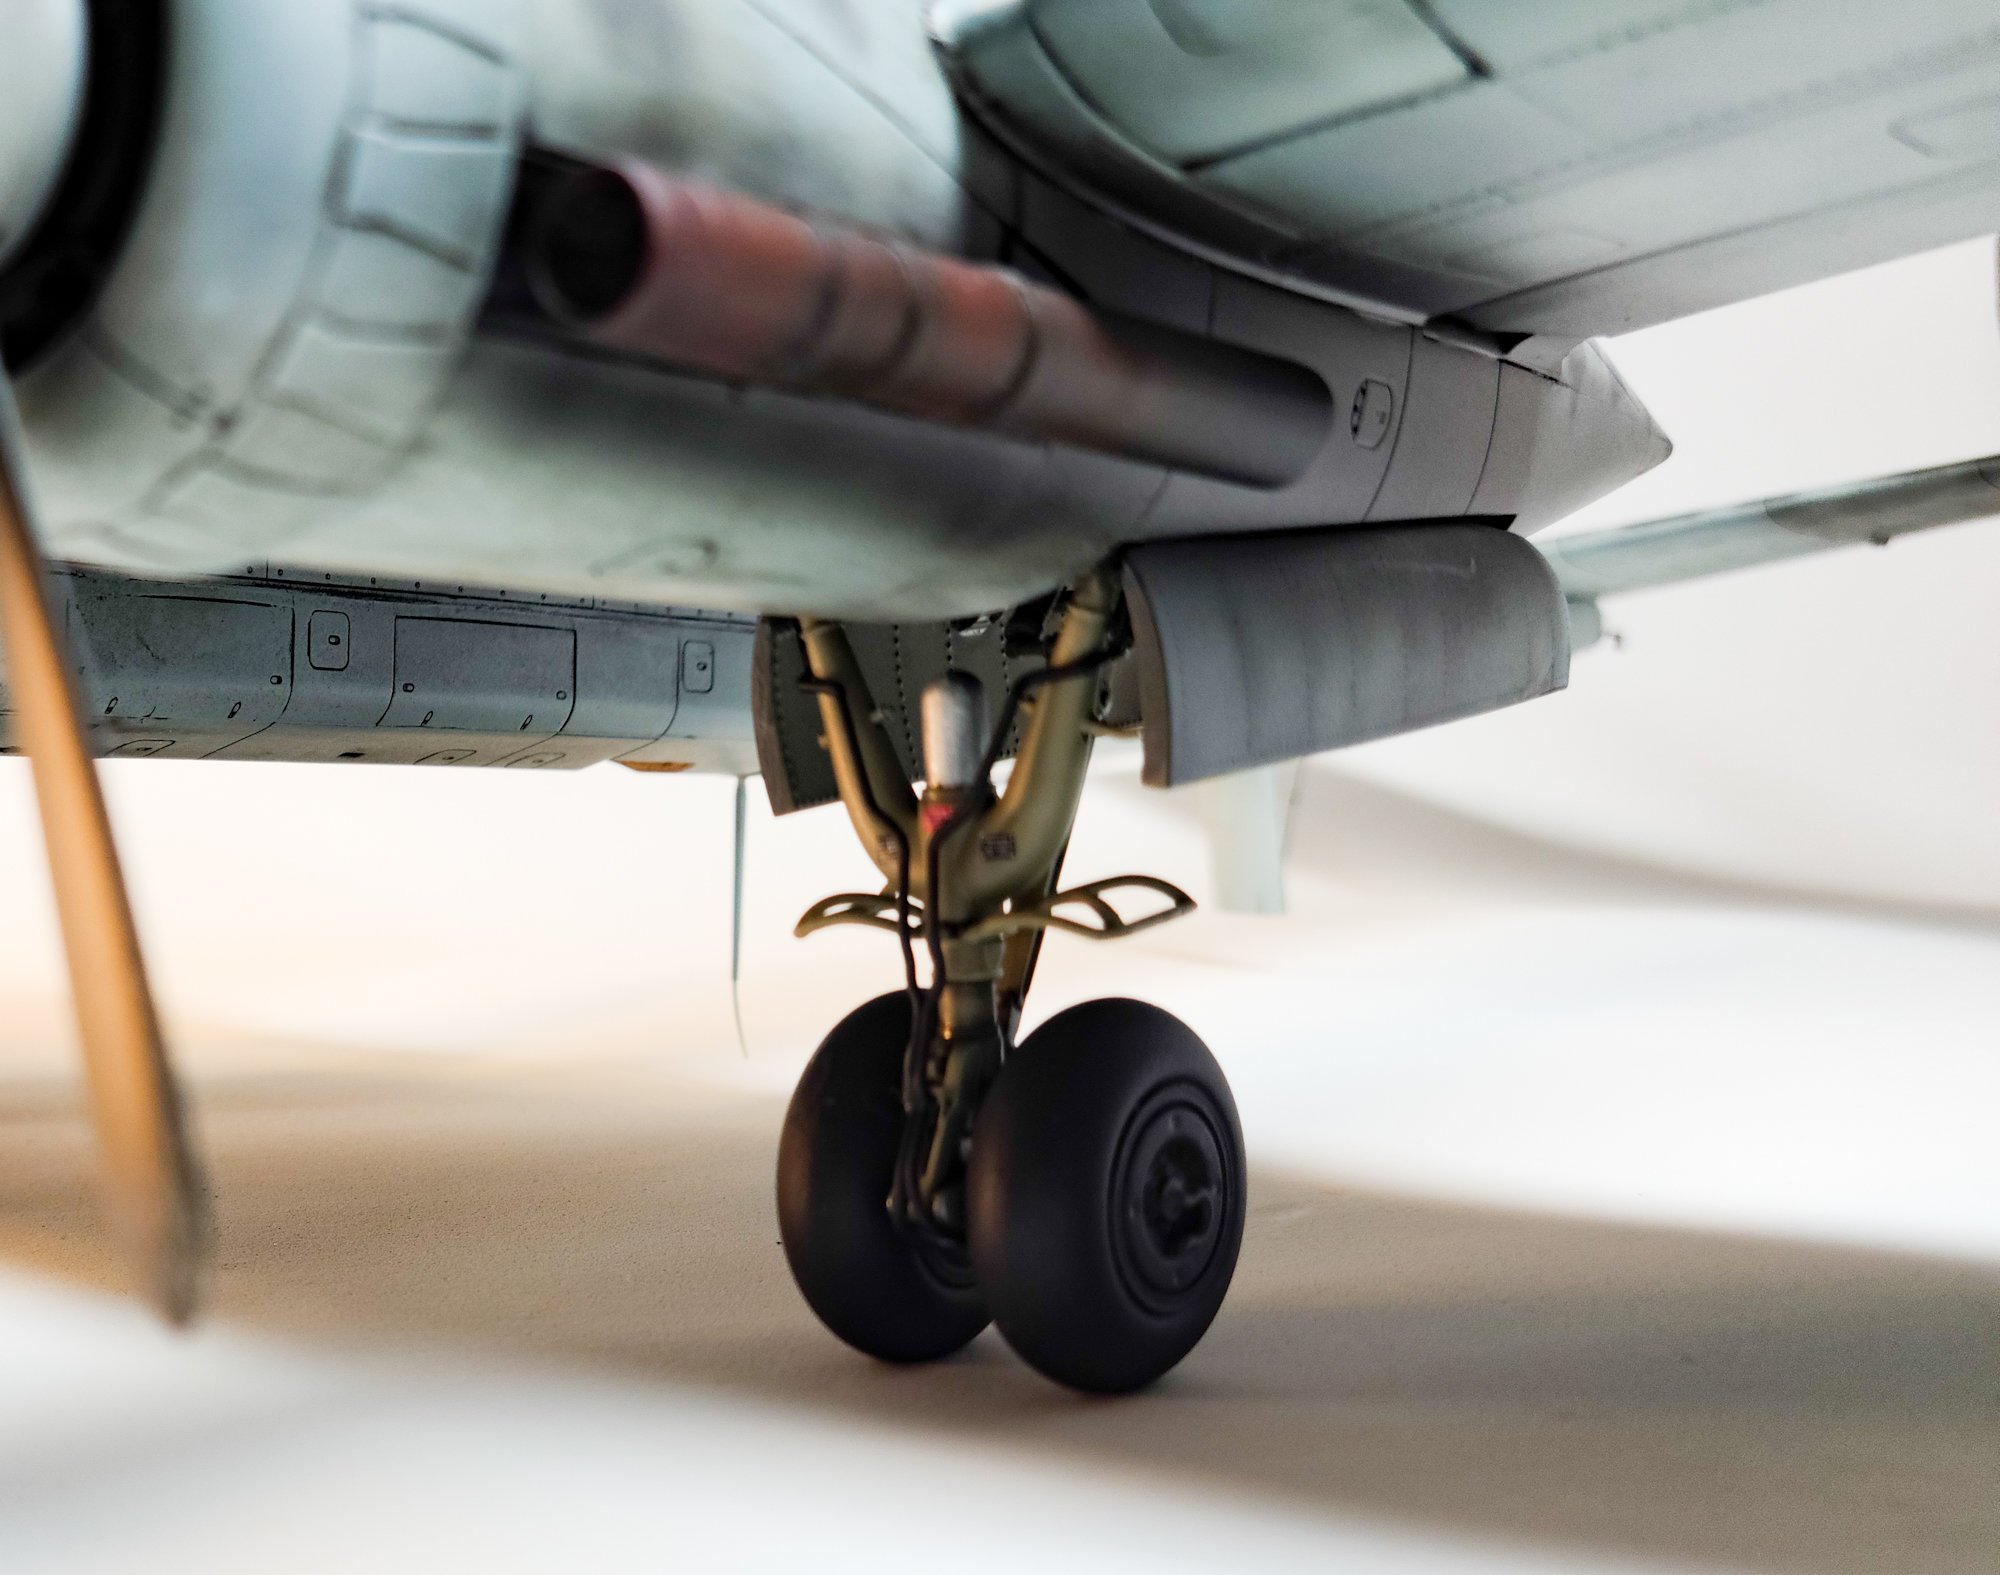
Other than that it's coming together. I'll leave the starboard engine open w/cowling flaps up, I did some sawing on the fuel tank cover and glued the center wing root section in place so I can remove the other two to show off the fuel tanks. Plus did the gun ammo you see in the wing roots and will glue those doors in the open position as they were on the original plane. So one opened-up engine, open cockpit, the wheels are a work of art so they'll be down.
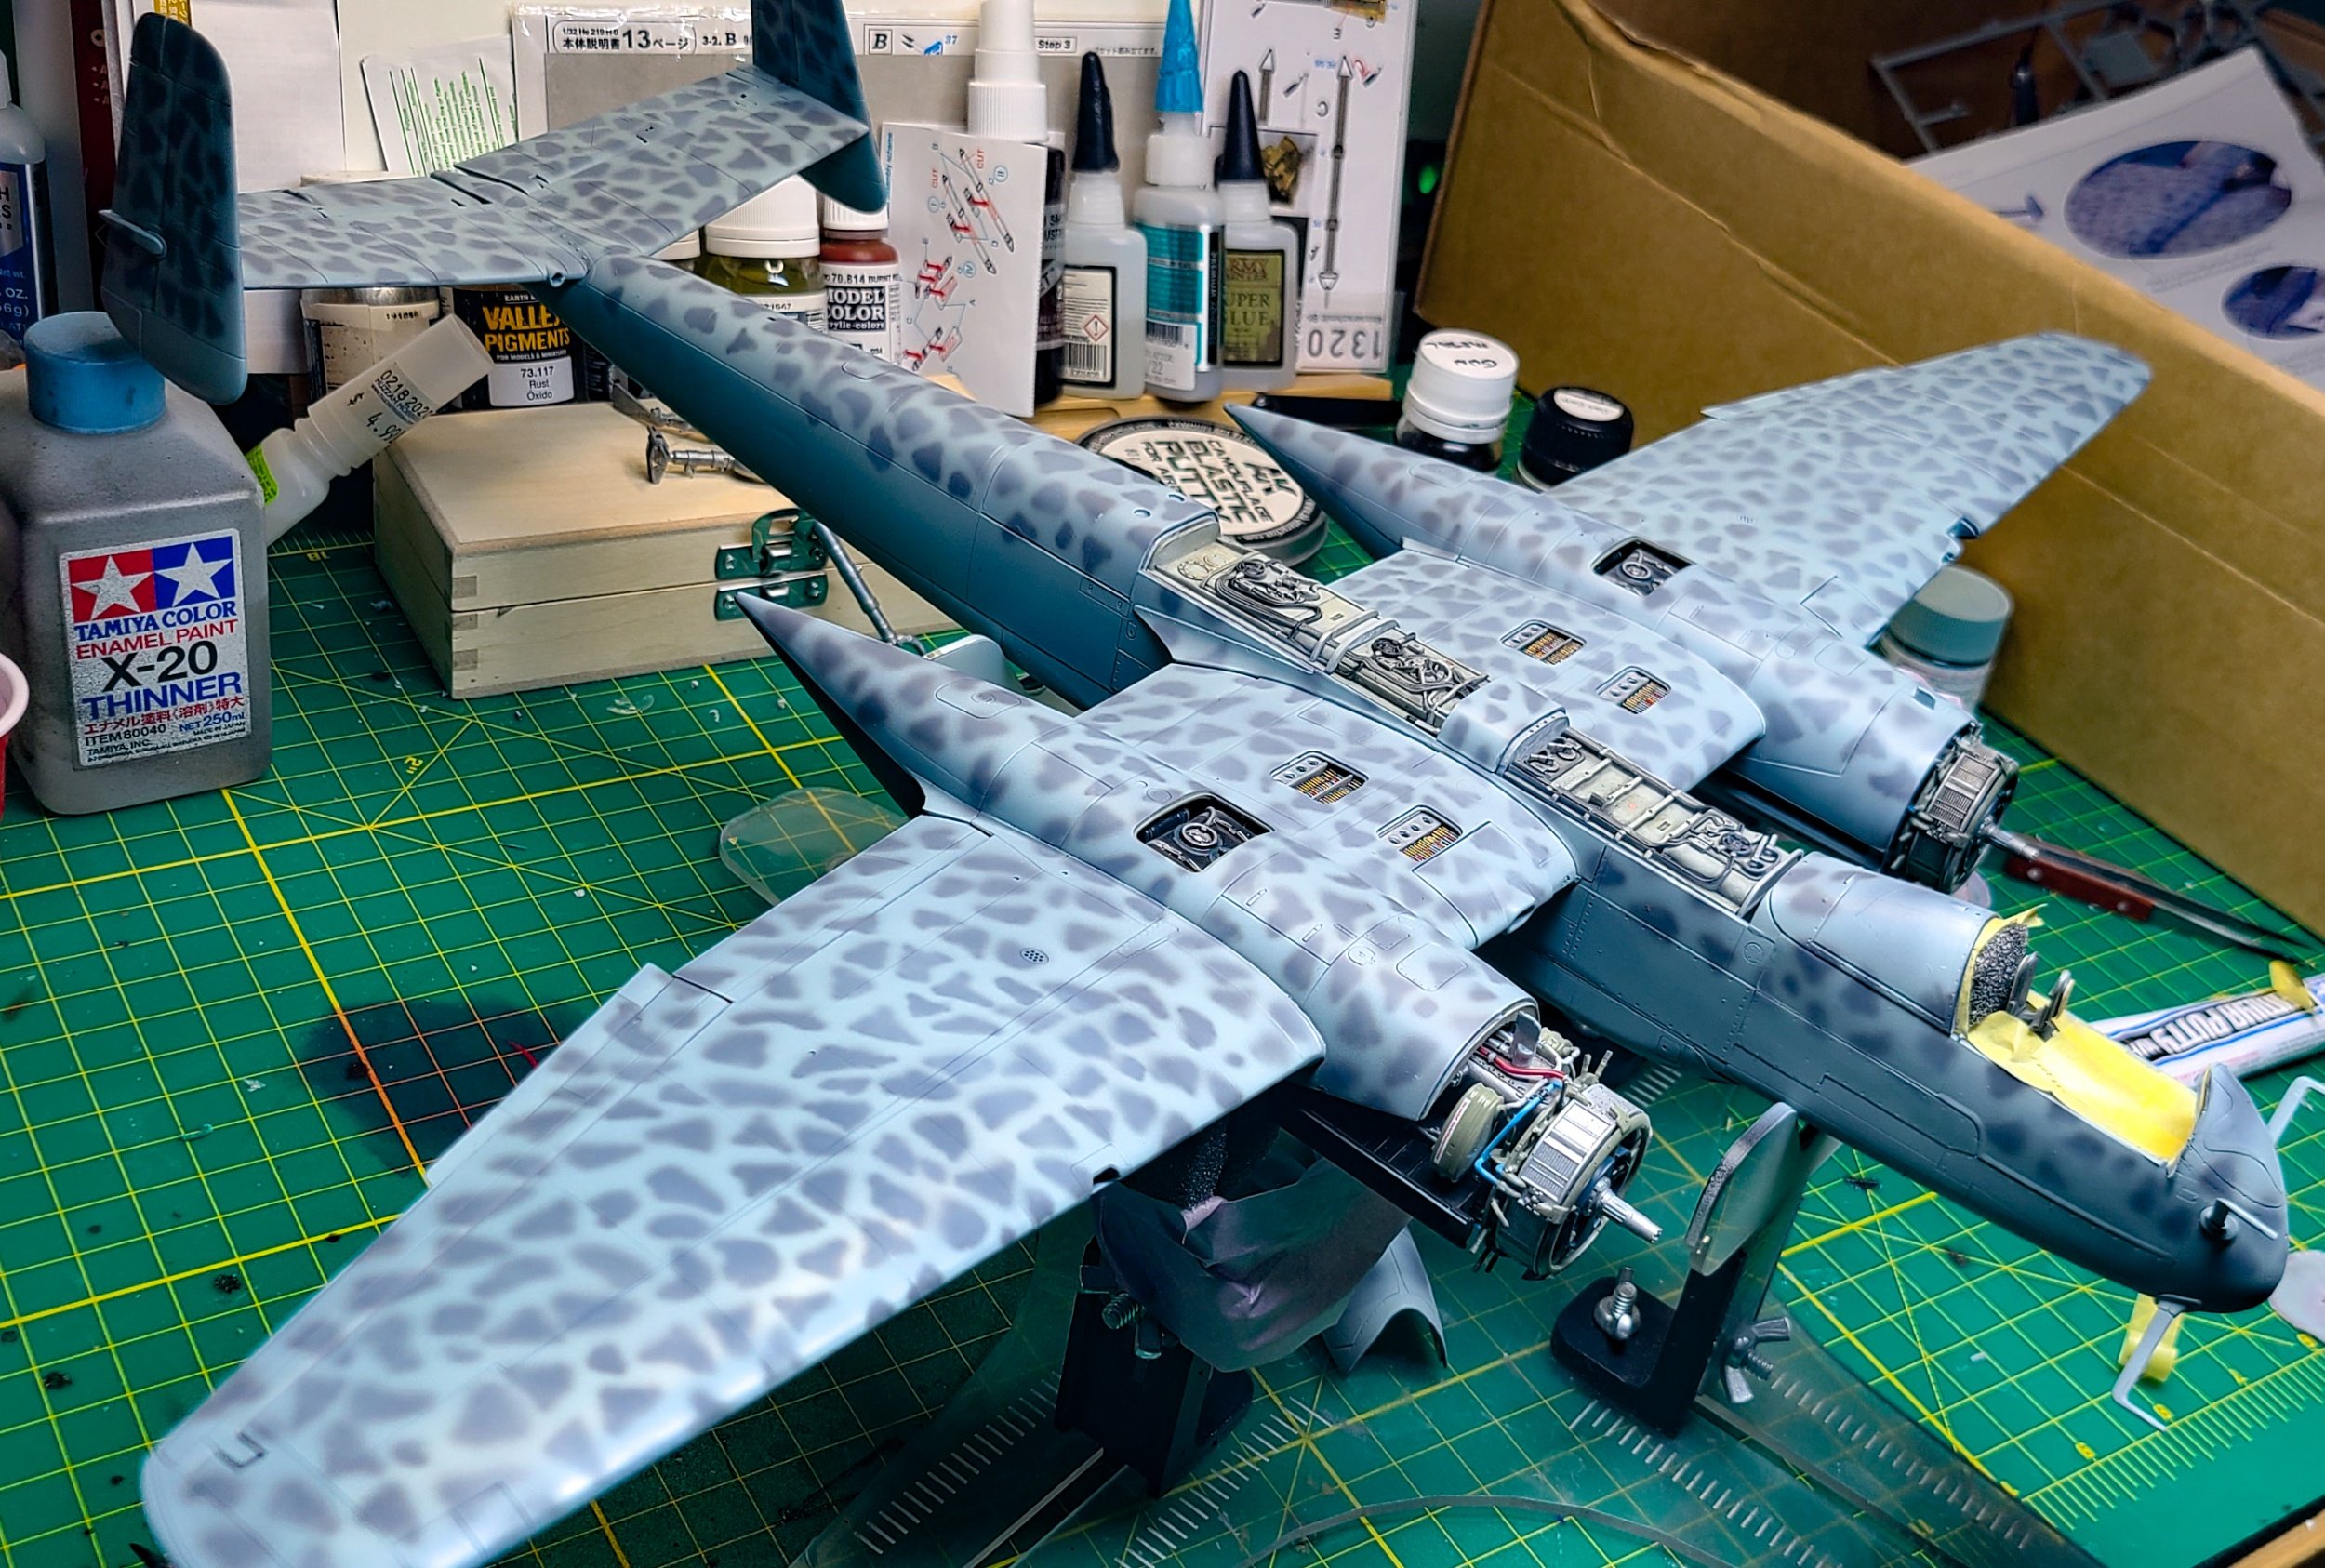
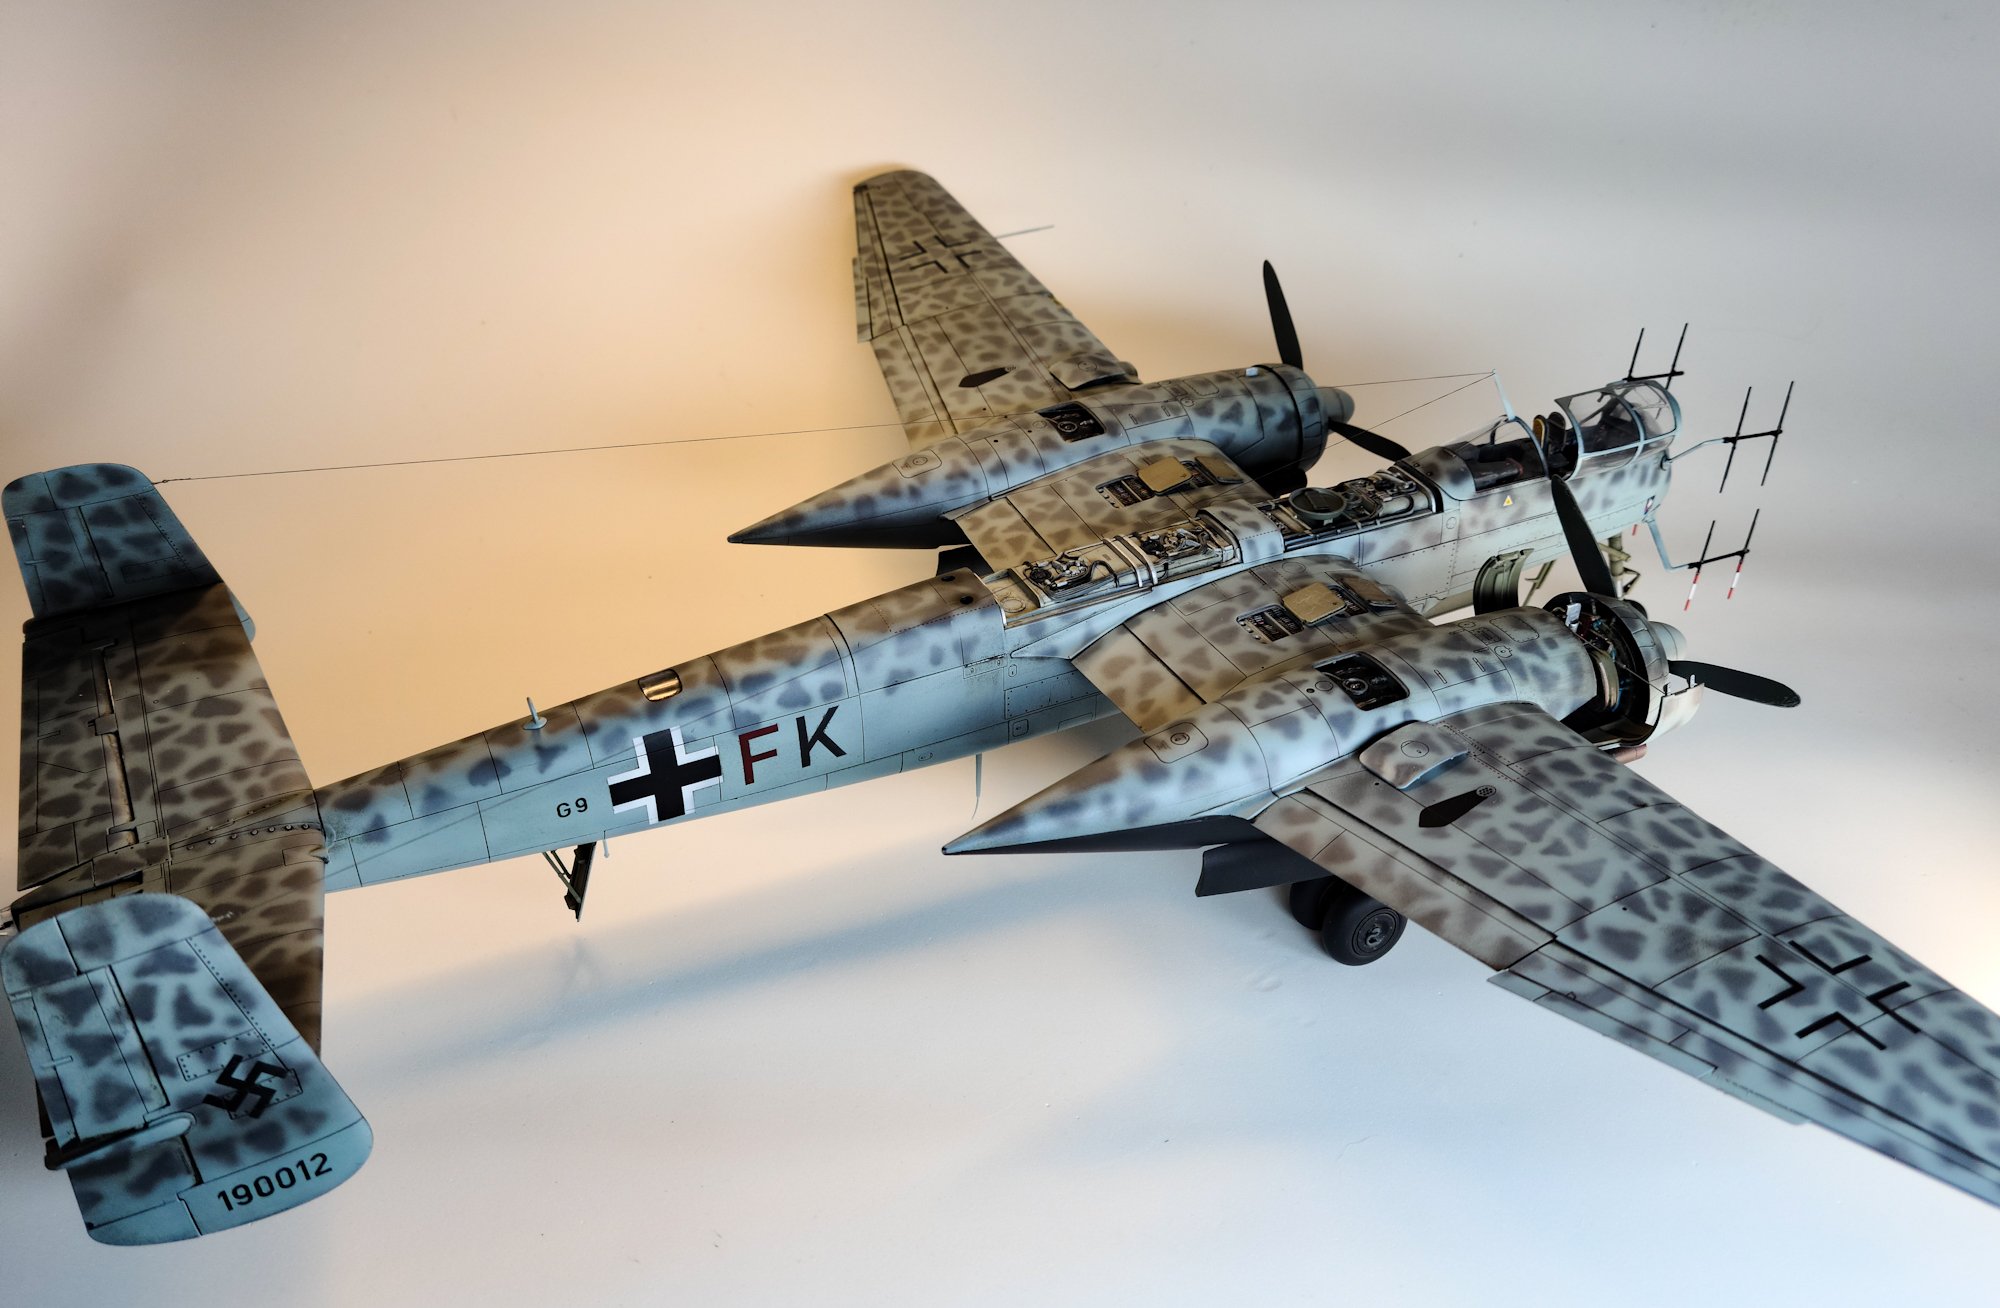
It is a monumentally fiddly airplane model...I can't count the number of things I've had trouble with and either broke and then fixed or had to fix. Yet as you can see it's going to look really cool when finished (if I can pull off the paint job). That said...I think I'll have to take some angled shots rather than head on because I'm pretty sure it's going to be slightly "off" when all is said and done.
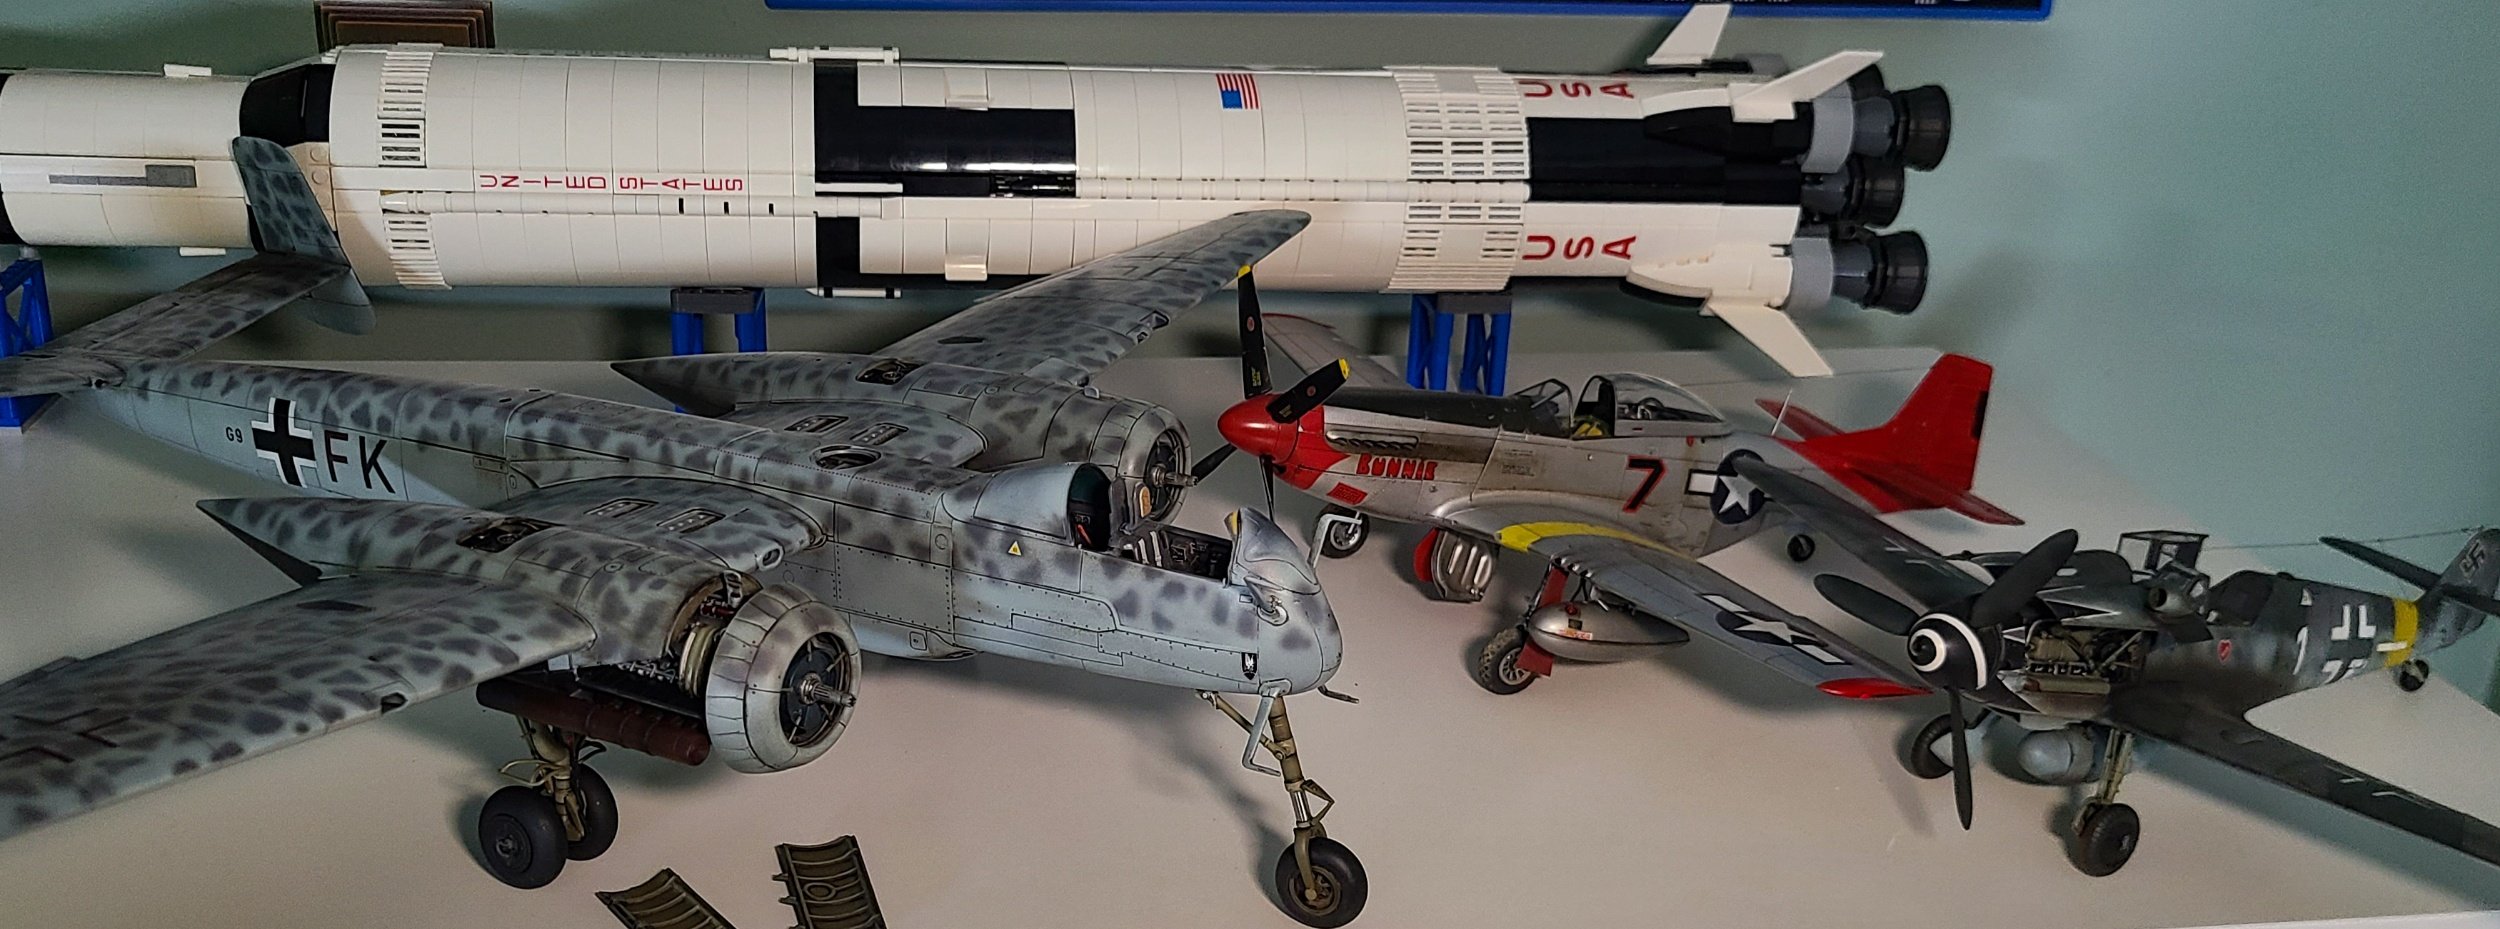
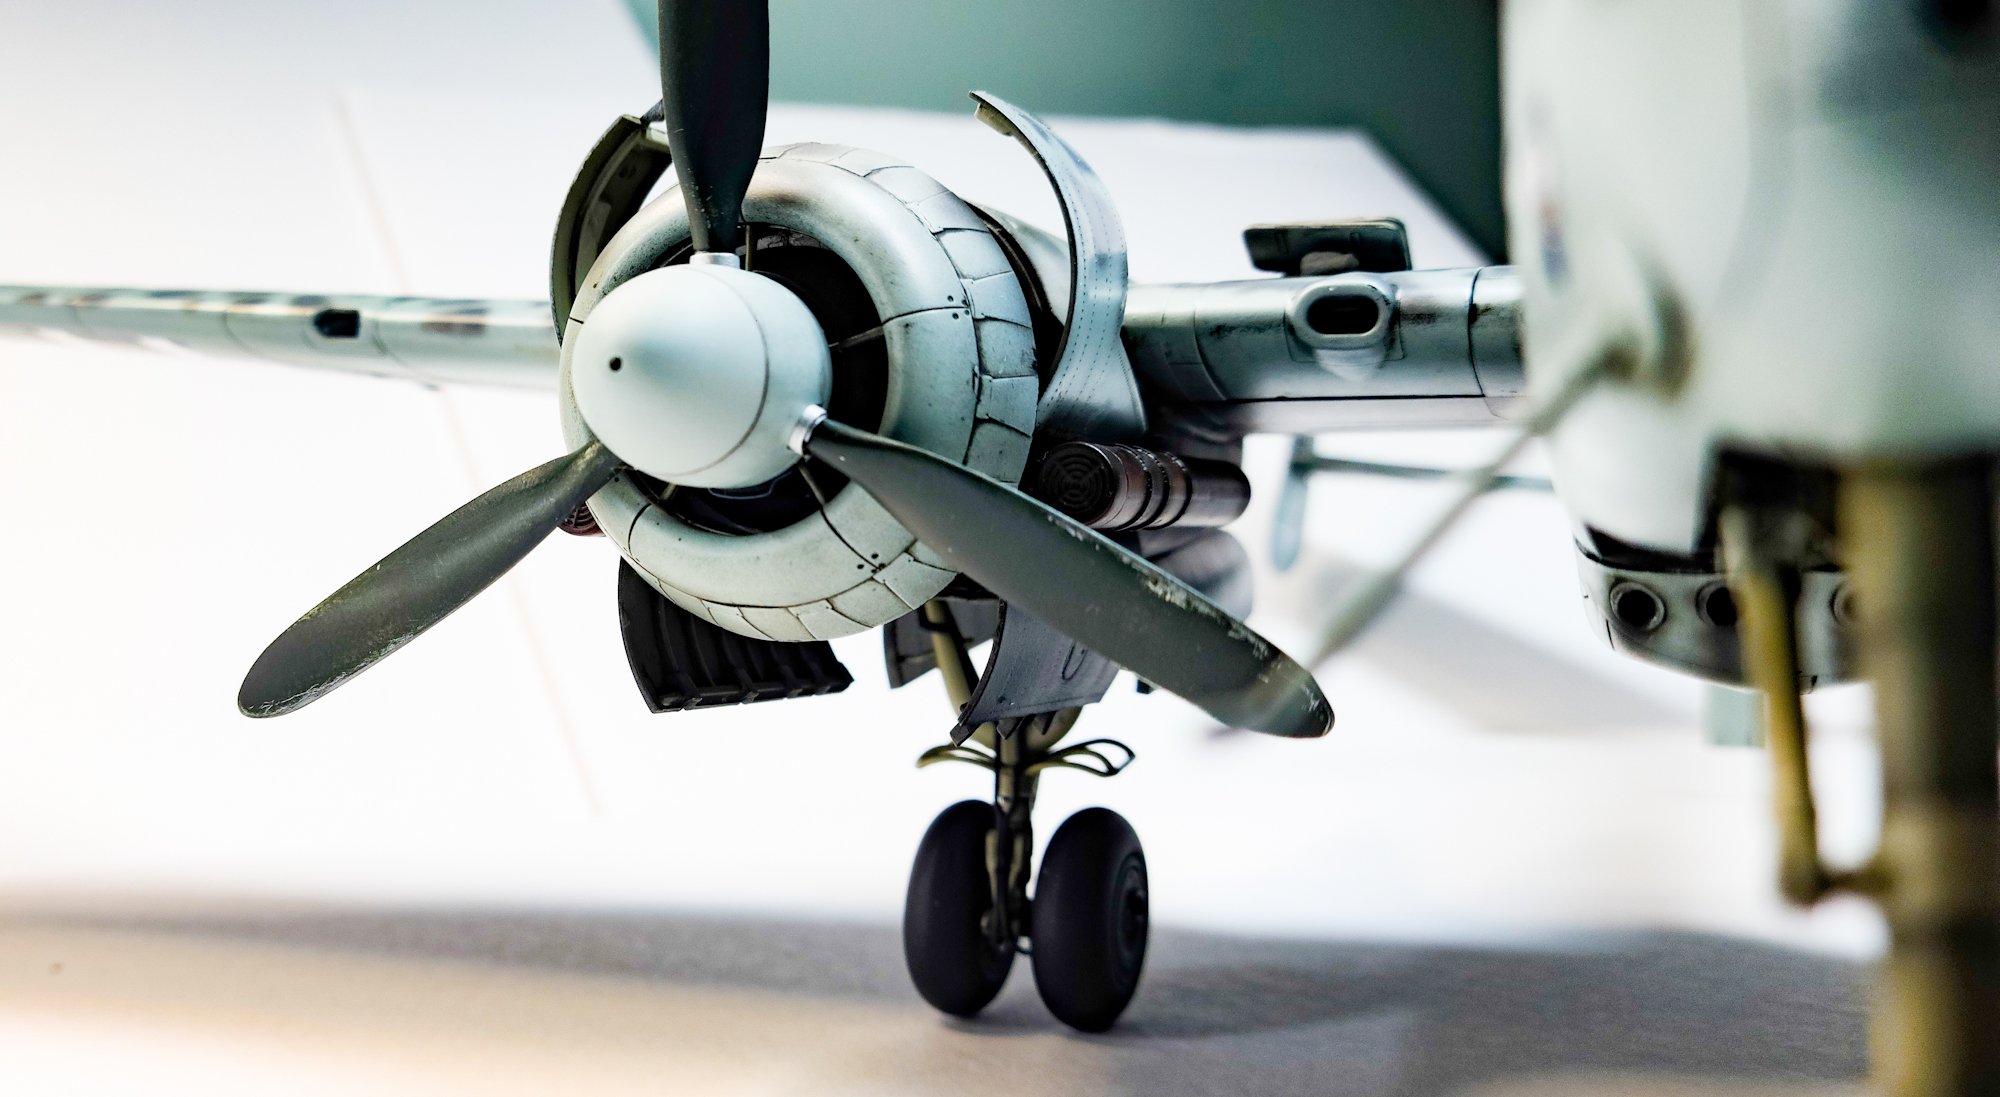
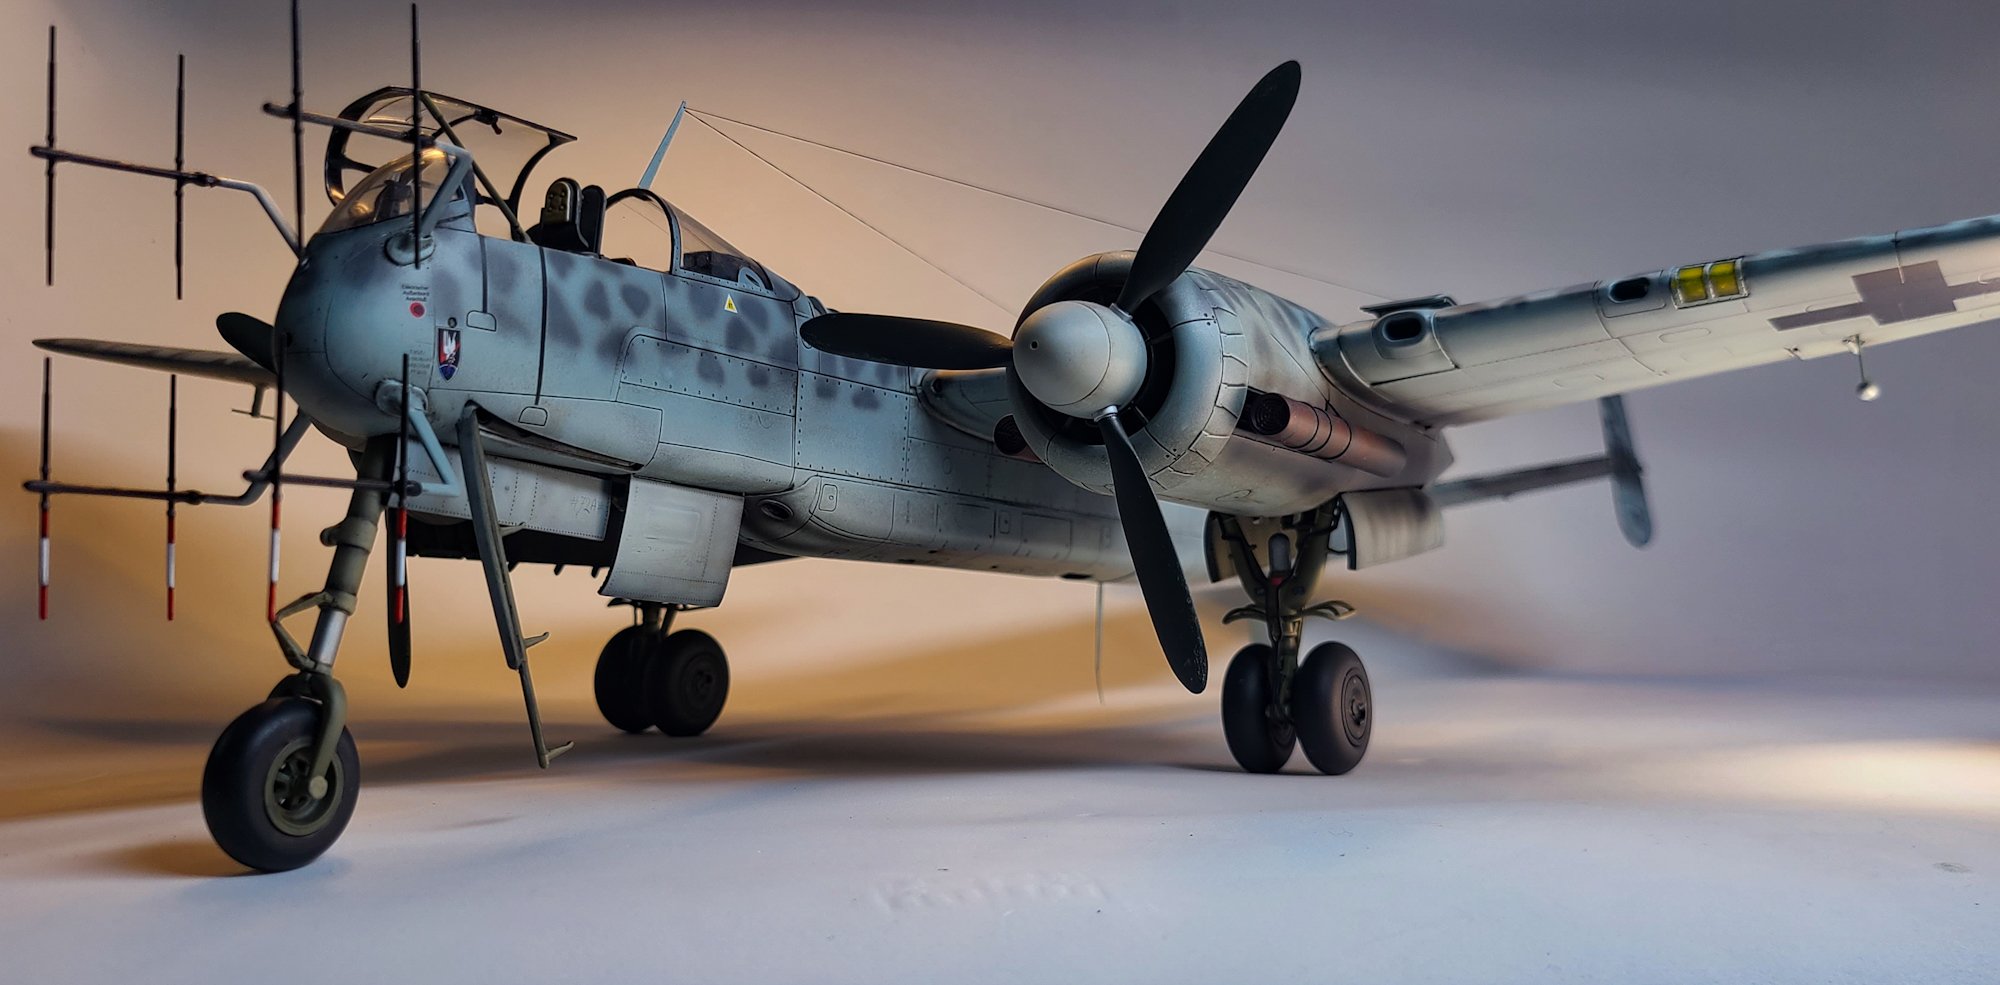
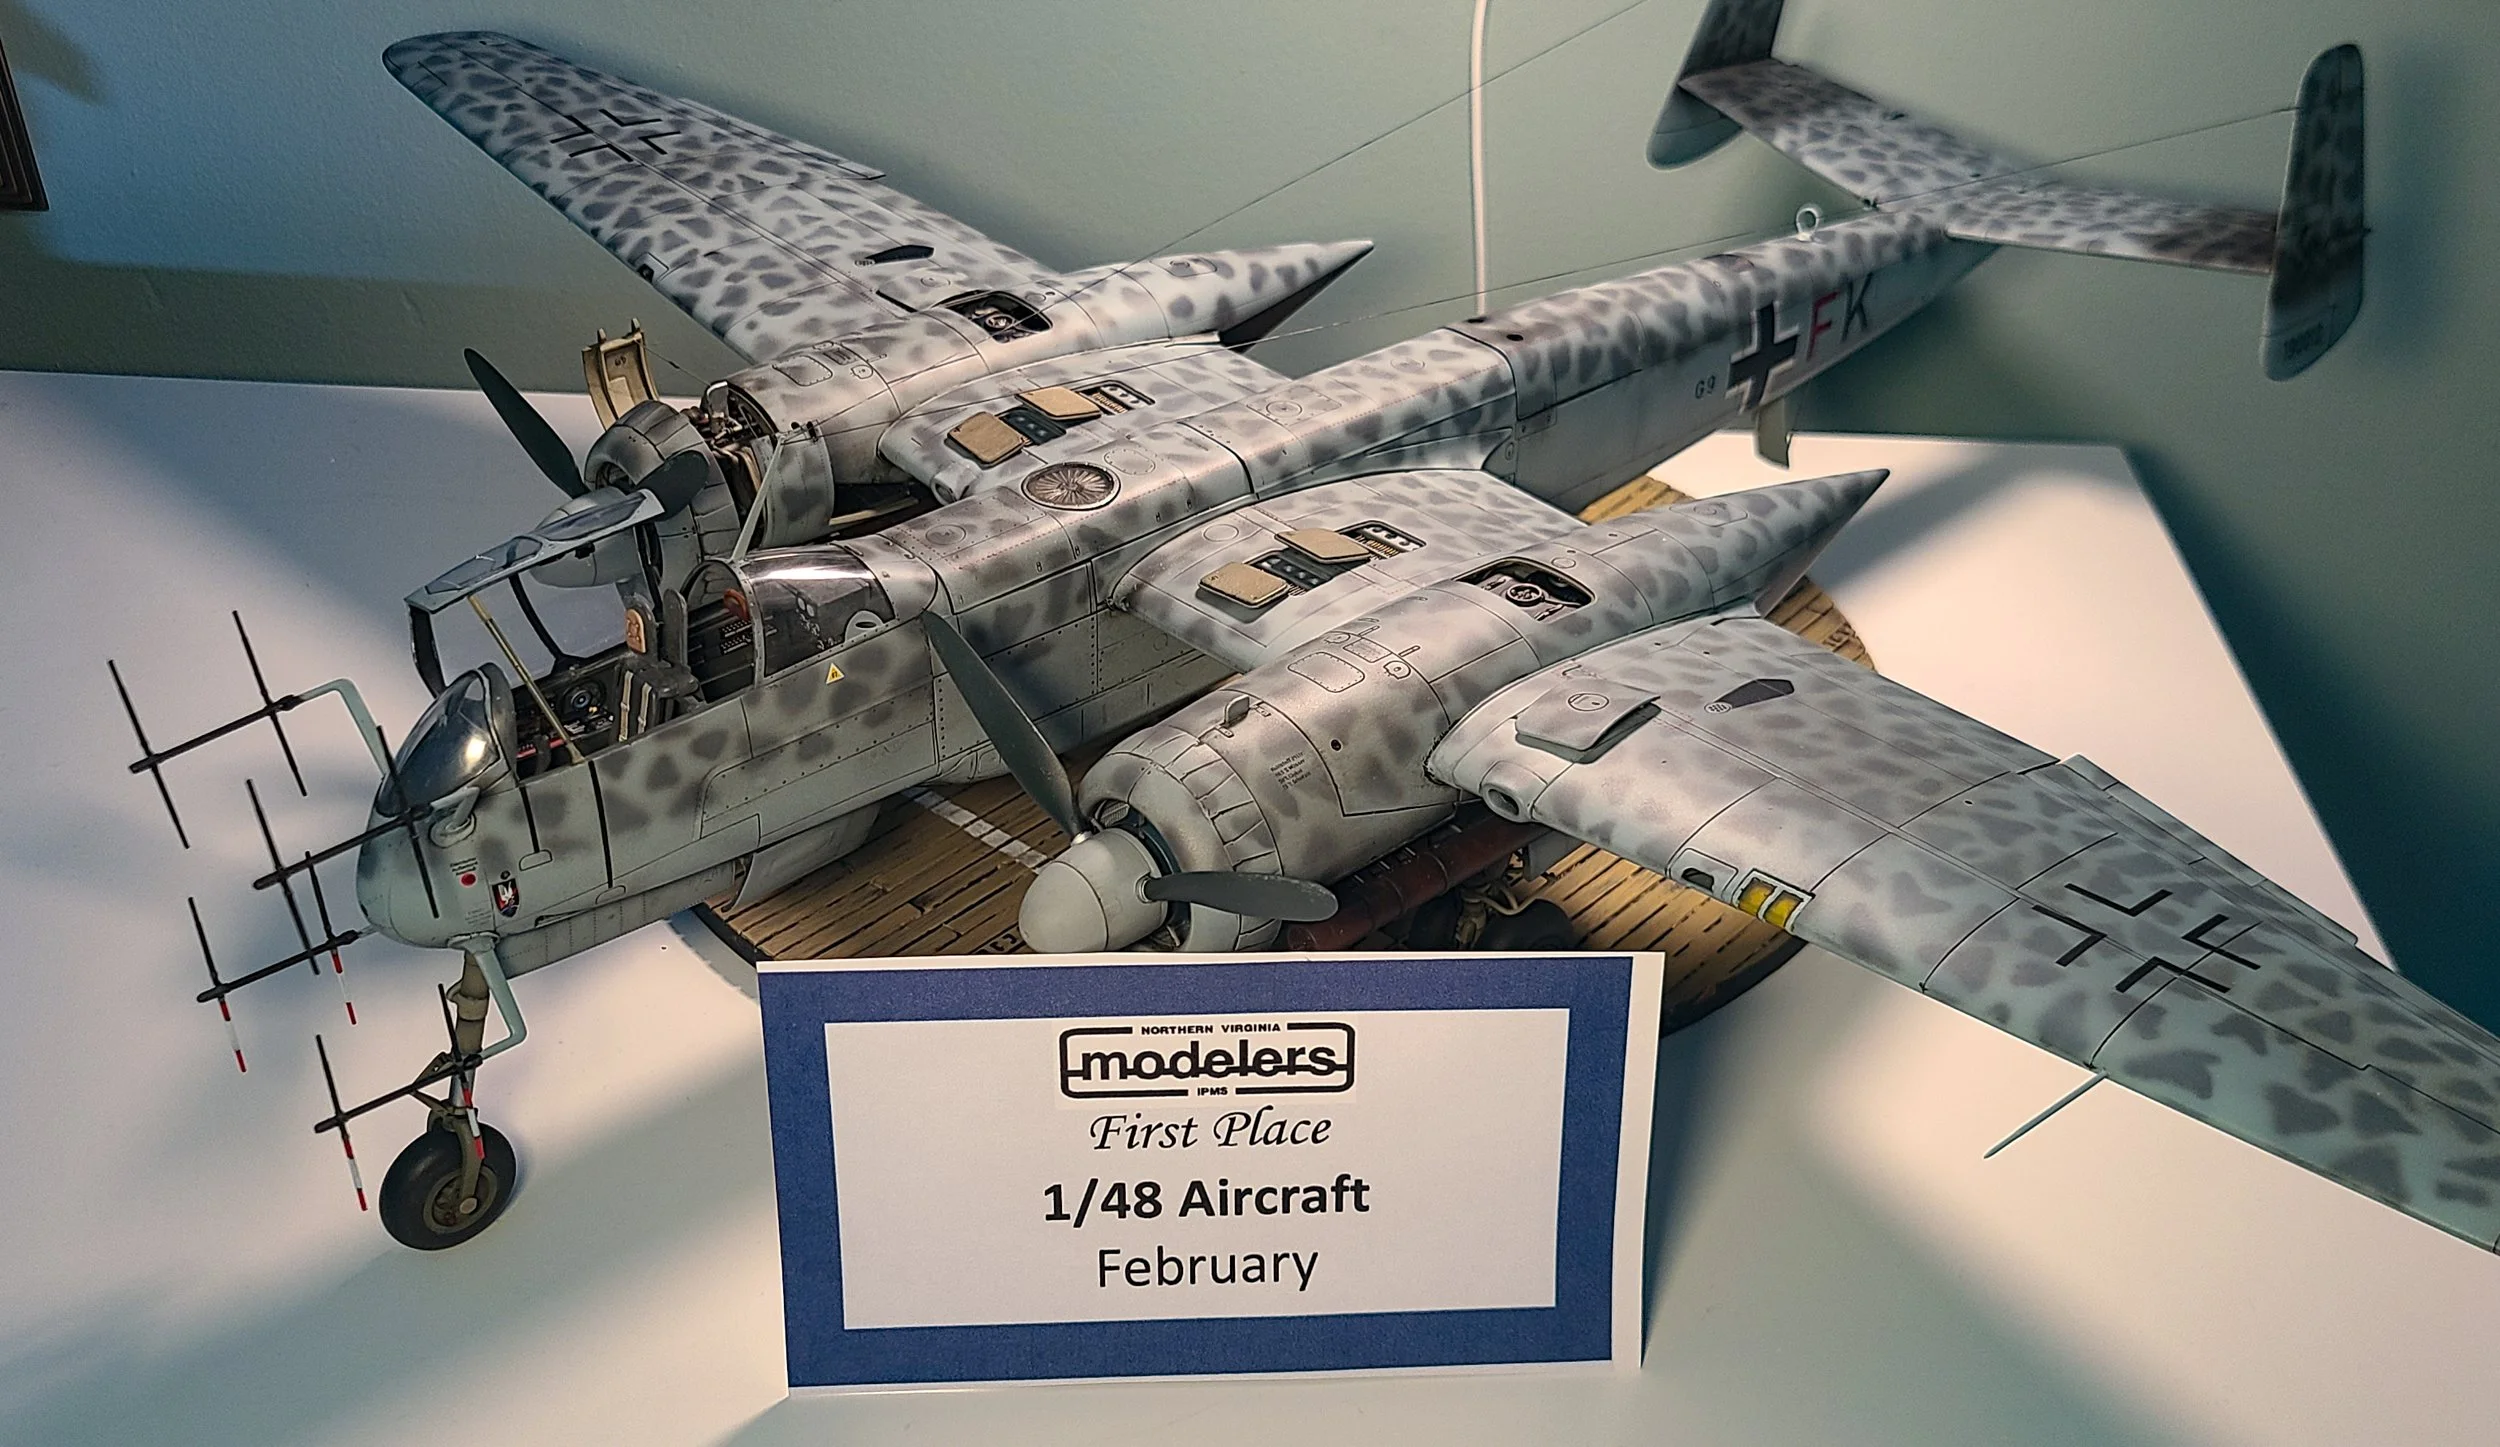
4/19/23: I have not written anything in a while but I did finish it. It was the worst-best model I’ve ever built. It won a scale competition at my local IPMS monthly meeting and a third place in it’s class at the annual Model Classic (IPMS Northern VA) and it’s incredibly hard to move around without something breaking.
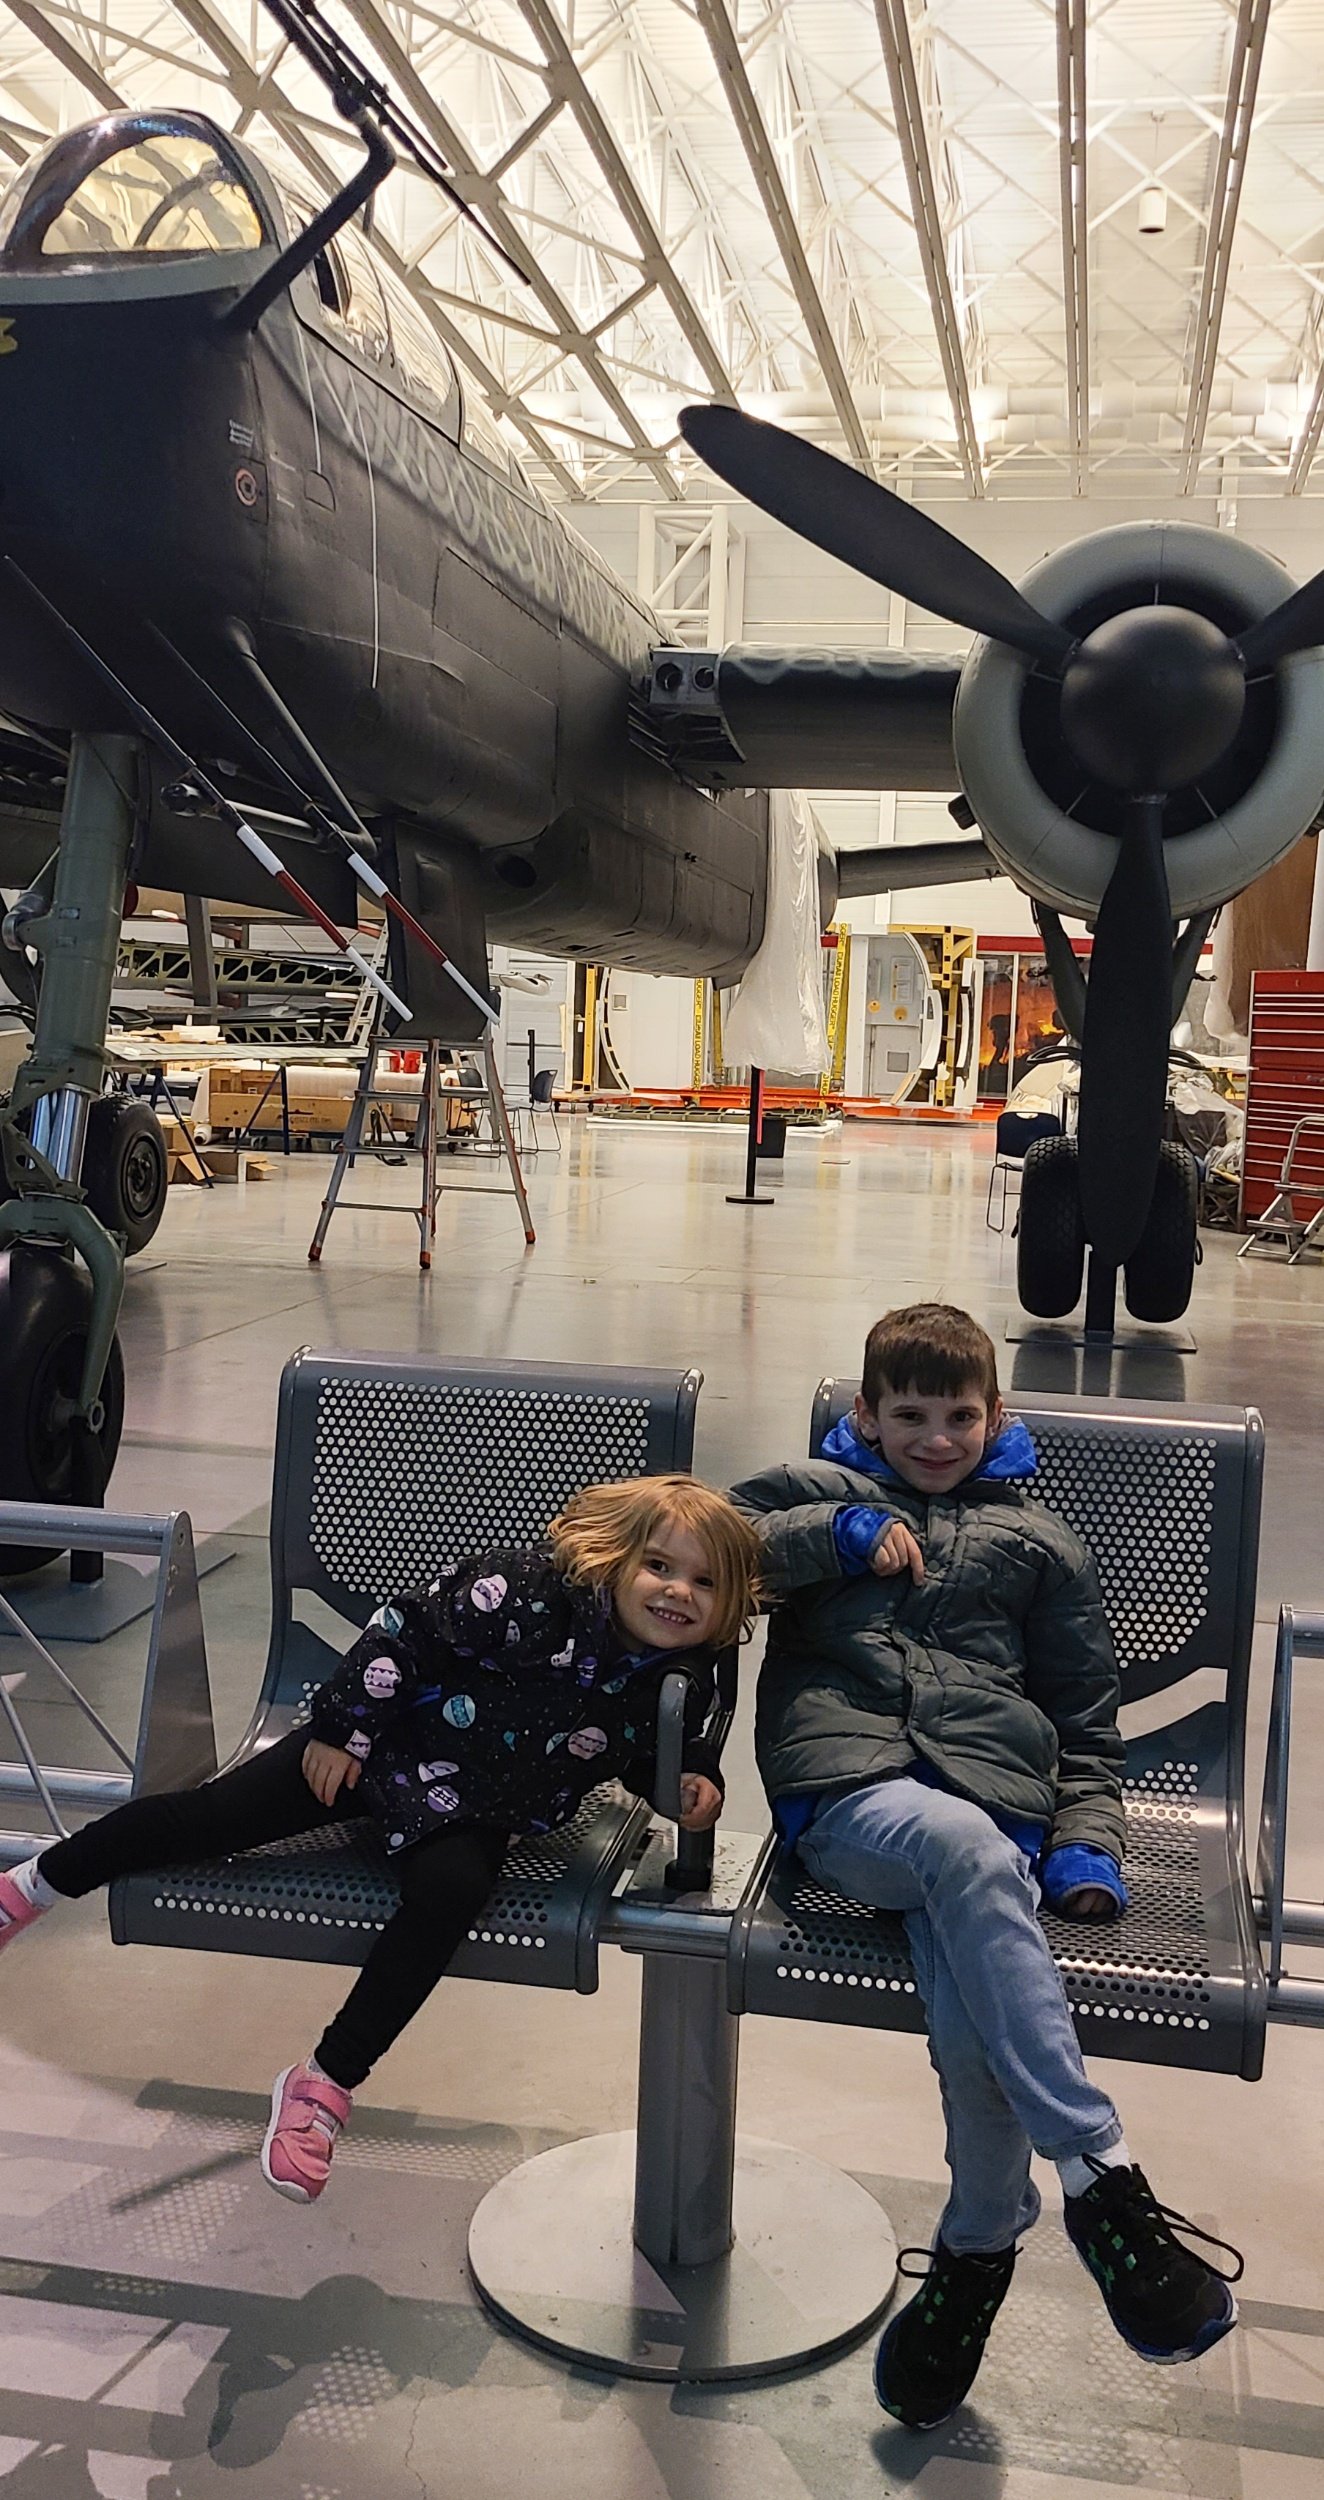
The short vid is an overall assessment of how I feel about it and the rest of these shots show a progression of the build until I finished…and I inserted a pic of my grandkids when we went to Udvar Hazy to look at the real thing. I’ll leave a few notes below this to explain a few things I did/used.
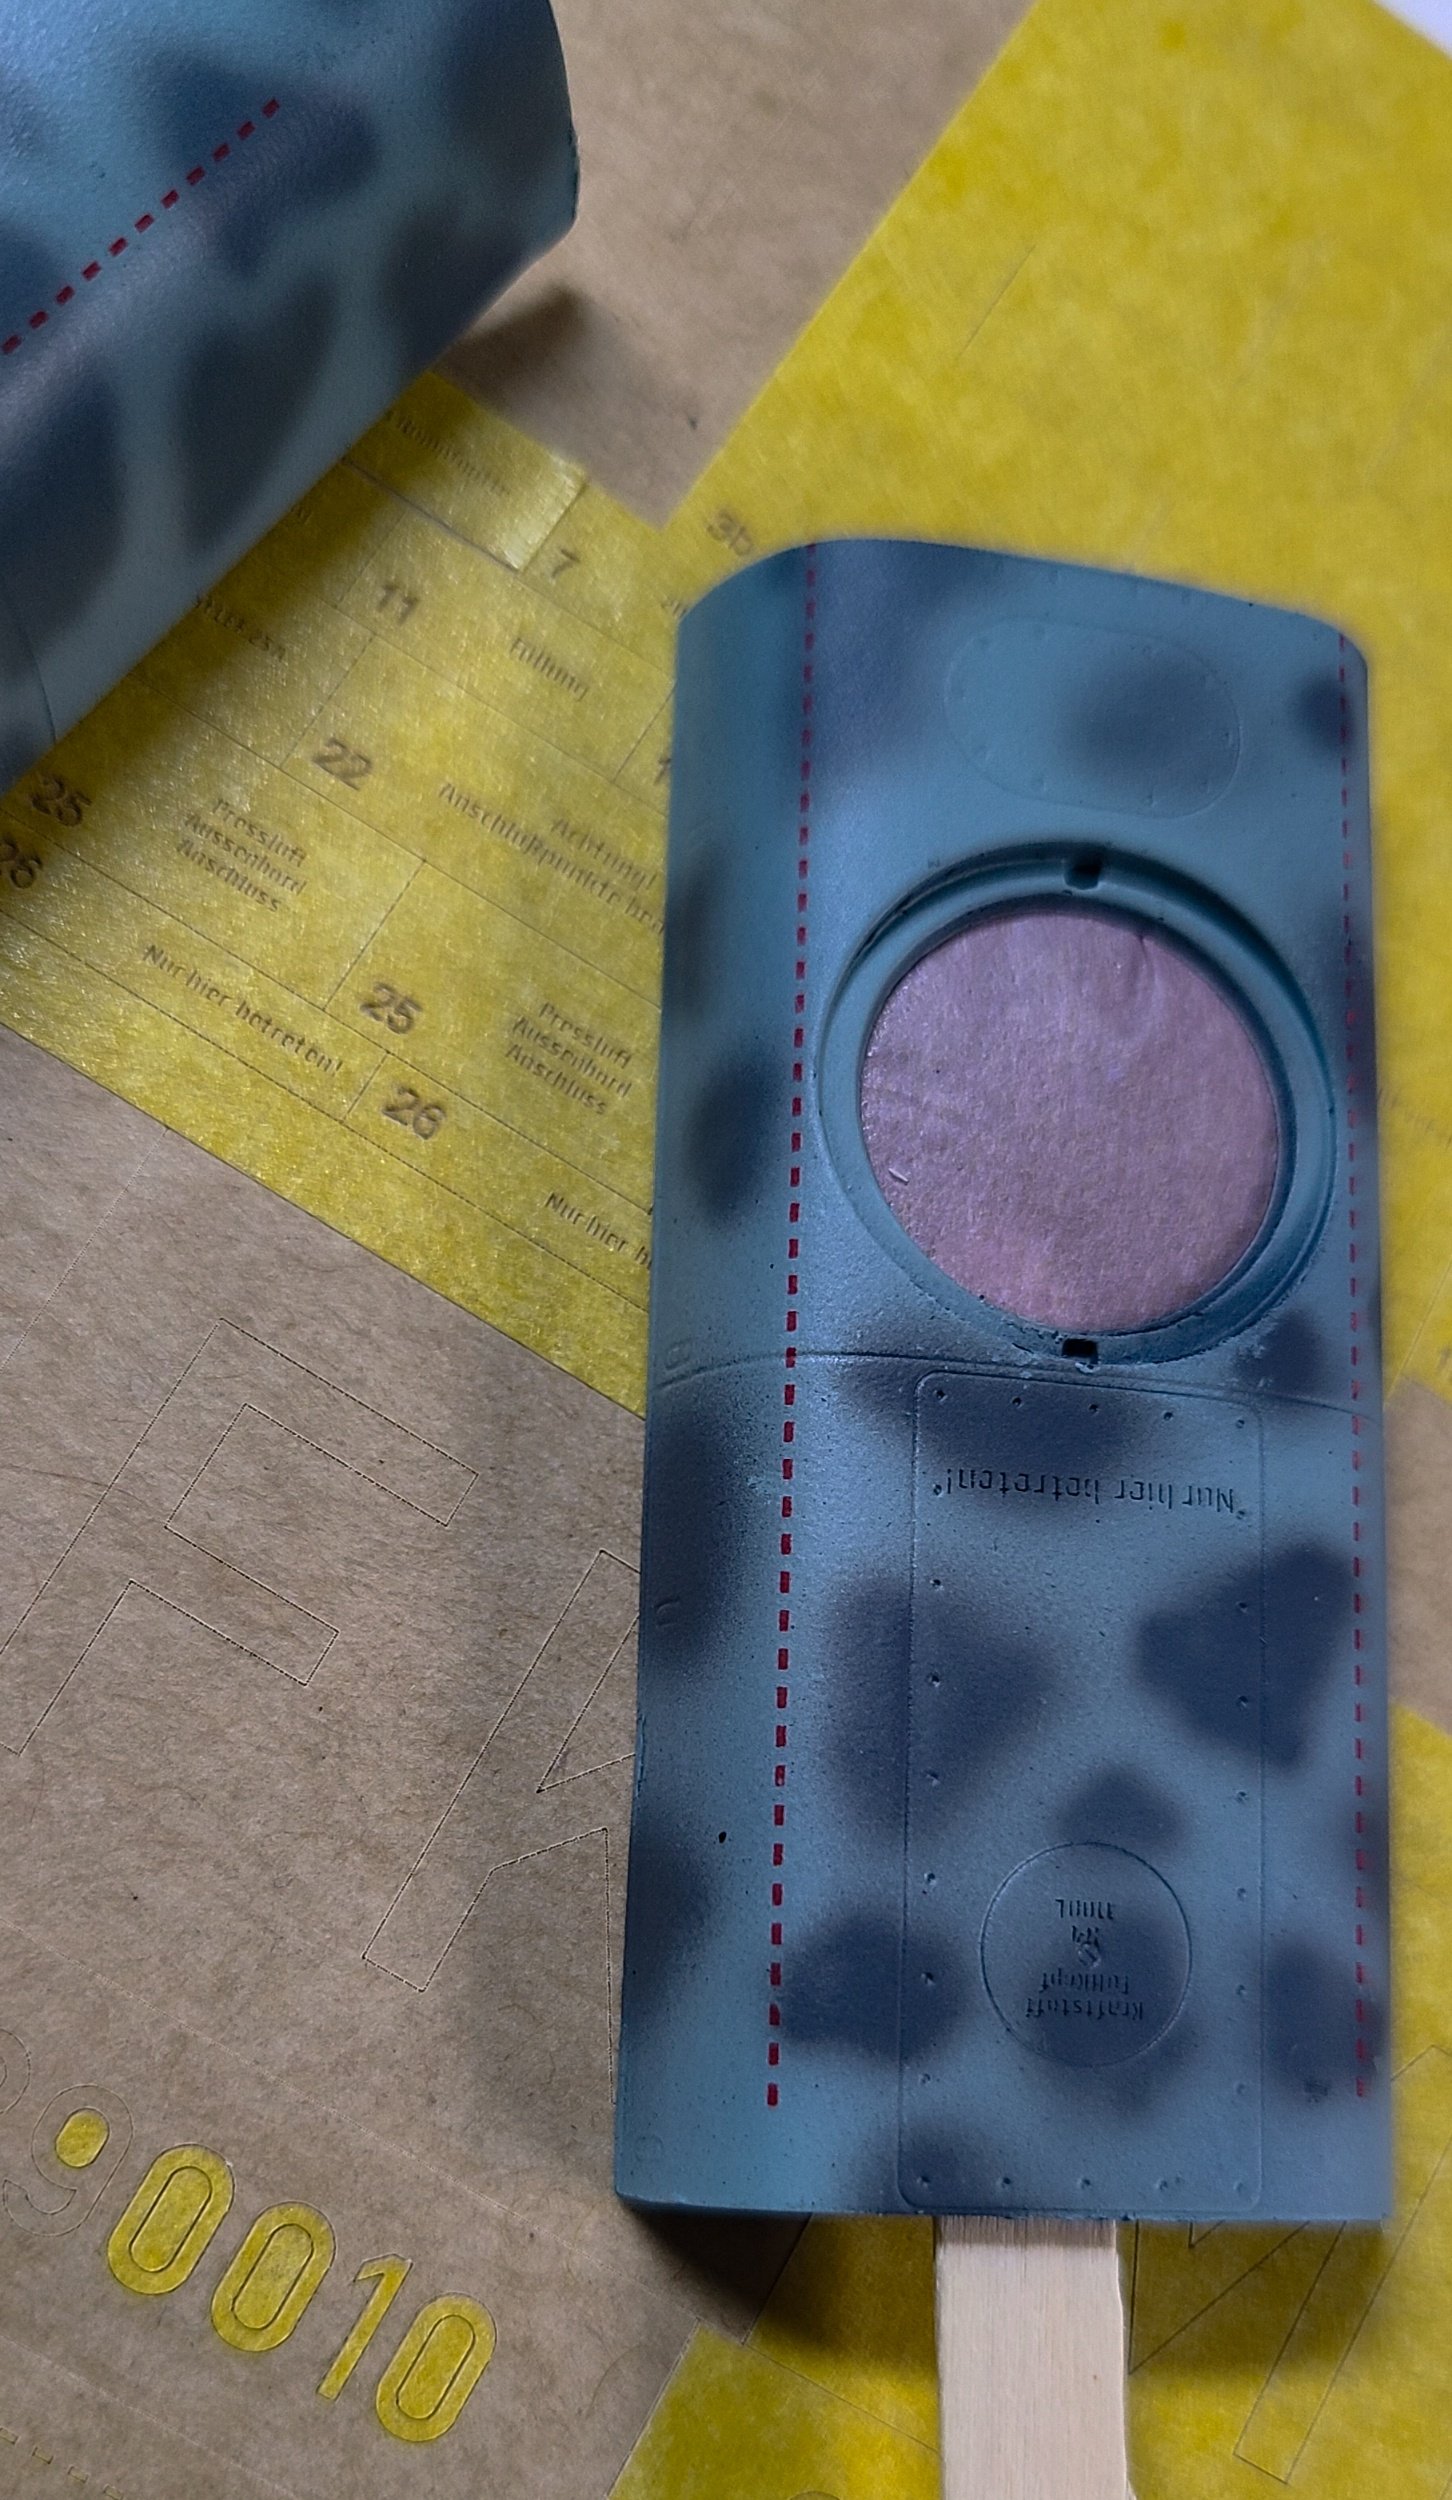
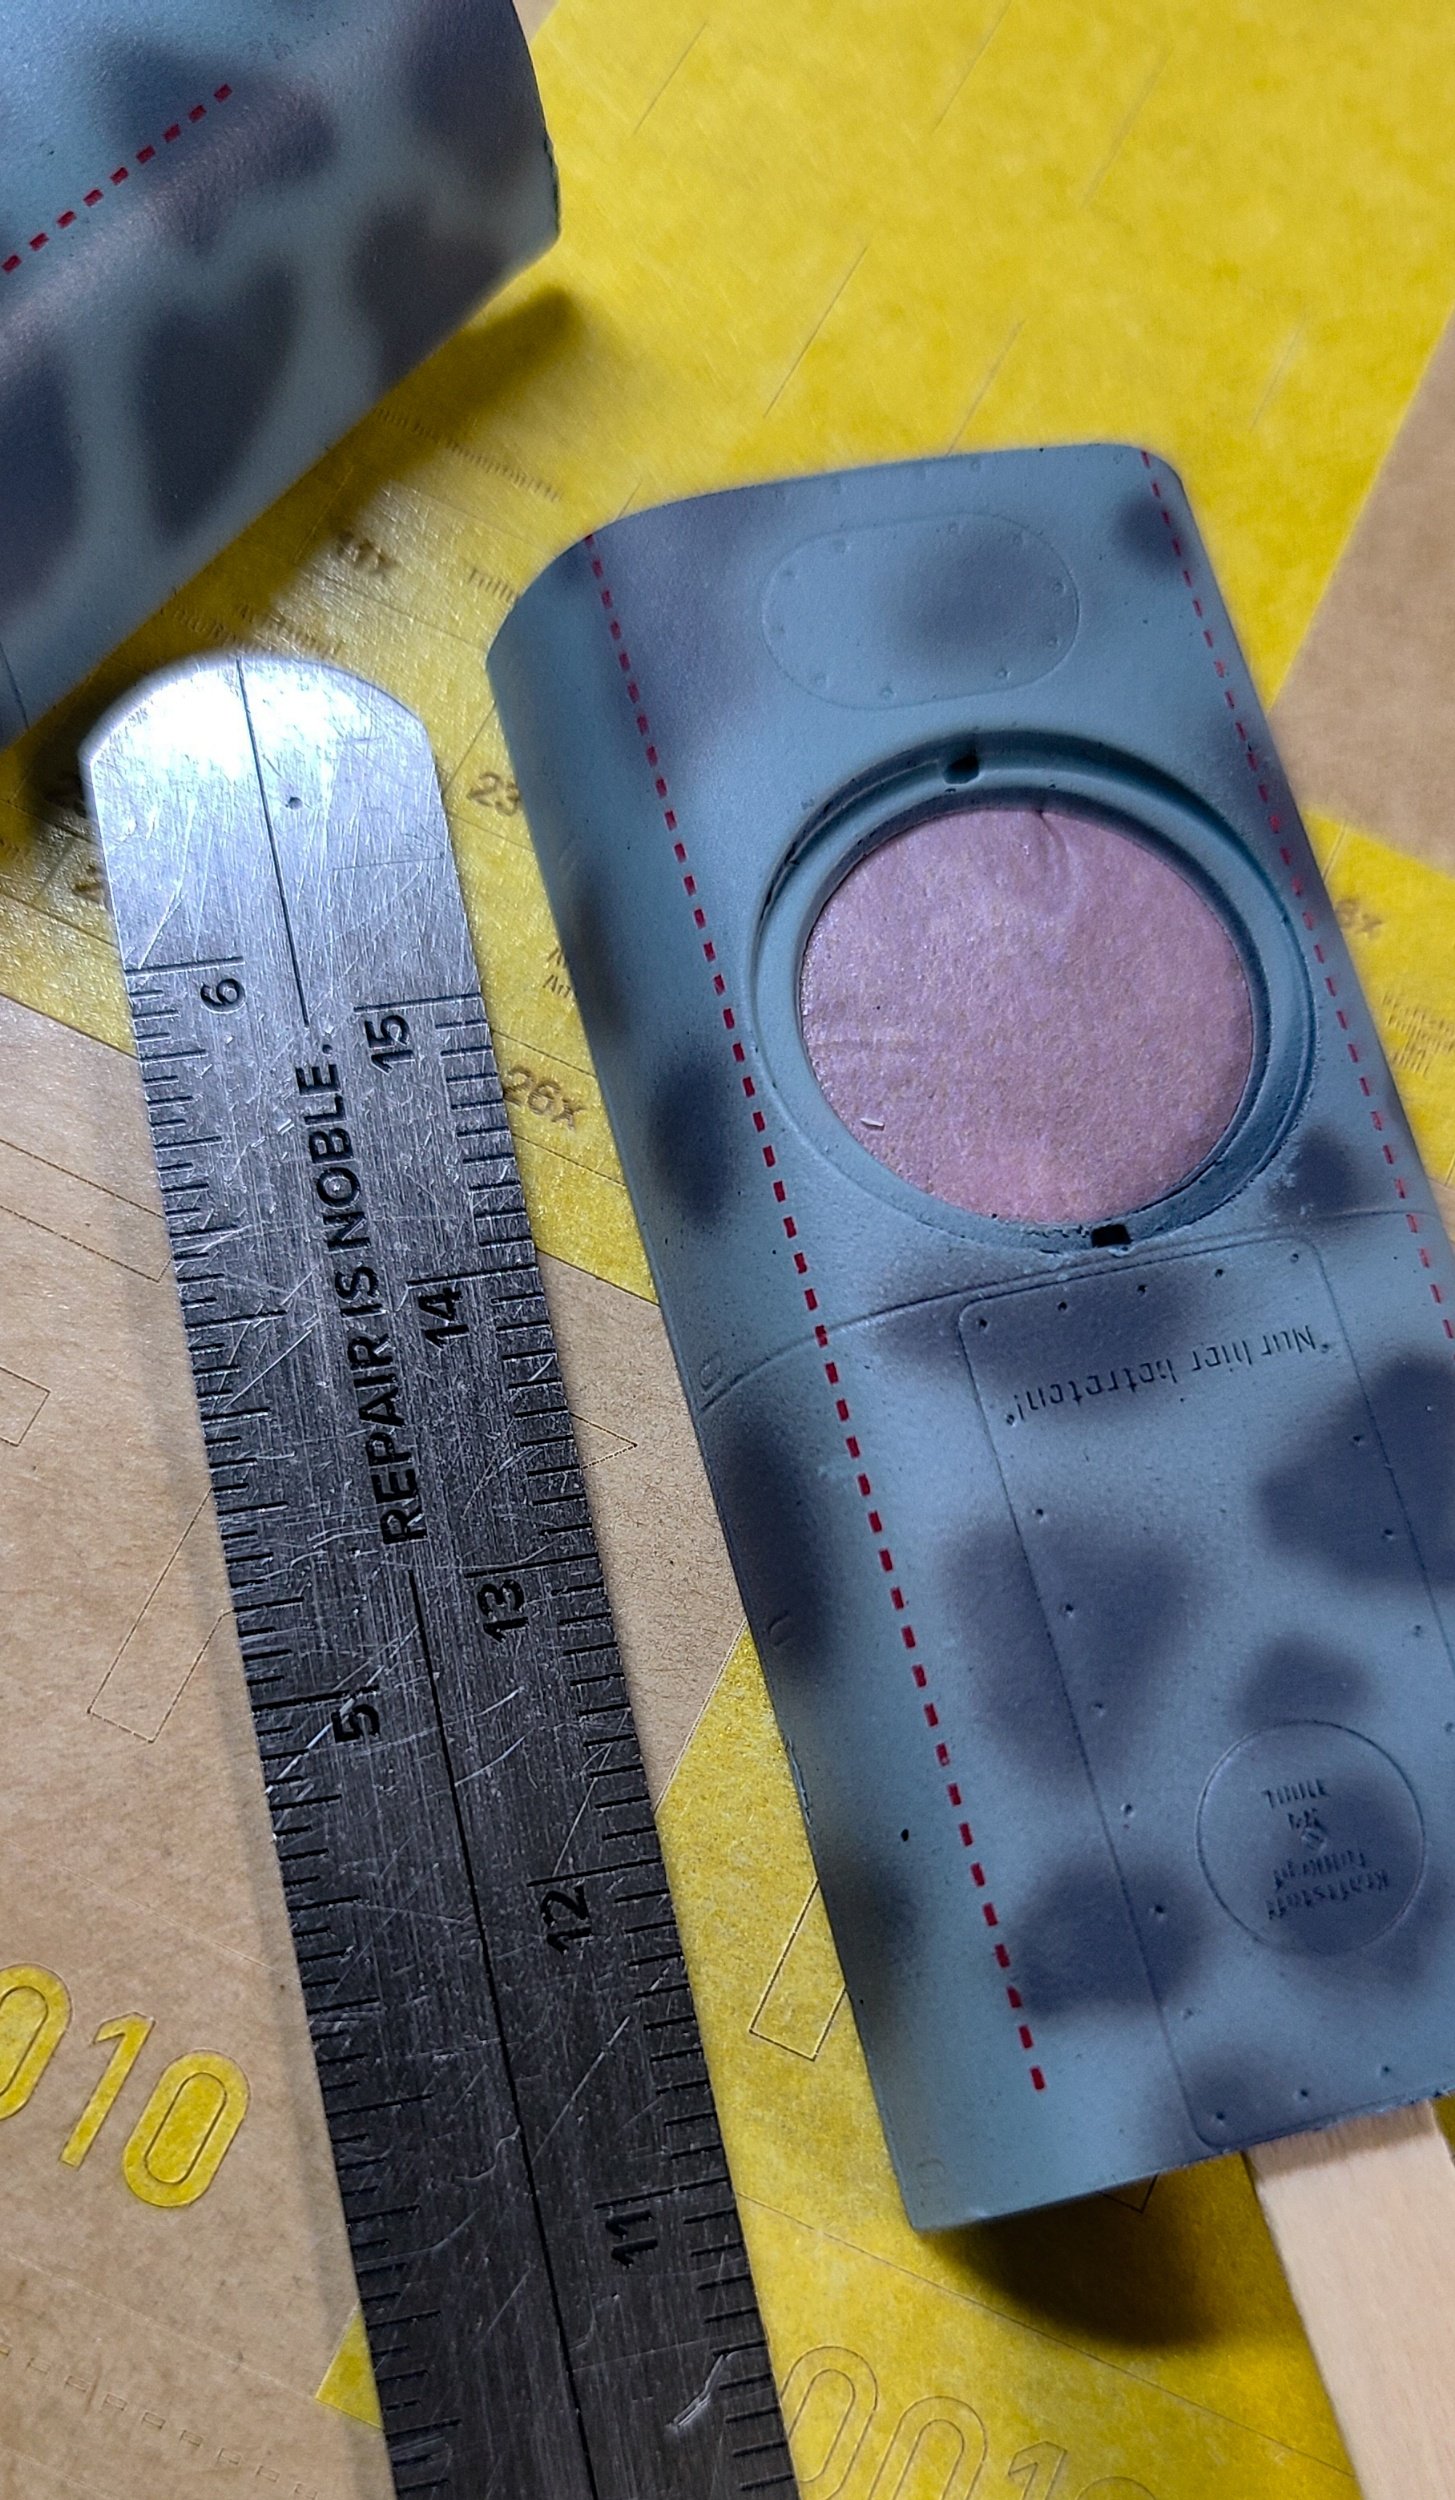
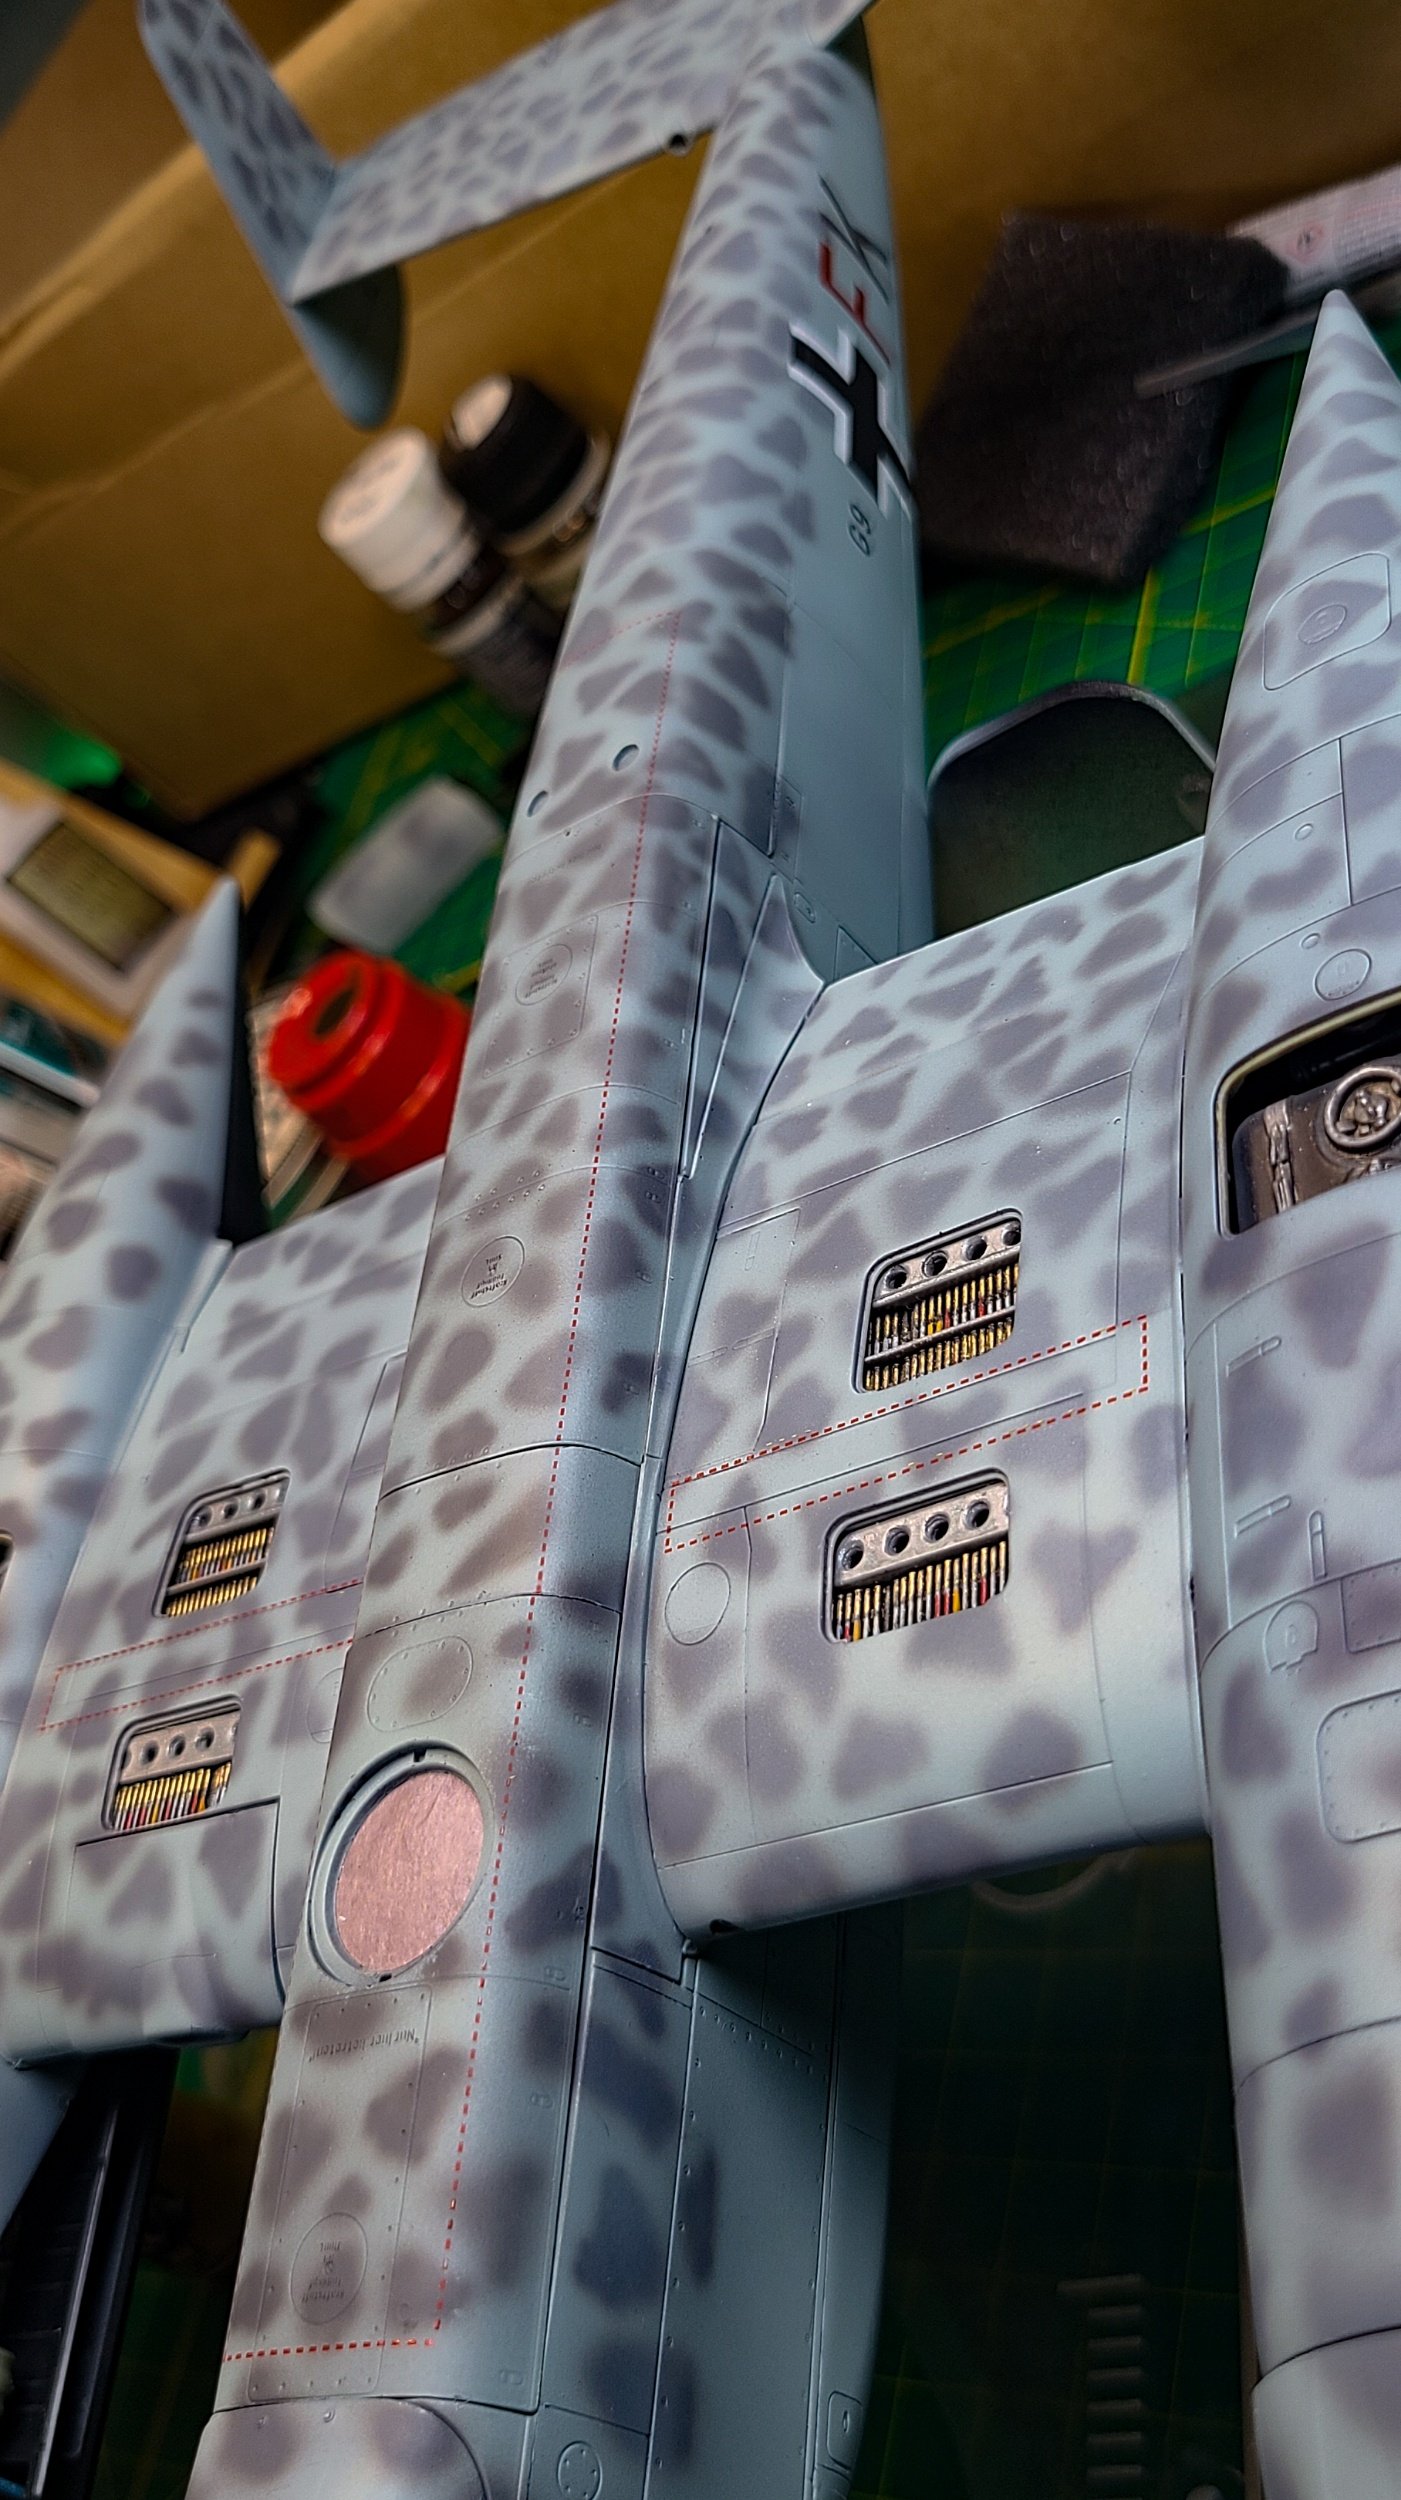
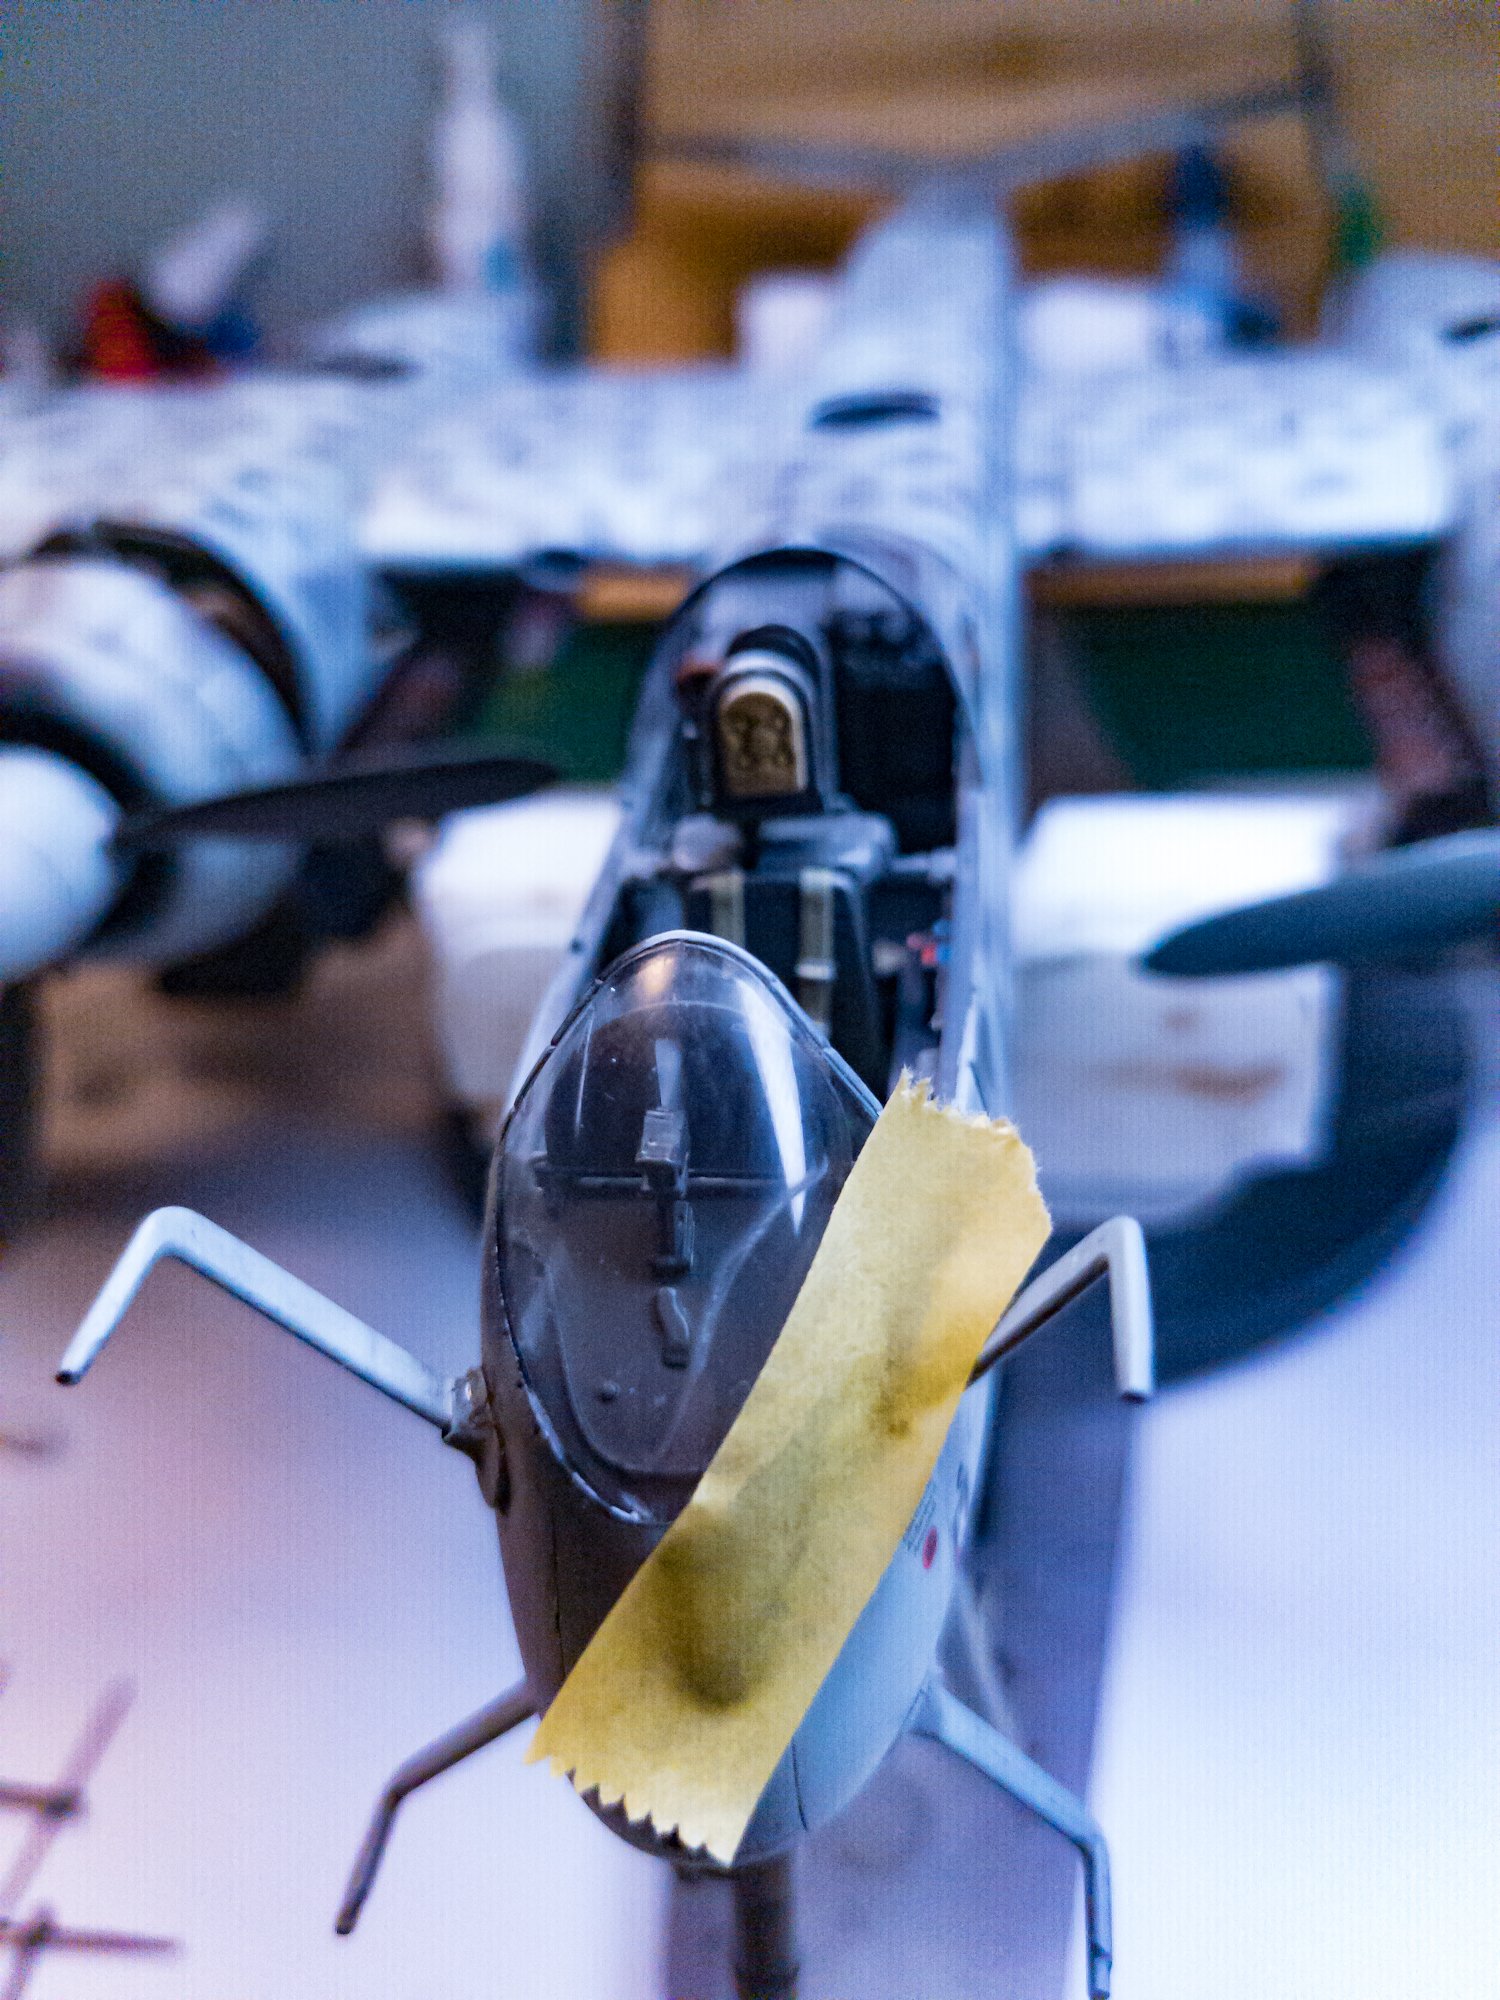
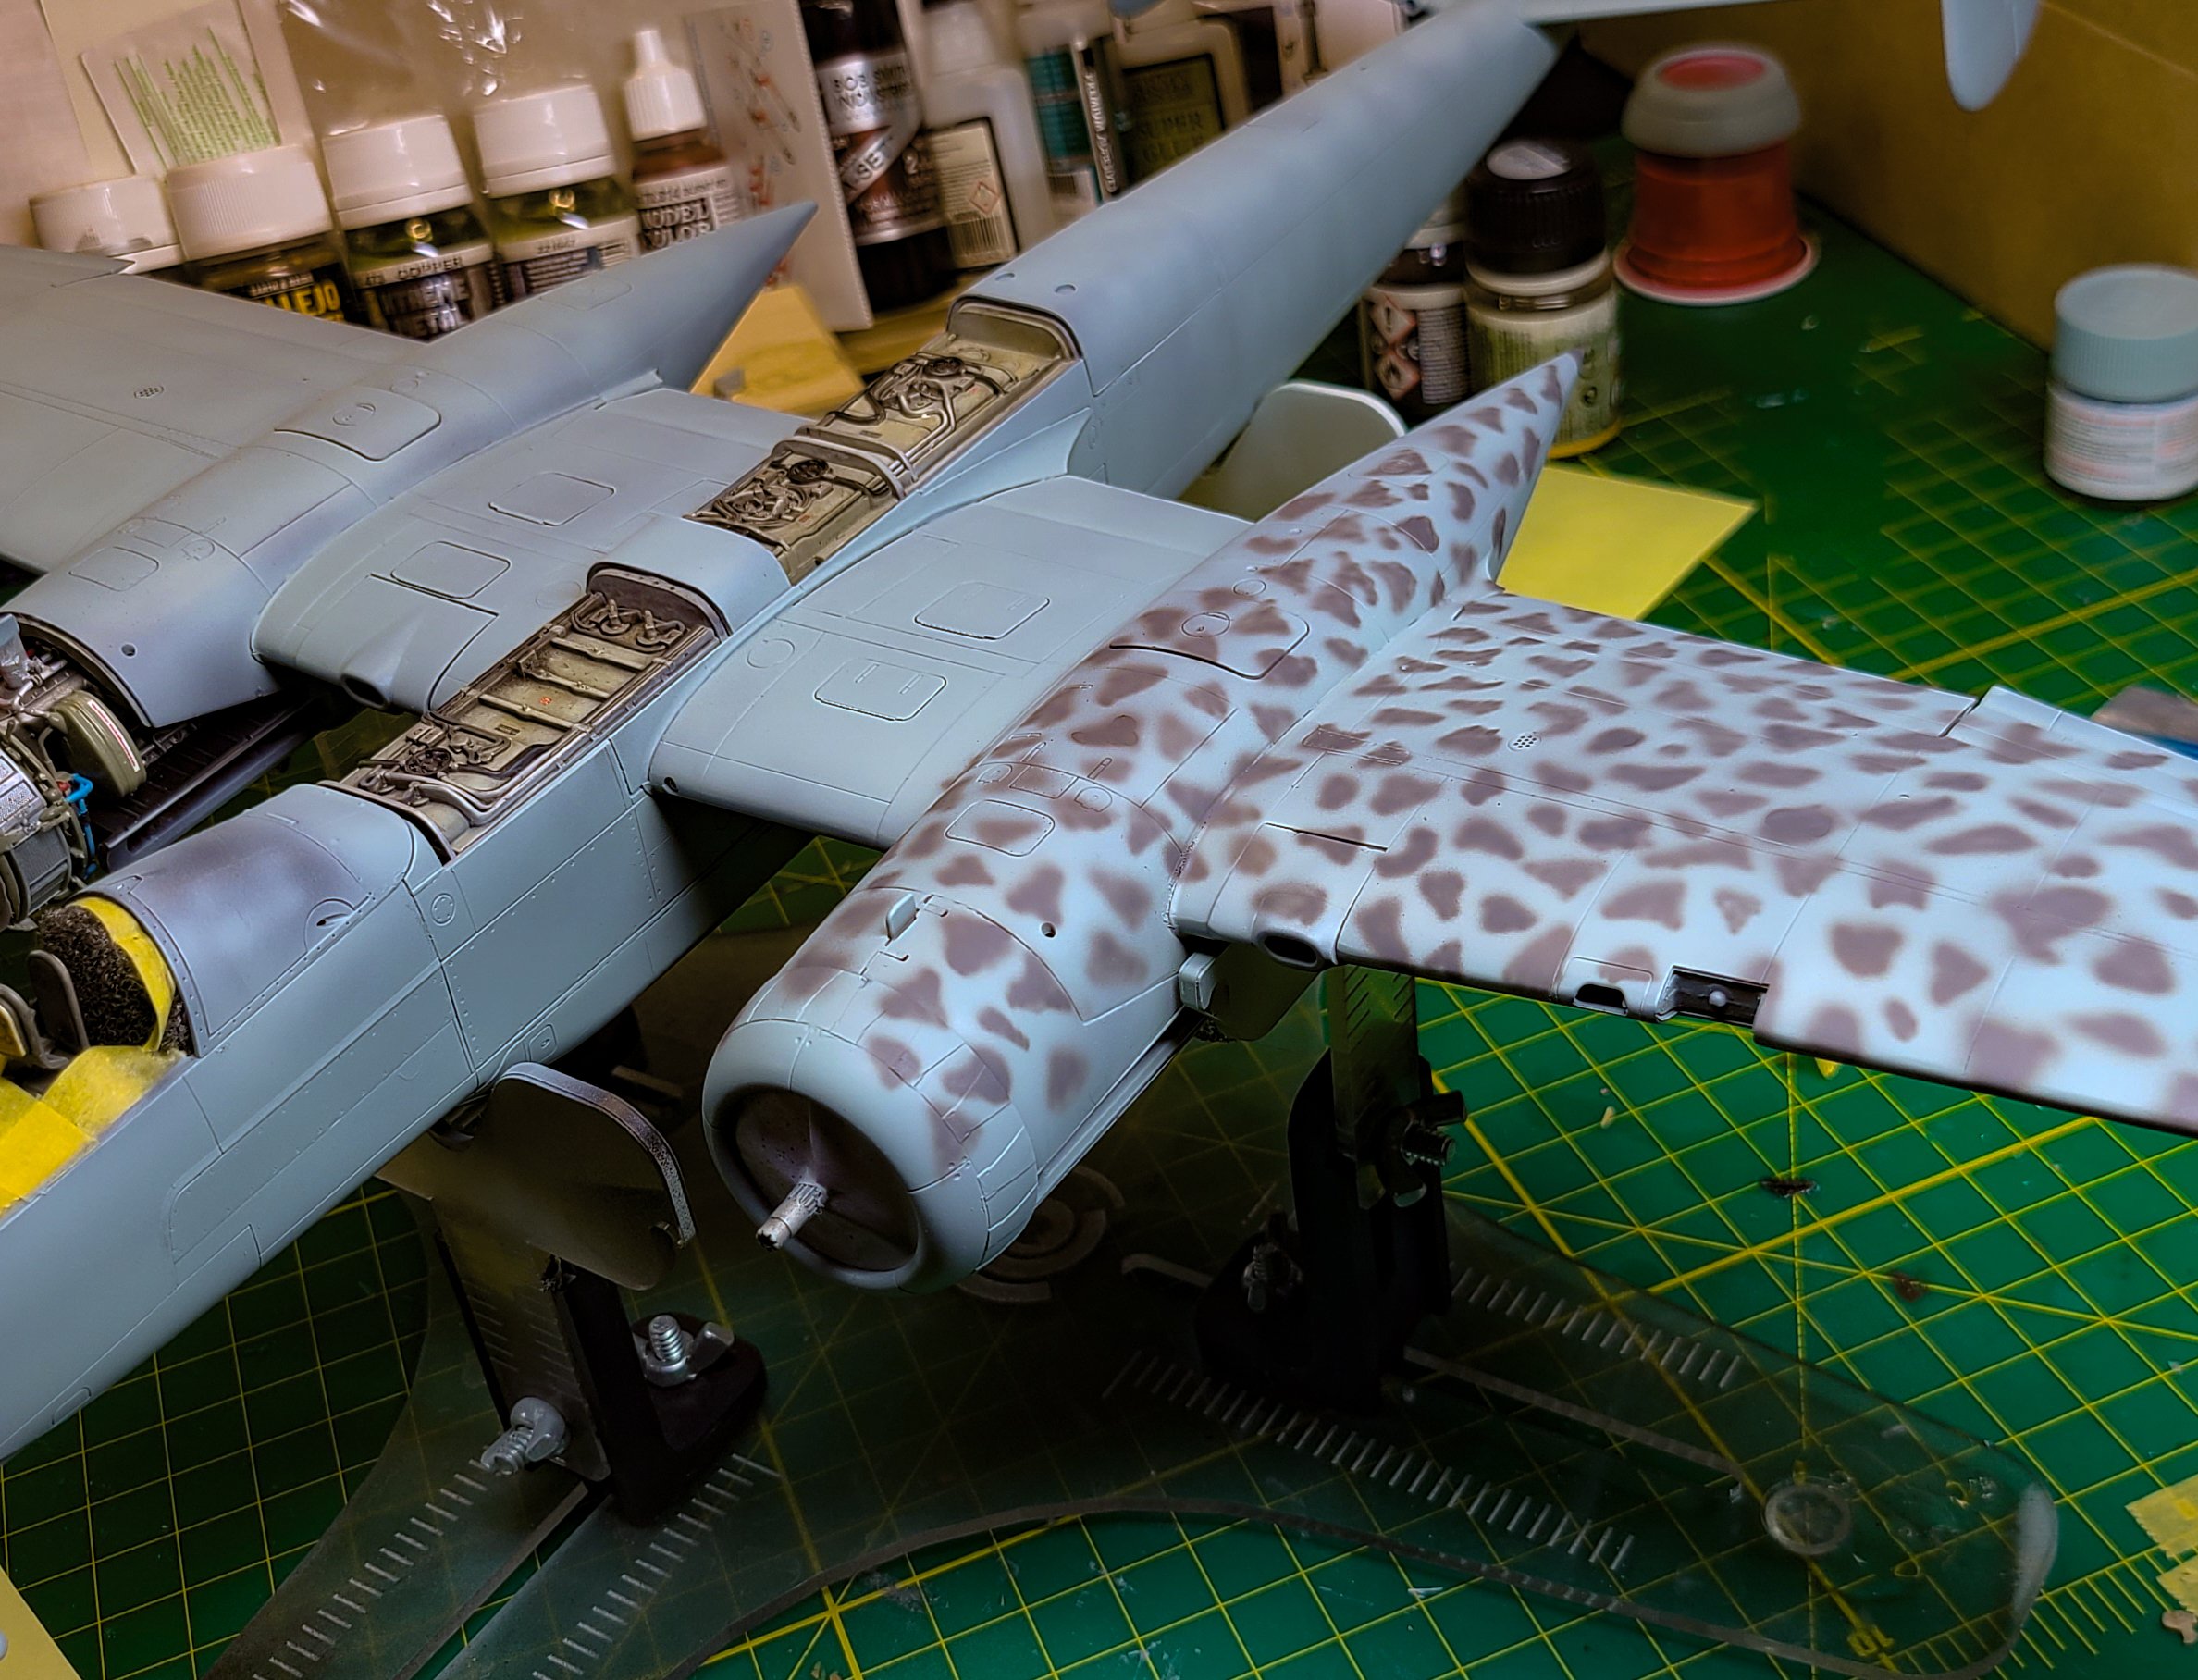
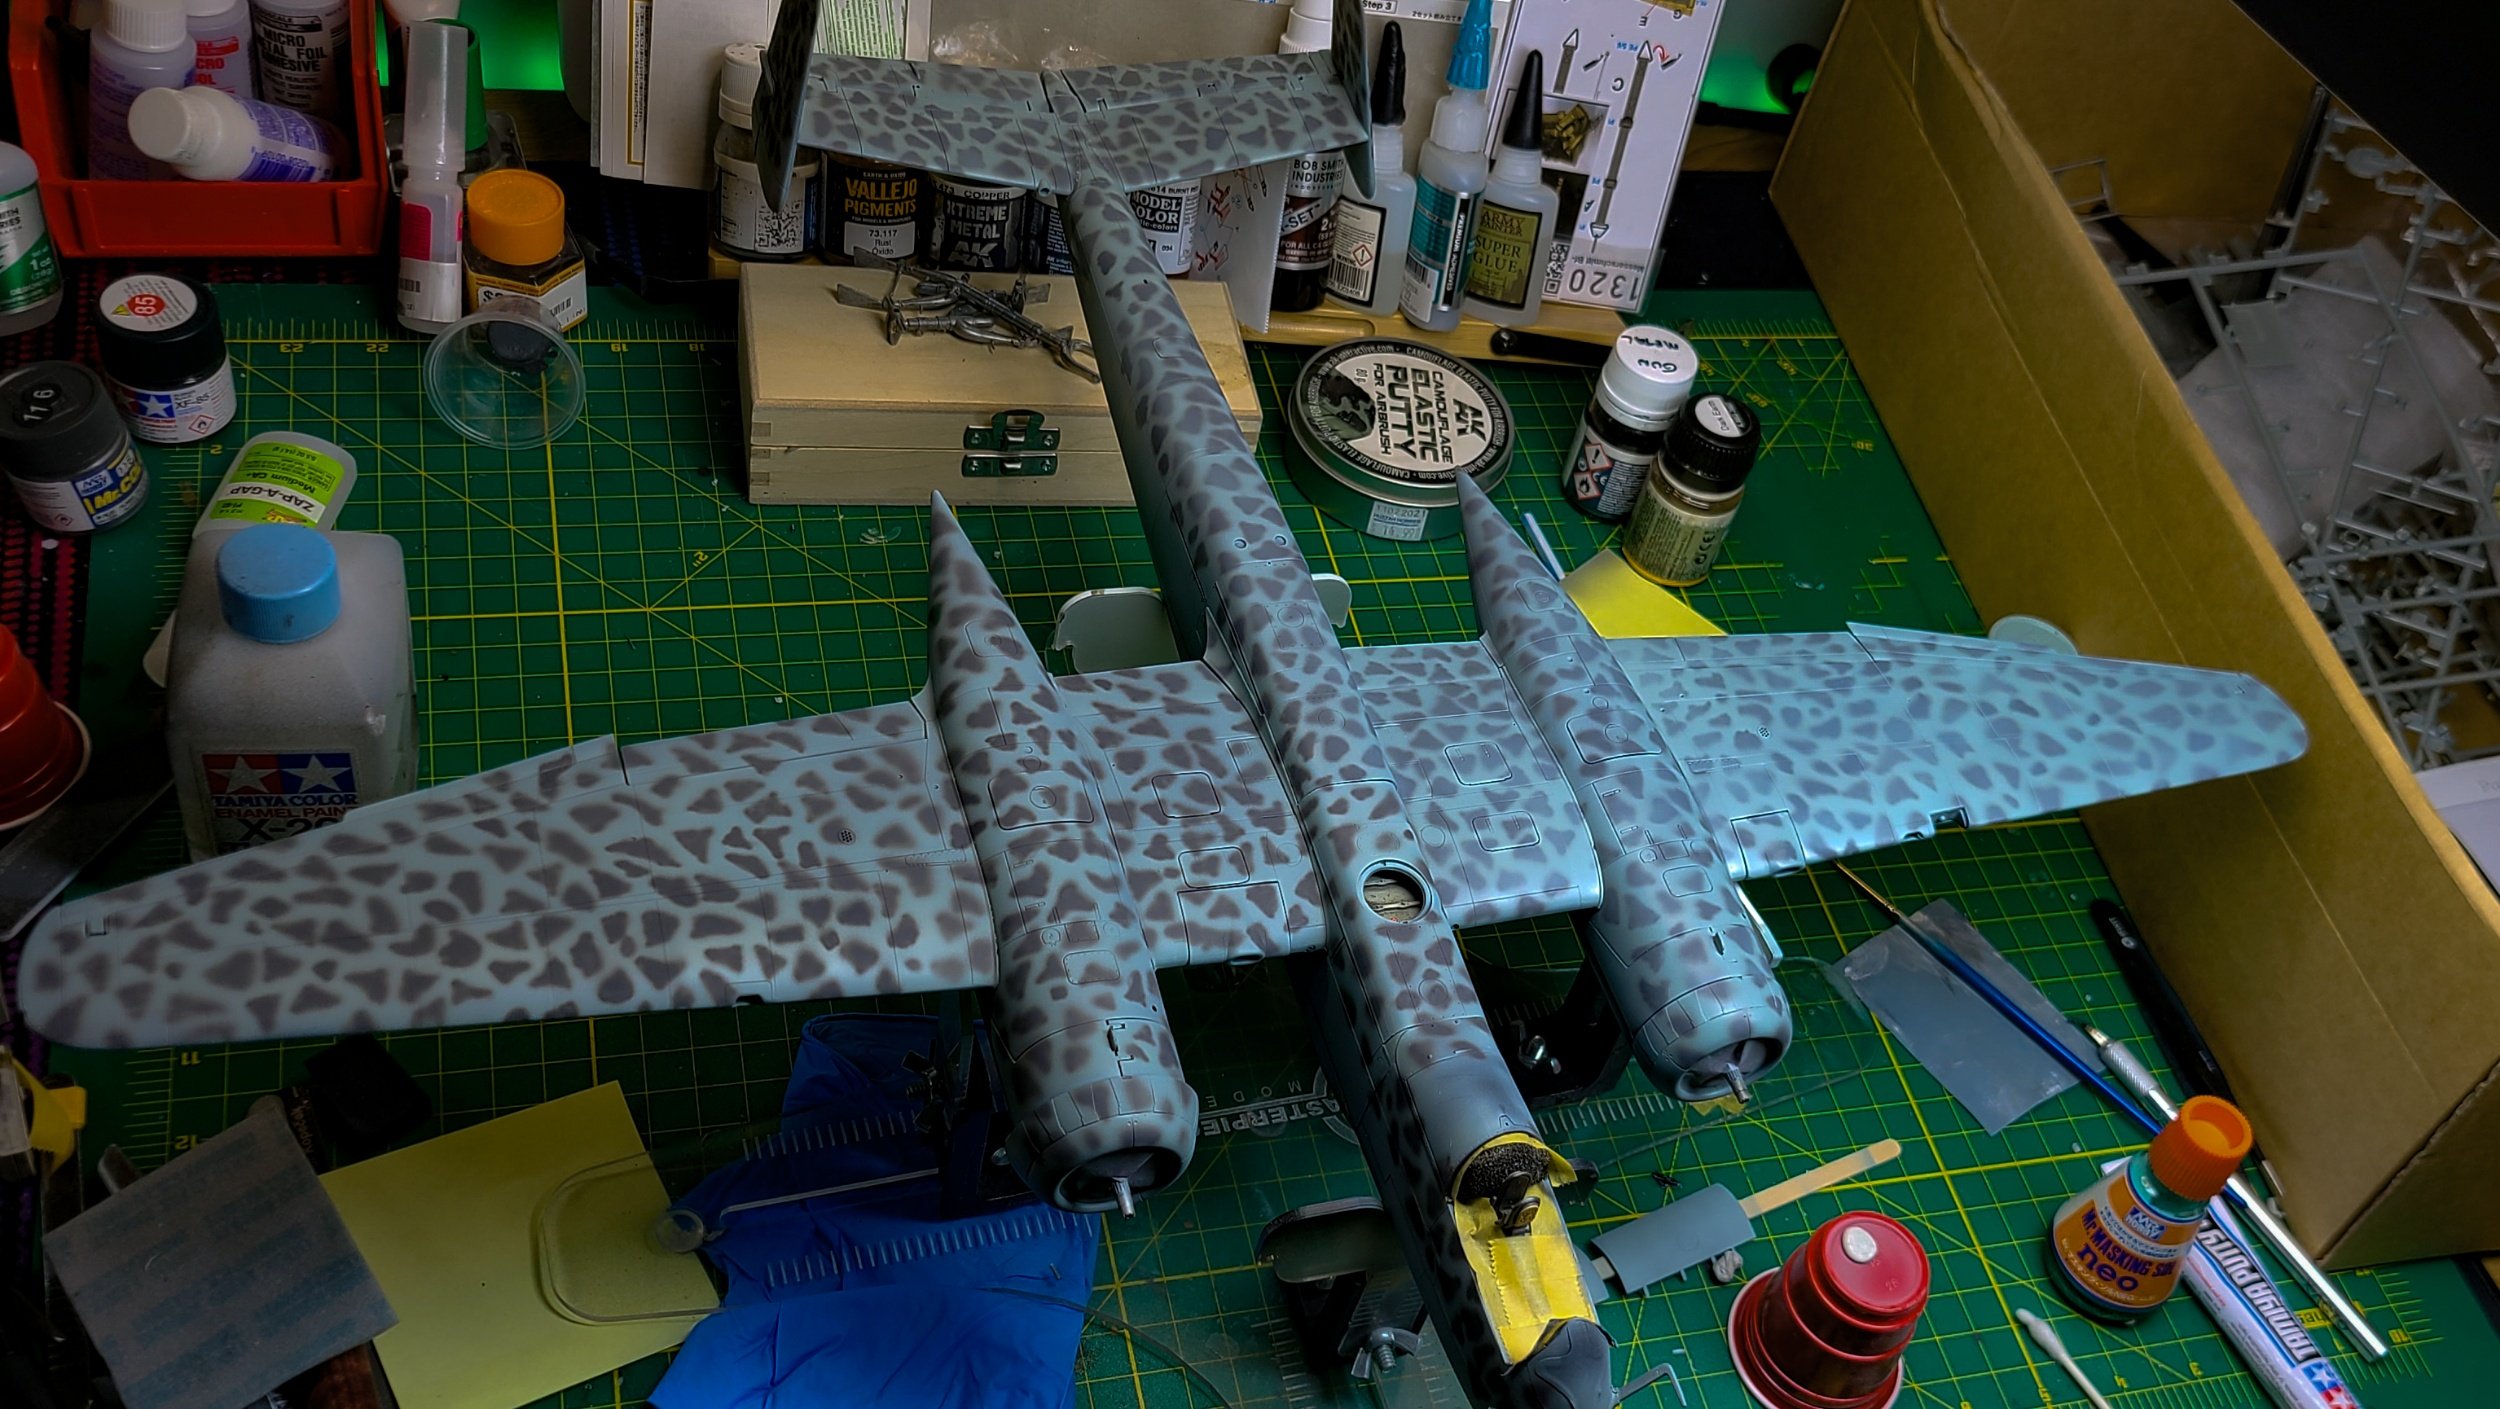
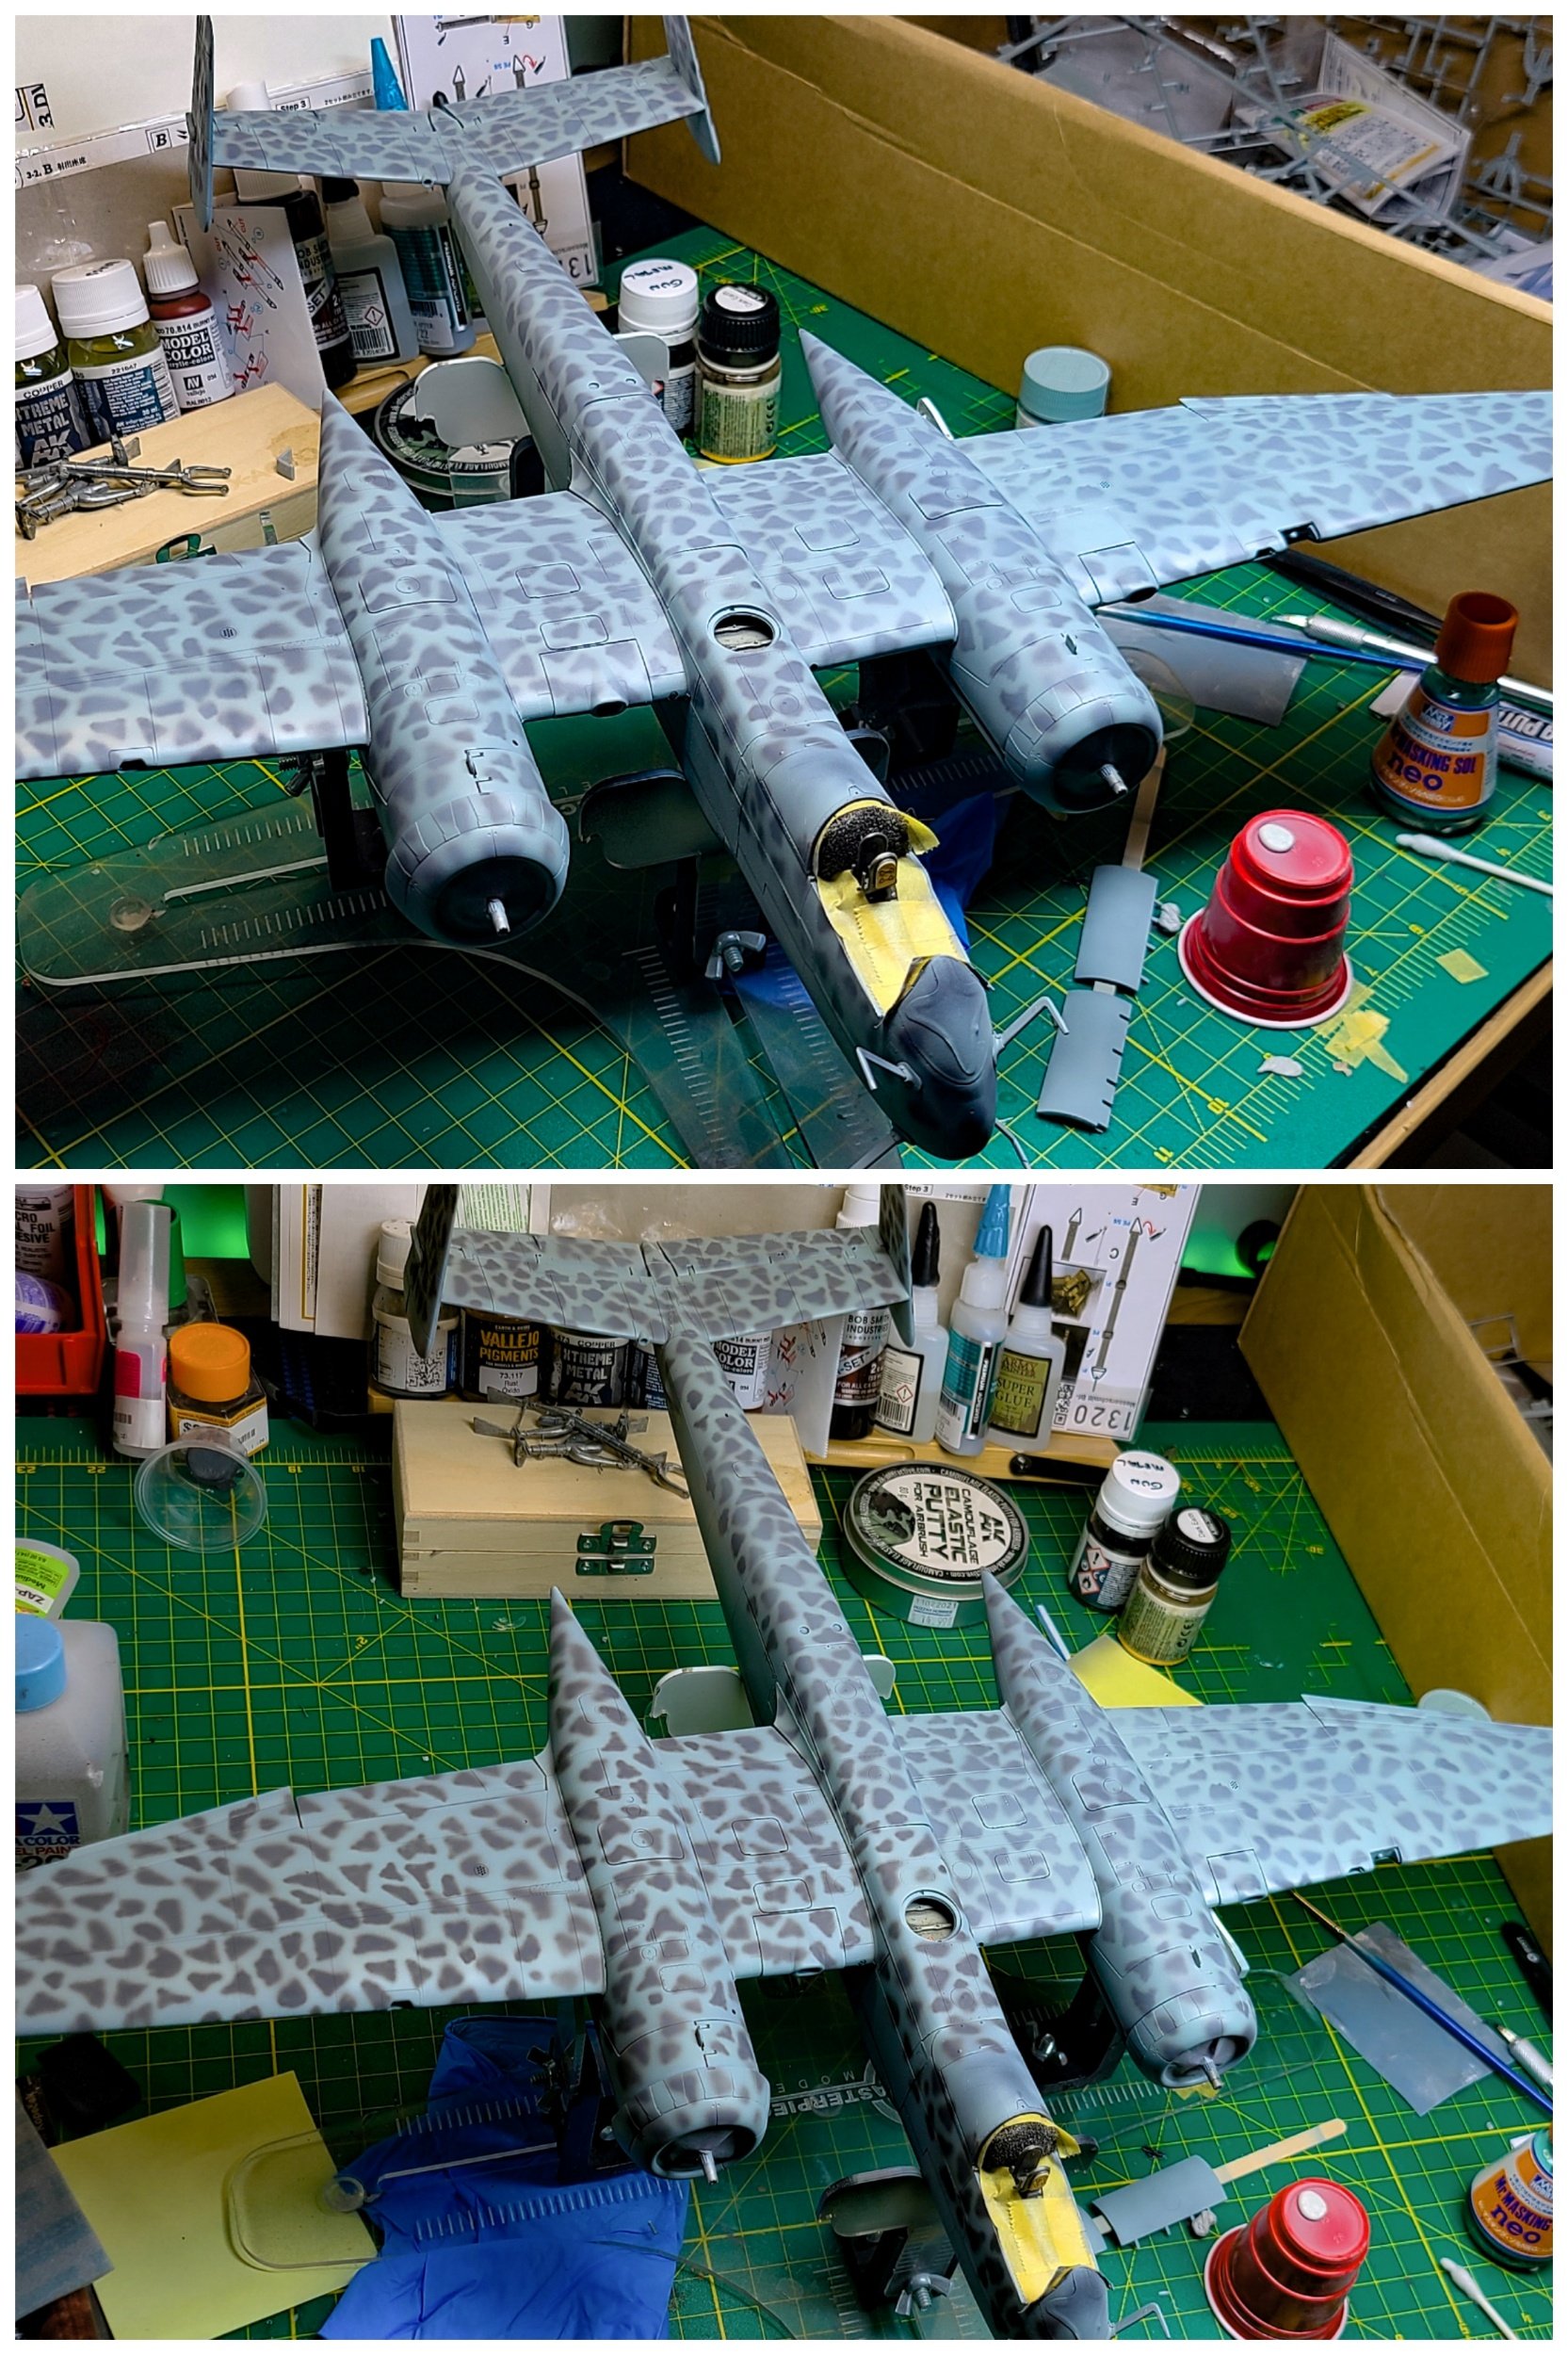
First shot at this mottling. It's not as good as I want but I'm making progress. You can see where I started on the outside part of the port wing and the pattern kinda sucked and then got better for a while and then went too fast near the tail. It's a bit more stained glass than mottle.
I'm in the process of "fading" the grey mottling with a light over-spray of the light blue heavily thinned (did the port wing). I'll probably repaint the port wing blue and redo the mottle but making progress. Took four hours or so. Also had to use some putty around the front windshield frame and will need to scribe it (totaly forgot while "mottling"). I also picked up 1 Man Army stencils...they do micro-stencils for text warnings and the like so going to give that a shot.