Tamiya 1/32 A6M2b Zero Model 21 (Zeke)
After I purchased the Tamiya 1/32 Corsair there was no question I had to balance the force…so I bought the A6M2b Zero (Zeke) as a companion piece.
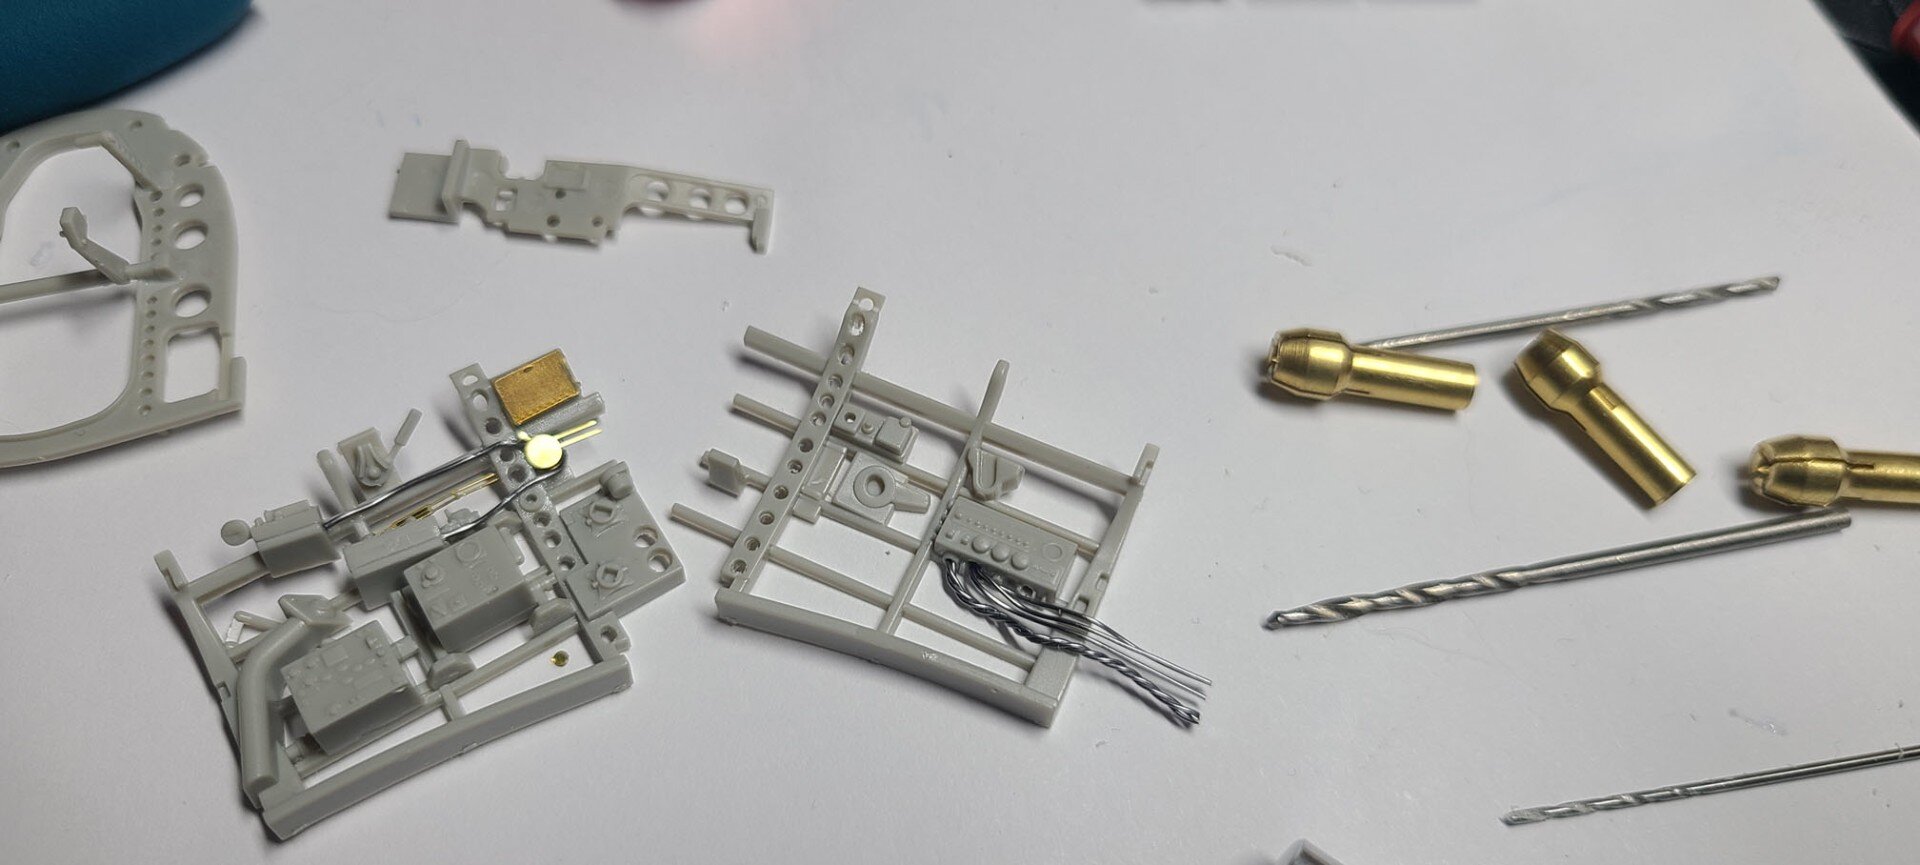
Overall kit is interesting but I think they made a mistake w/retractable gear and all the moving parts...it takes away from detailing and it's a janky setup (so far). The elevators droop and the wheel pants are flimsy and tend to come apart at times. Feel like they tried to do too much and IMHO takes away from the detail they could have put in the kit but didn't. It's also a PITA to get all of it working perfectly. and I suspect it breaks down a lot if you use it too much. I'll probably put it "flying" on the stand w/gear partially retracted. Extra bits: I bought some extra bits but decided against most of them...I will use some Eduard detail where I think it stands out, I bought an aftermarket mask to do the insignia but it's much more a clean build.
All that said, most of the construction aspects of this model are top-notch w/exceptions for thicker sprue’s and more than the usual amount (that is to say none) of flash and pin holes.
Tamiya, Mr Hobby, and Mr Color paint products and a small amount of PE from Eduard. I’m using Chris Wauchop’s guide here as well (I never said I was an original!).

The Japanese Zero
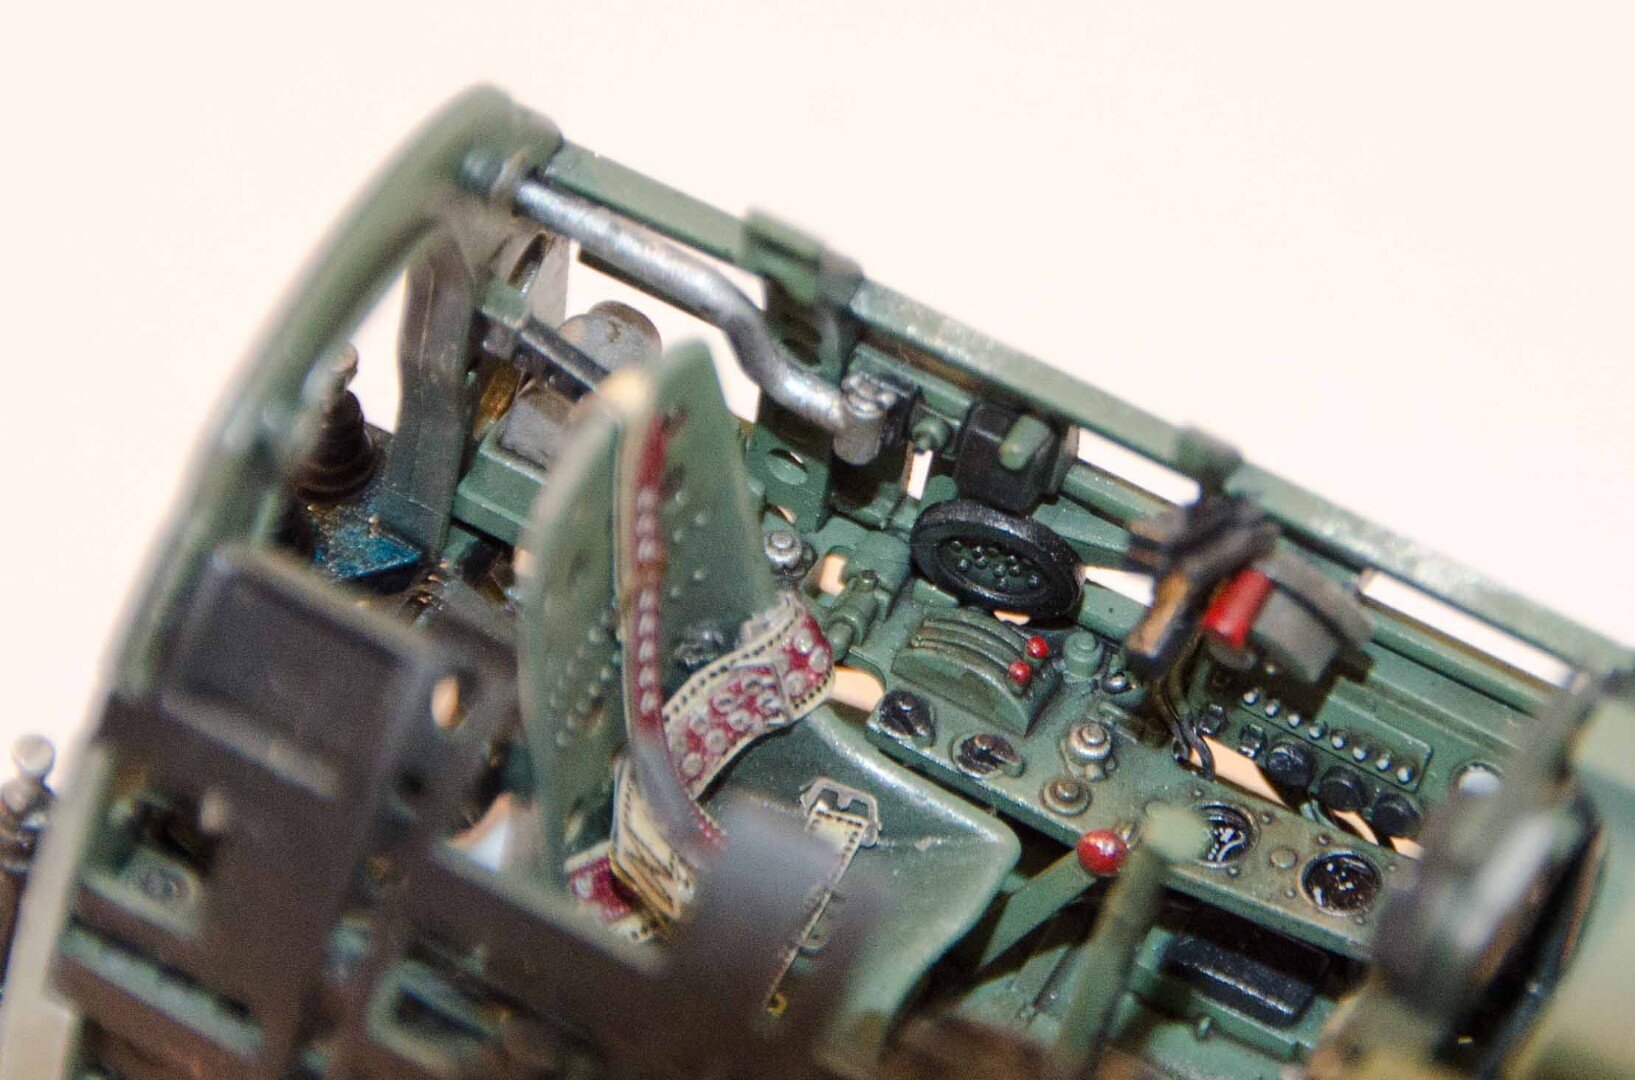
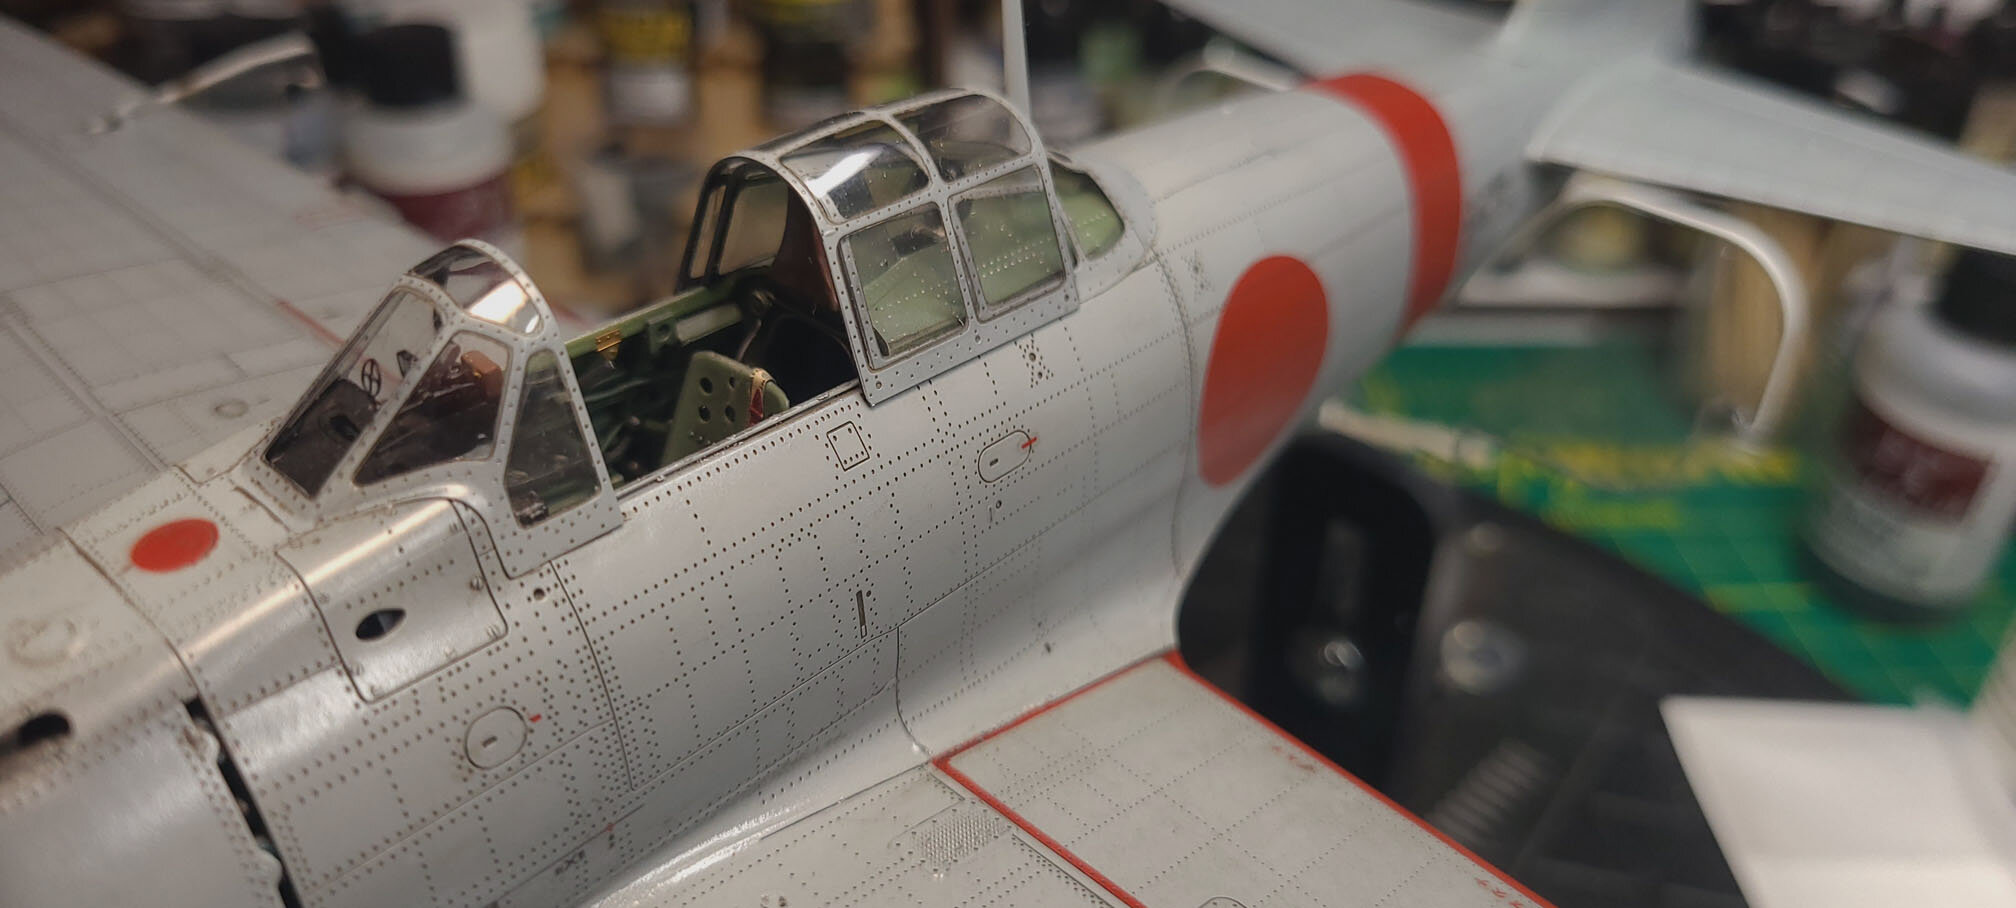
We Start at the Pilots Position
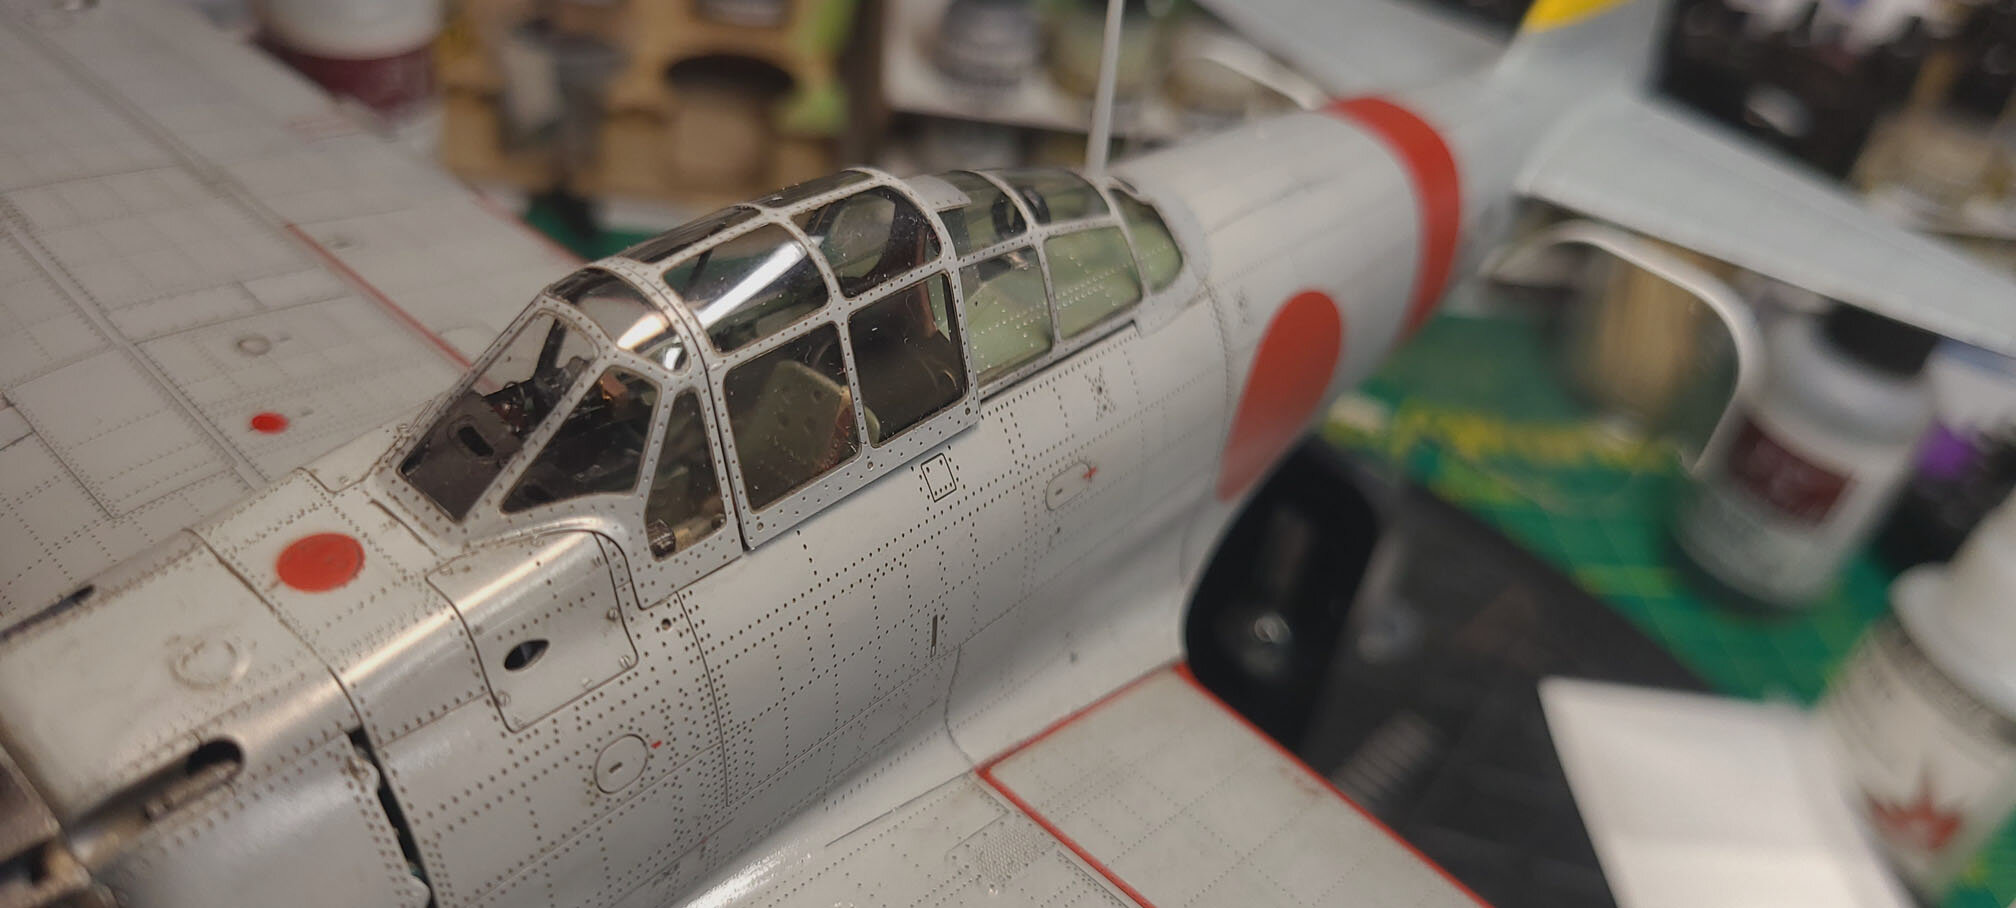
I used a few Eduard PE parts here but most of the detail was done with various widths of lead wiring. Not a lot of this can be seen once the aircraft is finished but as long as you do not build the pilot in, you’ll pick up some of the detail w/canopy back and using a strong light. Once I completed the basic parts build I finished the entire cockpit suit in Mr. Finisher 1500 and then followed the instructions w/cockpit green. When I spray the initial green colors on, I only spray from one direction and I use at least a 50-50 mix of paint to thinner…what I’m trying to do is artificially shadow some of the parts in there. Some modelers paint the cockpit thoroughly but then spray a lighter mix of the same color to do the same shading, just the “other” way. Either way is nice and reduces your need for a hard wash later on.
After painting the details I glossed it and used some Tamiya Panel Liner to add details.
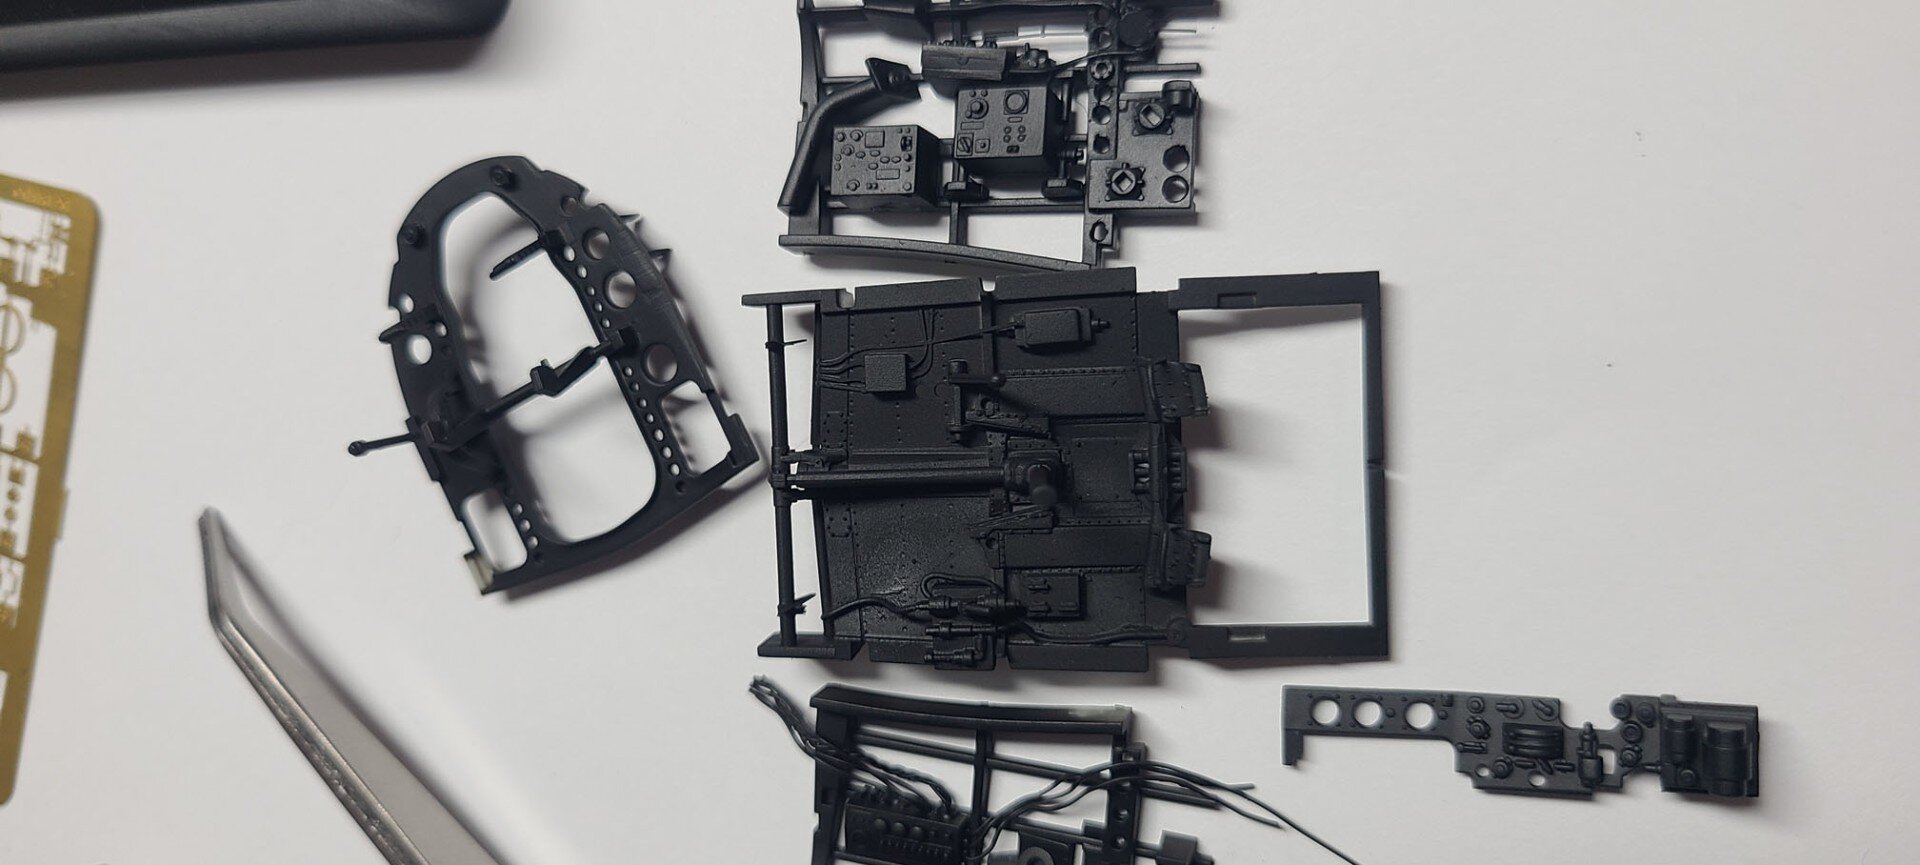
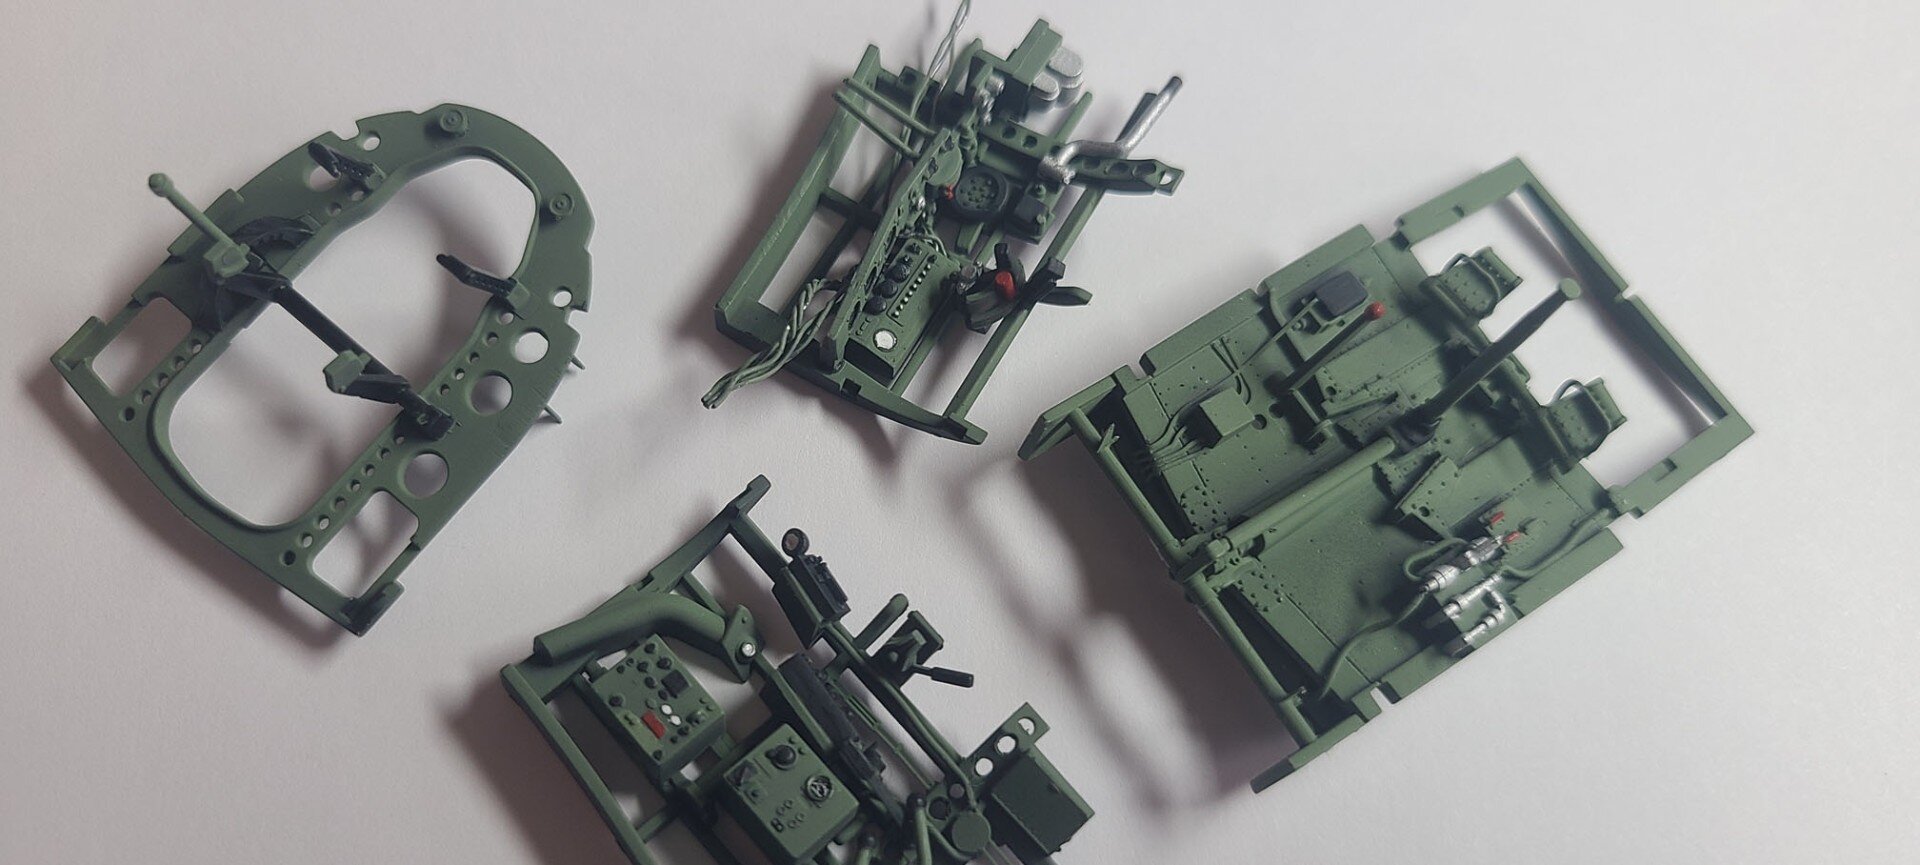
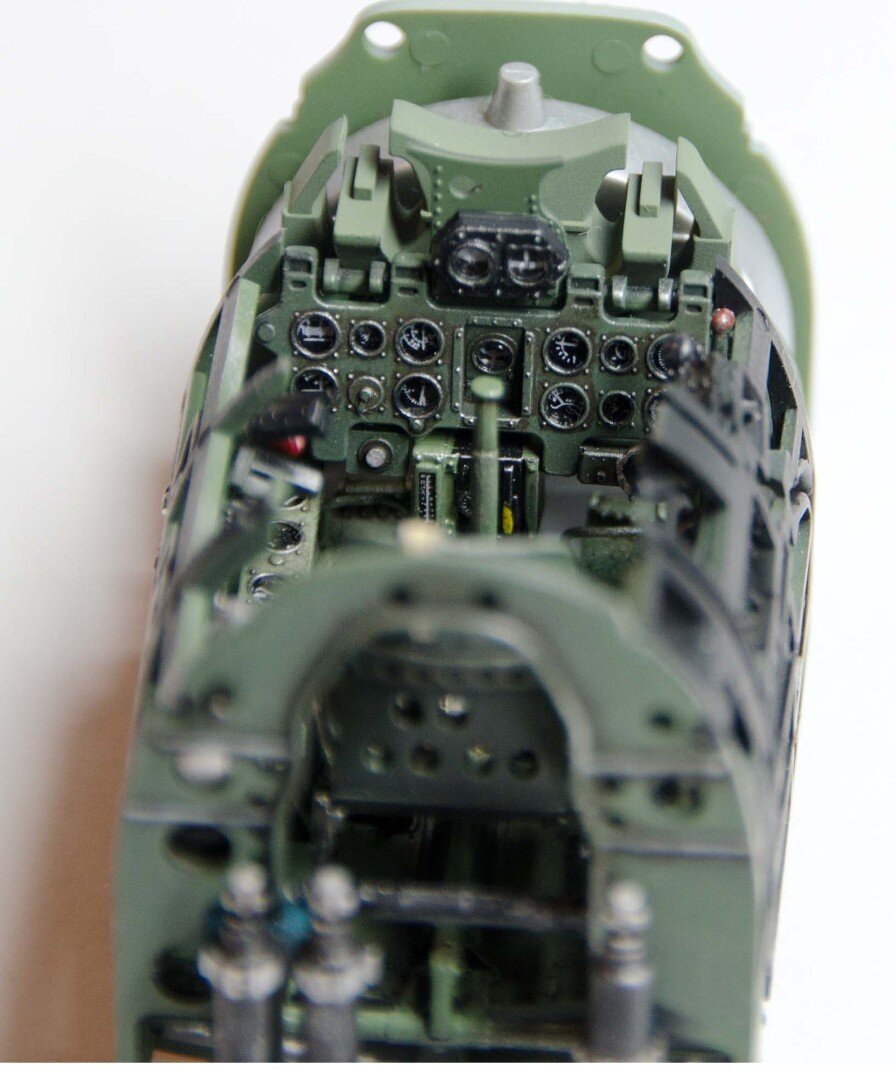
I used the Tamiya instrument panel and didn’t add any PE here…I thought the decals underneath the clear plastic worked just fine. What made the panel though was a light dash of Tamiya Brown Panel Liner wash. I also mostly paint the details w/nice Winston Series 7 0 (Zero) I’ve used for a year now. The metal part of the brush is slightly bent so I always know which one to use. You can see here I missed a little bit of paint on the left side panel…didn’t cover a few of the switched completely. The seat belt was the steel one that came w/kit.

Tamiya Cockpits are outstanding
But damn tiny work is hard on the eyes


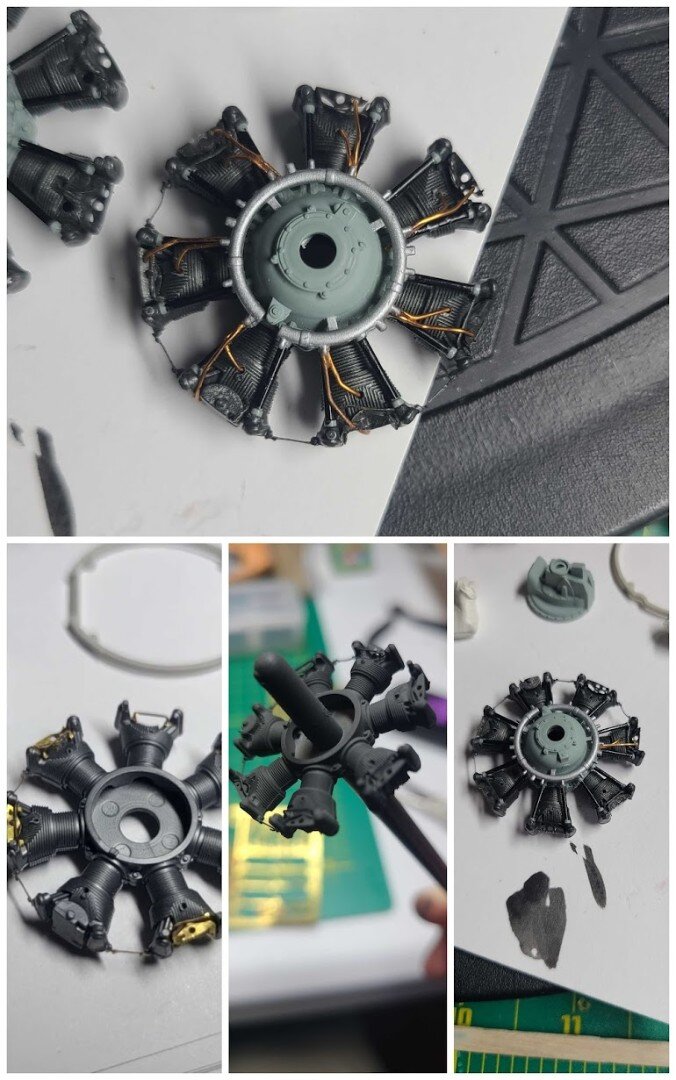
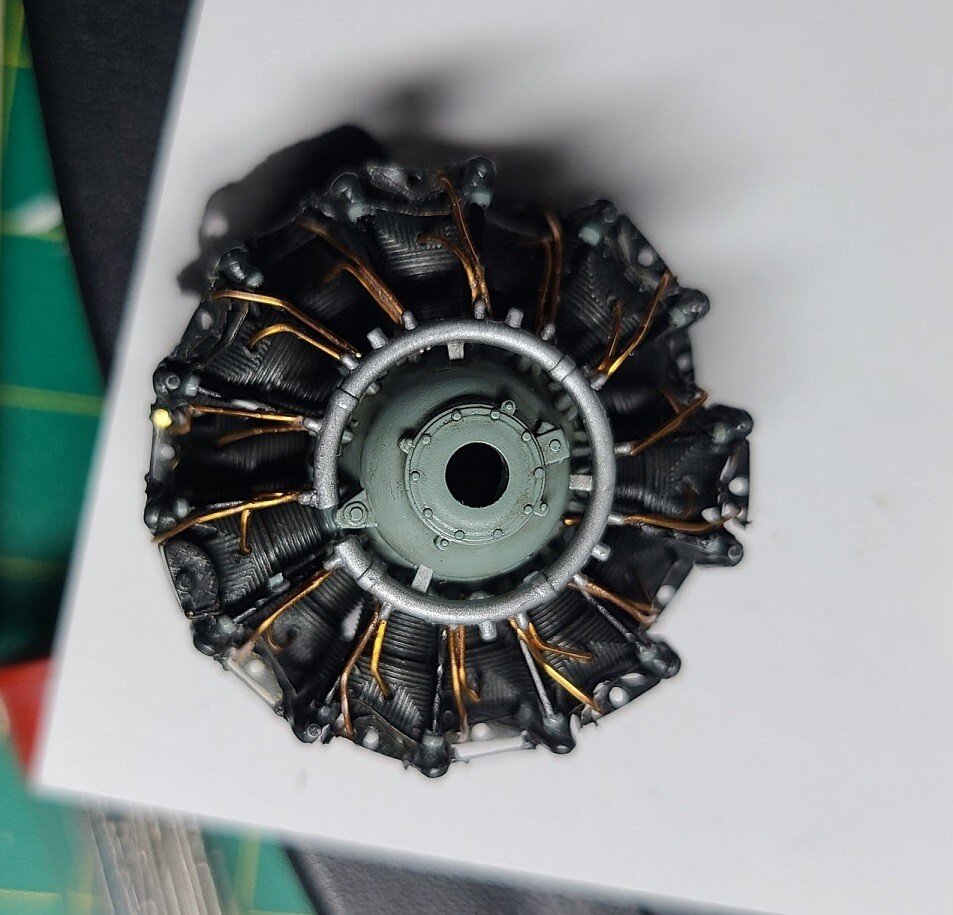
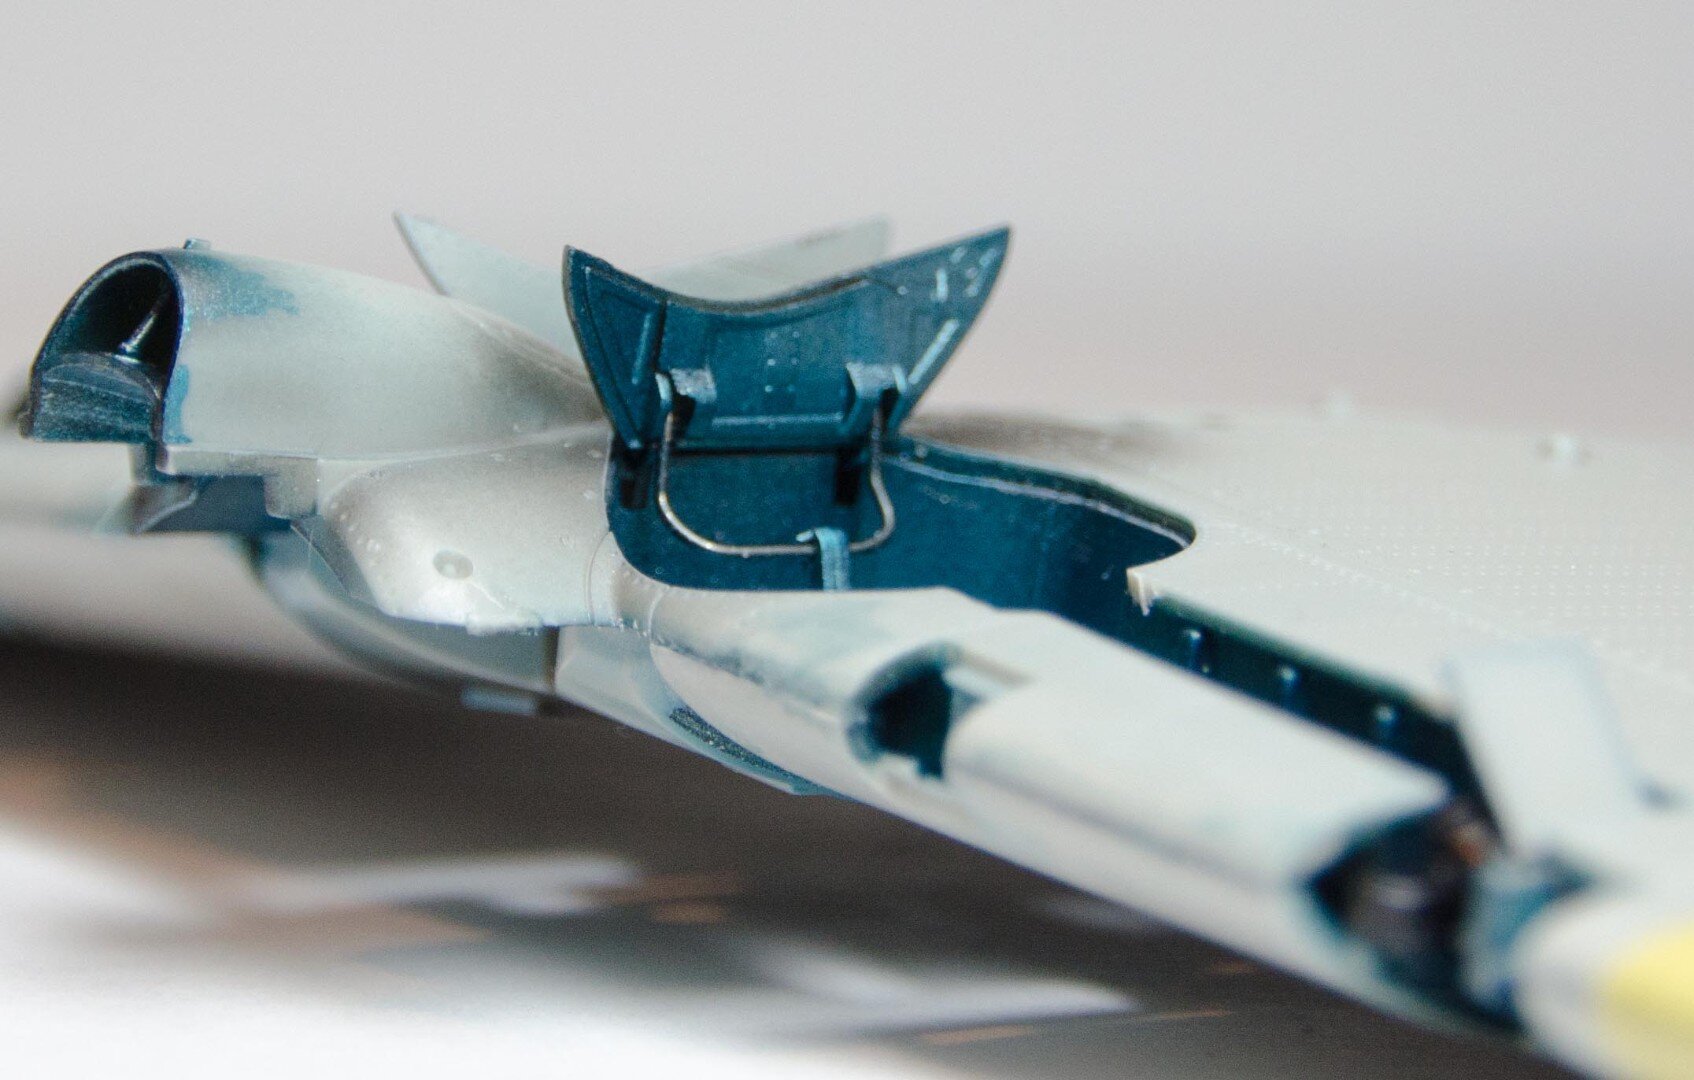
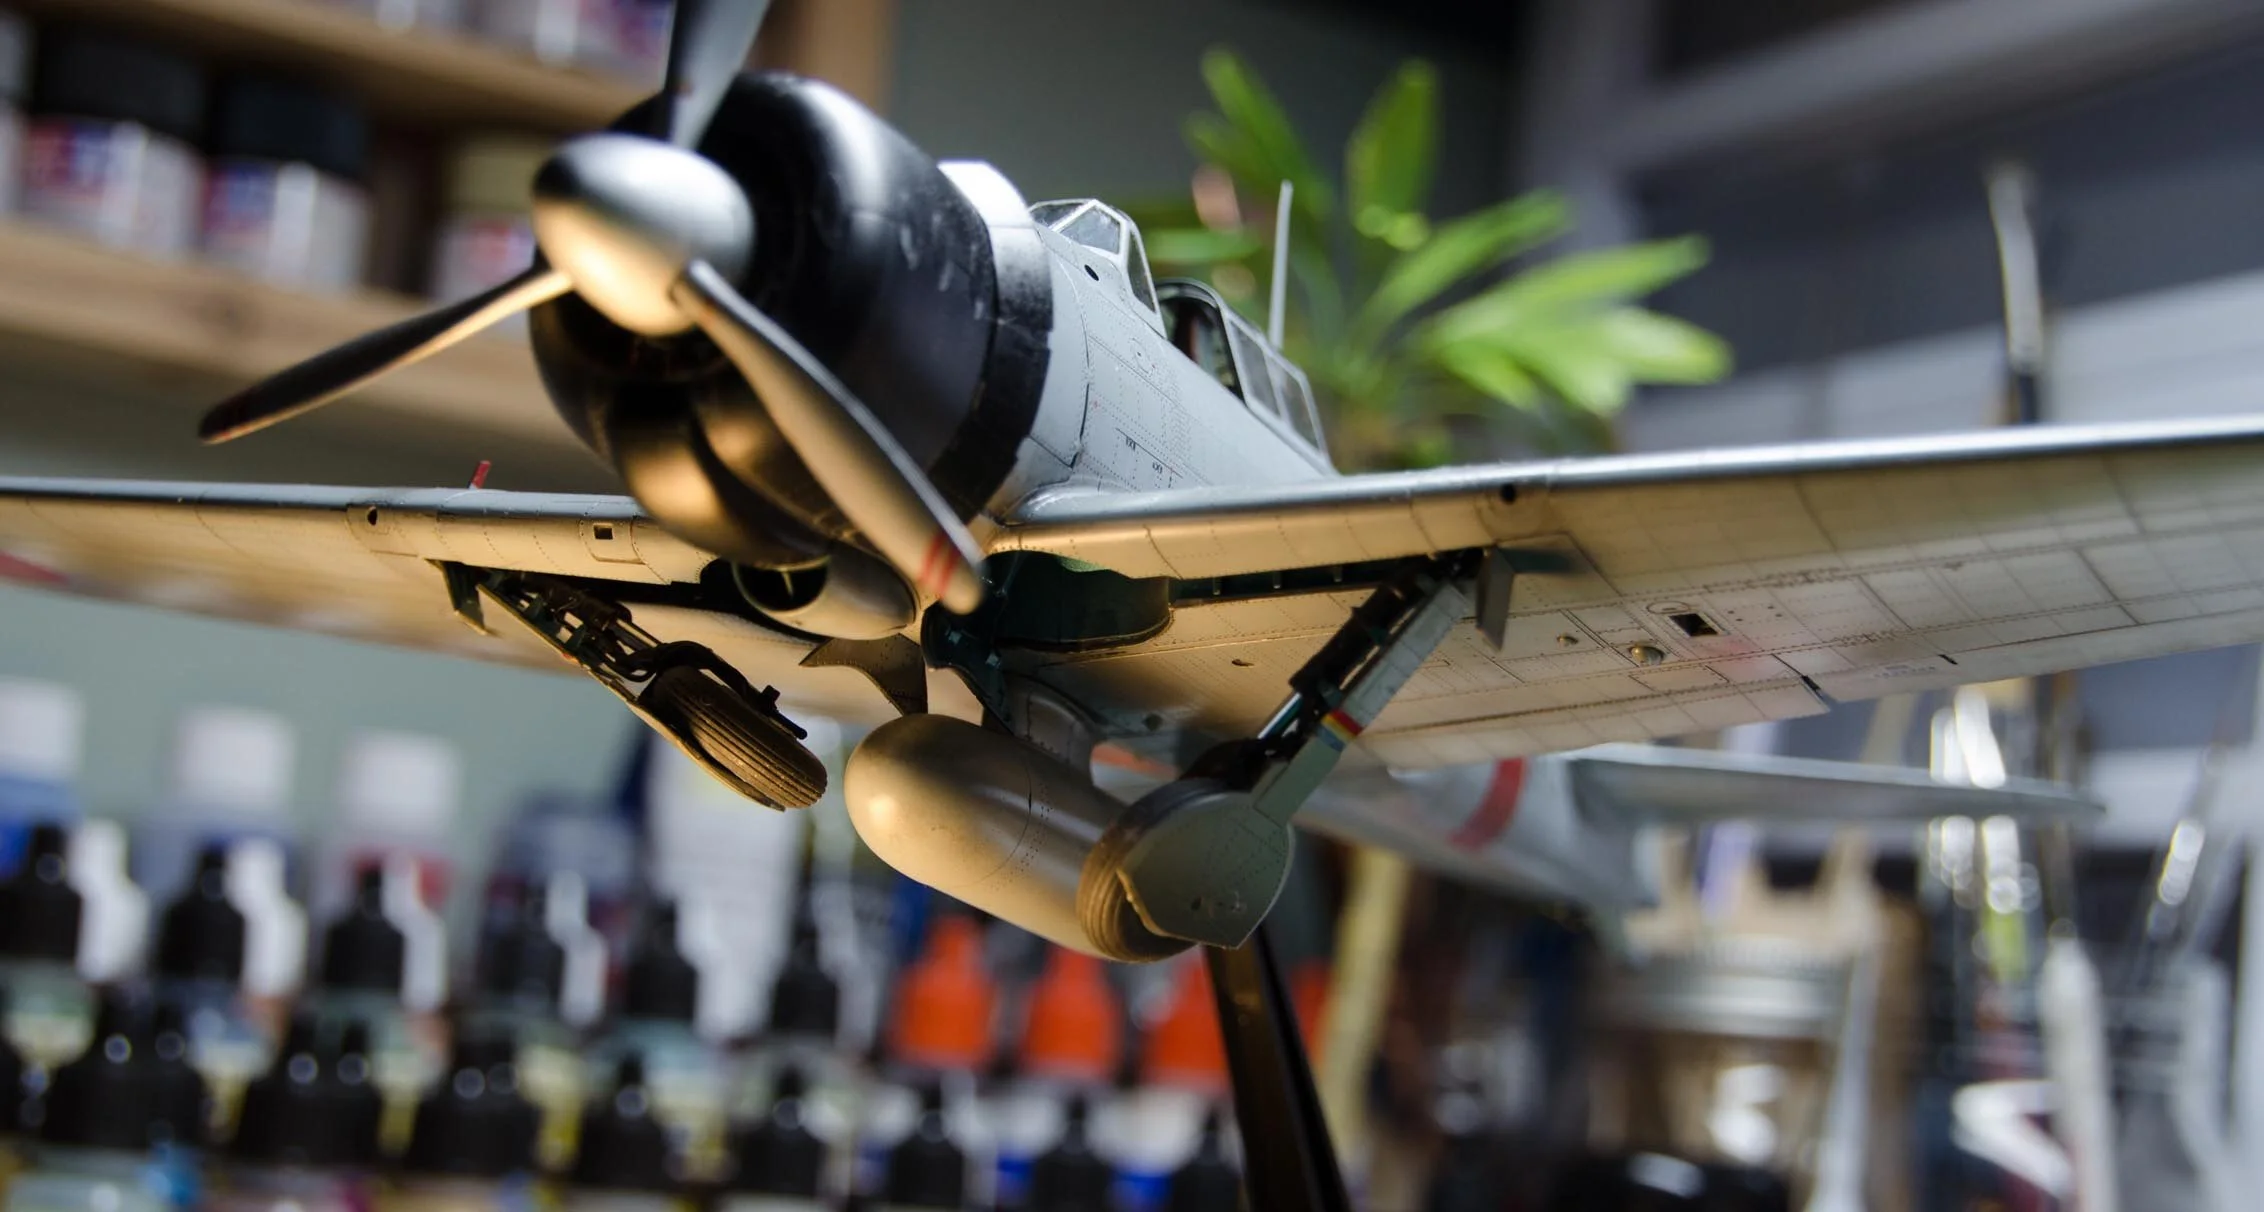
Engines are very detailed
I used a pin drill to drill all the ignition wires and ran a single wire through each piston and back to the ignition ring (or whatever it’s called). These are the same copper wires I…requisitioned…from an old led light set that had not worked in a few years. I did not take the time to drill each entry point on the ignition ring like I did w/Corsair because I was lazy and wanted to get on with it. It looks ok from the front but don’t look to close from the sides…
The other detail was a Eduard PE set for the piston detail. It’s messy and I rushed the work…but a nice coat of black paint, with Tamiya panel liner and Vallejo Engine weathering effects (best oil/gas stain IMO) gave it a nice look. I also accidentally wore off some of the paint on the rings that the cowling attaches too…but it looked like natural weathering so I left it.
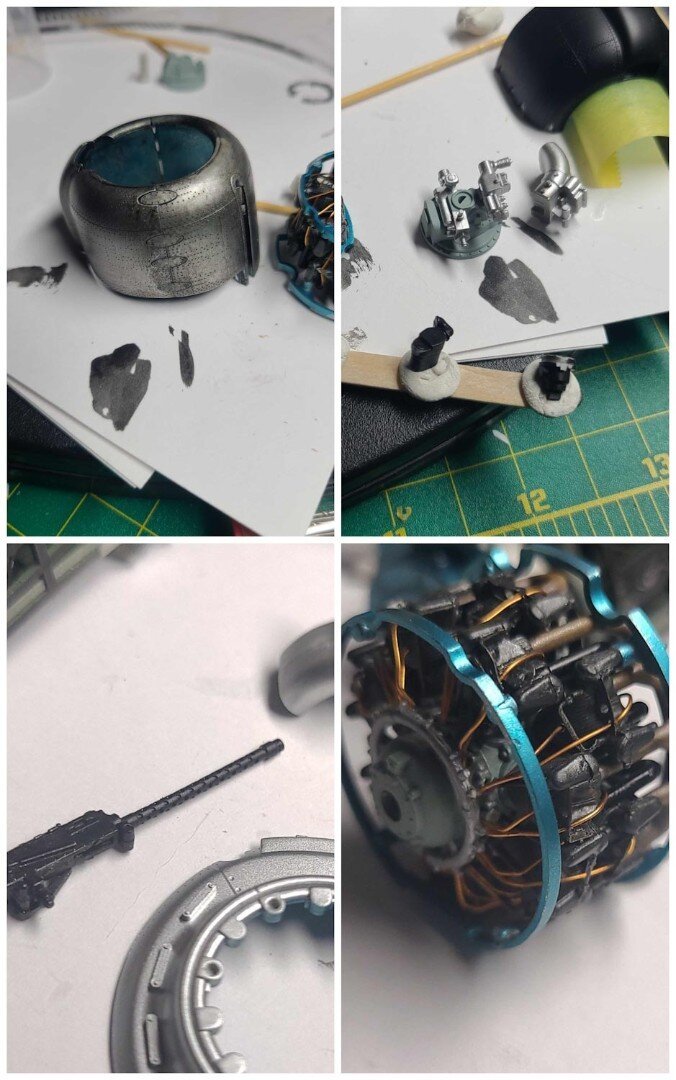

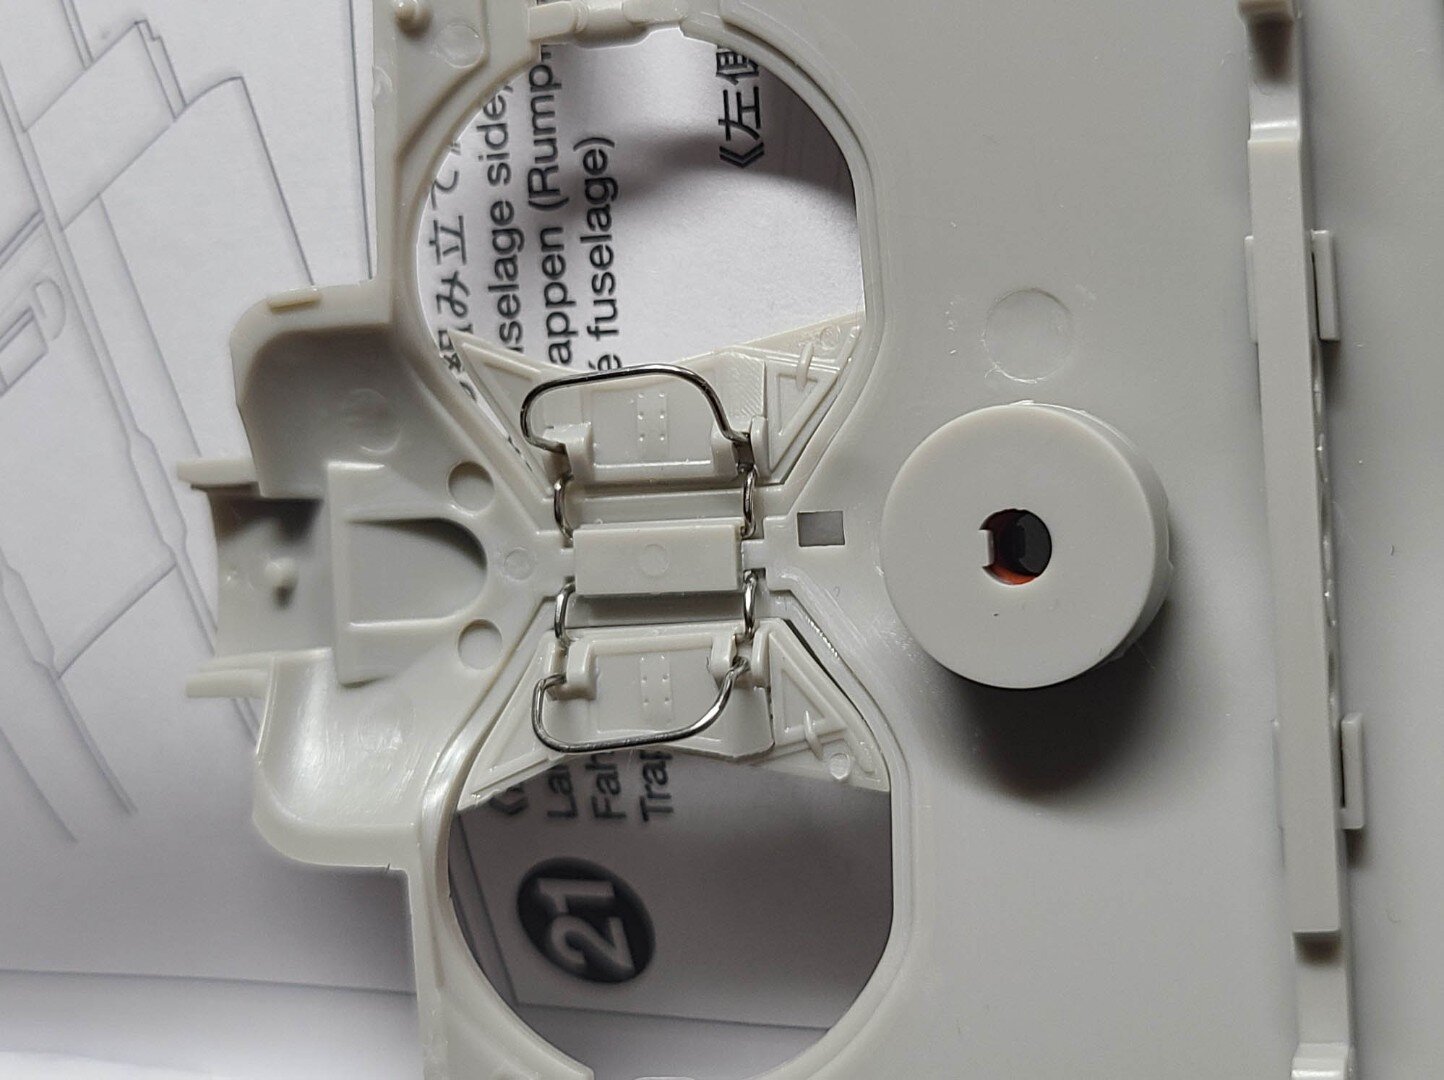
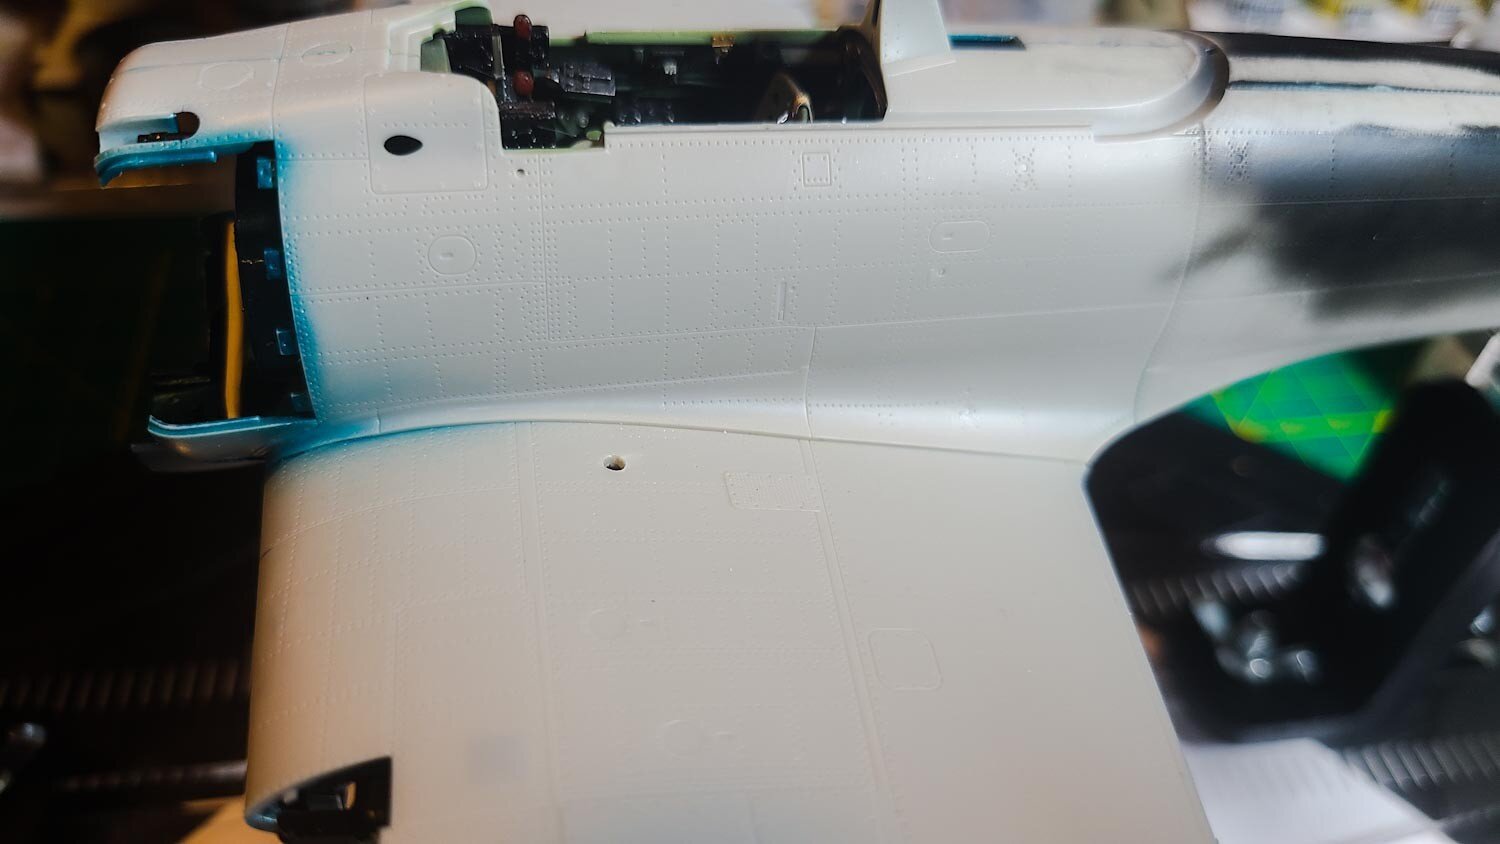
Landing Gear and fit around engine are…dodgy
I have two major, and one minor, complaint about the kit…the landing gear and the fit of all the parts around the engine are in the “not-great” range and the number of pin injector marks is high. I guess Tamiya was going through a phase where a lot of their 1/32 planes received retractable landing gear…and I think it’s a laudable deal…but it also complicates and weakens the build in many ways. It’s almost “toy-like” (I know…some people call models toys…) in their approach. Because of the landing gear and how they mate the gear, the wing, the fuselage, and engine all together…it needs a LOT of work to make it work. I’ve seen other Zero’s and some of the modelers did a much better job than I did here…but that comes to skill and I know I have a long way to go.
The various parts of the landing gear are held together with tiny, bent and straight pins/wires and some PE. It’s not “tight” in any appreciative way and I messed up this part multiple times and never got it perfectly flush. The only real positive is that you can take sweet pics w/landing gear in the process of lowering or rising and I do like that part of it…getting to it though was a PITA.
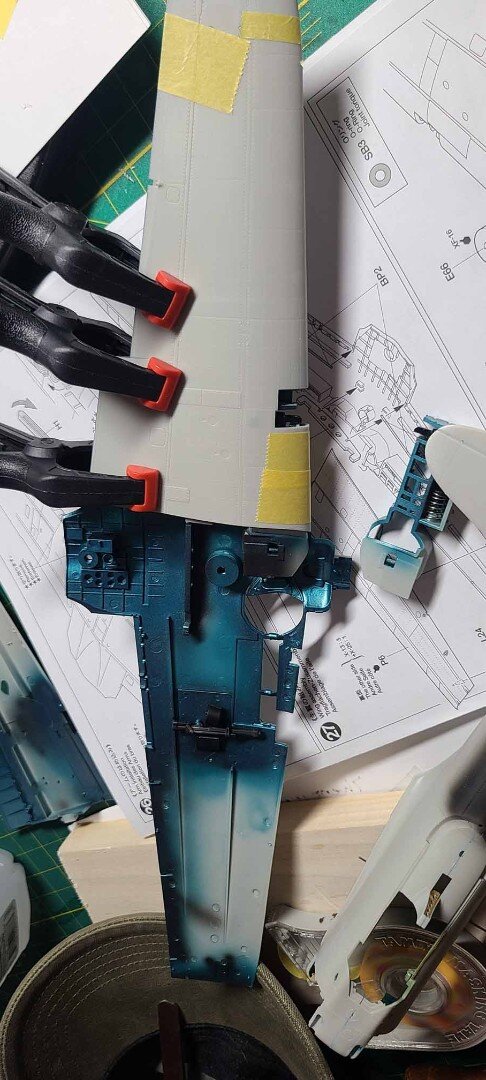
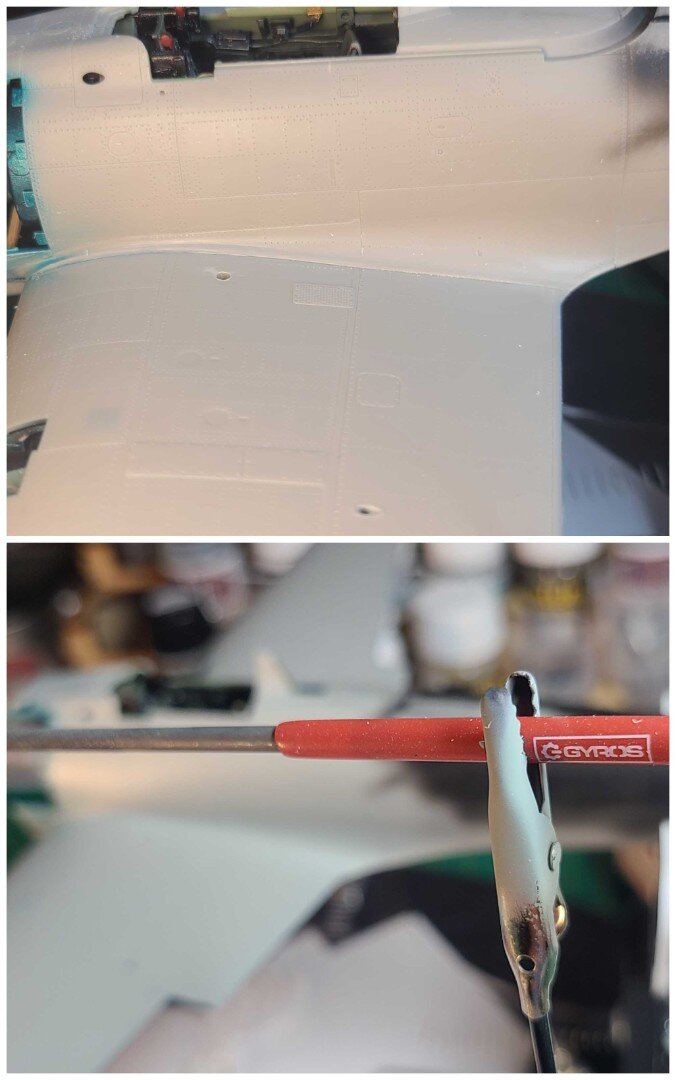
So here’s where that “not tight” fit issue I had first manifested itself…I could not get the wings flush. You can see me using a toothpick in the fuselage to make sure the front part was stressed to assist the fit of the wings but I still had some issues. I’m not entirely happy w/result but the use of a circular file and sanding paper wrapped around it worked OK to reduce the hump.

This is where it gets fun…
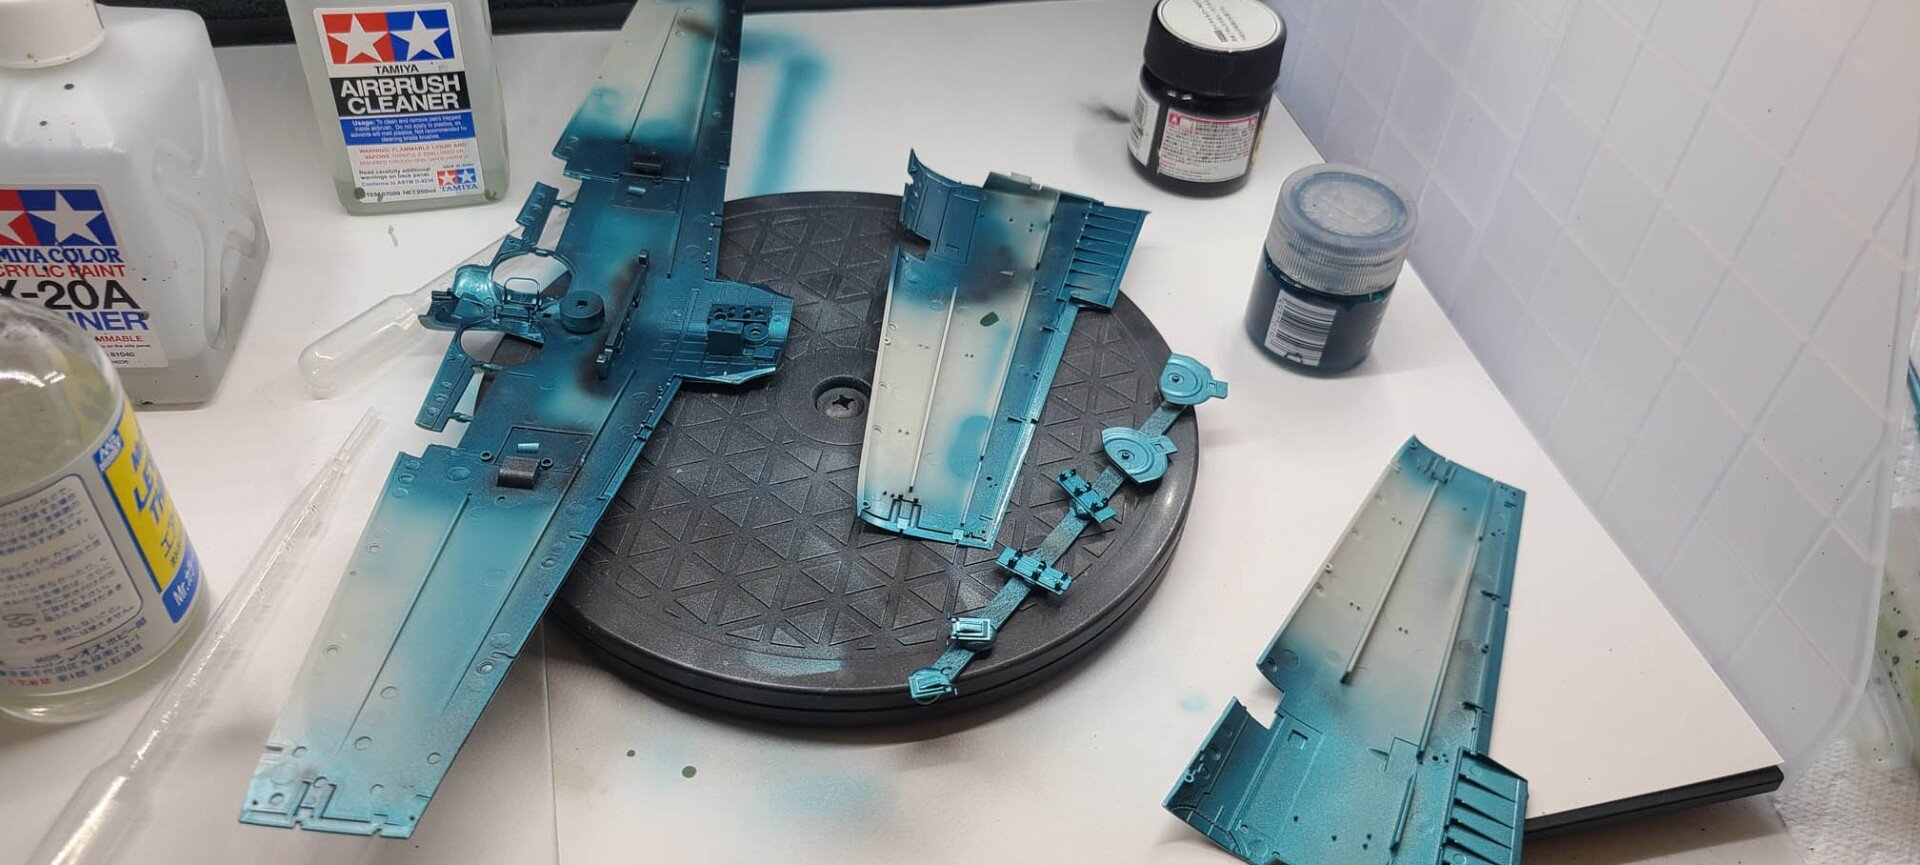
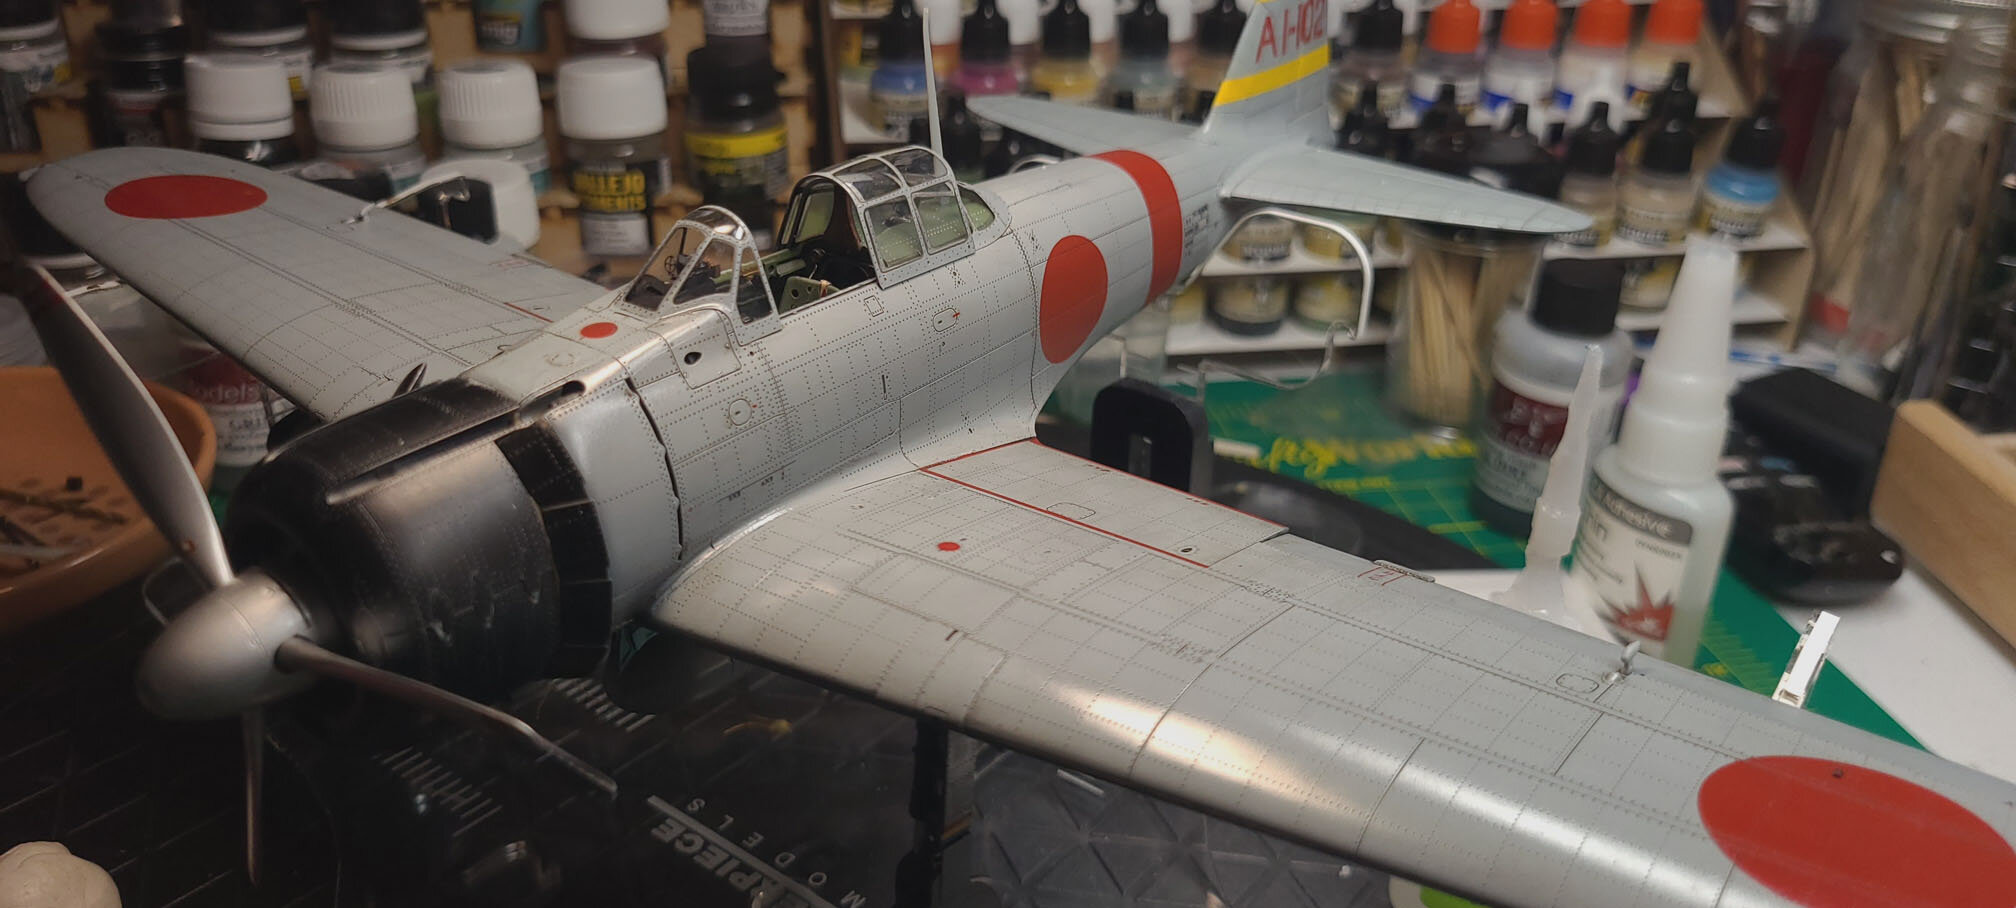
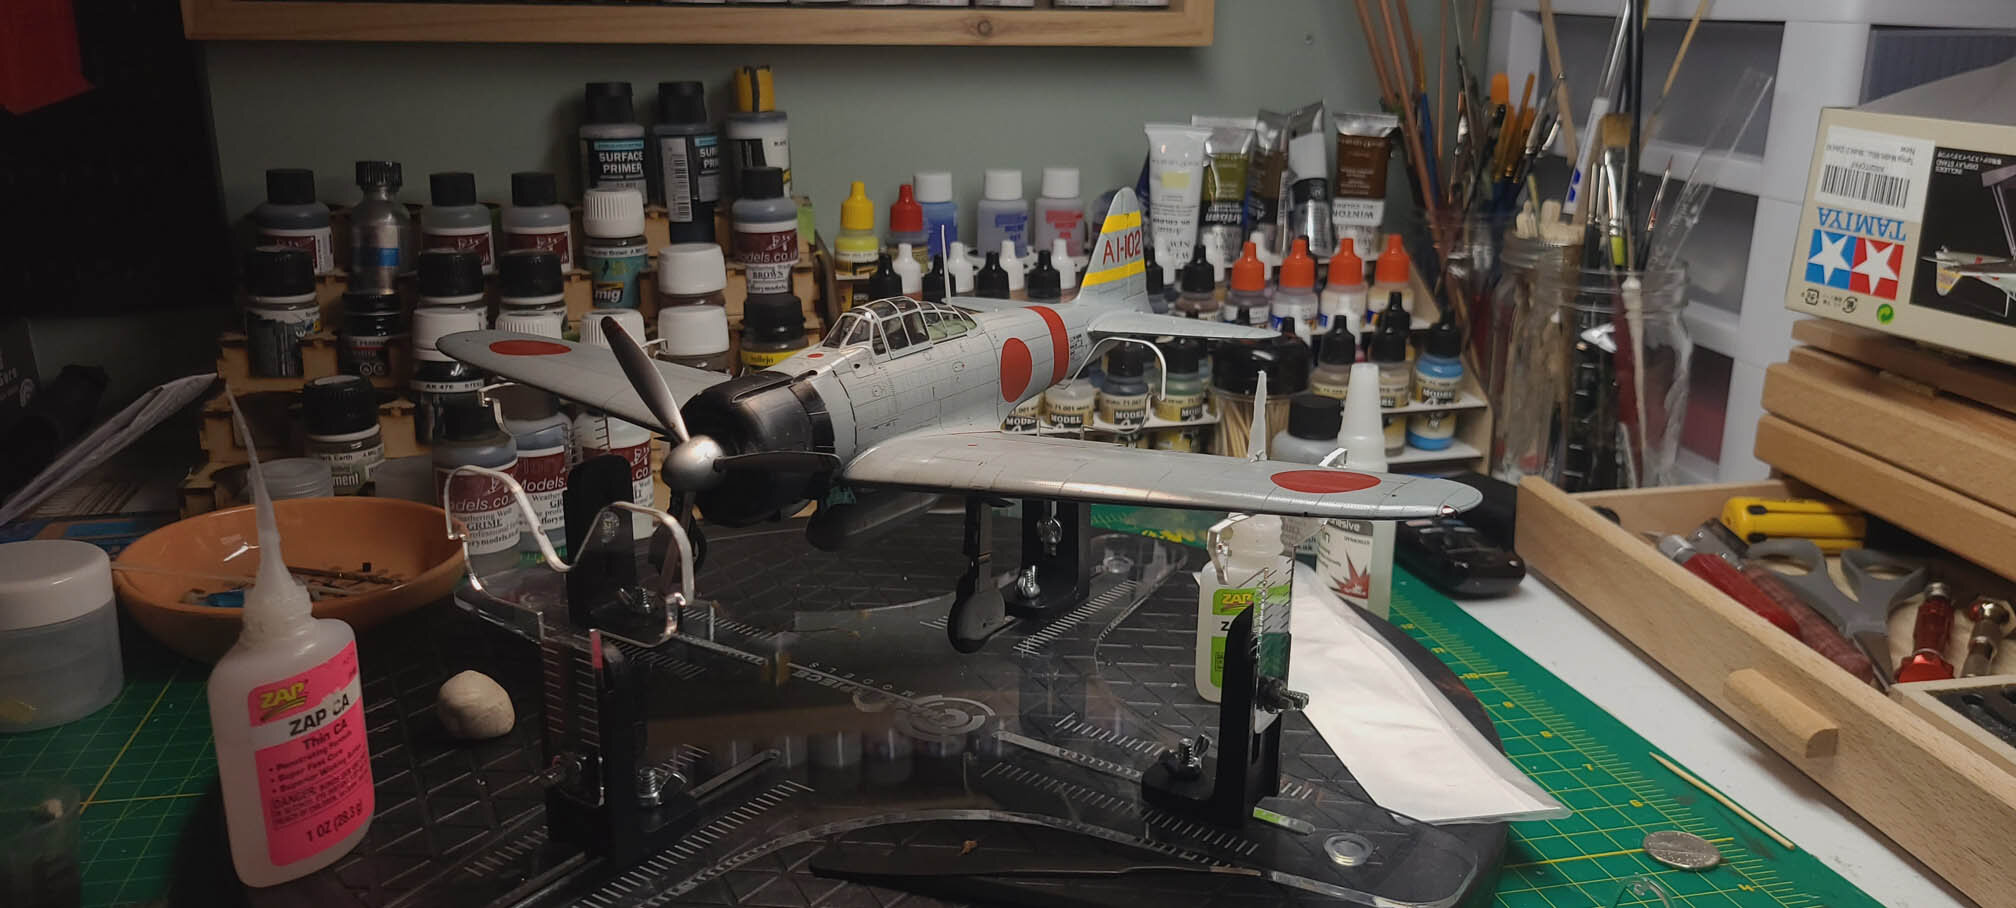
Black Basing
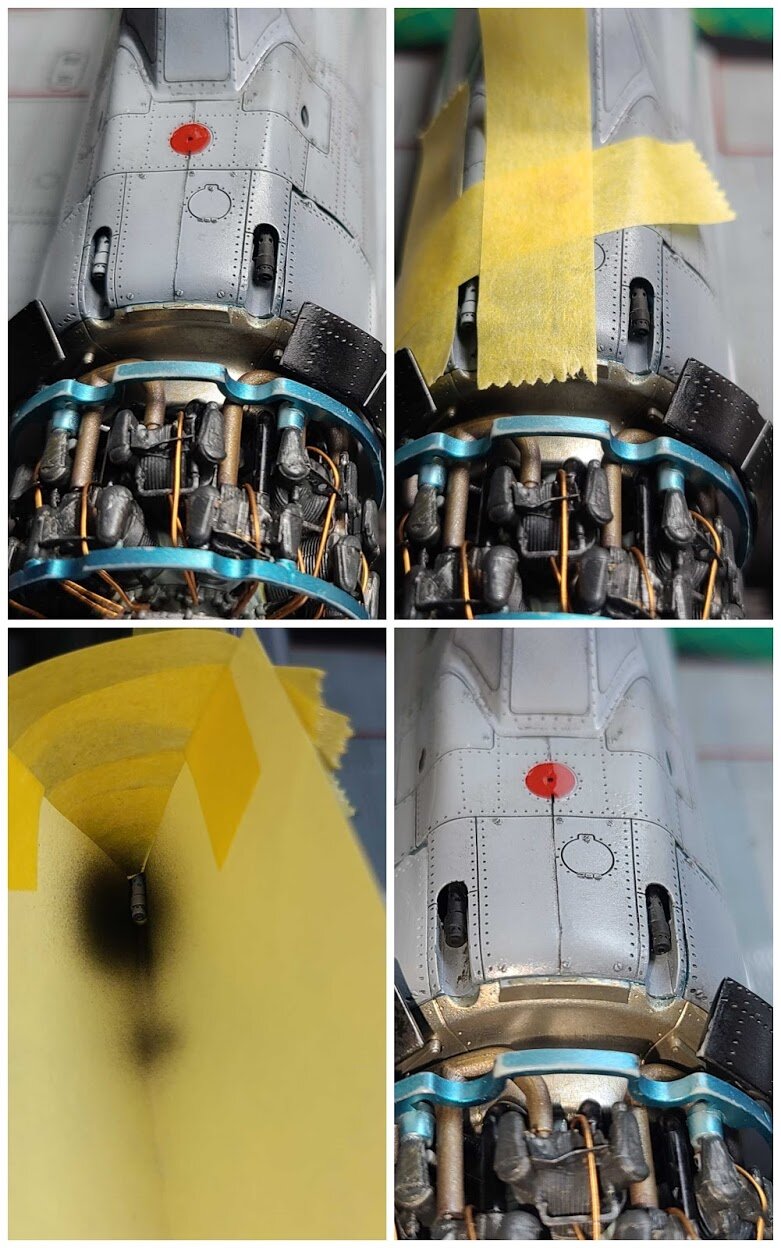
I like black basing…so that’s what I did here…but it was a bit more like black-basing with pre-shading in a way. It turned out nice…after spraying Mr. Finisher 1500 over everything, I use tiny splotches of the Mr. Hobby IJN Grey and gradually build them up over the entire plane leaving the seams mostly clear of grey. The mistake I made later was to spray on too much of a mist coat of the same paint…I went too far and lost some of that detail I was aiming for and since I’m not great w/detail work w/airbrush, I did not do post-shading other than engine exhausts, gun weathering, and a Flory “Dark Dirt” wash.
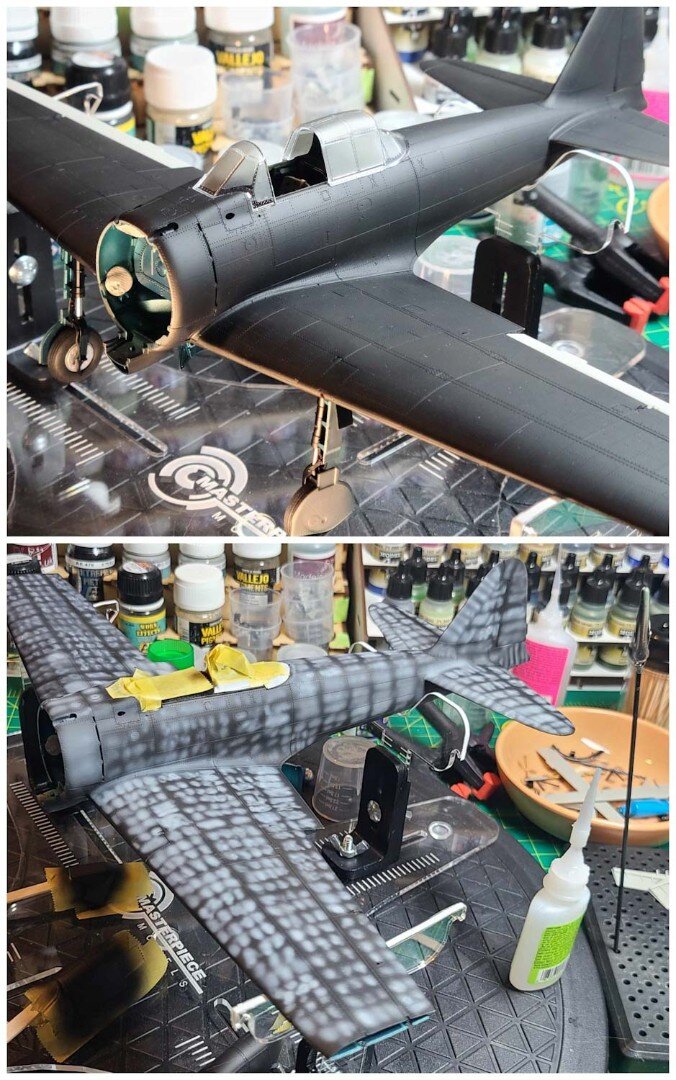
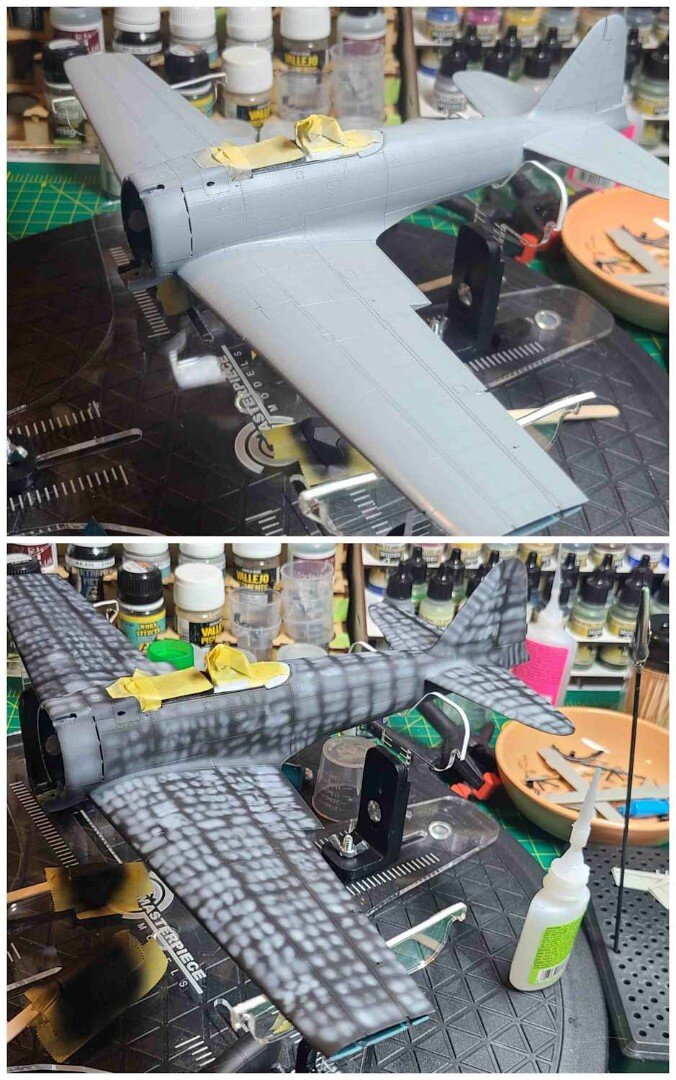
What I did do though was to occasional light sanding over the entire aircraft…even later on after putting on a gloss coat…so to dull the bright shine a bit. I’m also a big proponent of letting some painting mistakes to remain knowing that a wash and some weathering will not only cover some mistakes…it can enhance them to look “right”. The other weird thing I do w/models at this stage is to handle them a LOT w/my hands. Your hands have oil in them and that oil will change the paint scheme a bit…adding some dark patches. I’ll use my thumb and drag it in the direction of airflow over the insignias…over the wing and exhaust paint. I’ll even do light “sanding” with my fingers and palm.
spacer

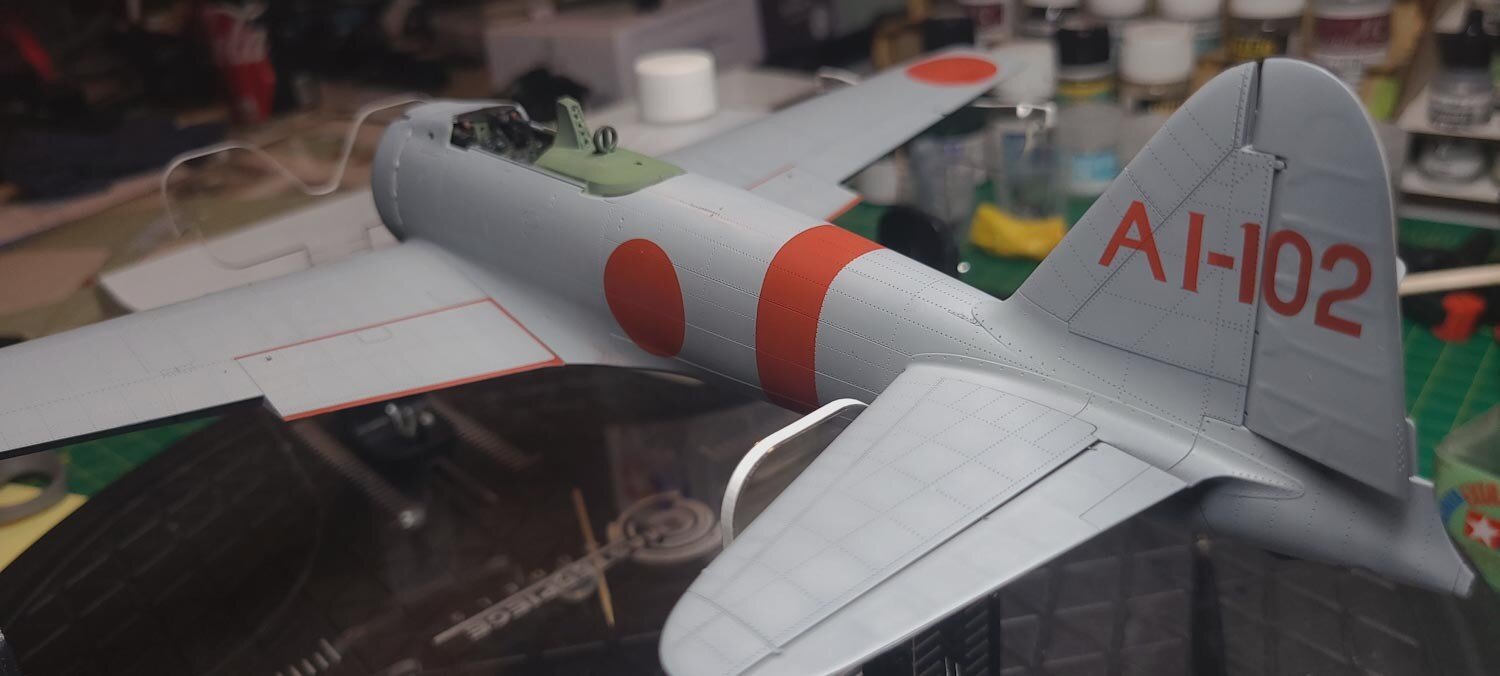
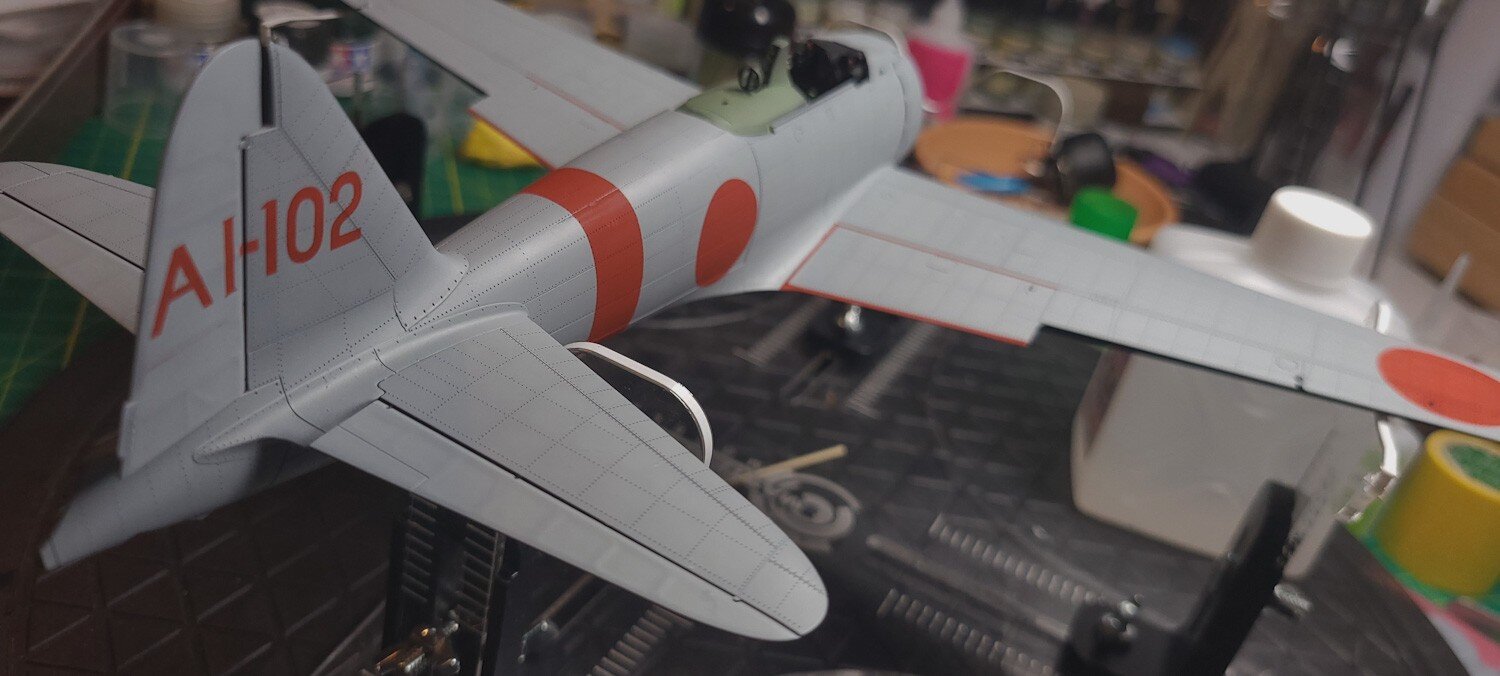
Montex masks make a huge difference
A little over-spray but who’s looking…
The heavy Montex Masks are a god-send…they really, really, really work well. In this case the only “complex” ones are the ones that masked the red “do not walk” lines on the wing roots. Other than those the rest were easy.
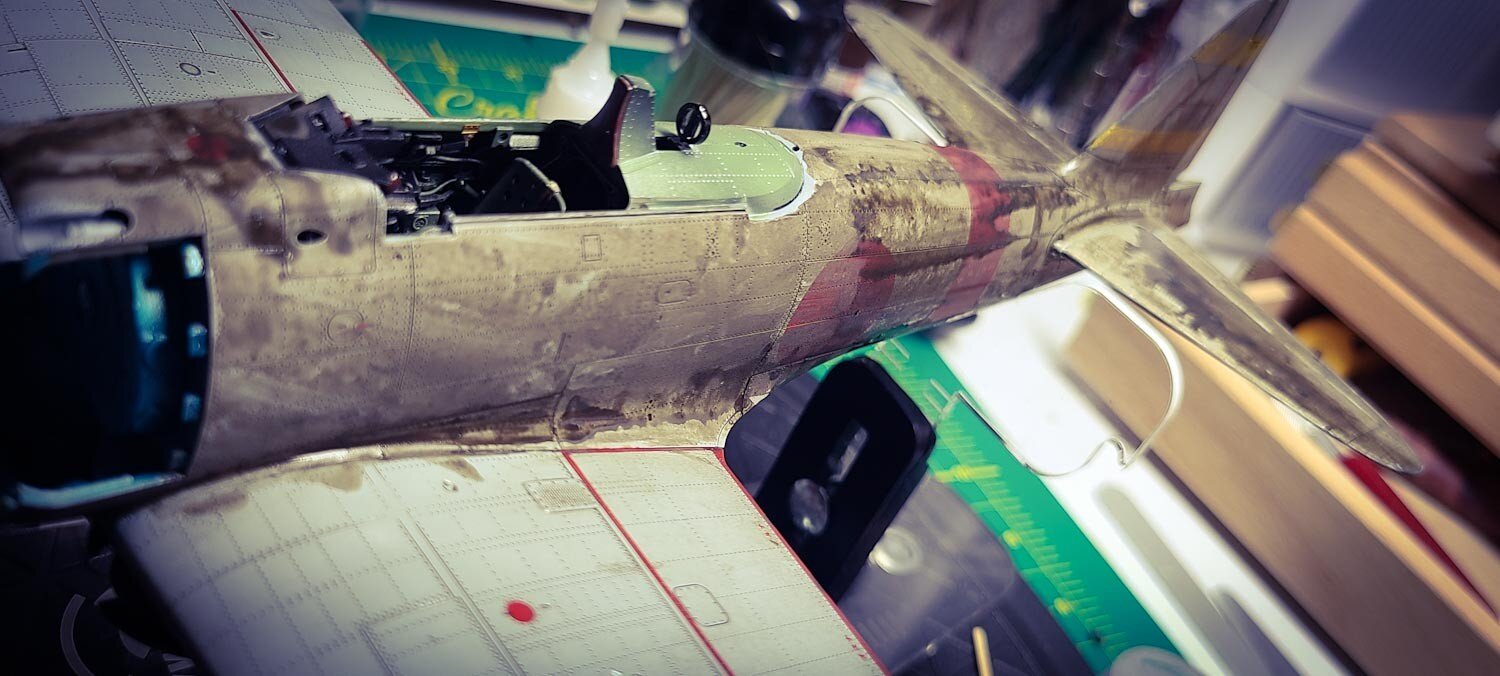
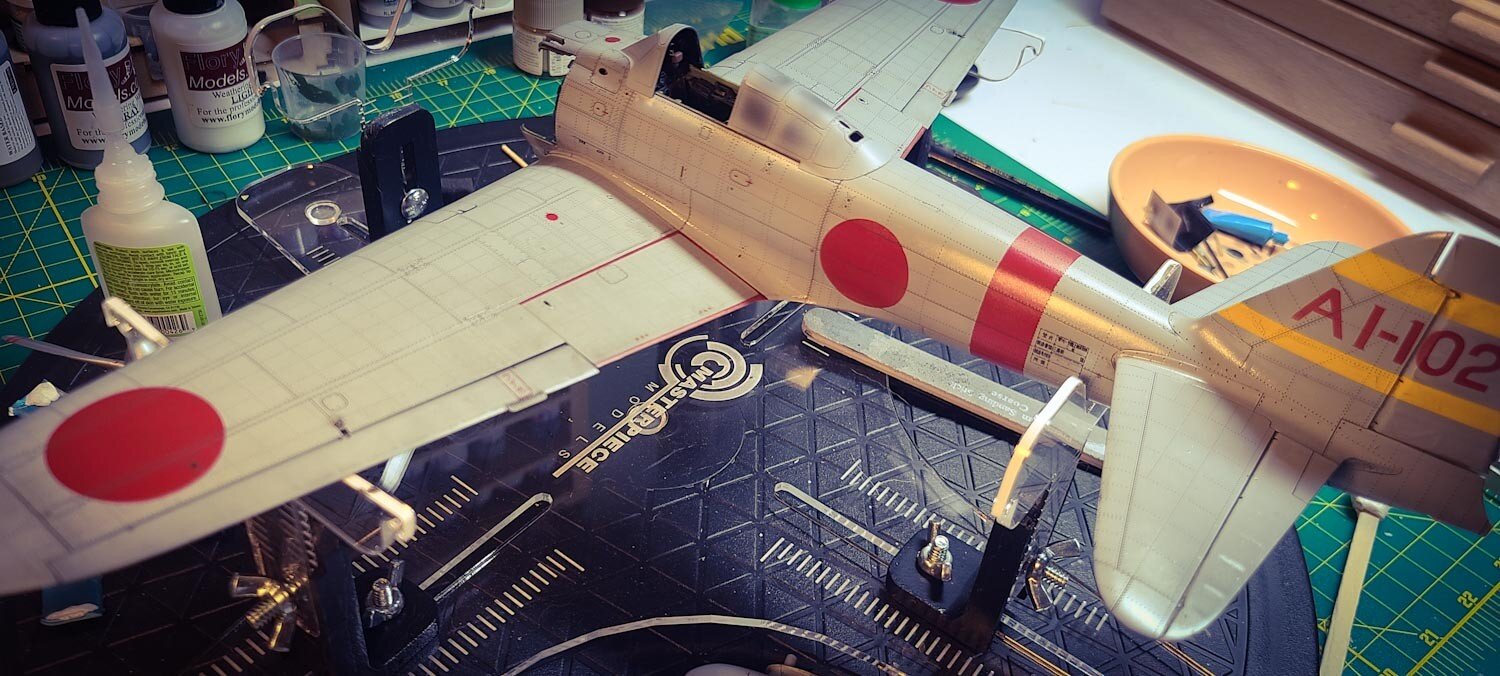
Flory makes some fine clay-based washes that really can bring out the detail and do so without a heavy hand and only require a semi-gloss skin (not unlike decal work) and water. No smelly chemicals. You coat the stuff on and wipe it off after it dries…you can vary the intensity w/how hard you wipe it off. I use multiple colors on the aircraft dependent on the location. I used a white wash on the aft section of the fuselage under the rear canopy, I used a grey wash on the black engine cowling, and I used several dark washes on the main part of the wings and fuselage.
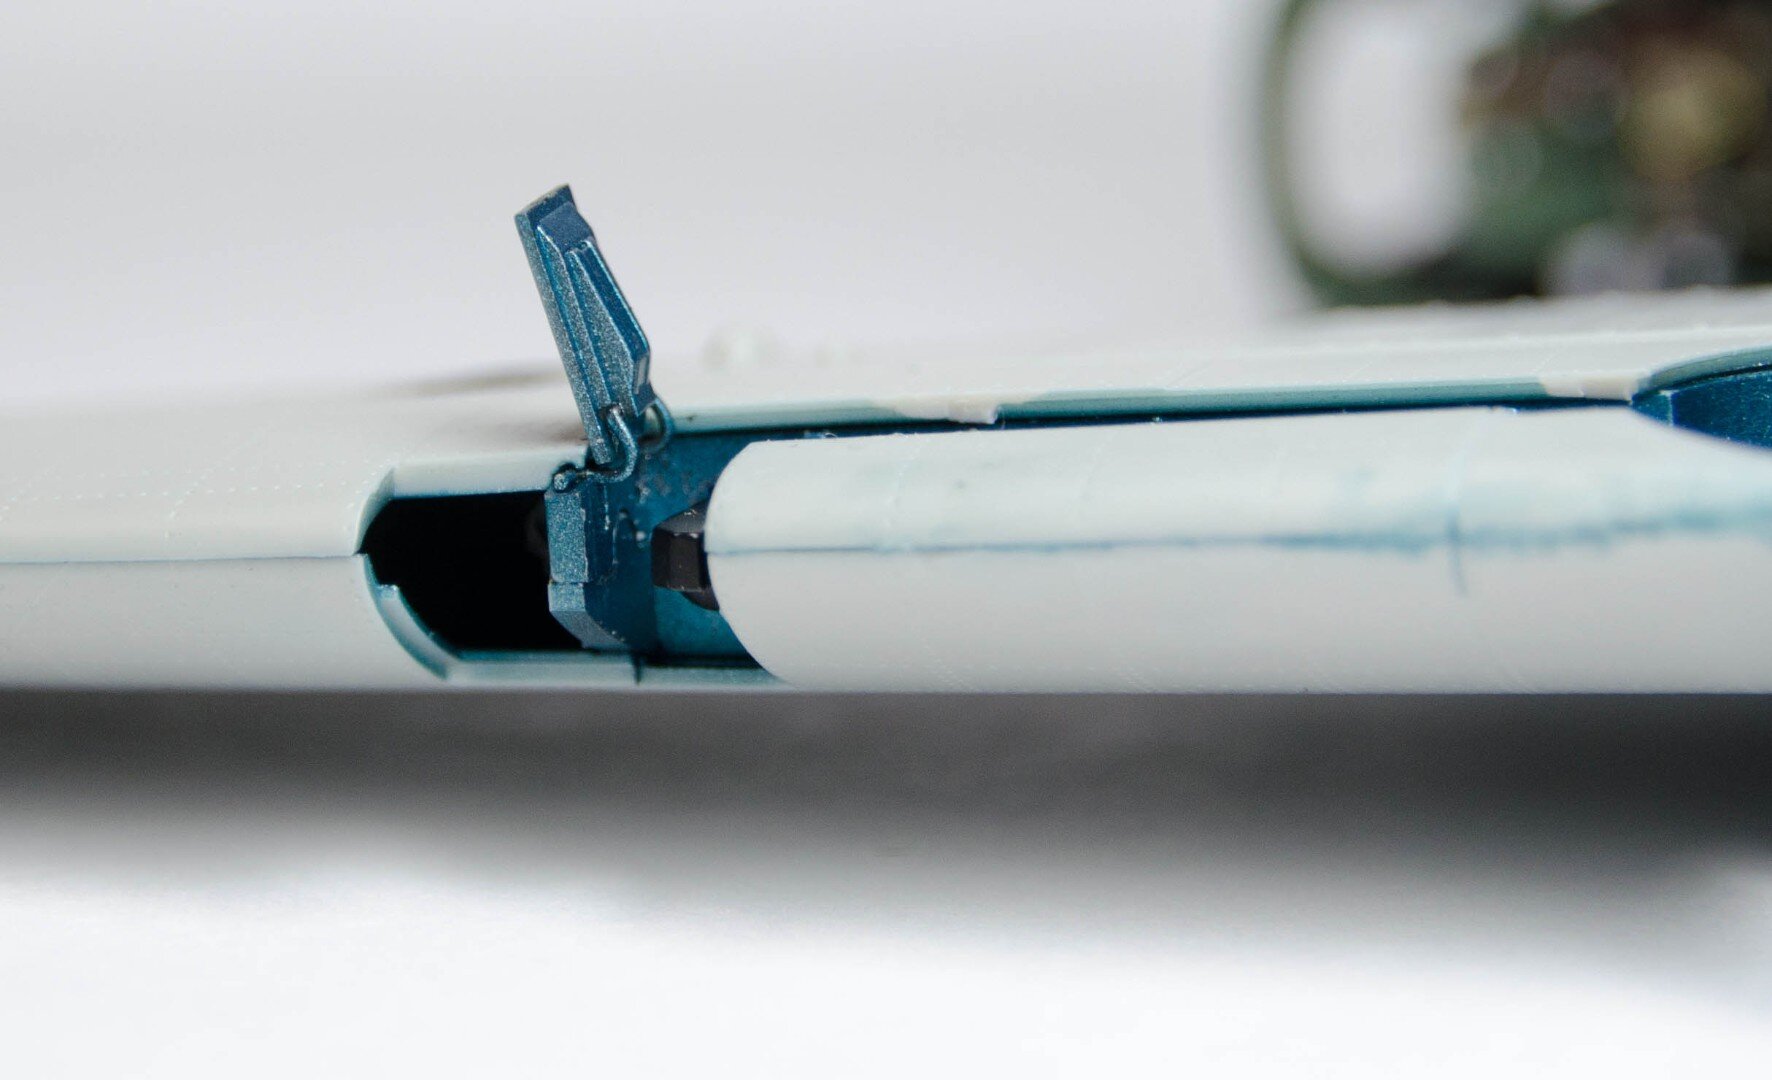
In several of the pics above you’ll see some of my mistakes and what I did to correct them. I forgot to paint the guns and I had to fix (poorly) some seam lines.

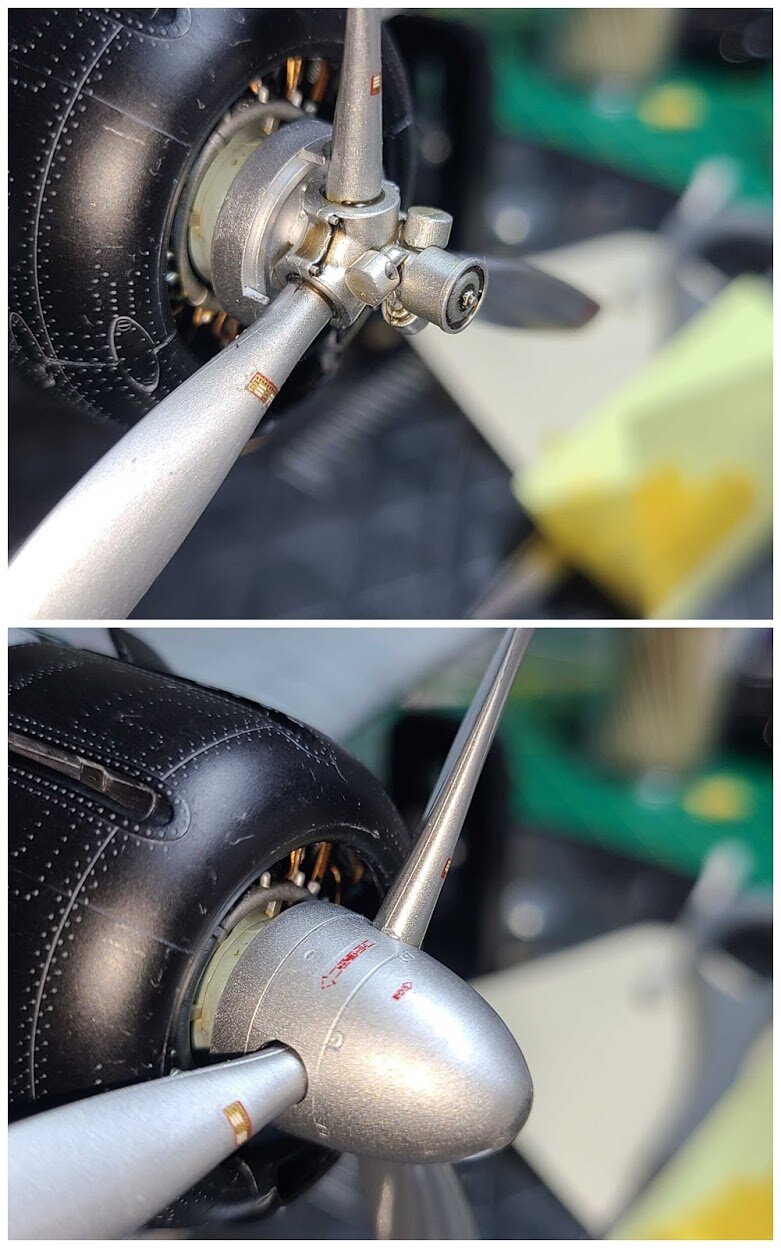
Silly GIF’s are for Kids


Almost done here…I’m waiting on some Gaspatch turnbuckles to do the aerial radio wire and I need to paint the back-side of the propeller semi-gloss black (with some wear on the top of each blade). There are several other areas that need some detail paint to cover up a mistake or two and to fill in area’s where I wore off the paint by rough-handling the model at times. That said…it’s so close to being done let’s call it that.