Zoukei-Mura 1/32 Henschel HS 129B-2/RIII
Started in 2020…finished in 2022

So. Many. Parts.

An Intro to Zoukei-Mura…and one of my Cats
Everything about the kit yells quality (including the price) and I'm going to follow the instructions and use Vallejo paints. I'm comfortable w/Tamiya but I've been watching a bunch of "how-to" vids on using ModelAir so I'm OK w/approach. I tried to get a shot of the top of the kit and when I turned around to take the pic I got this.
I picked up Mitzy at the Loudoun County Animal Shelter…I had tried to get her in Aug 2019 but was too late (some other family picked her up)…but after a month or so I saw she was back up on the web site and asked about her. The shelter told me the cat stayed hidden the entire time they had her. Knowing a bit about cats I figured she was just shy and needed some time so I picked her up and it didn’t take more than a day before she was a little shadow and has been ever since.
It’s also why I’m always cleaning cat fur off my models and tools…anyway…back to the build

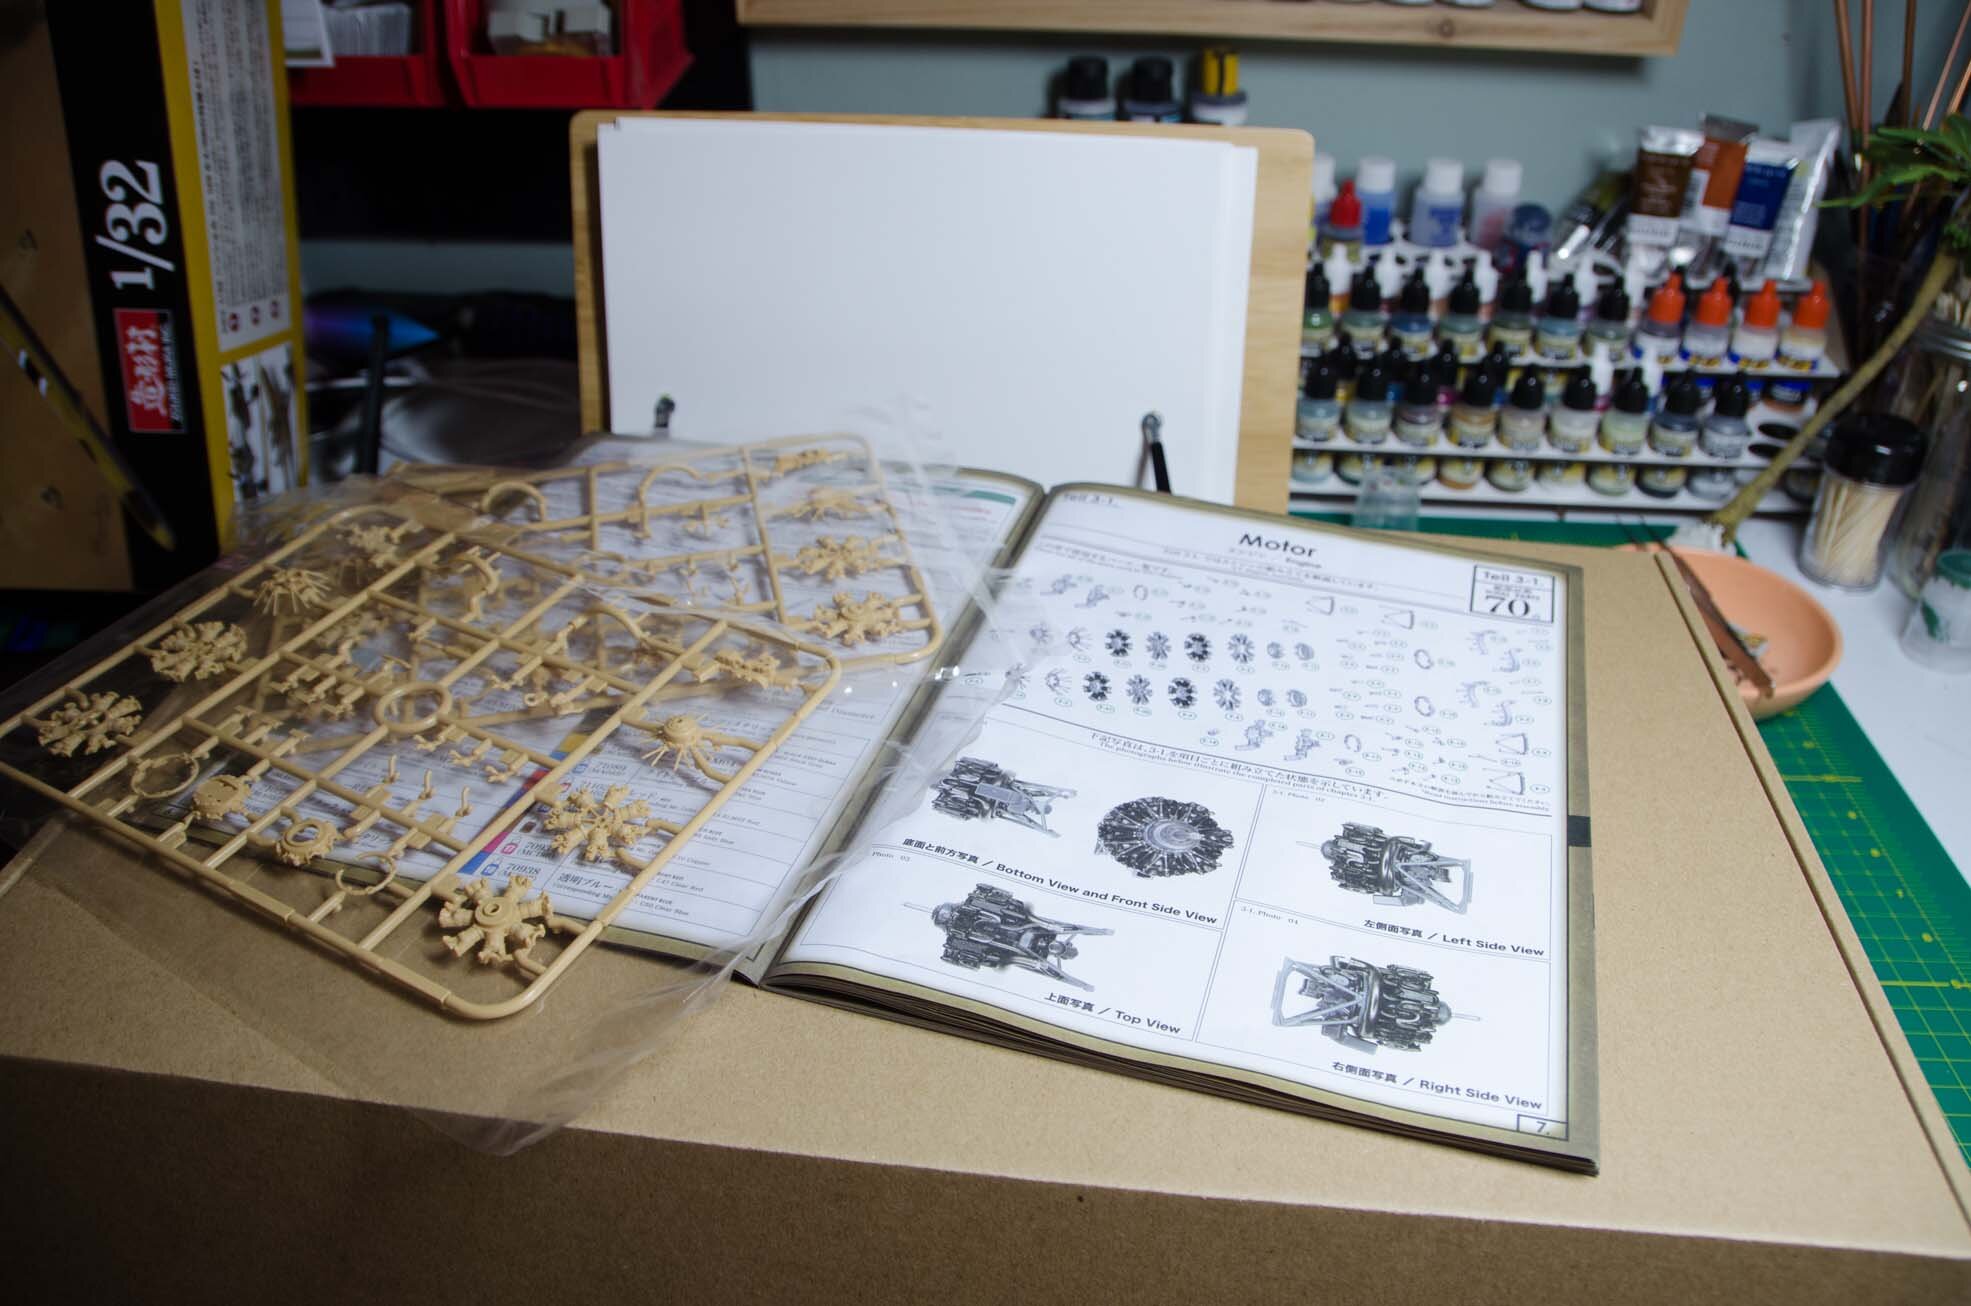
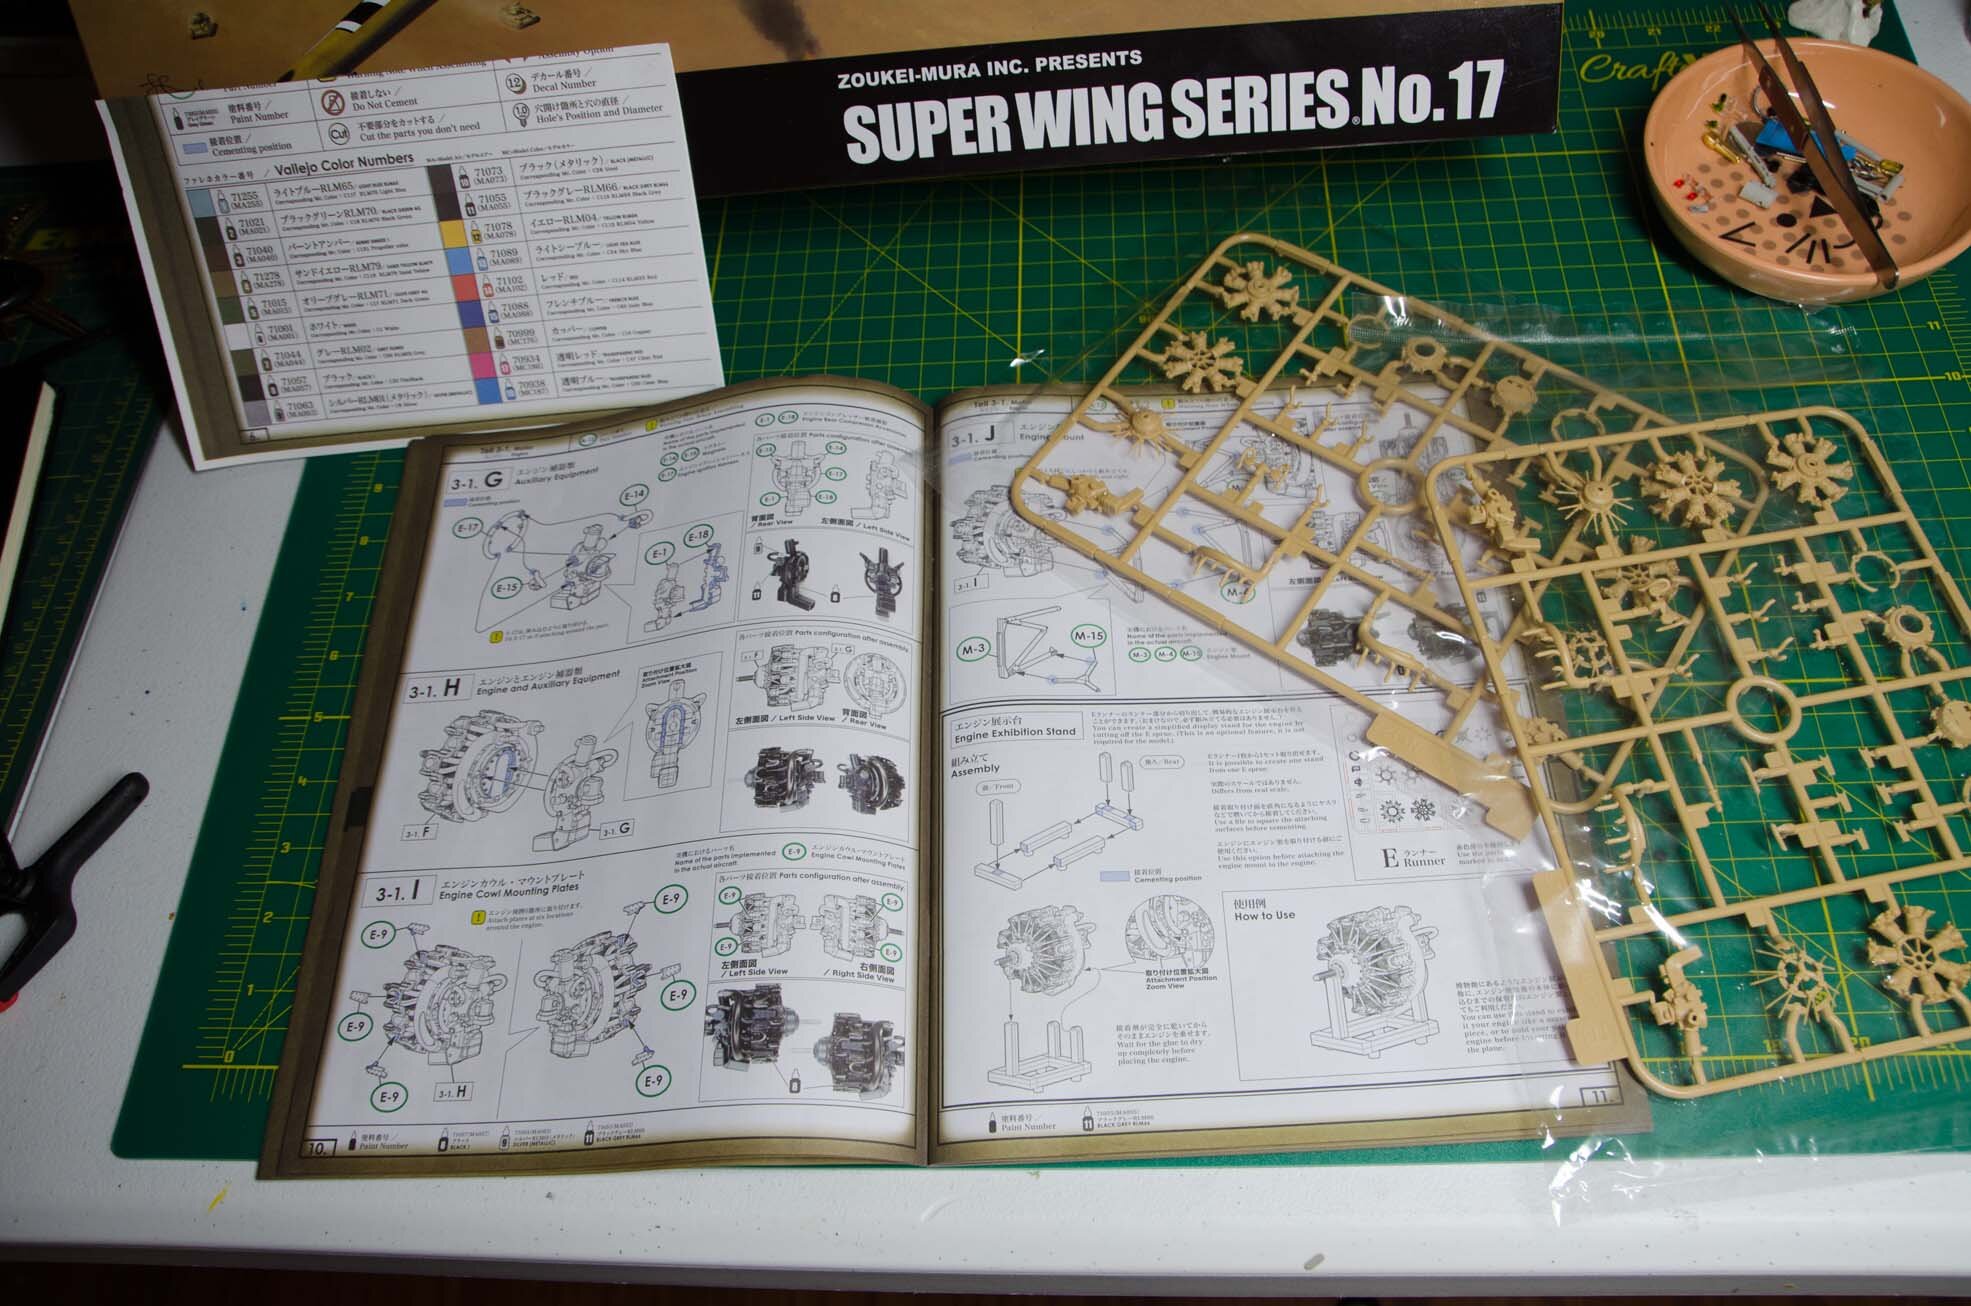
The one thing about ZM kits is that they provide more detail than you can ever display. It’s a blessing and a curse. The blessing is that you tend to do more research into your models because you’re seeing things you never saw before like fuel bladders, and radio sets and oil reservoirs and other things that make up the “guts” of an aircraft. The curse is thrice-fold; It costs a lot more because of that detail, the detail is usually covered up after you work on it so nobody knows it’s there except you, and although the detail is solid.it’s really not that accurate (it’s more Revell than WingNut Wings). I’d rather they either drop the detail and the price or go nuts on the detail and increase the price. FOr instance…they give you a lot of interior wing spars…but the spars are not even close to accurate. The AIrFix 1/25 Hellcxat does a great job of providing you interior wing spar detail but only what you can see AND it’s detailed.
For this build I decided to go mainly out of the box w/seatbelts and a few placards (I’ll probably remove the placards) because the original detail in the area’s you can see after completion is decent. I thought about wiring the engines up but wanted this to be a pretty straight-up build…let it stand on its own.

DETAILS, Details, details…
BTW…I love the instructions. Very WingNut Wingy.
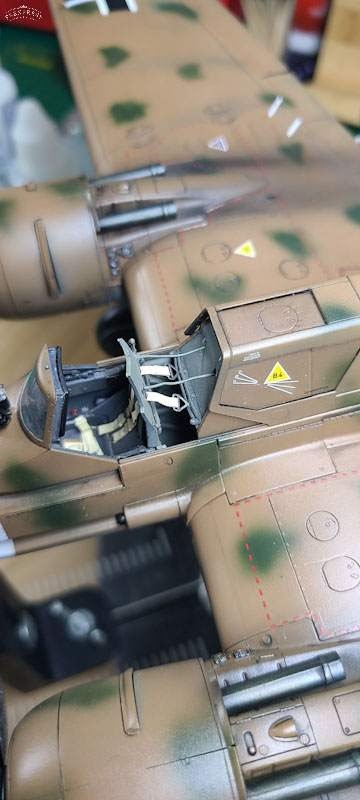
The cockpit has nice details. I used the clear plastic one, painted it in Tamiya’s Rubber black as a base and then used RLM grey over it, applied some detail painting and added the doodads the instructions asked for. The colors here are EXACTLY what the instructions state…lots of yellow levers. I used Micro Fit and Soft for the instruments and ran a soft silver dry brush over it all. The cockpit floor and seat assembly is pretty cool…but wait for your shoulder harnesses (if you go that route)…they slide through the openings in the armor plate but you don’t have the connection points for them farther aft in the fuselage because you have not gotten to that part in the instructions. You’ll also need to split the shoulder harnesses in two…the metal brackets on the belts will not fit through the slots in the armor plating.

I need tiny fingers…
…or two hours to make these w/glasses and tweezers

So I started this close to 2 years ago, took 16 months off to do RL and build the F6F HellCat and then picked this back up a few months ago. Interesting build with the usual Zoukei-Mura details you never see after sealing up things. But solid kit, no fit issues other than some of the removable panels are too thick. I used Tamiya, AK, Ammo, Alcad, Mr. Hobby paints. This time I went with rattle can finishers and clear coats and thought they worked great (Mr Color, Mr Finisher)...they saved me a ton of time. There are a few decals I need to finish up with but here and rework the aerial but it is more or less done.
Note: It was interesting to pick this back up and see where I had made mistakes 16 months ago that I learned from and applied on the F6F I worked on in the interim...for instance leaving the pin marks on the seat here (couldn't fix them after I sealed the cockpit up). I also wanted to get better at air-brushing so this was a decent test.
Note 2: I decided against doing a "realistic" version of this aircraft...I doubt they looked this clean coming off the assembly line. My weathering was a simple Tamiya black panel line wash and a tad bit of pigment on the wheels and wing root. This particular aircraft was stationed in Tunisia and as most of them, was probably OK for the first few missions and then broke down.

Here are a progression of shots I took and had to size them way down to fit the Flory website I regularly post on so apologies ahead of time. It really didn’t take me that long to finish this out. Biggest lesson learned was how to manage my airbrush technique to get the splotches…you can see where i started and where I finished, and the differences are easy. So, as with all my builds so far, I learned some new things…in this case airbrush technique and I started to trust rattle-can clear/flat top-coat strays.


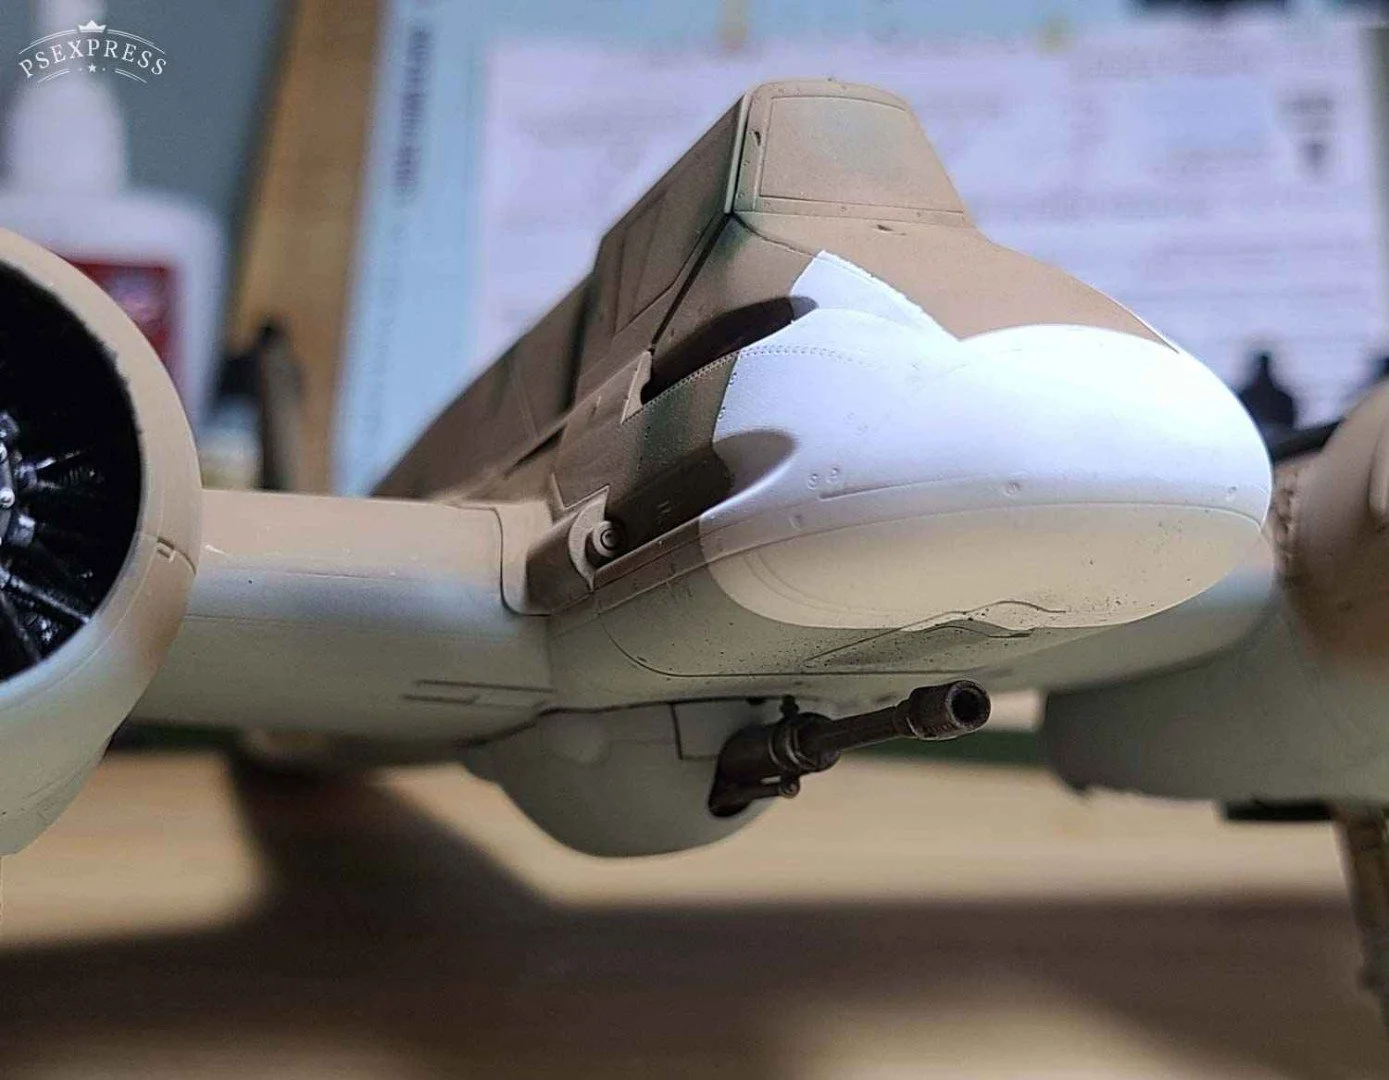


Semi-glossed, continue to touch up mistakes, decals, some seatbelts in. Masked the wing and fuselage stripes but the rest was freehand airbrushed...trying to get better with the airbrushes I have. Some minor mistakes but since most real camouflage painting was done in the field...lots of mistakes were actually made (at least that's what I'm telling myself) by field mechanics. Yea...it's a coping mechanism but hey! Why not!
I really like the blue...makes these almost "pretty".

WARNING—-LOW REZ—Don’t judge me brow
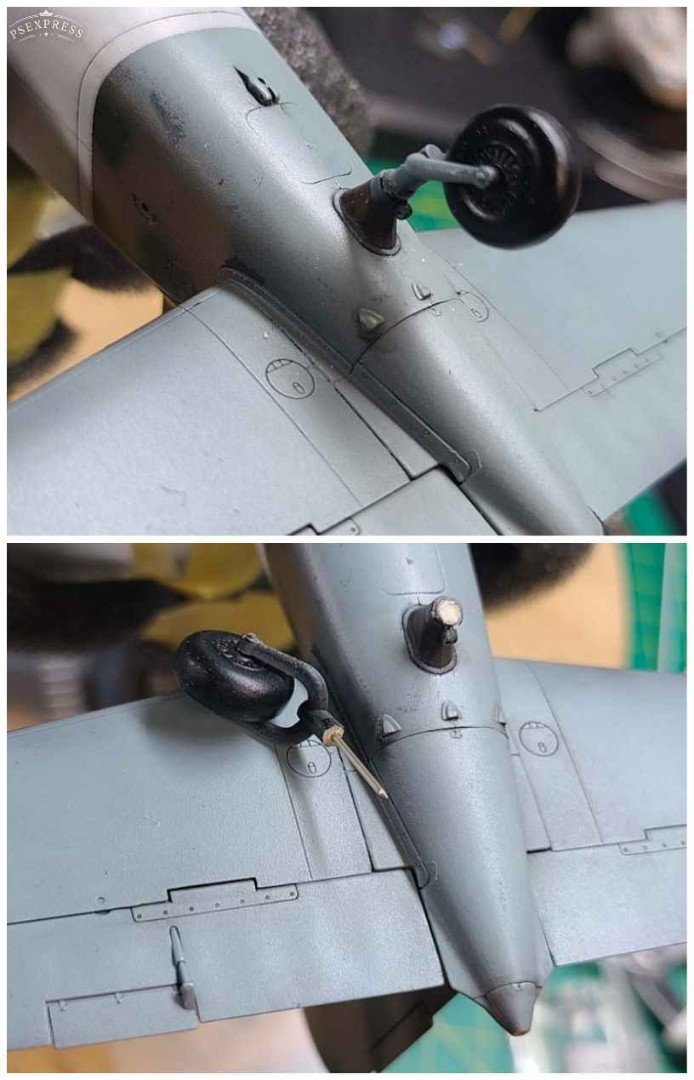
I broke both the tail wheel and the main antenna off so I fixed those (used a pin to hold the tail wheel in place) and worked a bit on the cockpit and seat belts...I need to do the navigation lights and a few more things and done.
Finished it up w/semi-gloss coat, some Flory dark dirt wash and that was it. Decided against a lot of detailing as I’d achieved my objectives with this build and was satisfied w/result.


