F4U-1A 1/32 Tamiya Corsair Build Log
Kit: Tamiya 1/32 F4U-1A Corsair (60325)
Paints: Tamiya, Vallejo, AK Main Colors: Intermediate Navy Blue (XF18:5 + XF2:4), Insignia White (XF2:10 + XF55:1), and Navy Blue (XF17:5=XF8:3+XF2:2)
PE: Ultracast figure, Brassin cowling parts, Barracuda Wheels and cockpit decals (the best), Montex stencils (all insignia's painted), airscale decals.
Weathering: Salt technique, Winston & Newton, Vallejo pigments (primarily 73.102 Light Yellow Ochre all over the upper surfaces and dusted off), just about half of Phil Flory’s washes (honestly).
Tools: Evolution (H&S), Eclipse (Iwata), Tamiya side cutters, ifixit tweezers, Gyros files, JLC saw, etc.
Build Length: About five months overall start-finish working evenings and weekends between epic Destiny 2 game play sessions.

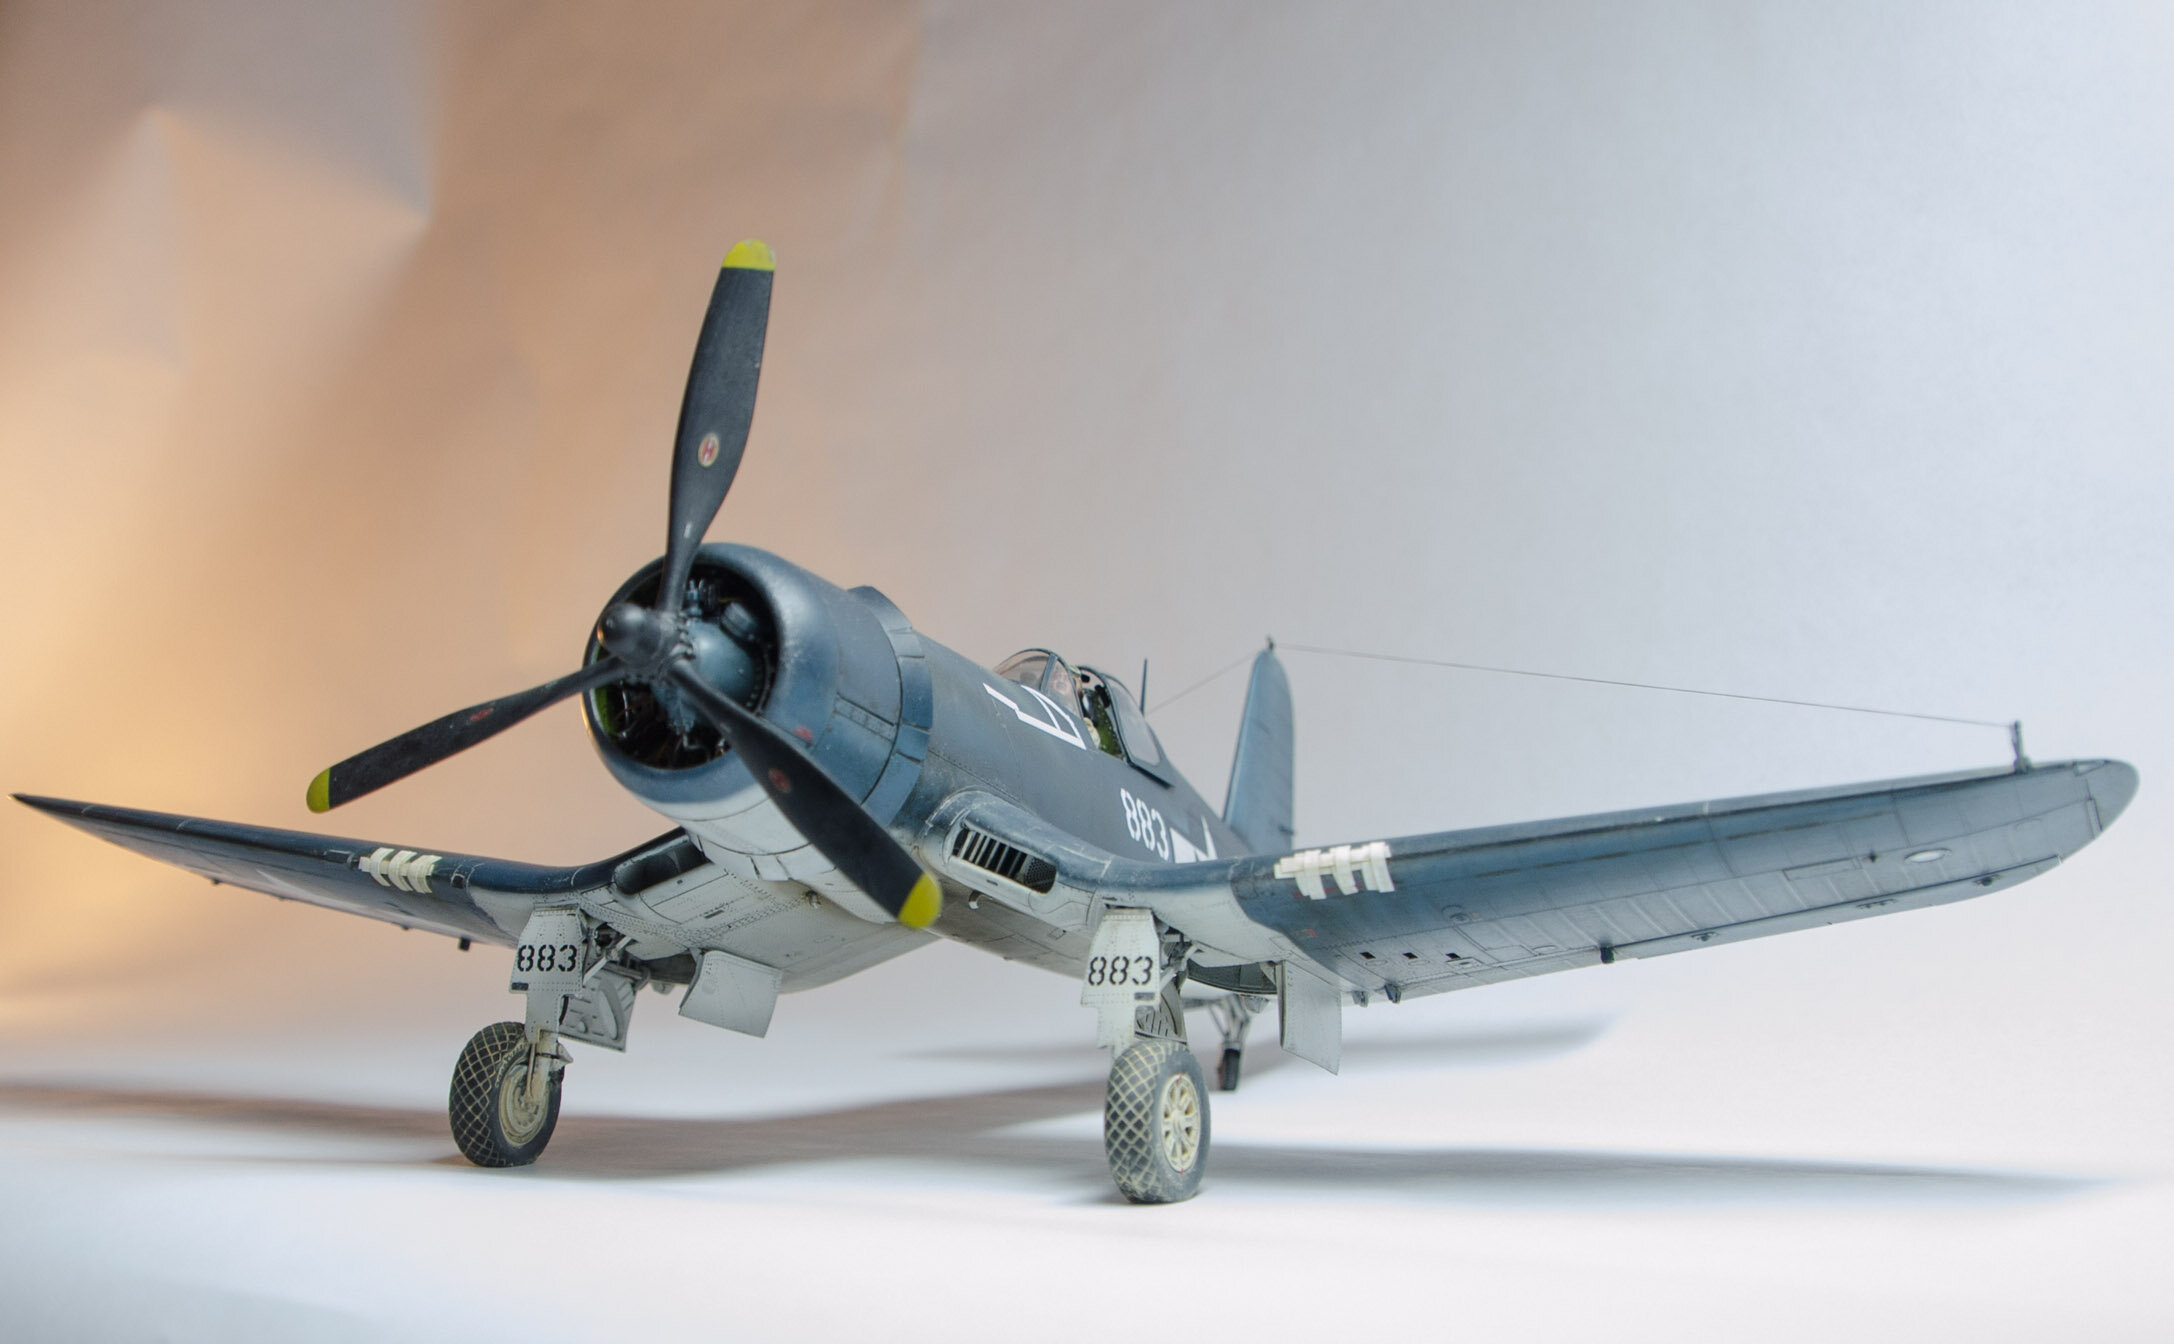
The AMERICAN CORSAIR
Note: My son bought this for me as a fathers day present more than a year ago...it would become my first 1/32 kit in 45+ years and the fifth model since i returned to the hobby after those 45 years. I built it during the first few months of the Covid-19 Pandemic when working from home (still am as of August 20th, 2020)
Since my son gave me the kit I knew I had to do my best
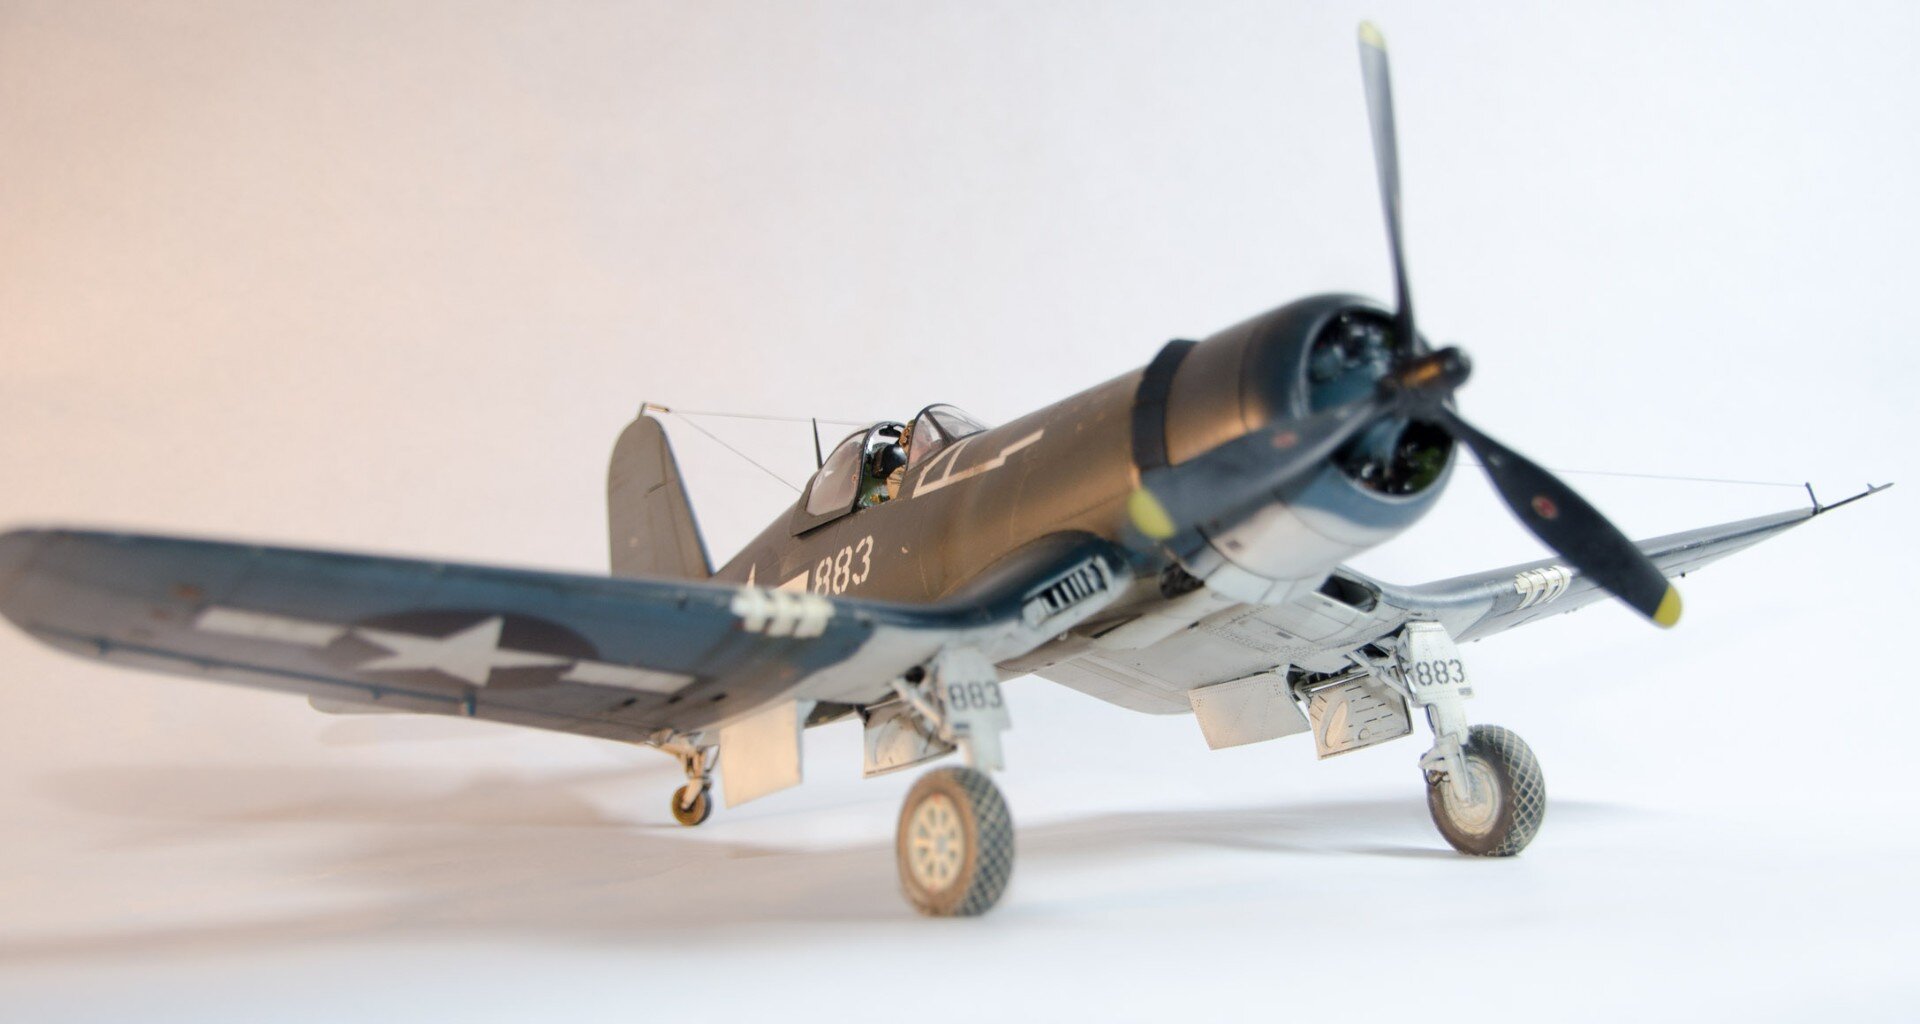
A joy to build at start, a real engineering triumph and technically a brilliant kit…but a bit of a slog towards the finish…I could not match the wing and fuselage paint to save my life. But…in the end that worked because it made the finish more realistic. You’ll see what I mean later on. I learned so much building this model…about modeling and myself.
This look was my goal

I bought a lot of extra stuff…

Extra bits: Eduard, Barracuda and Airscale cockpit placards, Yahu instrument panel (not sure I’ll use this), Basic line and Montex masks, a new Harder & Steenbeck Evolution airbrush (as a complement to my Iwata), substitutes for the Tamiya AS-series of paints (didn’t like them…too thick and decanting was just not fun).
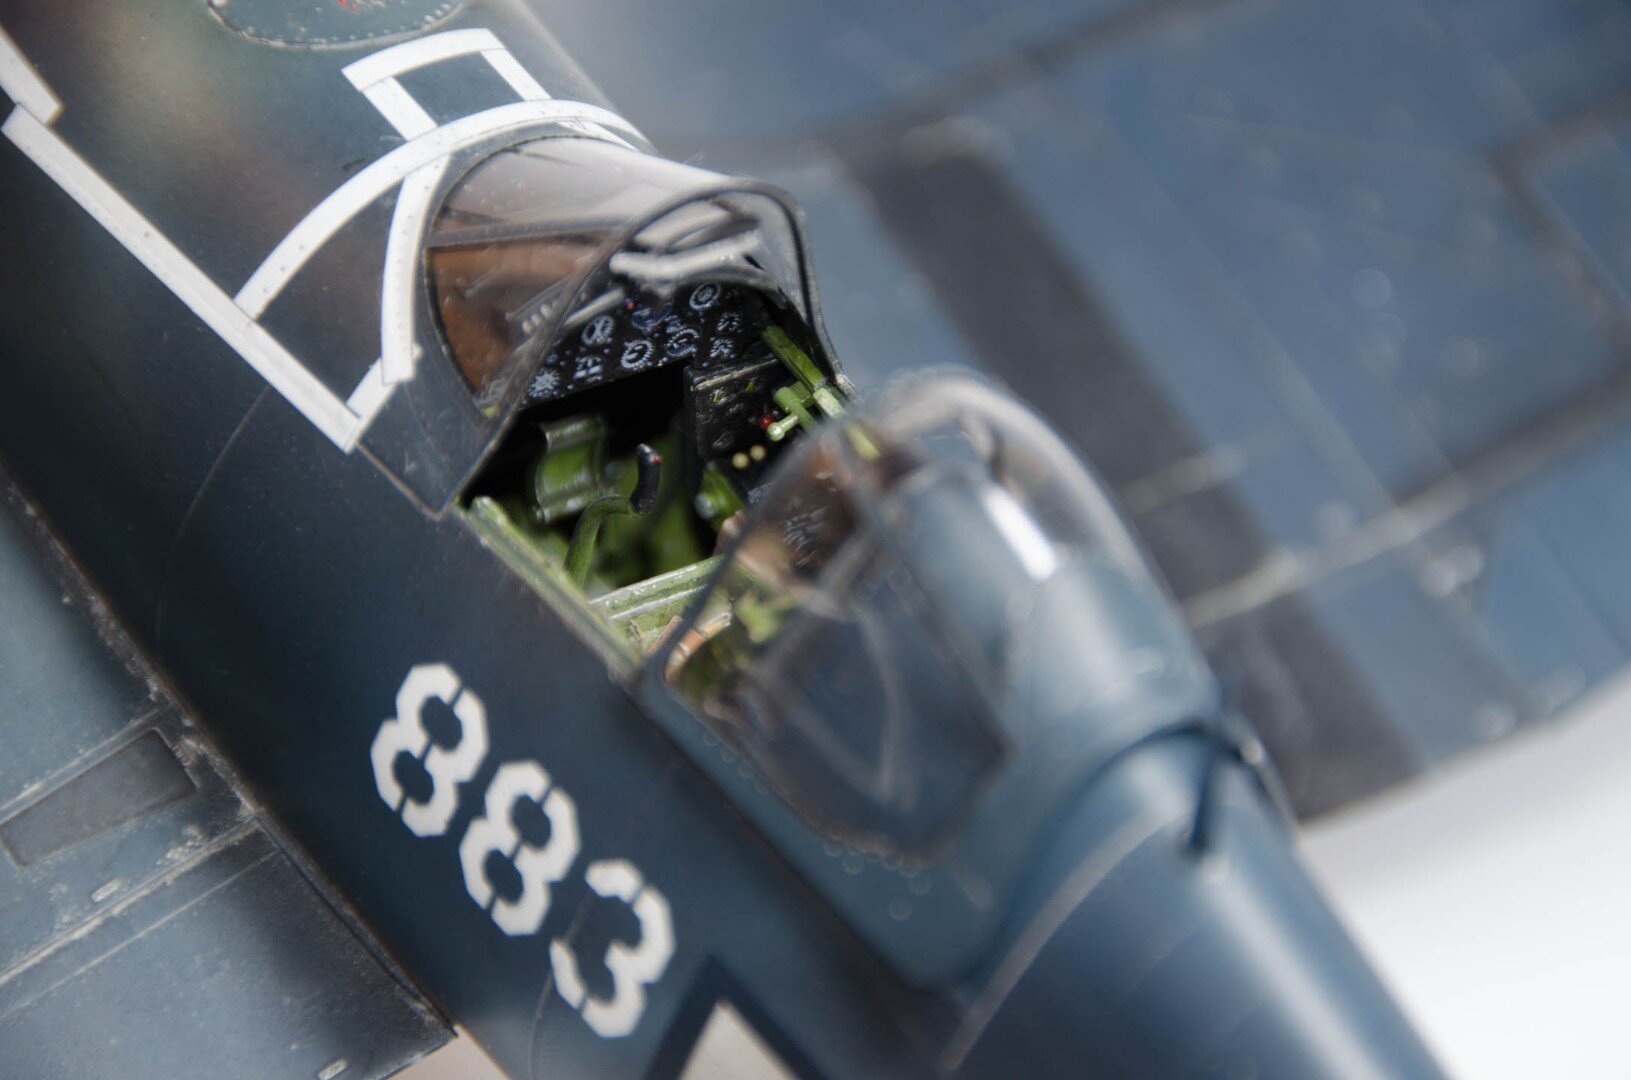
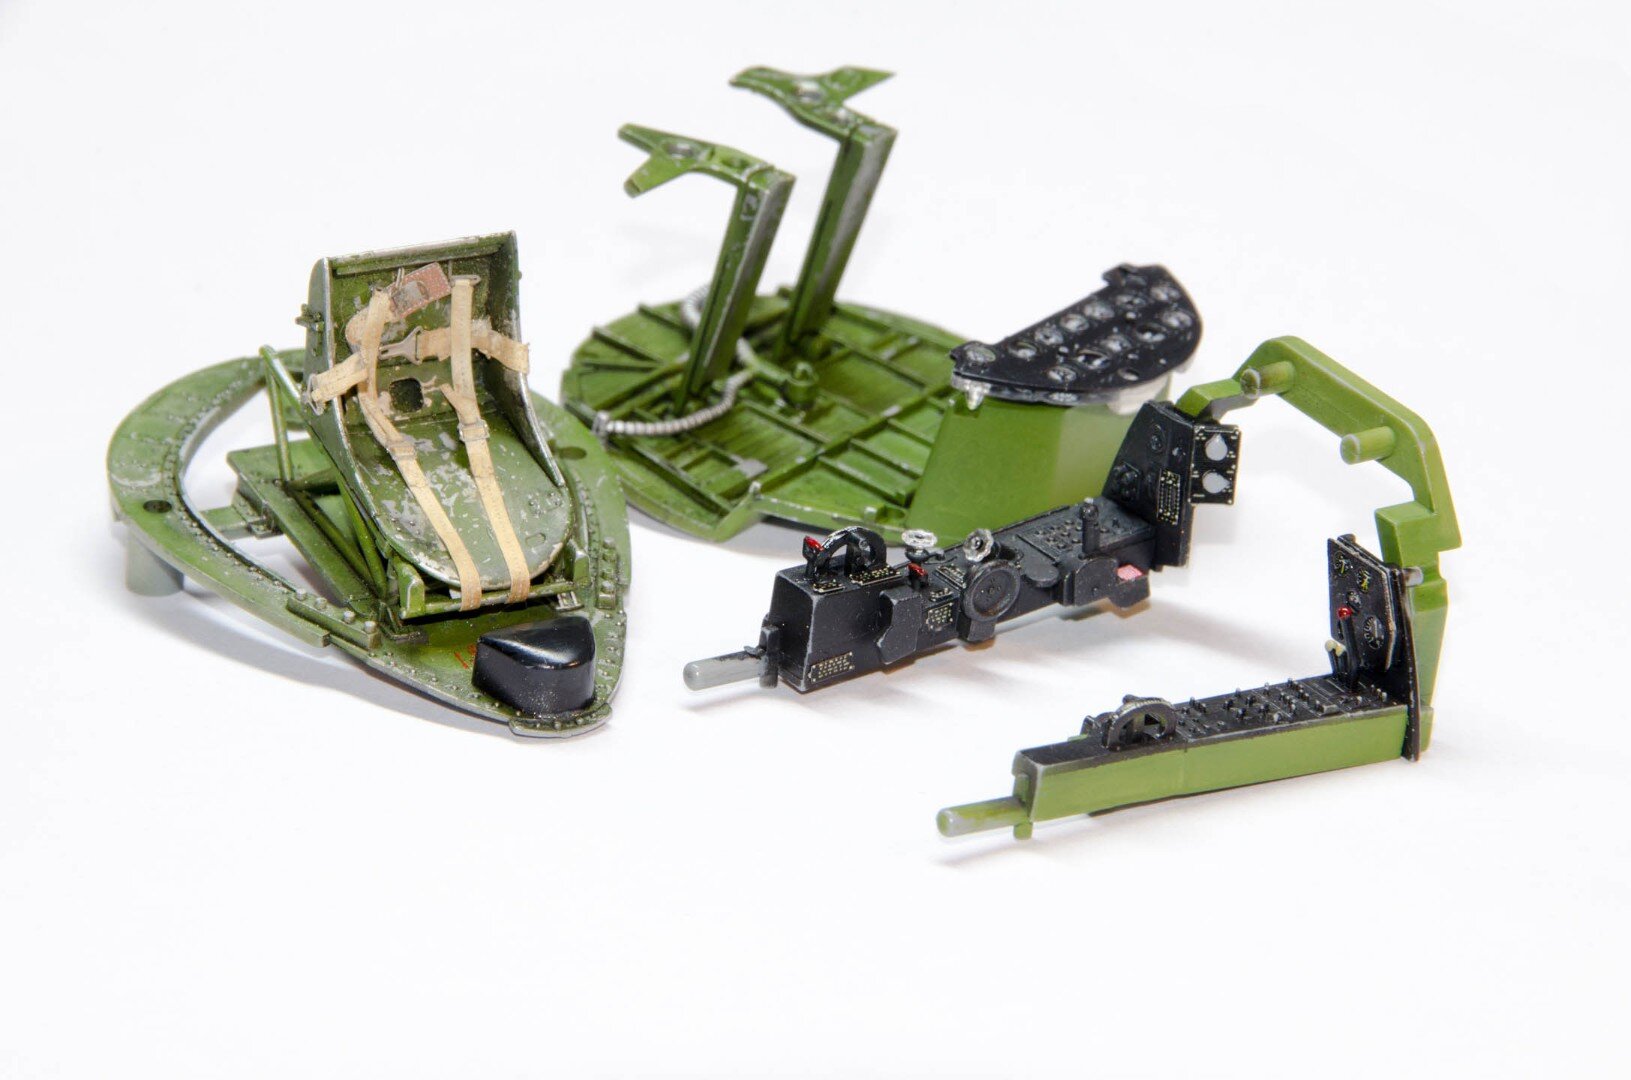
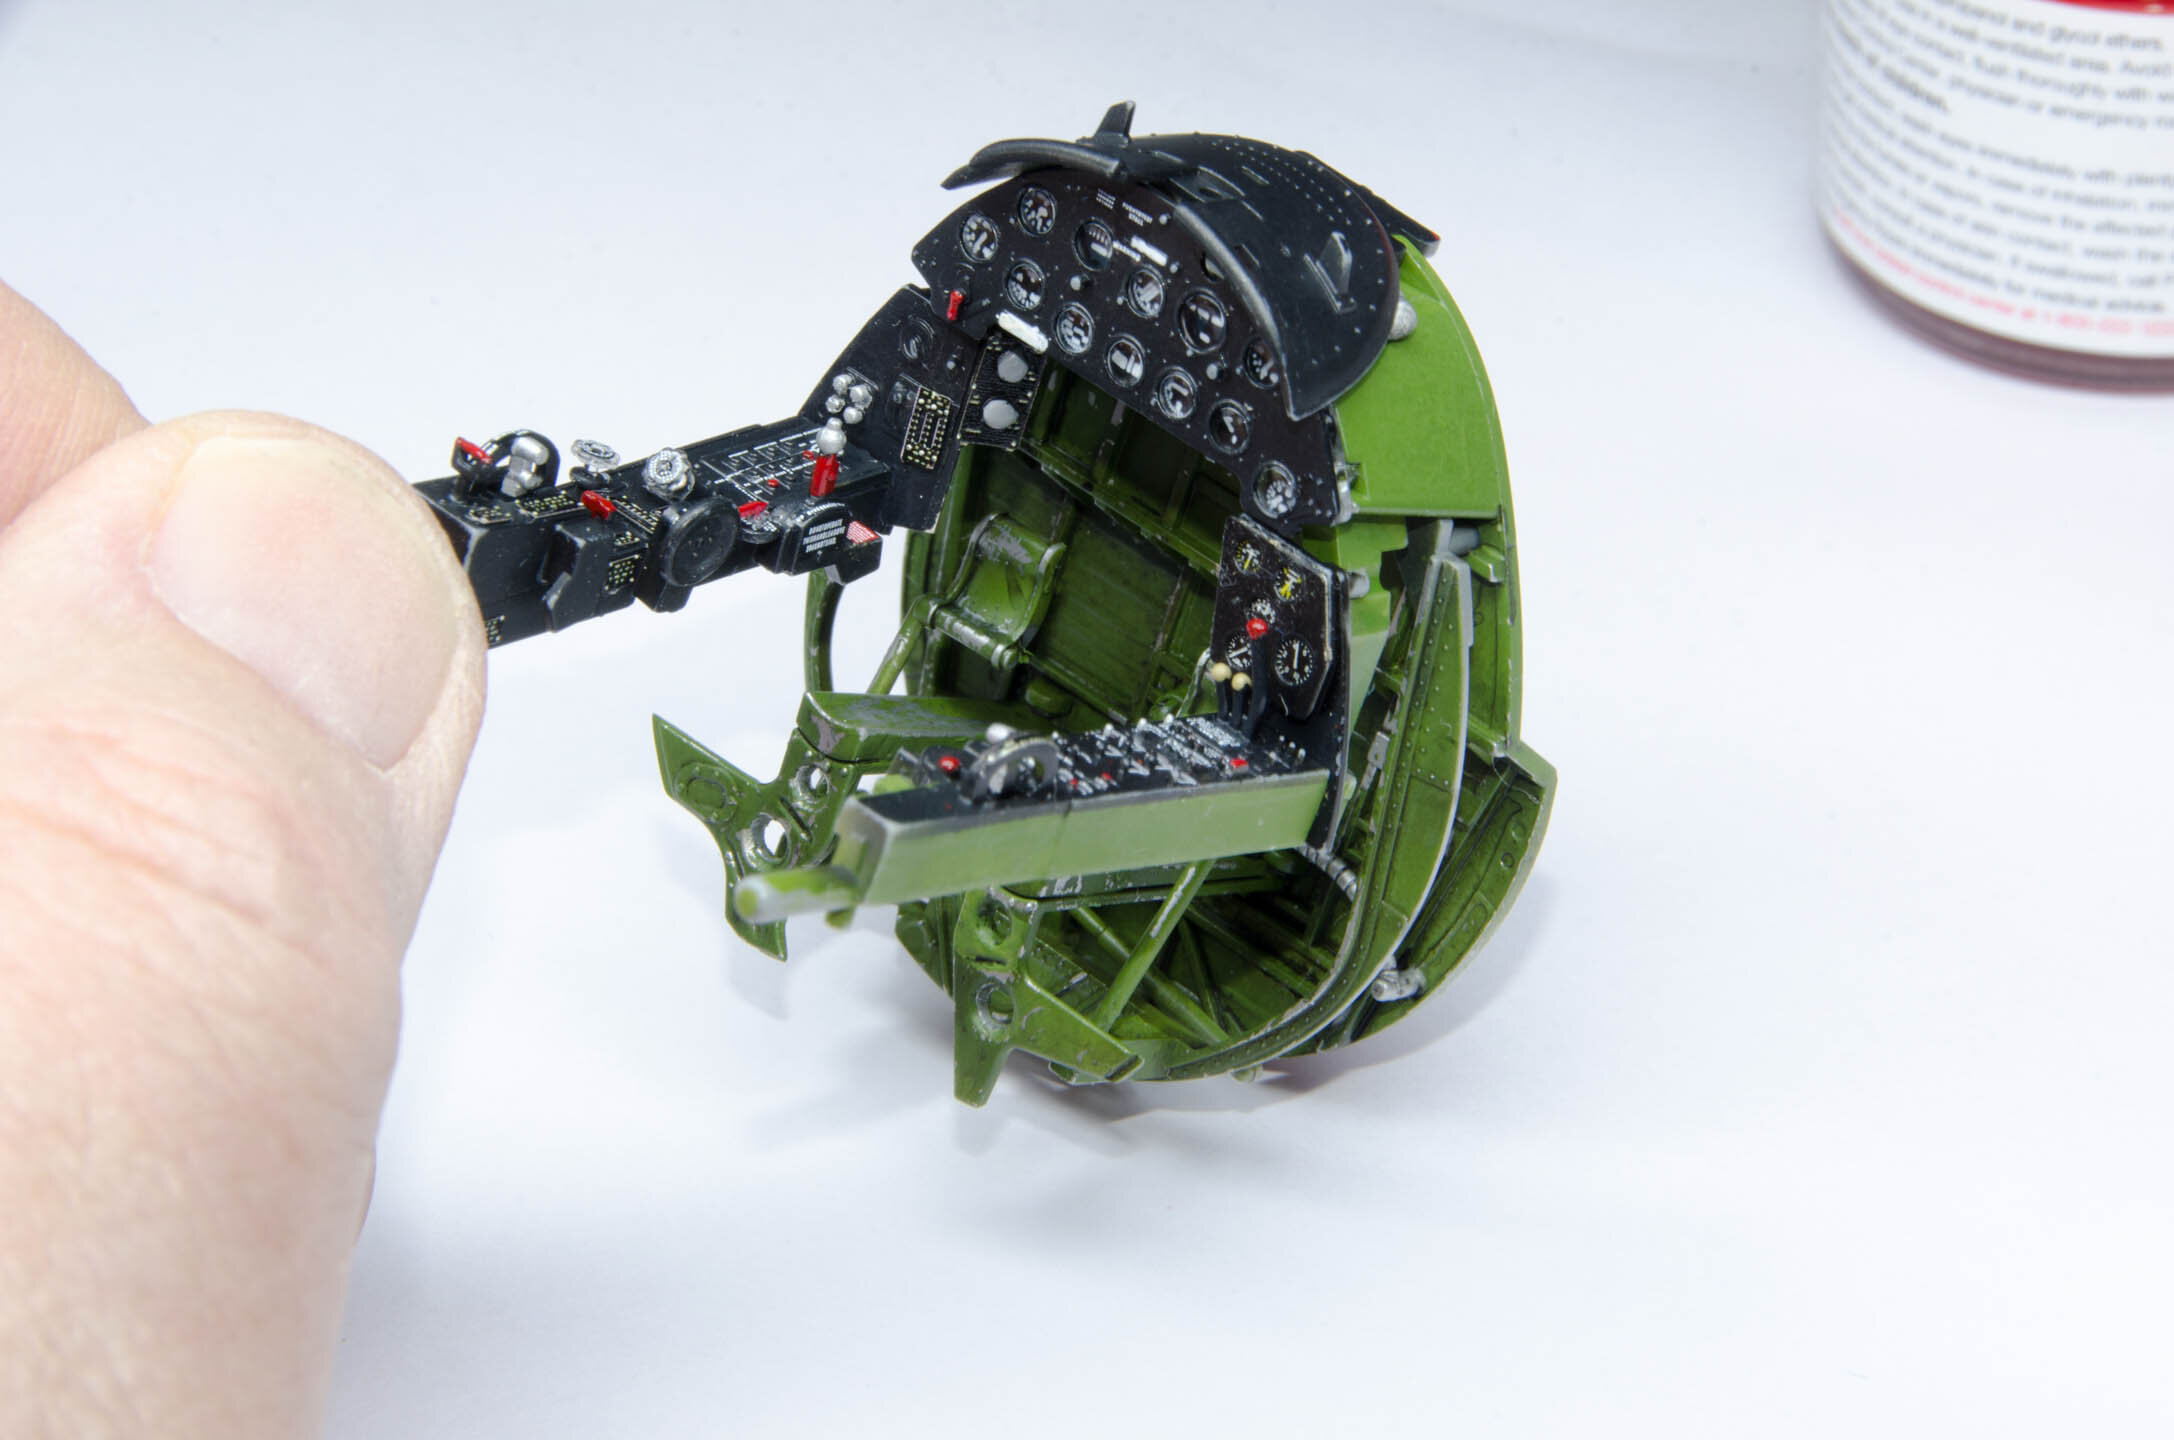
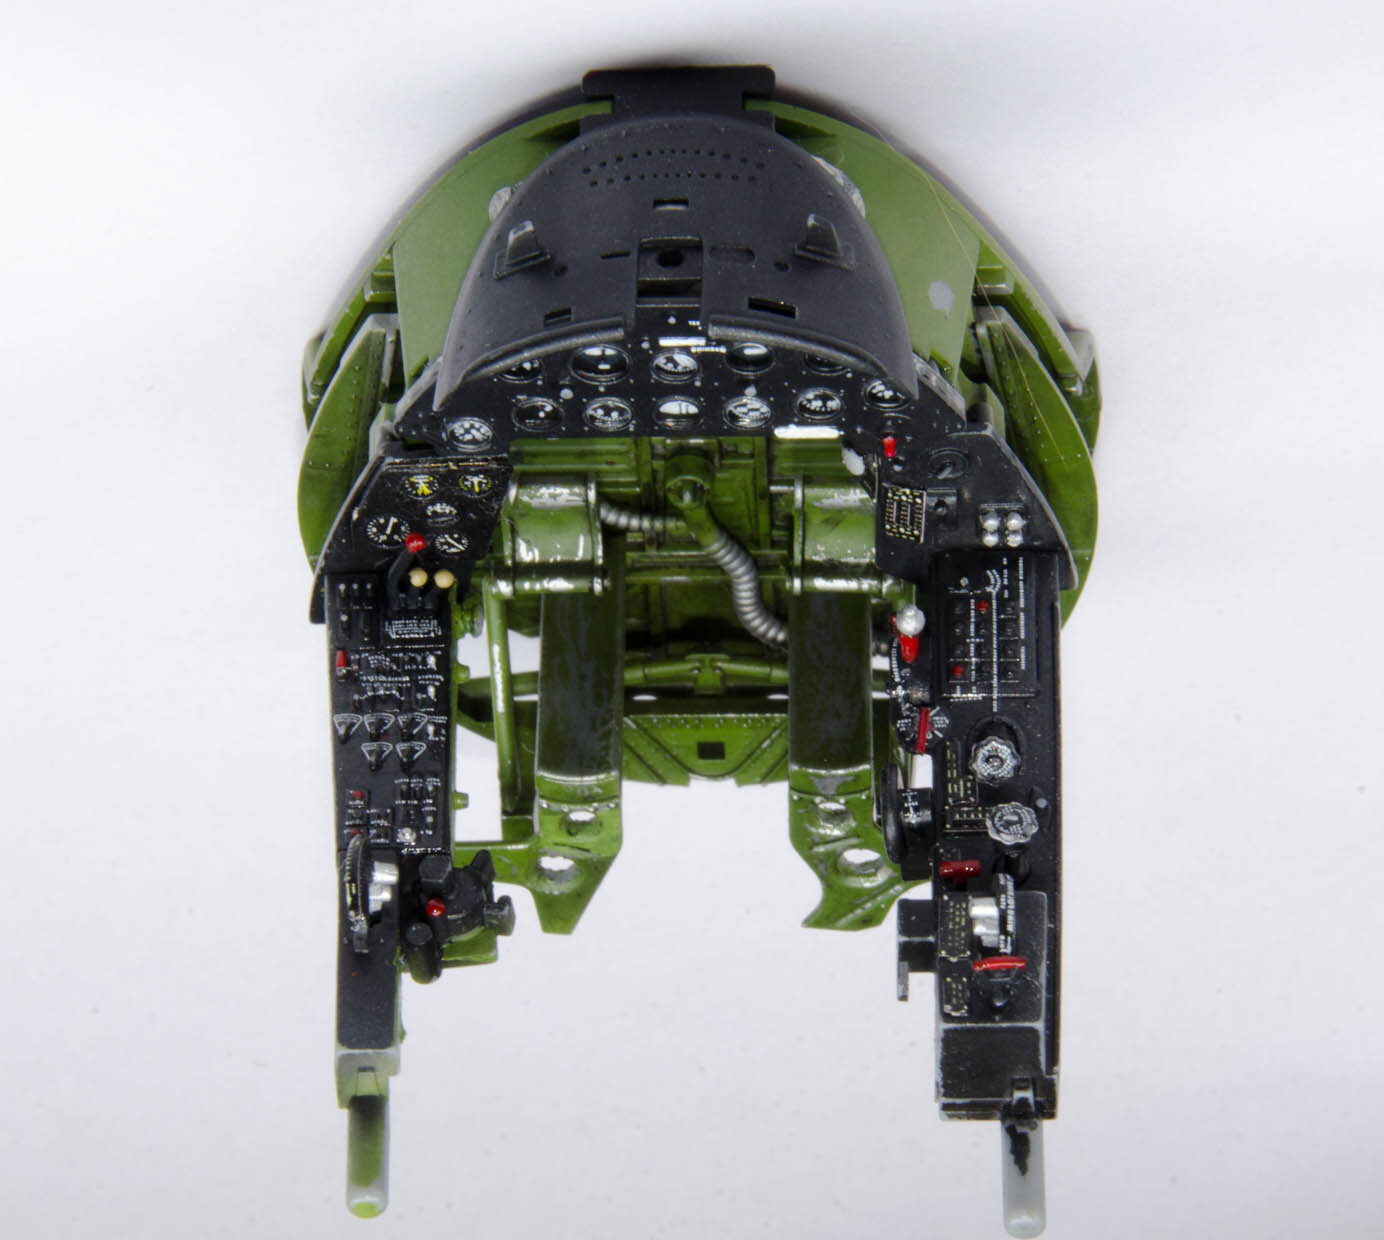
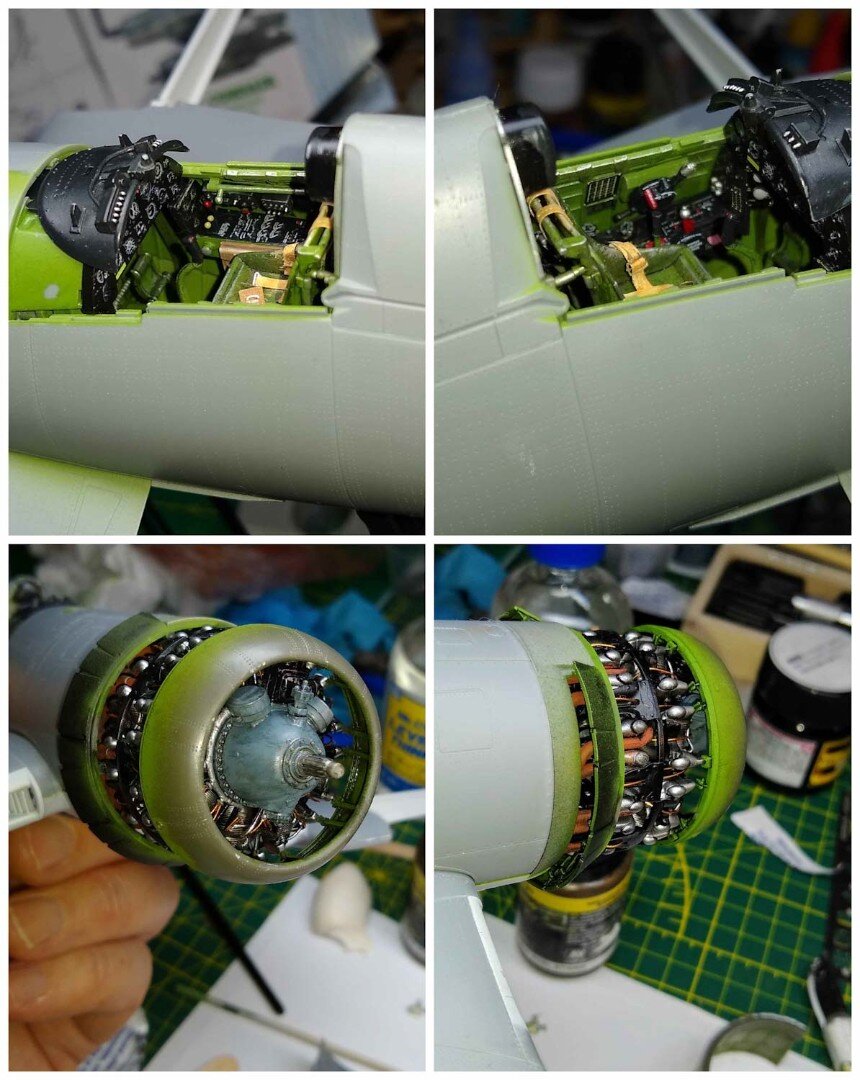
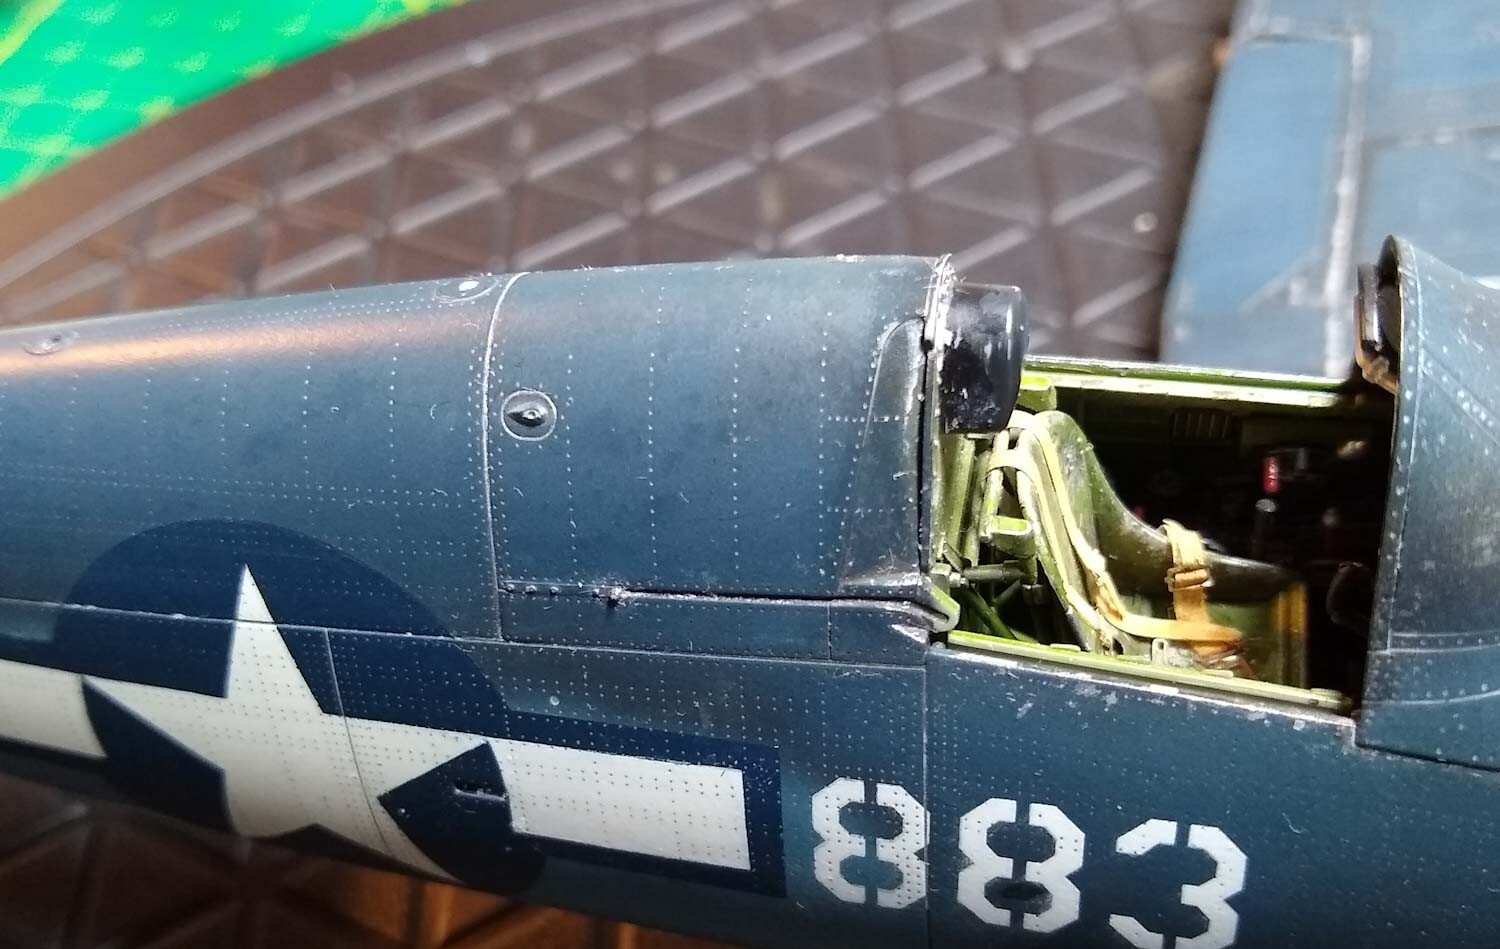
Cockpit
In airplane model making the primary places to show detail are the engine and the cockpit. Time and effort here can lead to a great model afterwards. There’s something about looking into a tiny cockpit and seeing the tiny switches, a well-placed set of seat and shoulder harness and a clear canopy/windows. It just sucks you in to some imaginary place where you’re the pilot and the clouds await your arrival (dreamer…I know). Technically speaking just take your time, use a magnifying headset to get the details right and as you gain experience you can add details found in magazines, historical documents etc…or just wing it. Remember…this is your model…your artwork. So build it as you see fit.
The Painting flow I used to get this chipping done: Alcad aluminum->chipping fluid->Dark Green weathering preshade->mix of yellow and green (their cockpit color) as directed in the instructions. I tried to spray the mix from a single direction to let some of the pre-shading to work. Didn't need a lot of water to do the chipping. Chipping was a new technique I learned when I came back to the hobby. It’s great when done well, but a little goes a long way. There are videos up on YouTube that do a great job of explaining it. It started years ago when hair spray was used (still used) as the chipping fluid. Now you can buy specialty products that do the same thing (at a much higher cost per oz/gram of course)
BTW...the H&S Evolution I'm working with is excellent but at some point yesterday I tipped the bowl over far enough and a lot of paint ran down the front of the brush into the nozzle area. The next time I applied air there was this Jackson Pollack blast-mist of green spray paint that covered these parts in spots...I chuckled, used a little thinner to make the spots less conspicuous and moved on.
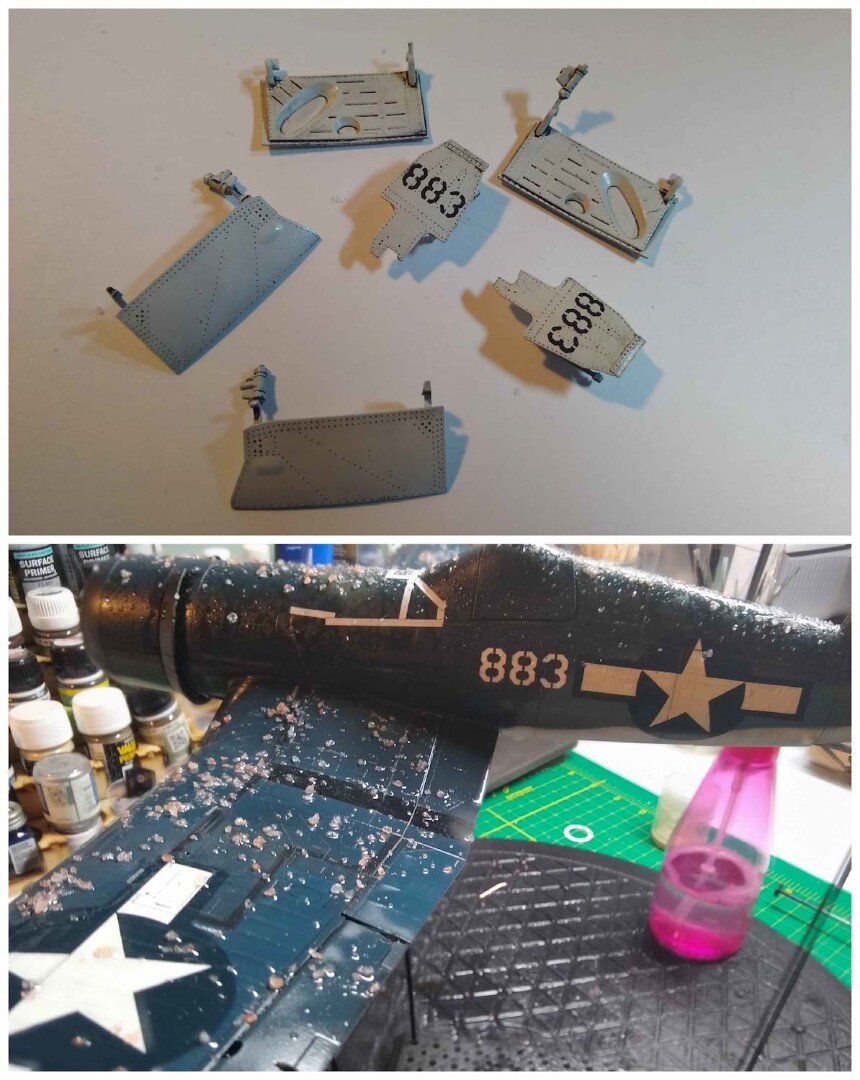
I spent time in the instructions to figure out what to glue first and paint second…and what to paint first and glue second. I settled on these main parts as shown.
Chipping is fun…but you can get carried away…later on you’ll see some serious mistakes…
Some thoughts here...as we age our eyes go "south" as some of you (most of you) know. As I build I like to take telephoto shots and really zoom in and use a bright flash to pickup details I otherwise miss. I shoot pics in RAW format and roll up the exposure in Photoshop to get the details to pop. What i really notice here is too much "wear" (most will be hidden so I'm not going to "un-wear") and how the paint wears off the hard edges as we handle our models. You also see dust and other details you might otherwise miss. It's been a joy to work w/this one...even the small bits are perfectly set and I have not had to remove much flash at all.

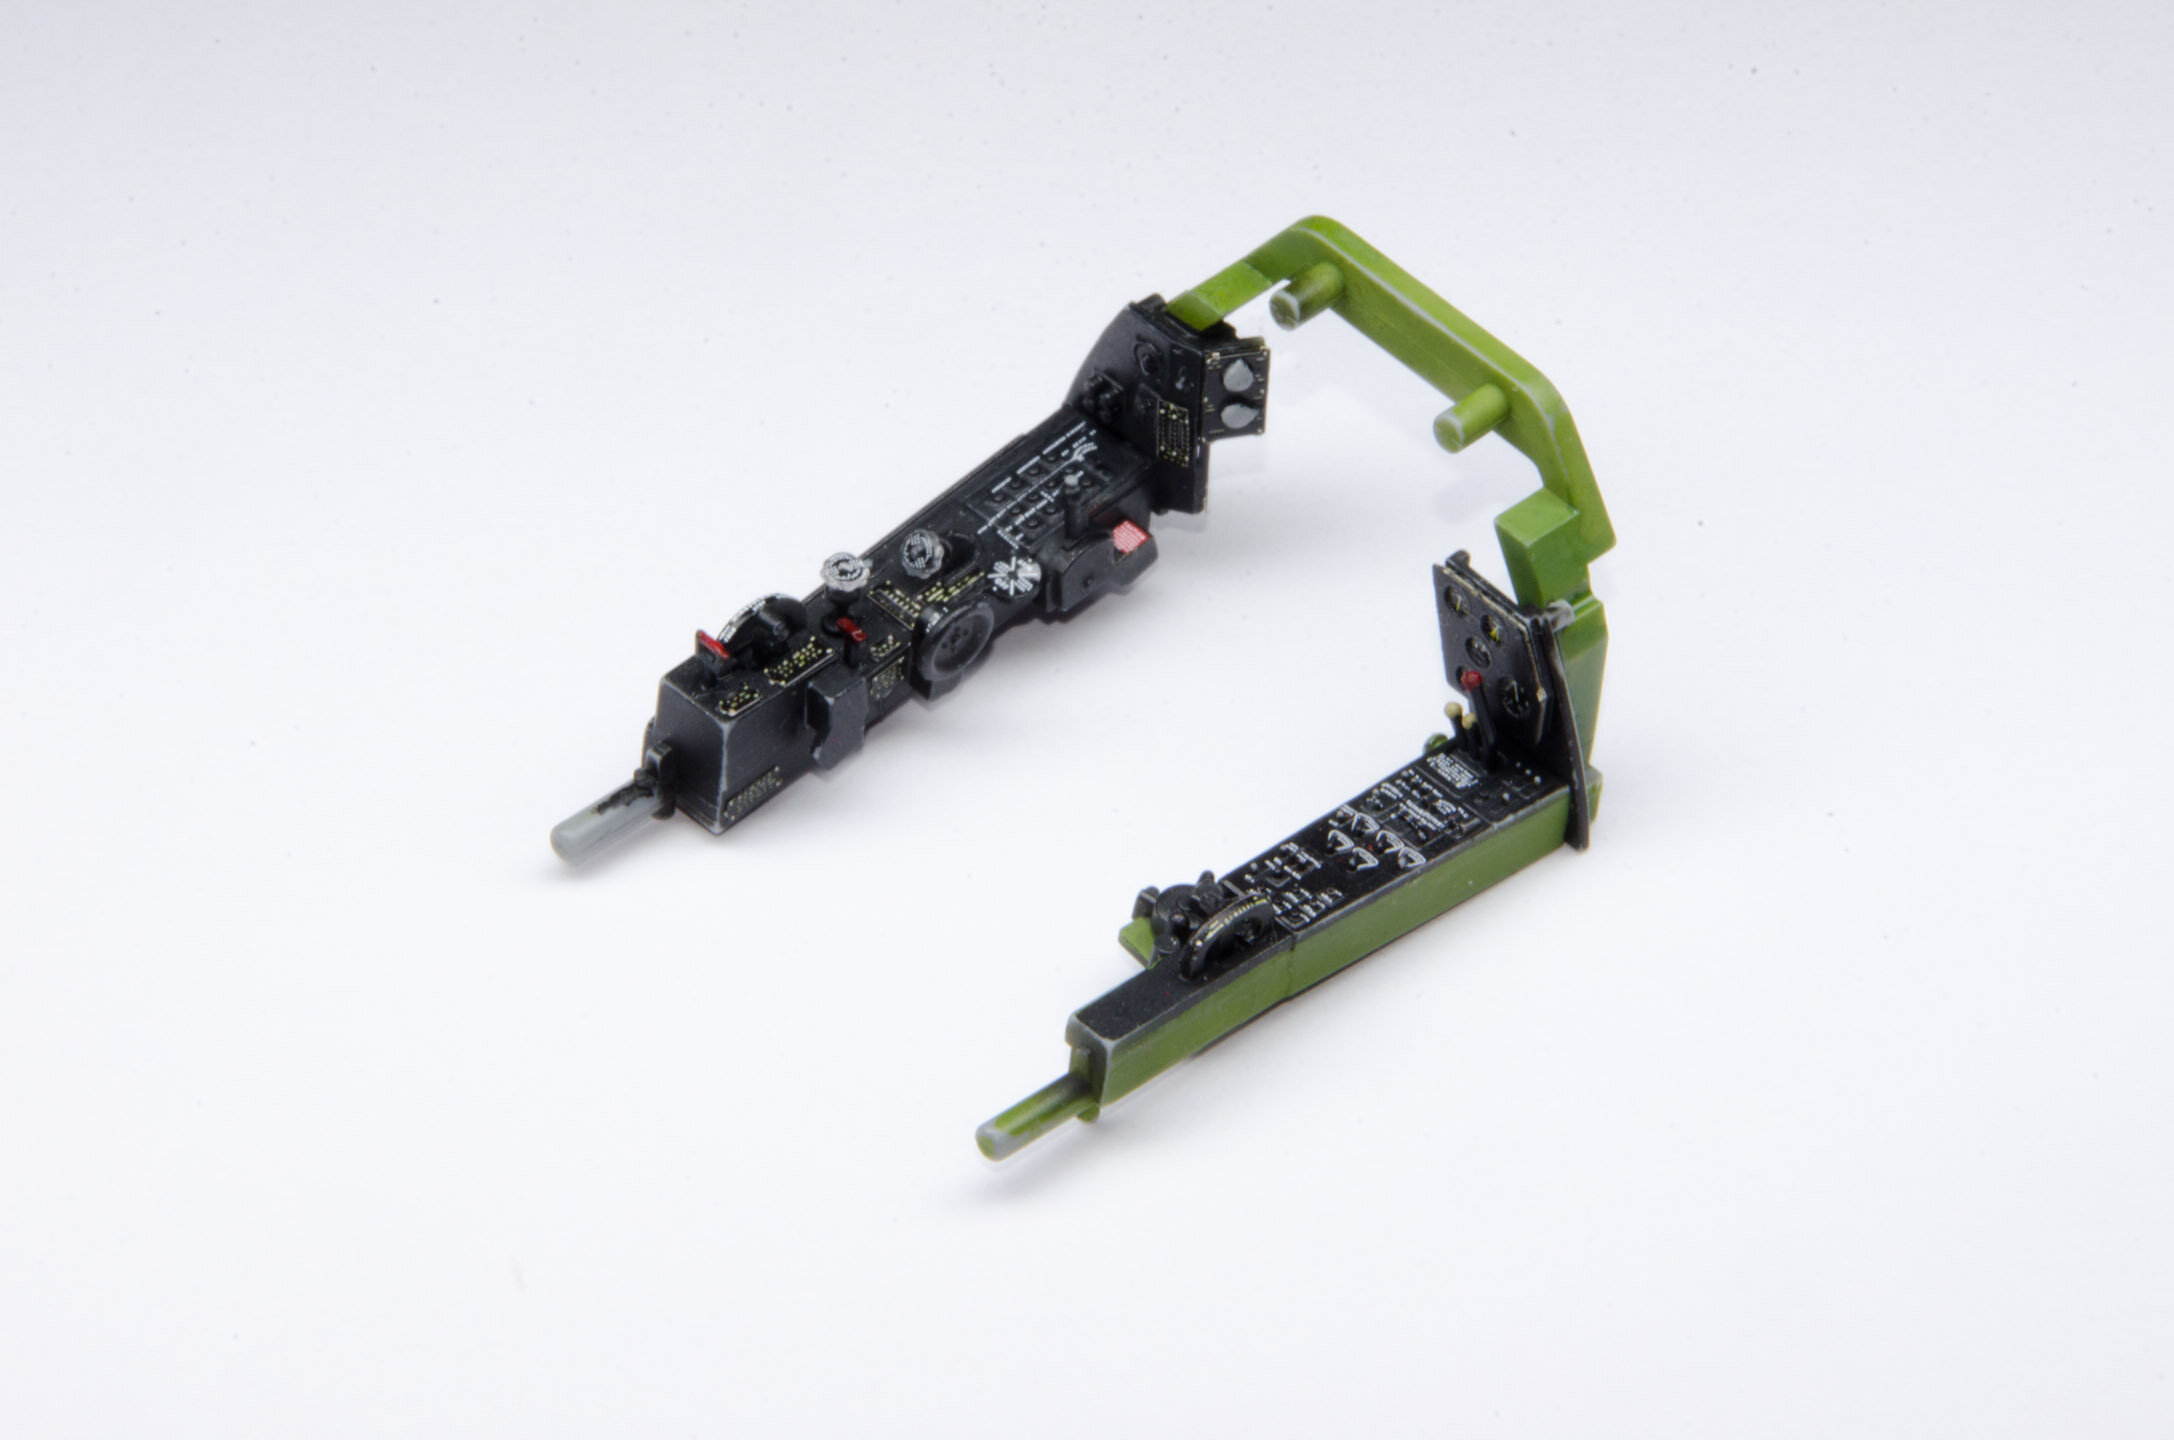
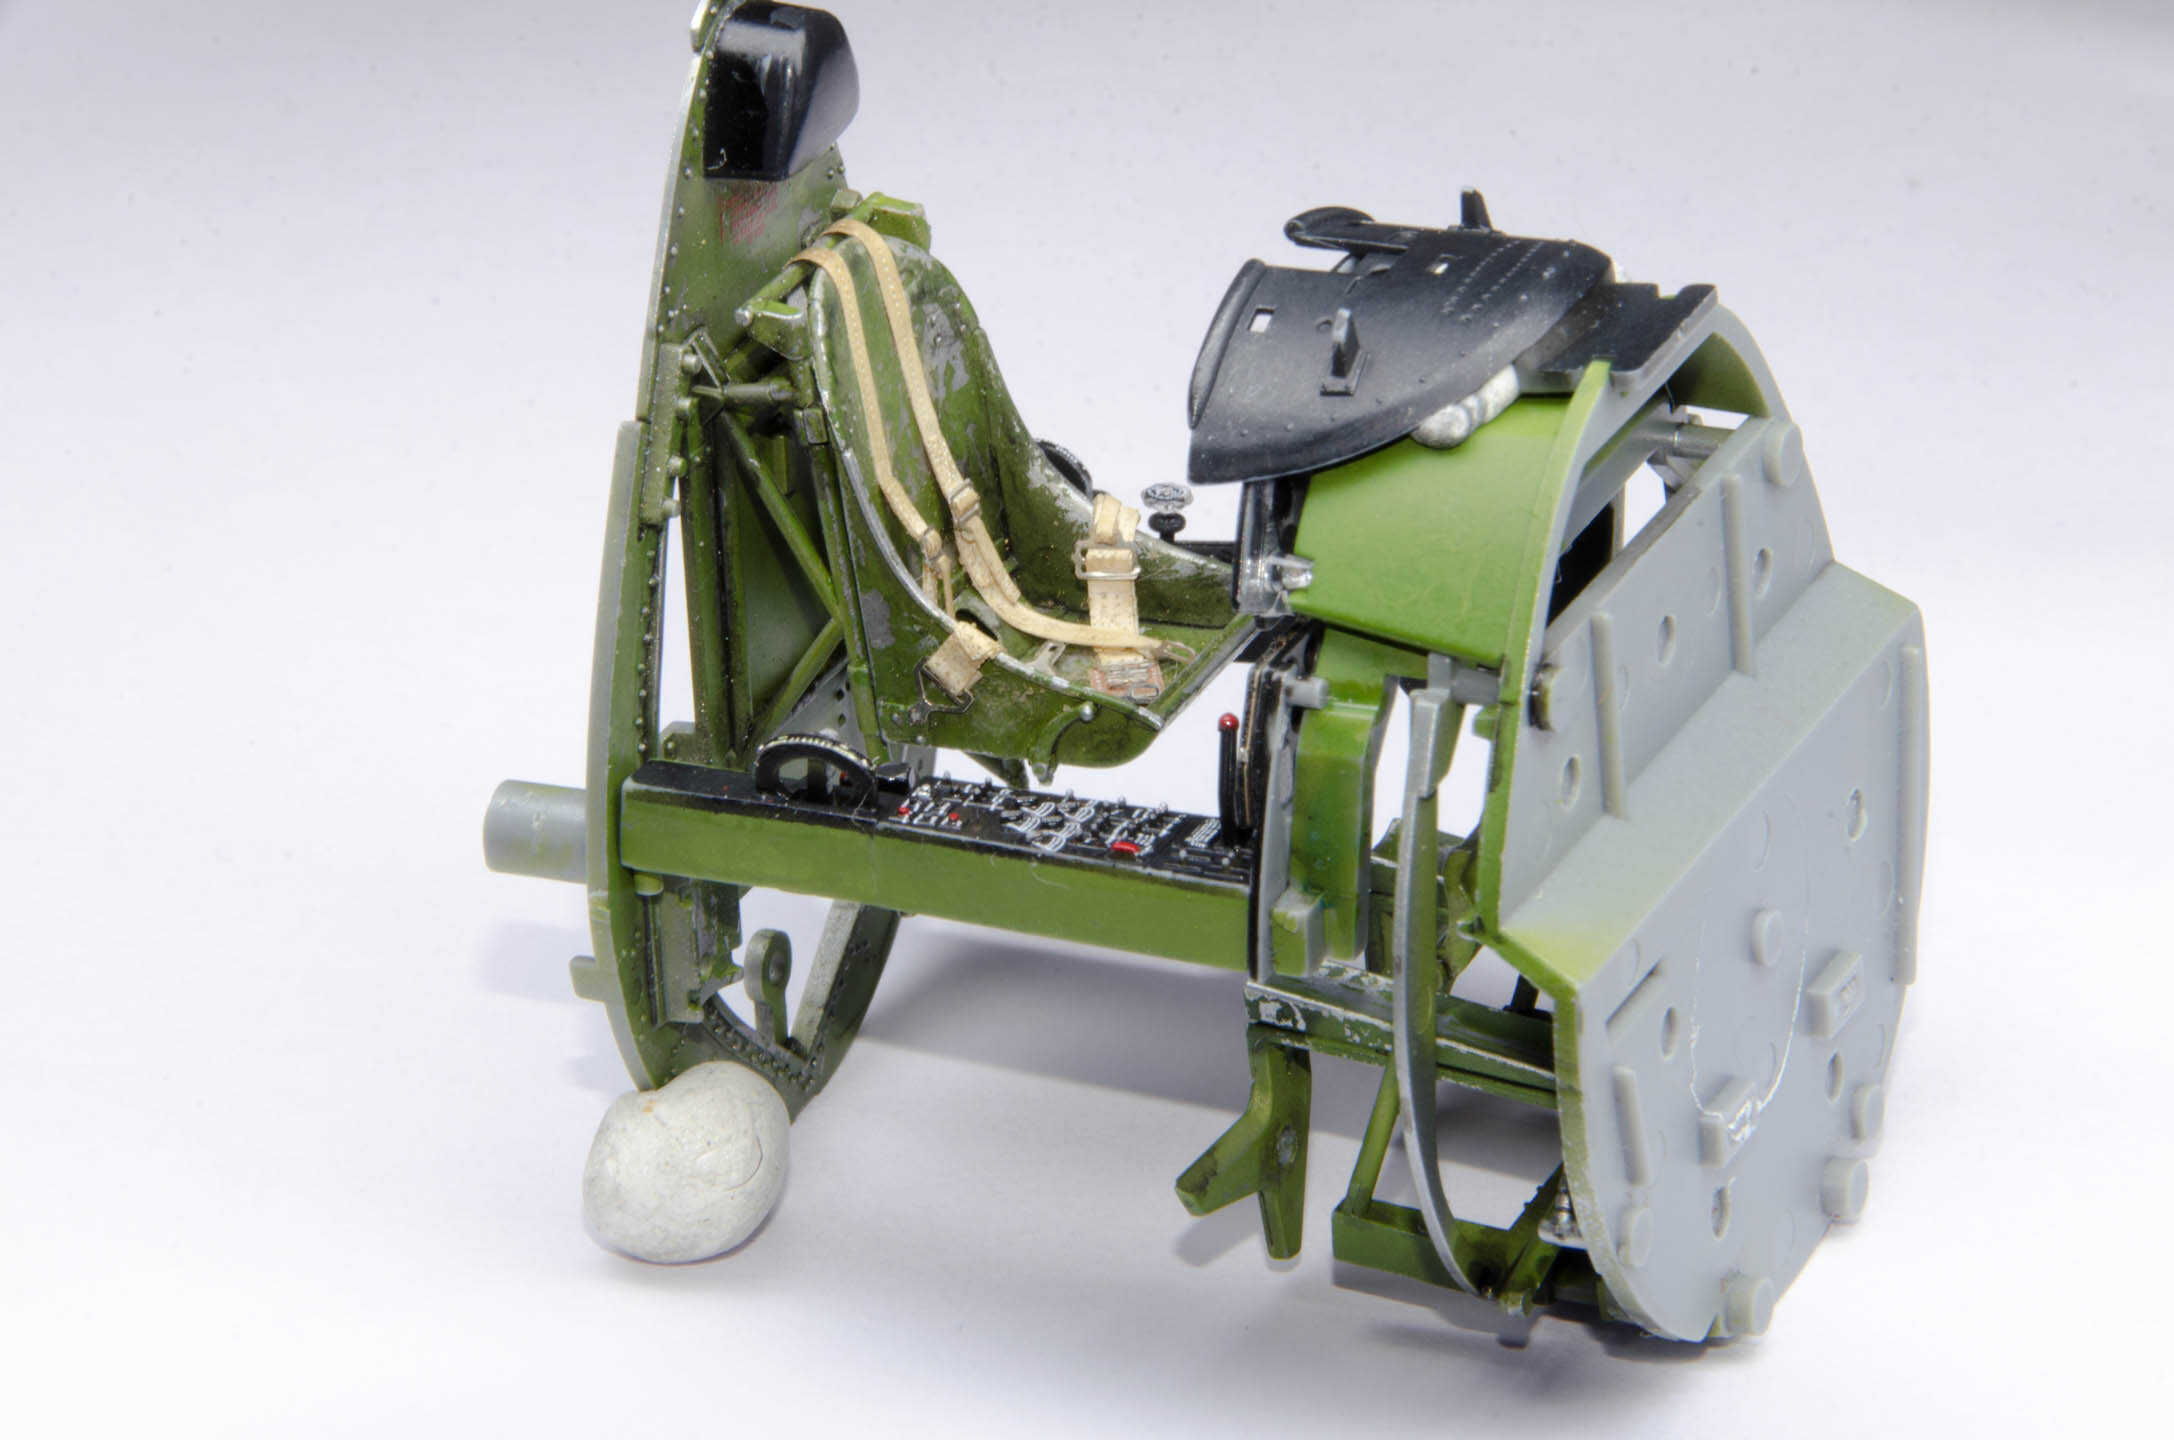
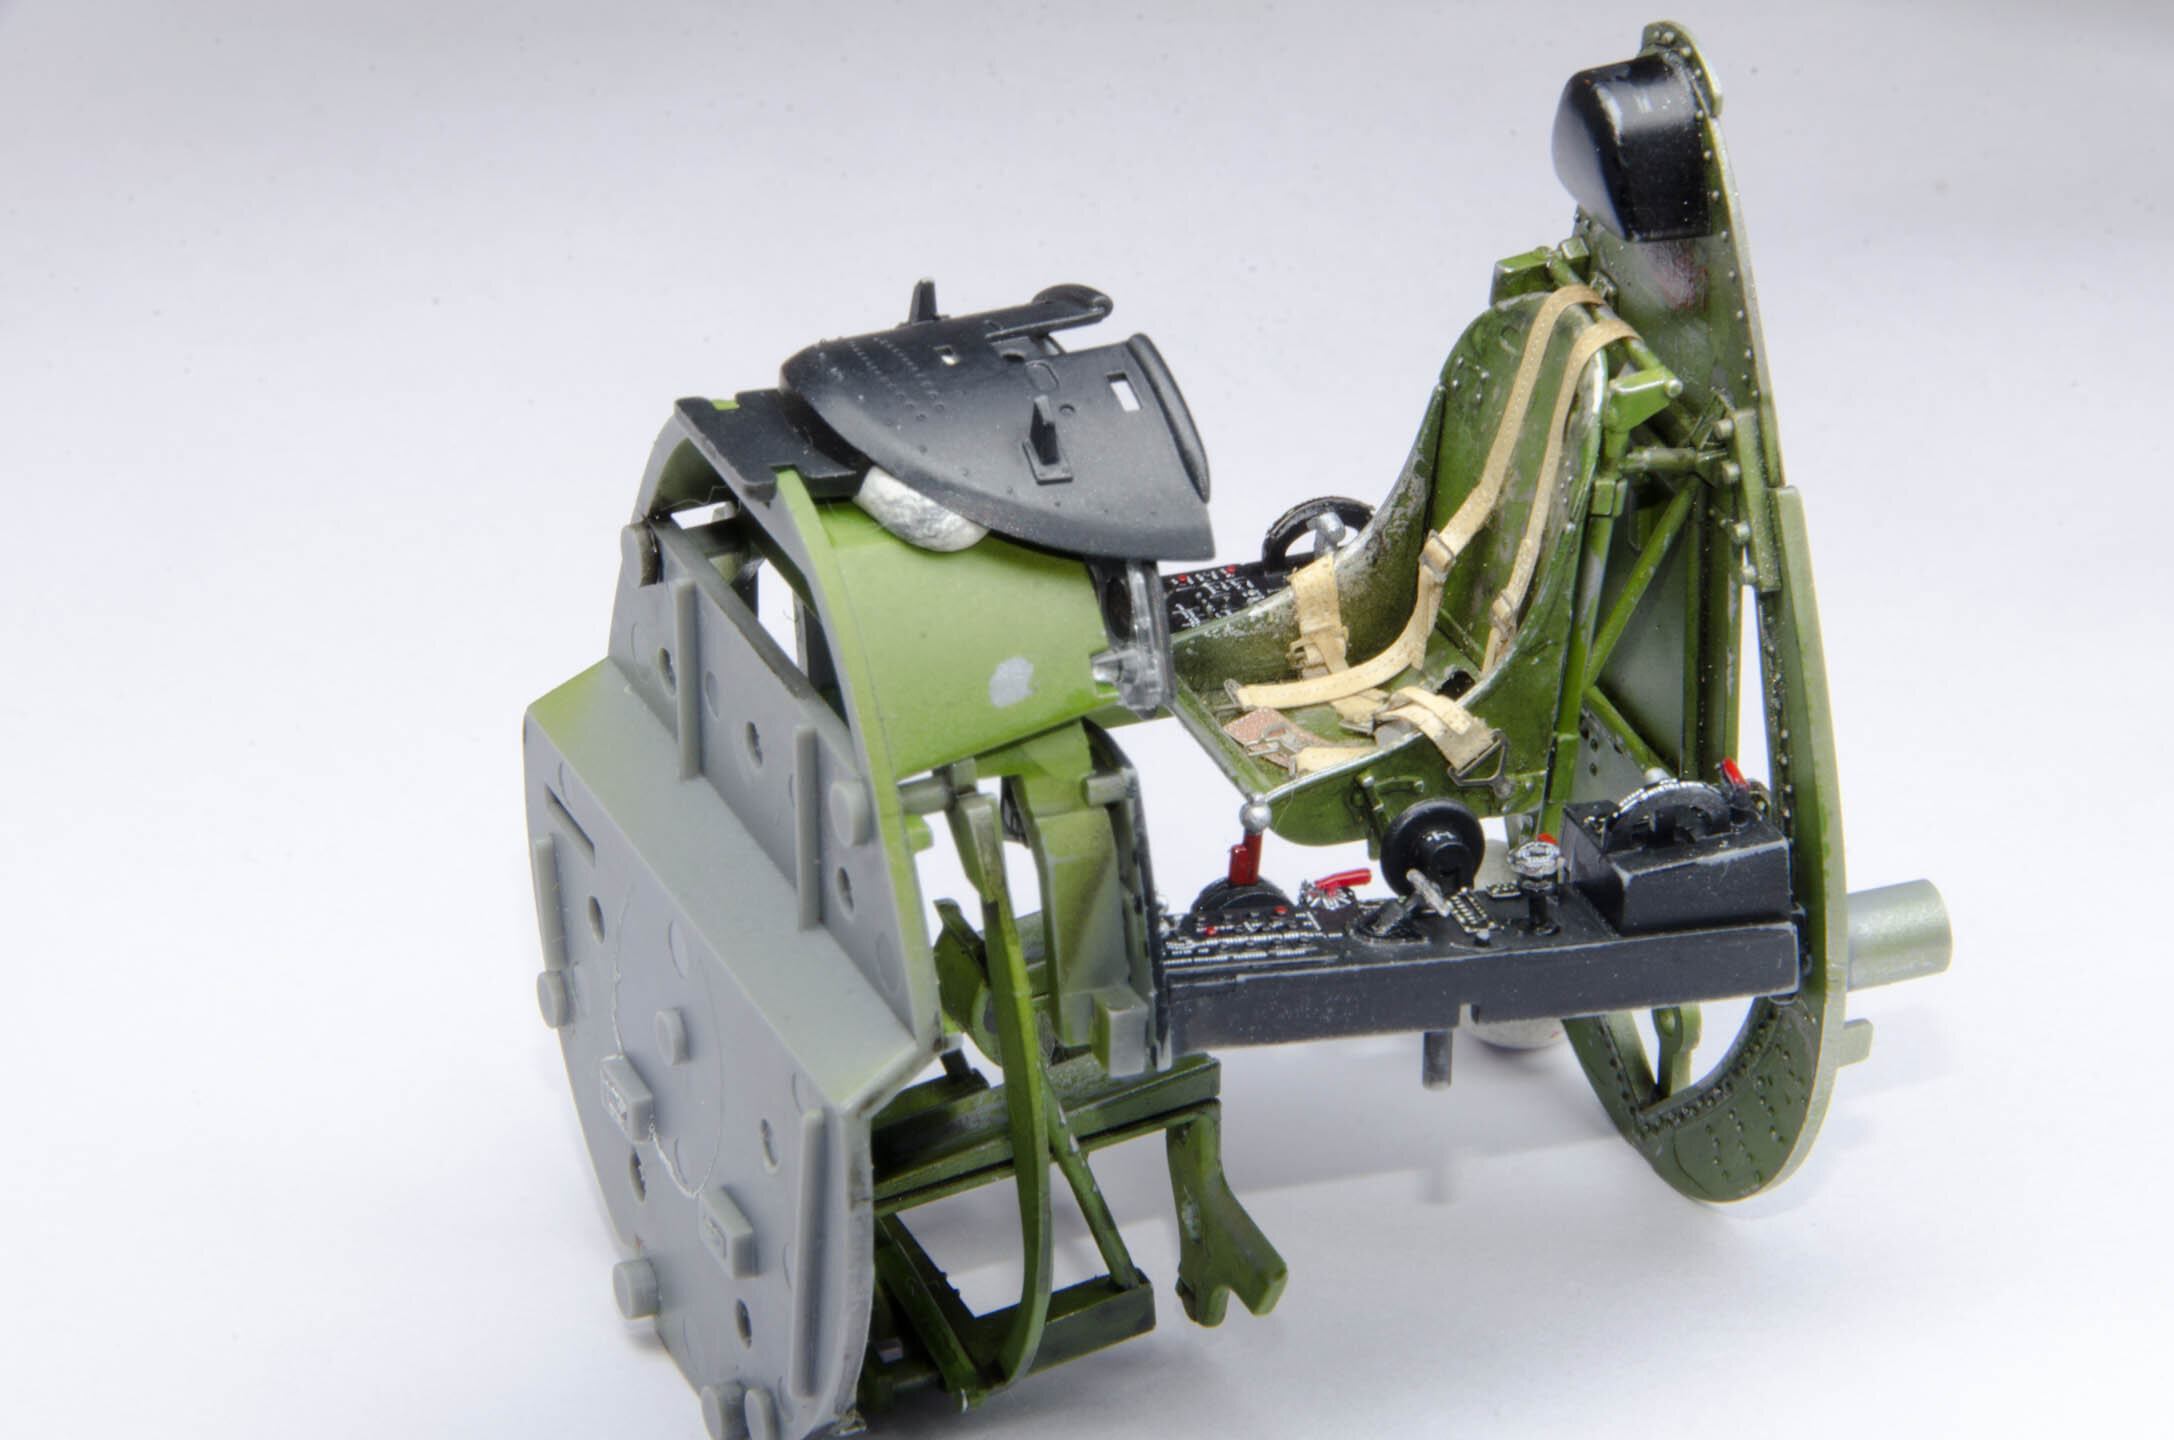
REALLY SMALL BITS
I used Barracuda decals and other bits from Eduard and Airscale to add detail and ambiance. I followed the Brett Green book on building this Corsair (great book). After I finished the cockpit I took a few days off…I had strained my eyes working at this very intently over a week or so.
What I did not do here, that I’ve seen in a lot of other versions of this, is to create the mess of wires and pipes that actually occupies a Corsair cockpit.

If you’ve ever seen a picture of a Corsair at war, you’d think the cockpit more resembled a plumbers and electricians shop than anything else.
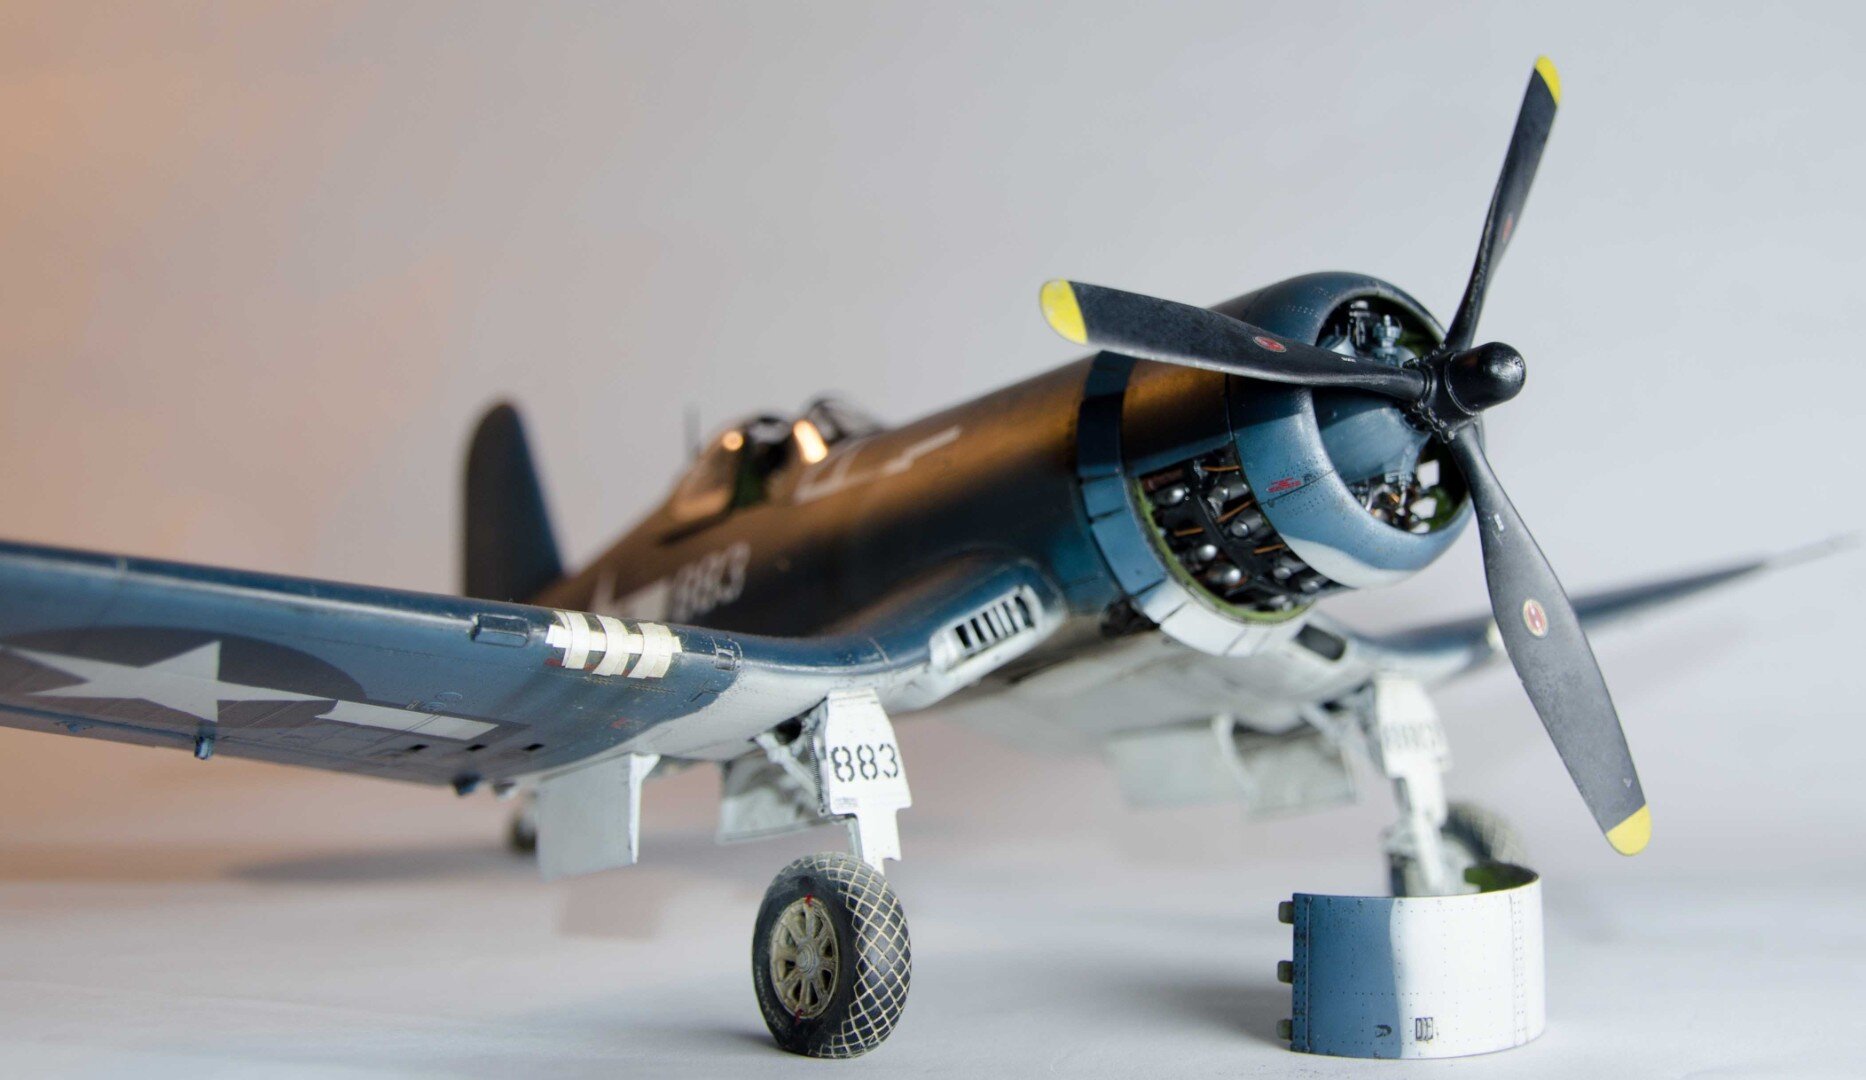
Engine
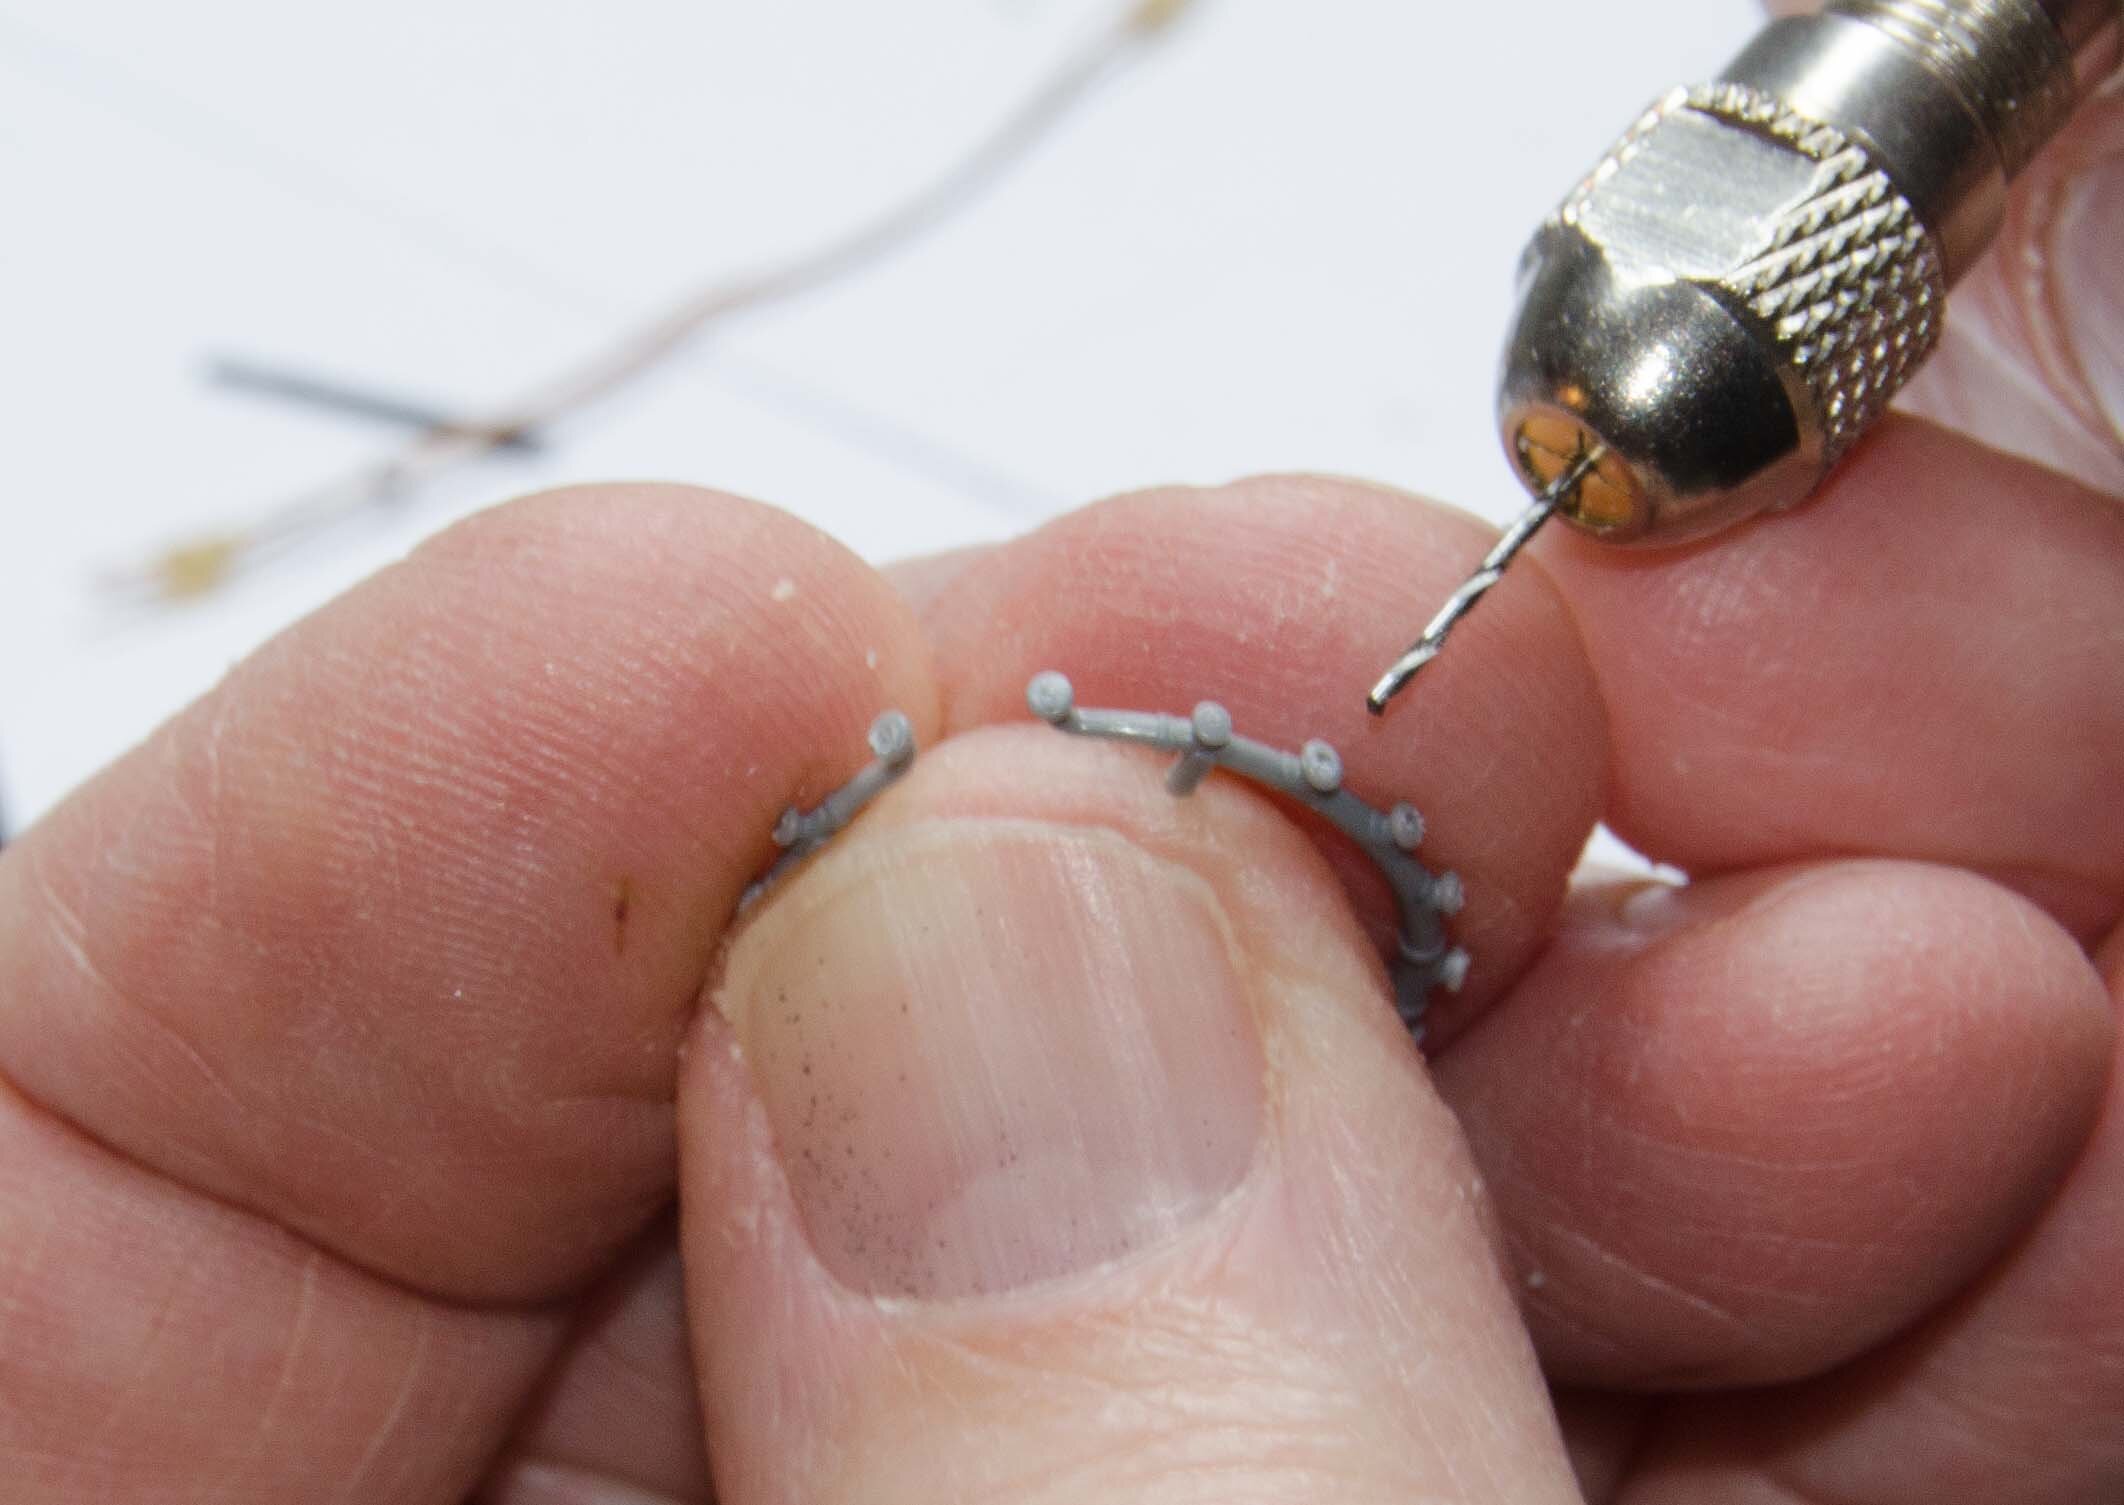
Tamiya did a great job on the P&W engine. The actual Corsair’s engine was a beast and the gull-wing shape is due to the speed requirement of the contract forcing a mid-wing configuration and because the engine required a huge propeller, a design engineer, on a scratch pad, designed the iconic design. It even forced the design of the landing gear…everything was connected. And that’s what Tamiya did when engineering this models engine…they connected the fitting of engine, cowling, exhausts and fuselage as perfect as you can get it. It really is an engineering triumph. That said…you can still add details…specifically wiring. Good wiring in the engine is analogous to great detail in the cockpit. So I grabbed a pin drill and some copper and lead wiring…and started.

I drilled 96 holes in this beast
I drilled four holes in every cylinder; Two for the two spark plug wires, and two for whatever that cross-tube is (I should know…probably did know…but didn’t care to remember what it’s called). That’s 4x18 to start. Add in holes for the distribution ring (?) and others for oil lines and other bits to attach and it ended up at 96 total drill points.
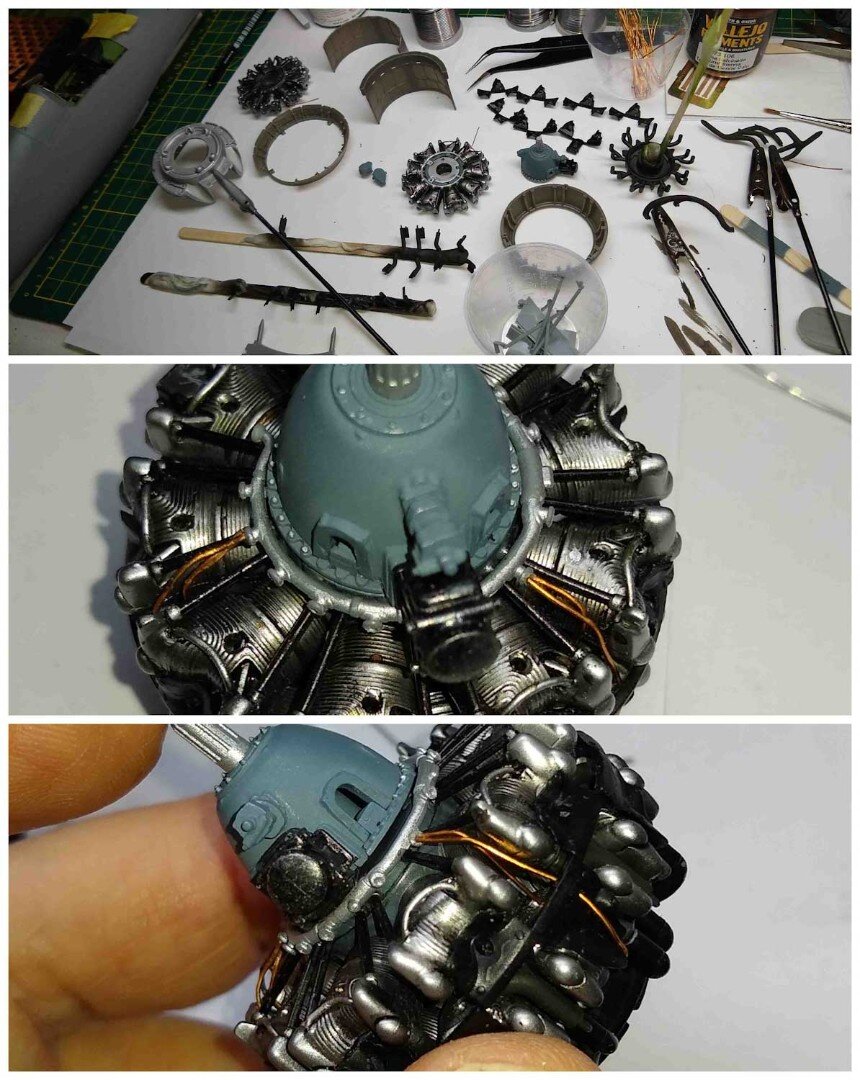
The engine was painted in Alcad Silver and I washed the cylinders (and engine body) in Tamiya’s Black panel liner (liberally). I detailed painted the bolts and dry-brushed silver on any black component. The plug wires are copper wires I cut from an old led light set that had been hanging out back for years.


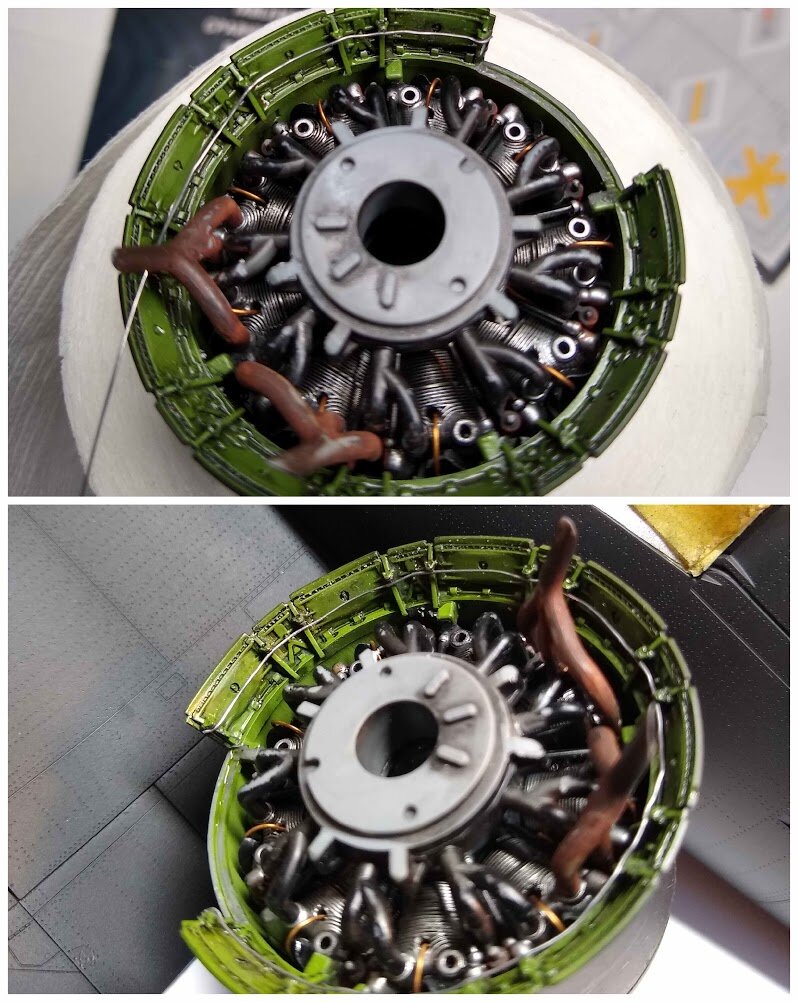
I used combinations of rust-colored Tamiya Weathering Masters and Vallejo pigments to detail the exhaust stacks. I then purchased a Brassin cowling to give some detail to the engine cowlings…particularly the engine cooling flaps. The wiring you see below was connected to the cockpit so the pilot could crank them open/closed.

Wire detail really works
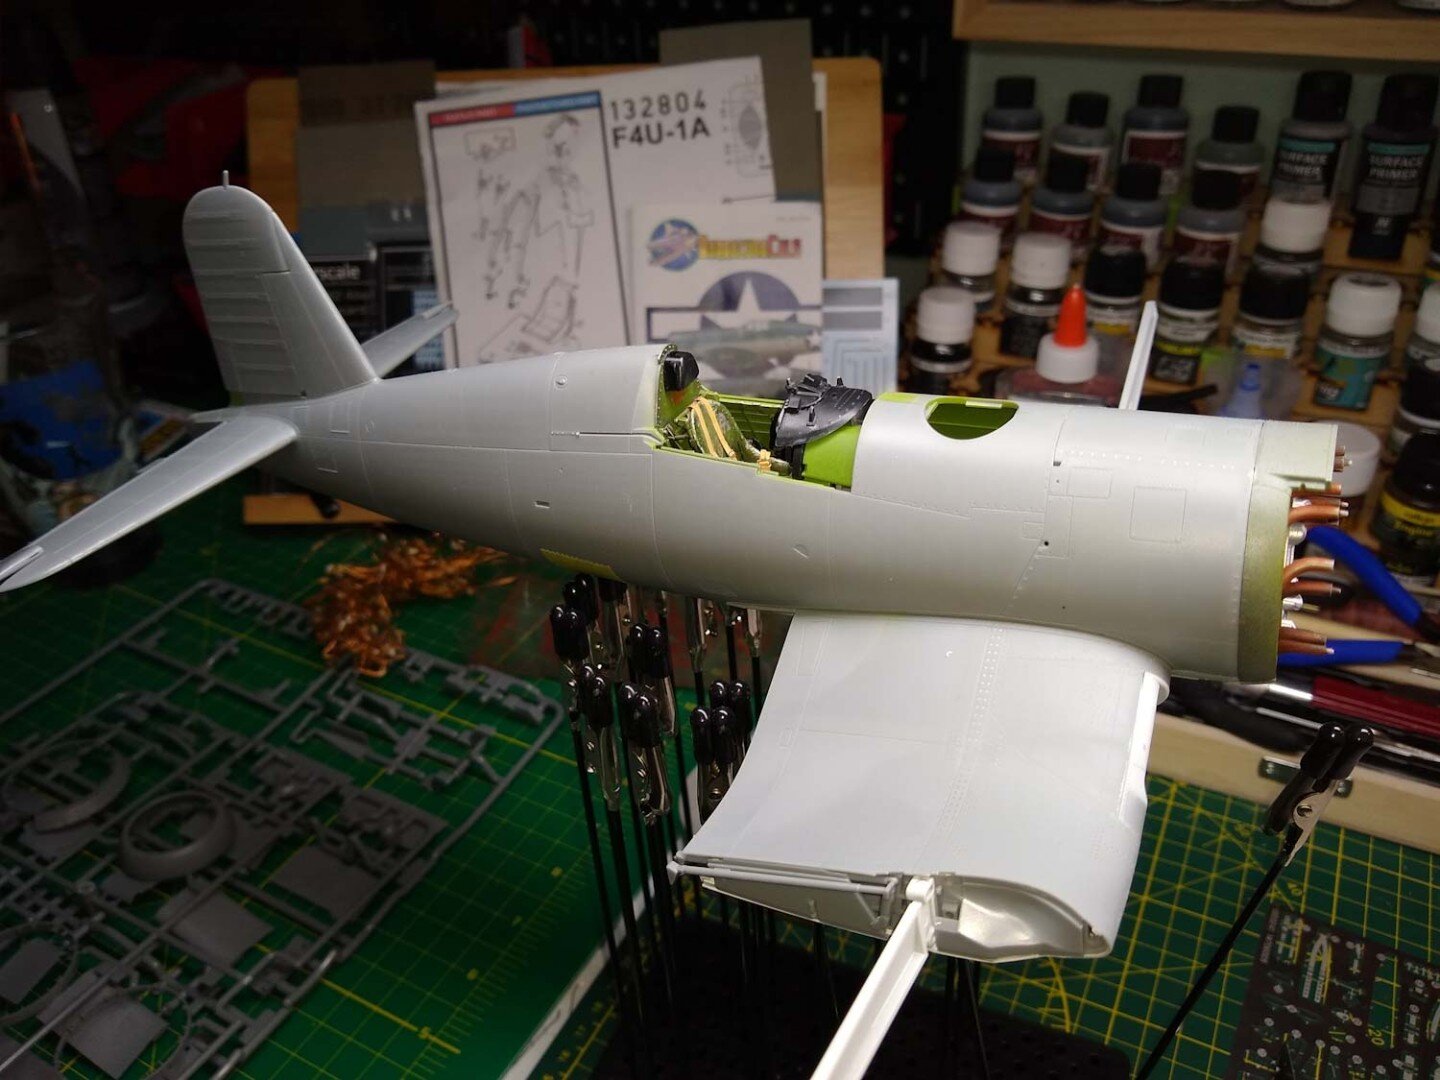
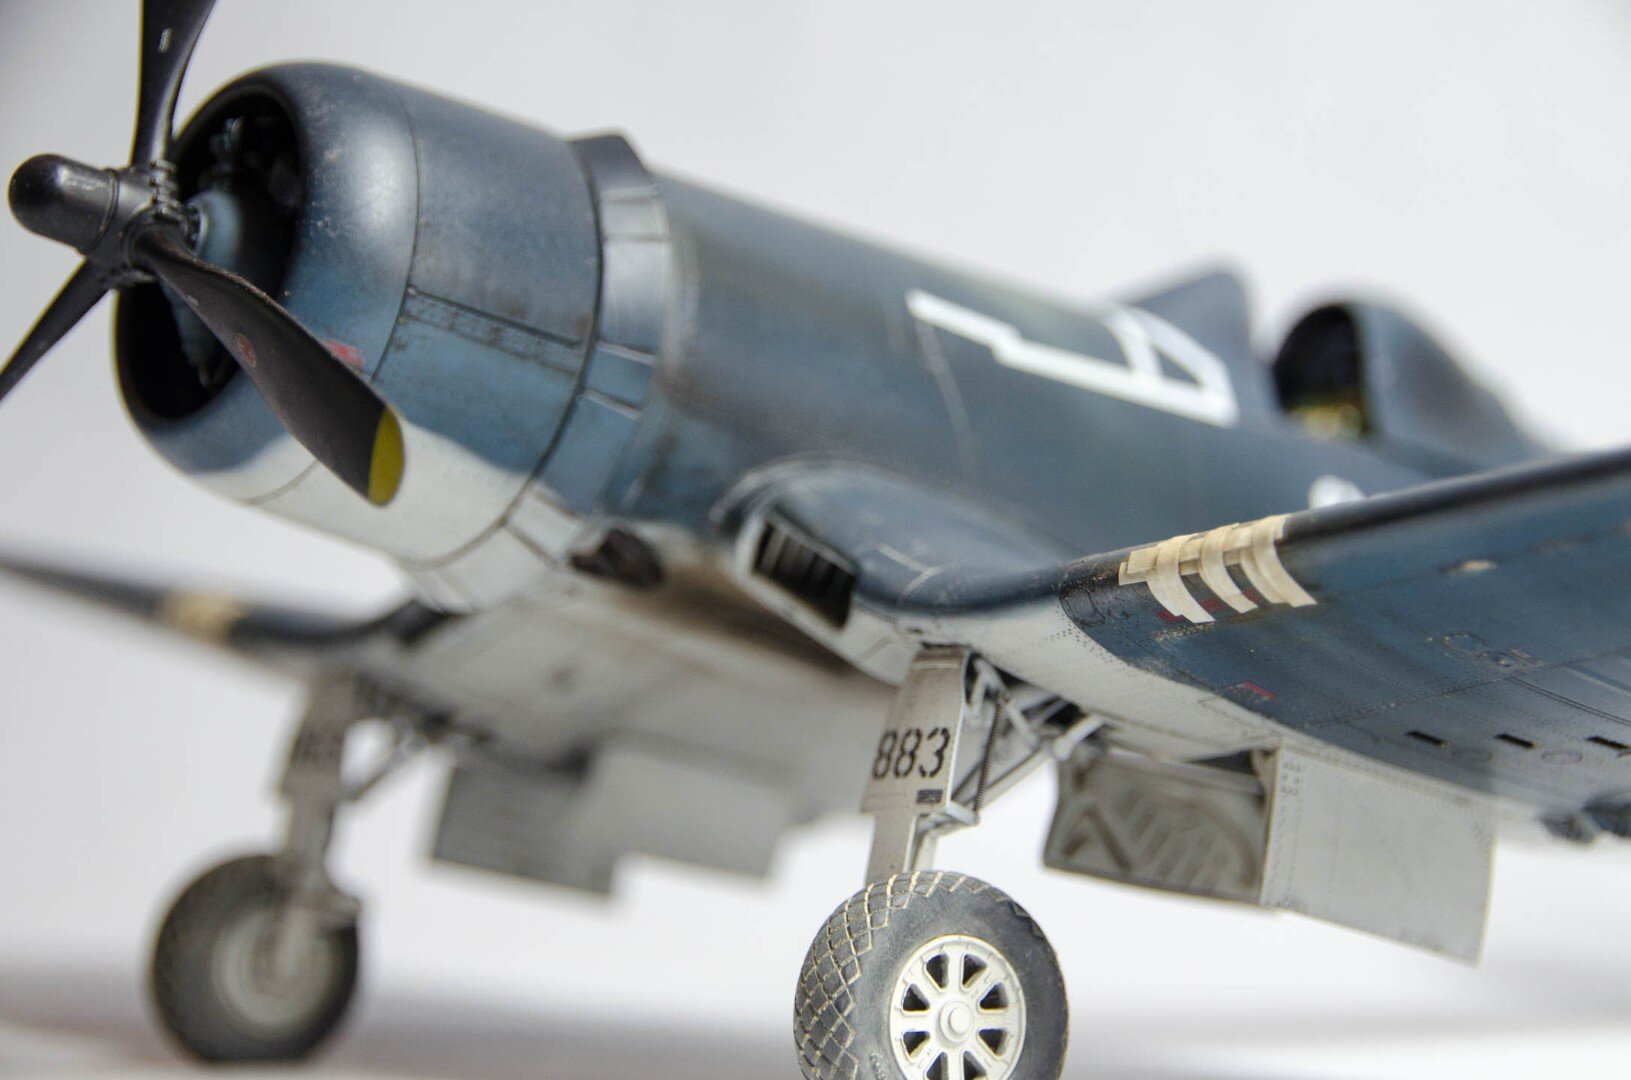
Putting the pieces together wasn’t difficult because everything fit well…almost no seam work required. I used some small brass tubes to simulate machine guns (they’re too close to the opening though). The one seam I had to work on was the underbelly but using Mr. Surfacer 1500 and a variety of sanding sticks did the trick. You can never have enough sanding sticks/pads/wheels/whatever…but remember plastic is really easy to scratch so make sure you get some fine sanding sticks to work those out.

Now the real scary part…painting
I had previously built a Tamiya 1/48 scale Corsair to prepare myself for this model…the three-part camouflage is complex in that at points on the aircraft you have all three colors coming together over complex curves and my limited experience with an airbrush (only four models before this) made me really slow down here. I spent hours visualizing how I was going to pull this off…and ended up using a LOT of tape (you’ll see), Plasti-tak, had to repaint the entire fuselage and parts of two wings and generally spent an inordinate amount of time mixing paints to get some semblance of an overall paint scheme that didn’t include too much, or too little variations and hues of blue. When I built the 1/48 Corsair I decanted the exact spray Tamiya instructed us to use and that was…interesting…to say the least. I’m never going to do that again. Not only were the fumes bad, but having to let the gas come out by constantly stirring the stanky paint made me feel like a mad scientist who didn’t give up glue smelling this week.
This time I spent more time on the Internet looking up paint mix schemes and settled on these mixes for the AS paints:
AS6 Olive Drab = XF62
AS7 Neutral Gray = XF53
AS8 Navy Blue = XF17:5 + AF8:3 + AF2:2
AS9 Dark Green = XF58:1 + XF62:5
AS10 Ocean Gray = XF18:1 + XF-21:2 + XF24:2
AS11 Medium Sea Gray = XF19:3 + XF54:5
AS19 Intermediate Blue (US Navy) = XF18:5 + XF2:4
AS20 Insignia White (US Navy) = XF2:10 + XF55:1
AS22 Dark Earth = XF52:1 + XF64:1
I decided I wanted to build a fairly weathered Corsair…maybe not as nasty as they were early in the war…but definitely cruddy looking. I had success w/chipping on earlier models and on the interior so with knowledge I was great at this I pushed forward and…

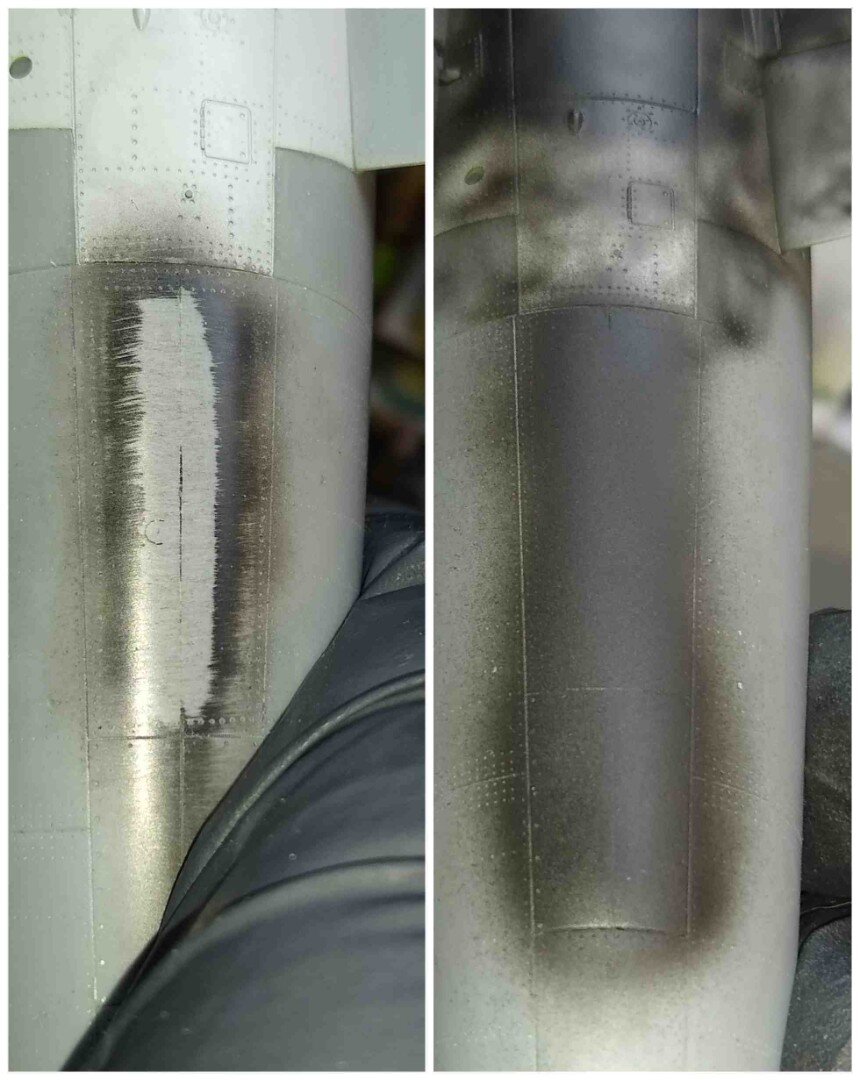
…I used a mule to practice
I was worried about the weathering…so I used a Tamiya 1/48 scale corsair paint “mule” to run an experiment.
Top to bottom. I was trying to get some original aluminum and the anti-corrosion paint to show on the Corsair as weathering after I painted on the final color schemes. Reasonably good plan but you’ll see later.
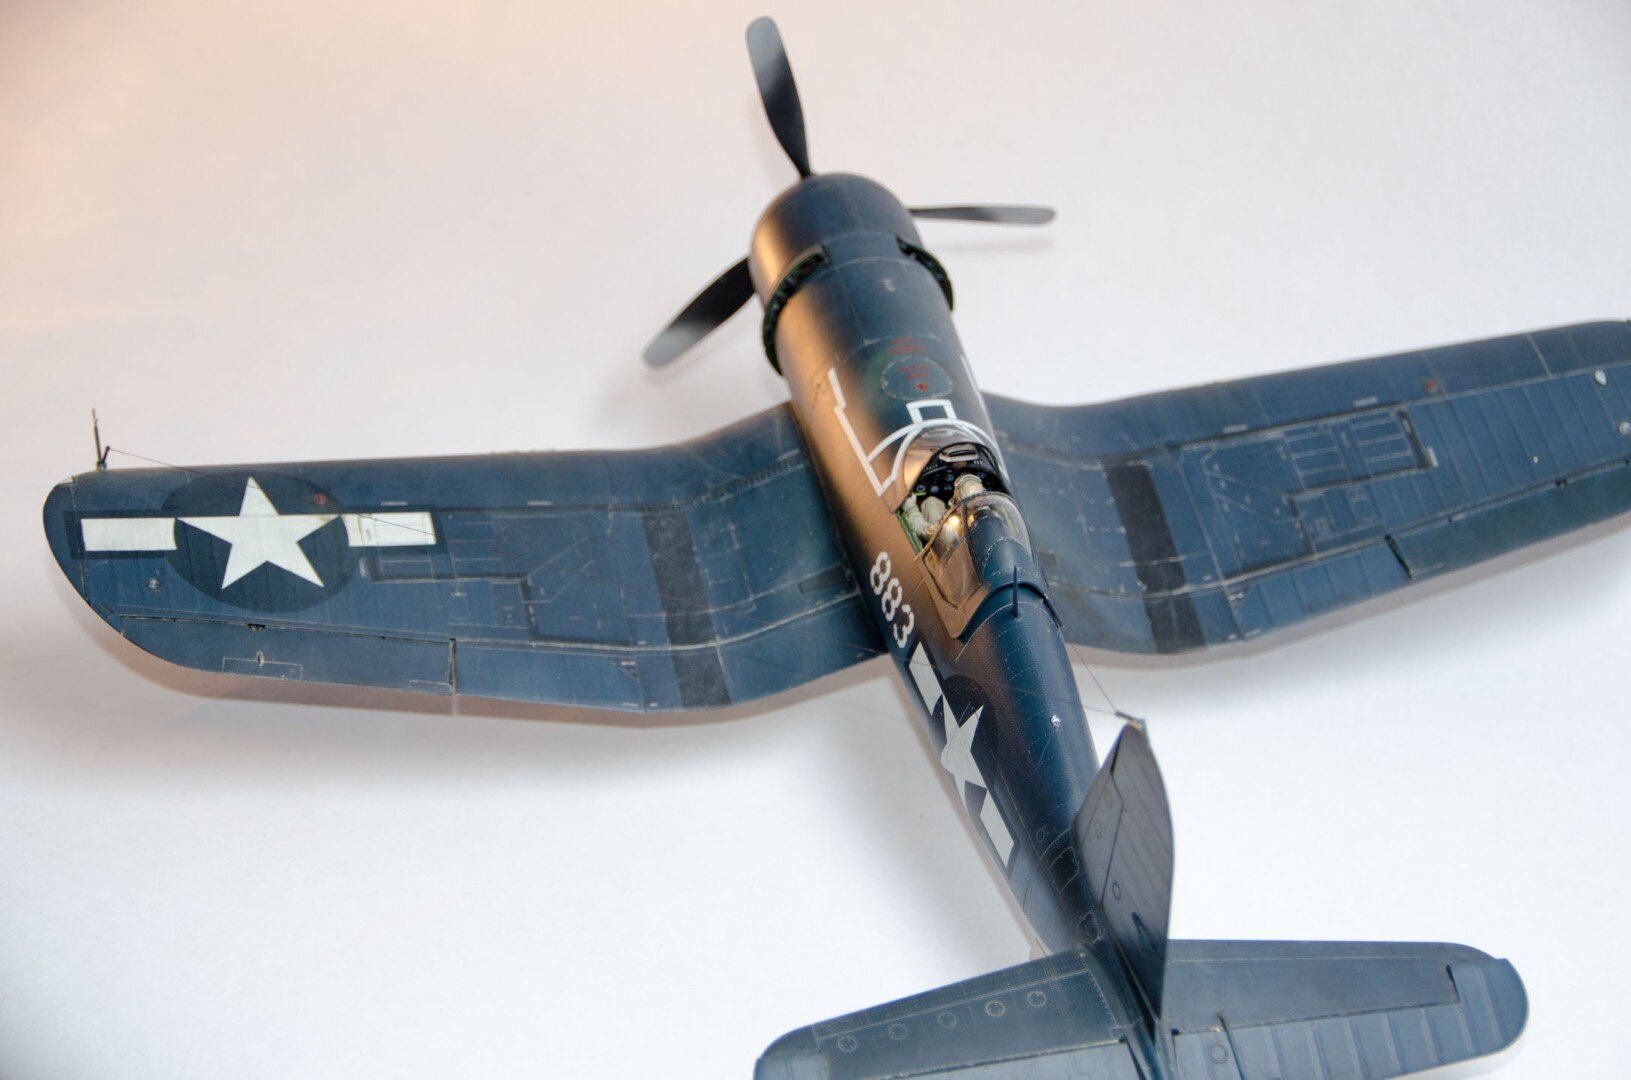
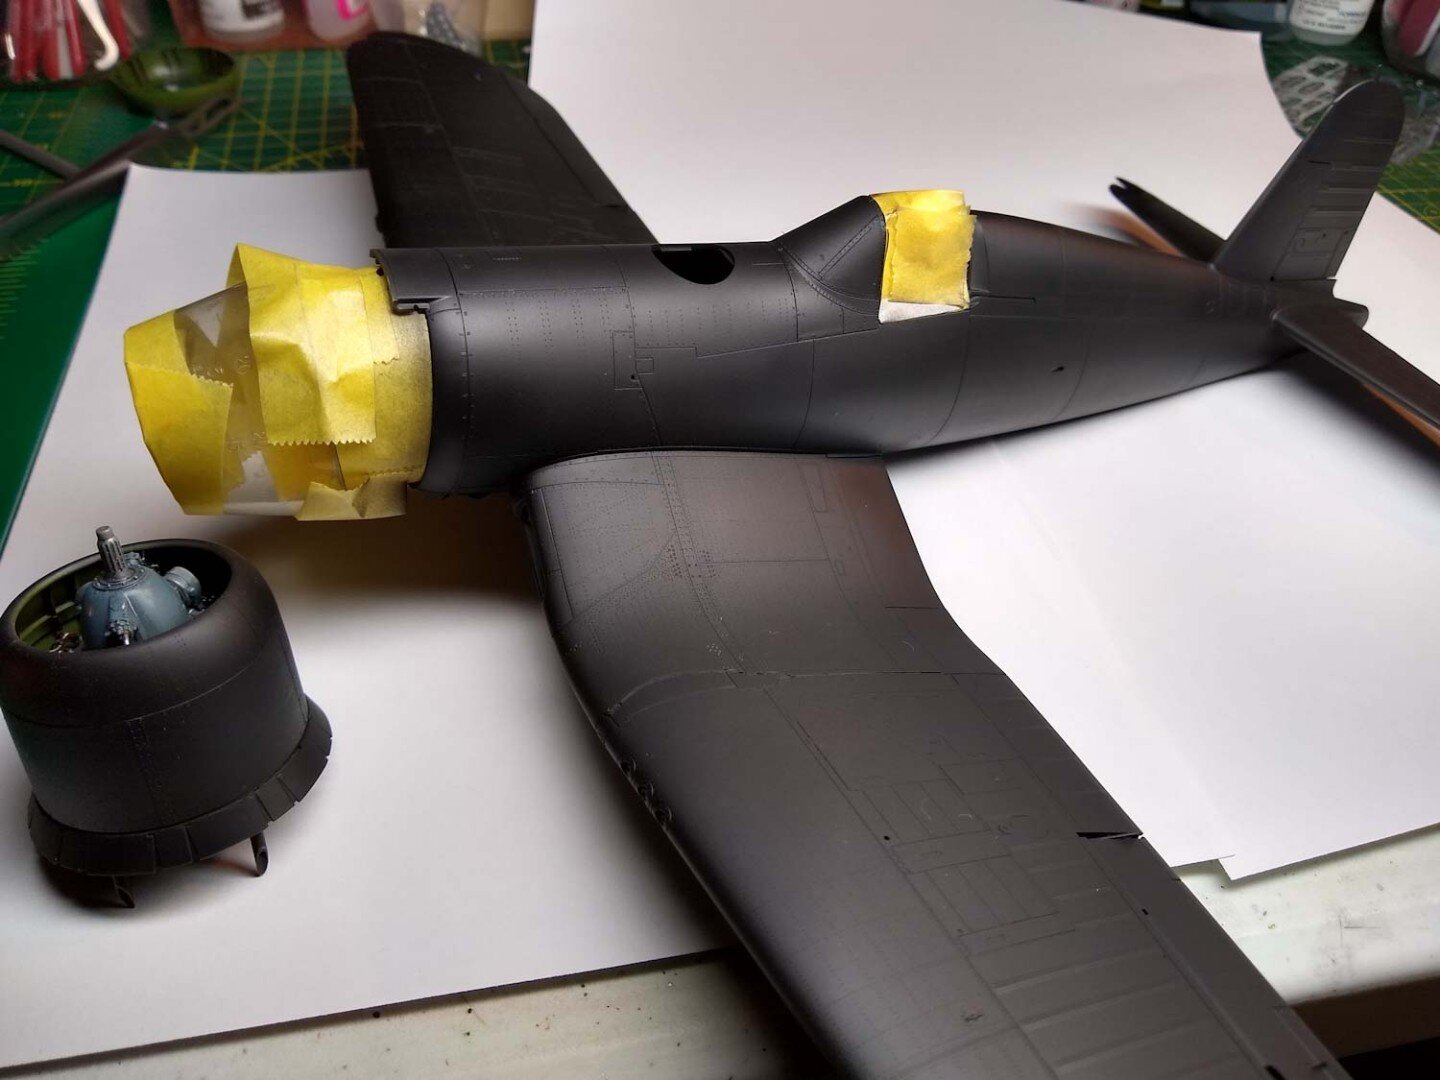
Armed with a plan I covered the 1/32 Corsair in primer, and used black-basing techniques to fill in the three main colors and felt like I had accomplished something decent. Black basing allows you to put variations in tone and hue across the entire plane in, more or less, a randomized way. It gives the paint a worn look that’s really hard to replicate without extensive post shading. Scroll through these to see the progression.
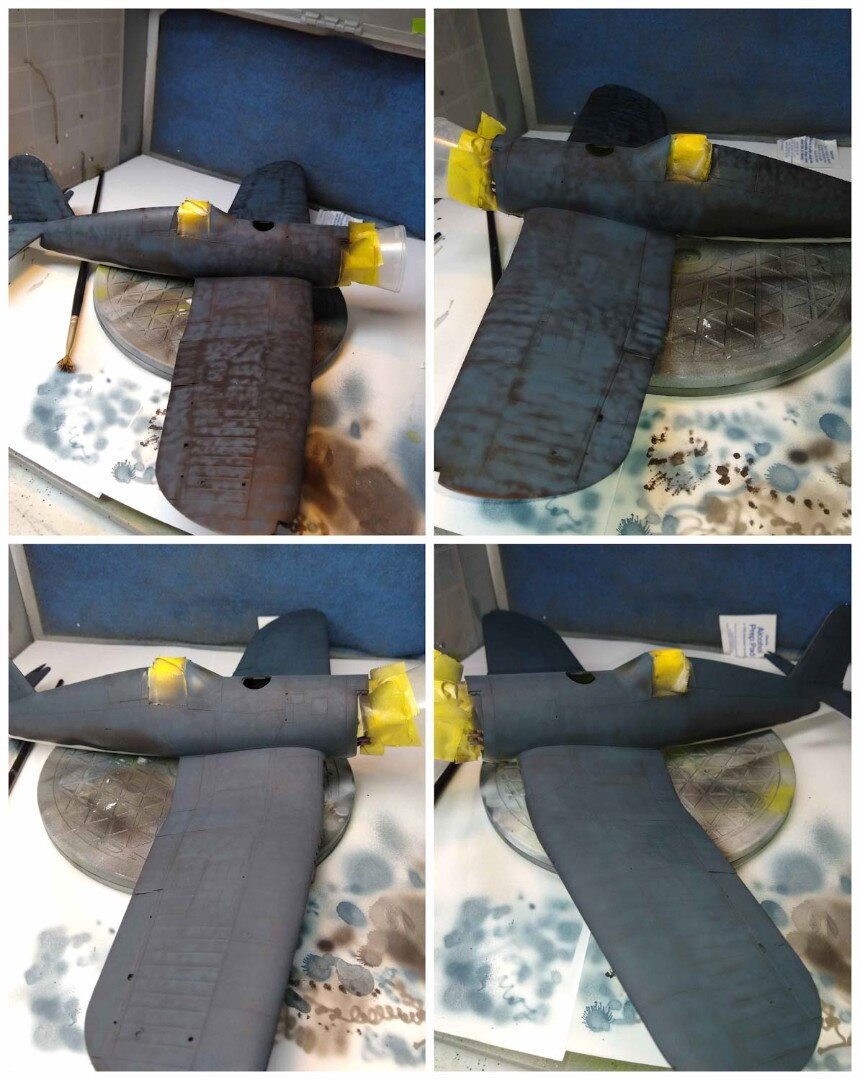
As I did the bottom of the plane (see slide two above) I used too much paint (this is a reoccurring theme here) and actually wiped off parts of the underside multiple times. Not show here were three attempts to get the wavy camouflage line down the fuselage…which required multiple wipes/re-paints. All told I think I cleared 60% of the original paint off this as I went through getting it where I wanted it. Trial and error and fix and repeat…a lot.
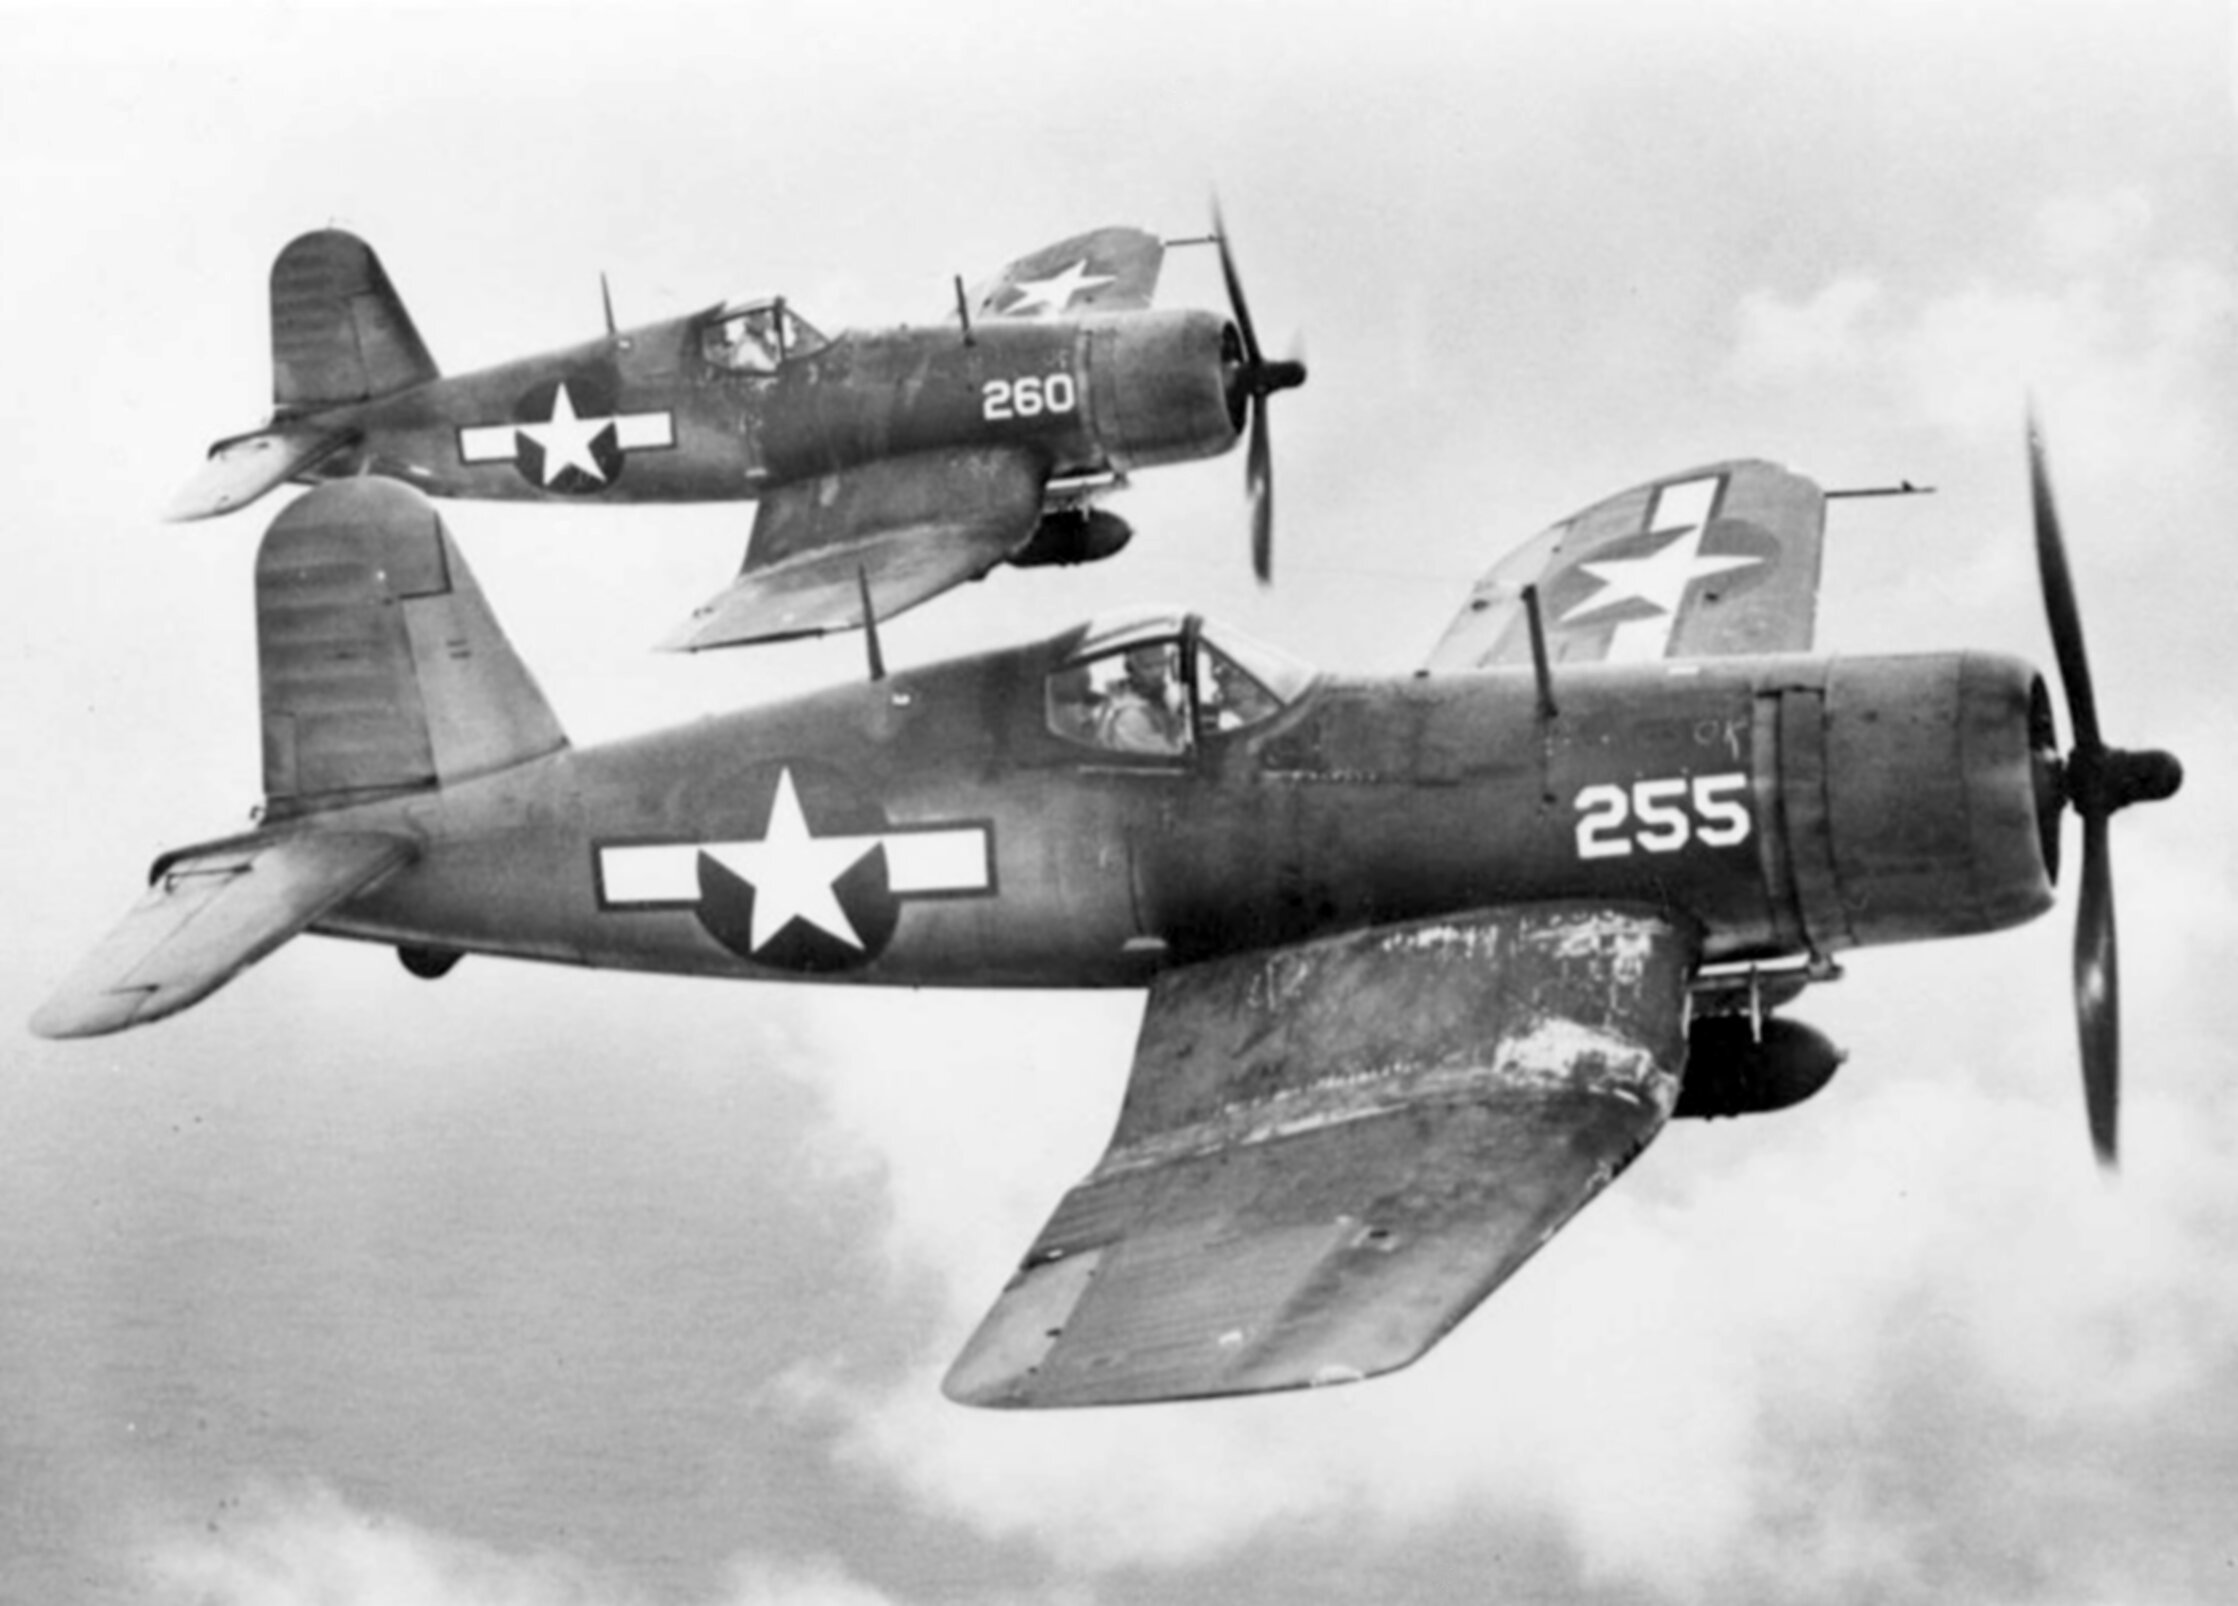
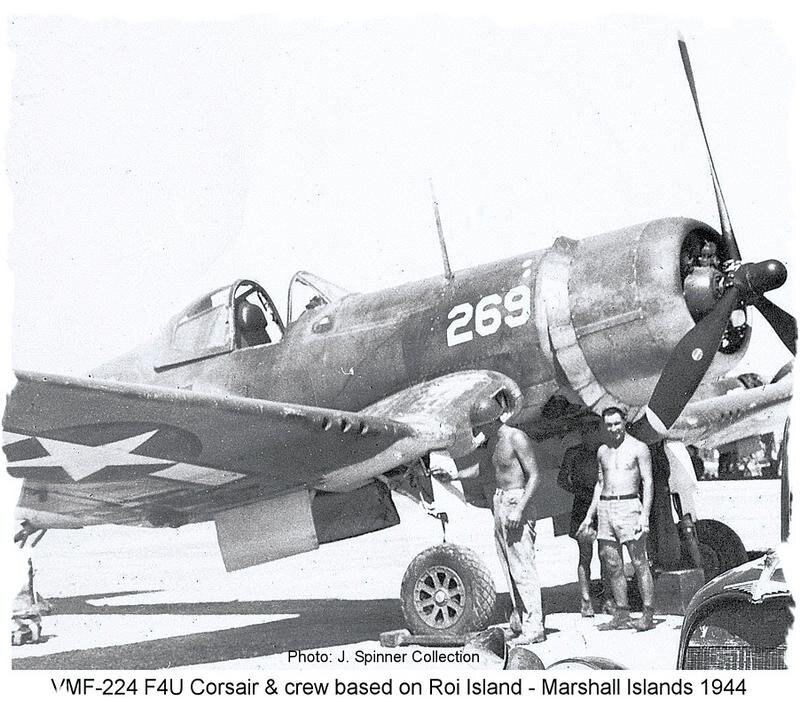
Here’s why I used the black-basing technique…compare a B&W combat photograph with this model in B&W…it’s pretty decent IMHO.

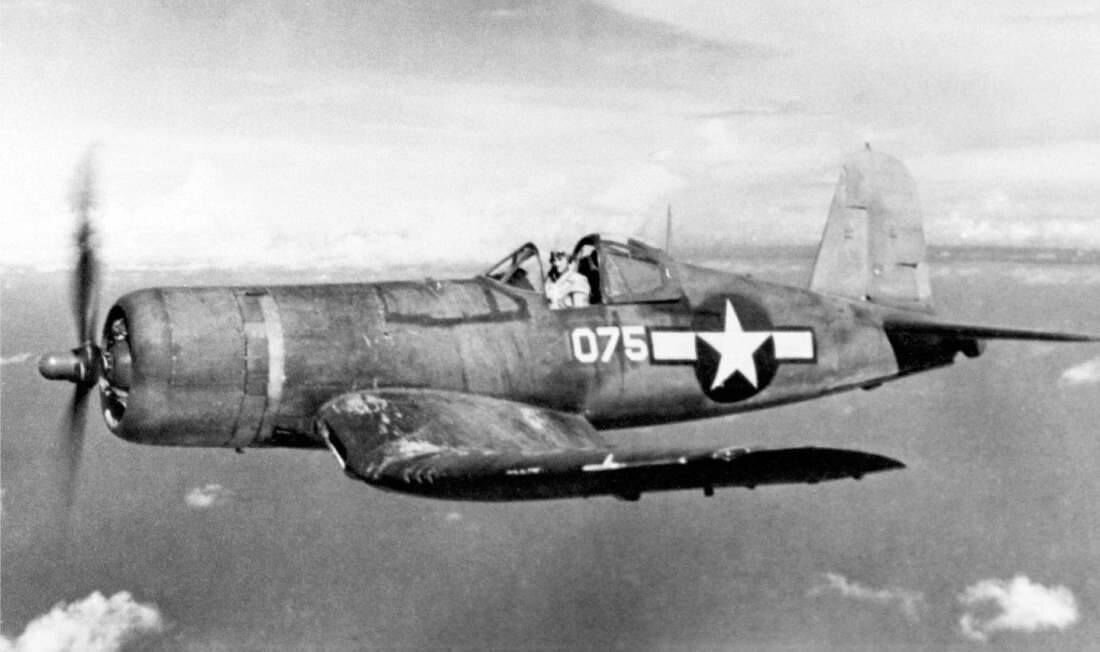
Ira Kepford…stud Corsair pilot

And here’s where it got screwed up…
Top left is where I chipped off some panel lines and other items…and although in the picture this is hard to pick this up, you could see a really thick problem w/paint. All those layers added up and it looked like the paint was thicker than the aluminum it was painted on. Earlier in the process I had laid on so thick a paint job, I had covered up rivets, panel lines, and it looked like (in places) like a layer cake.
So I wiped it all off and started again…
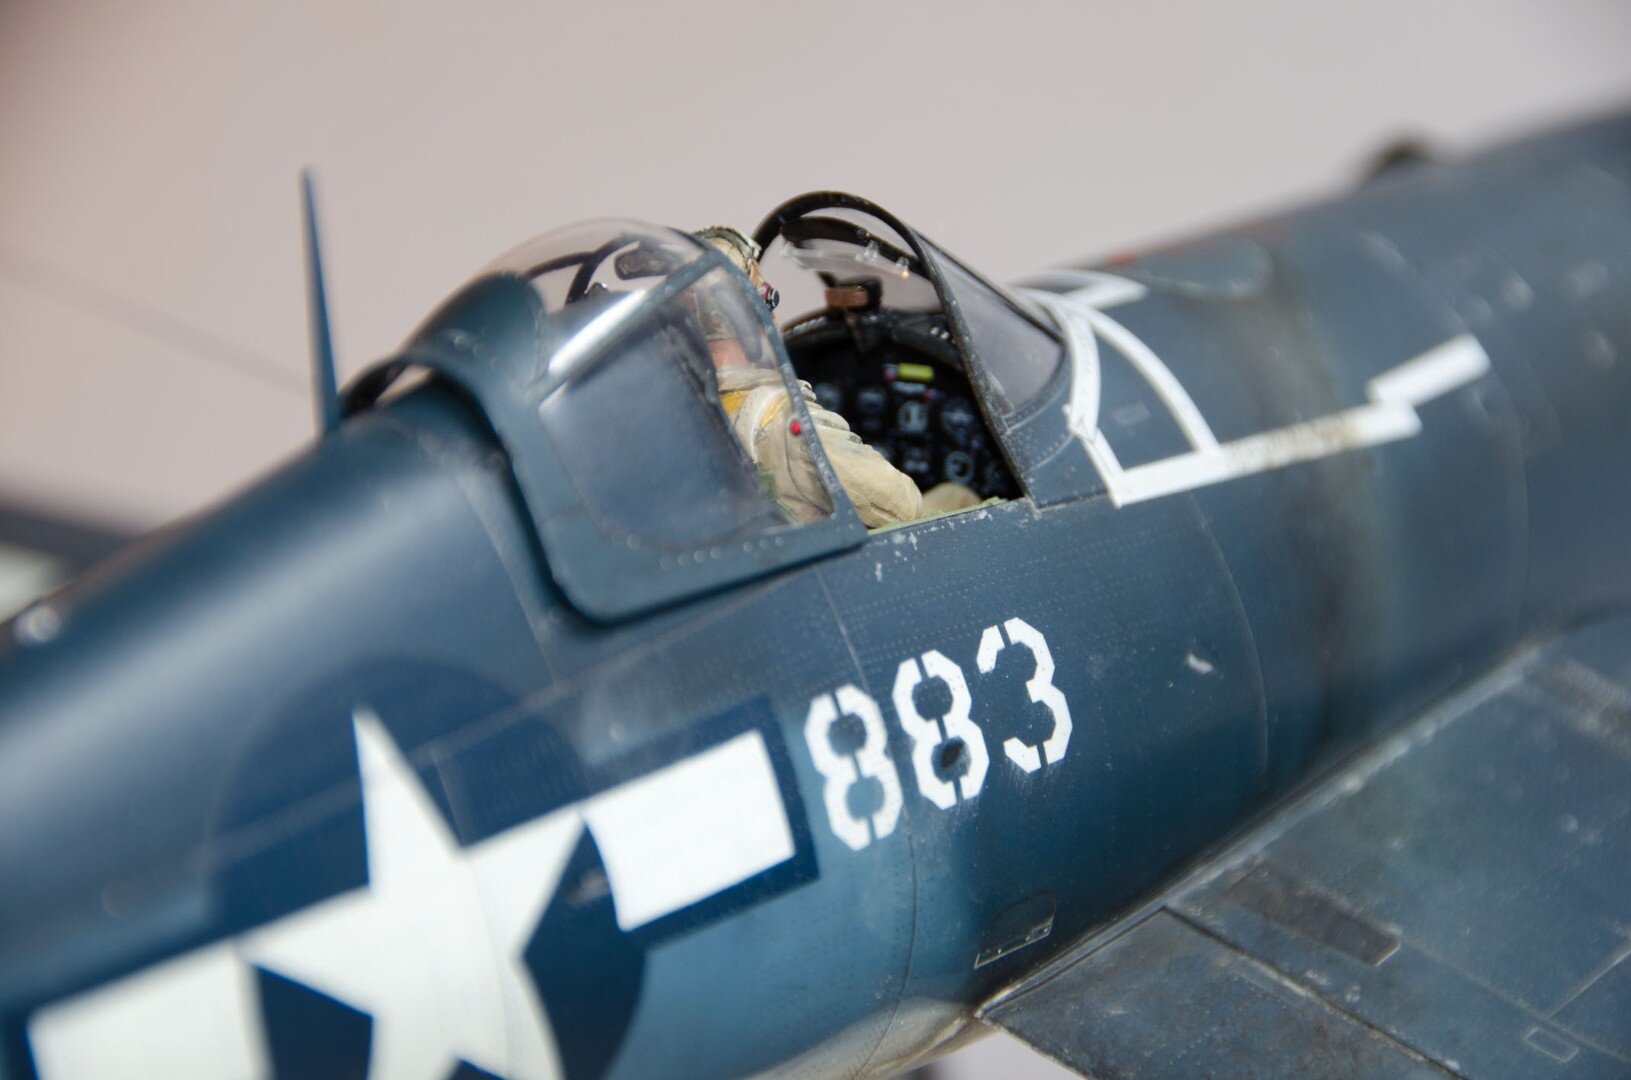
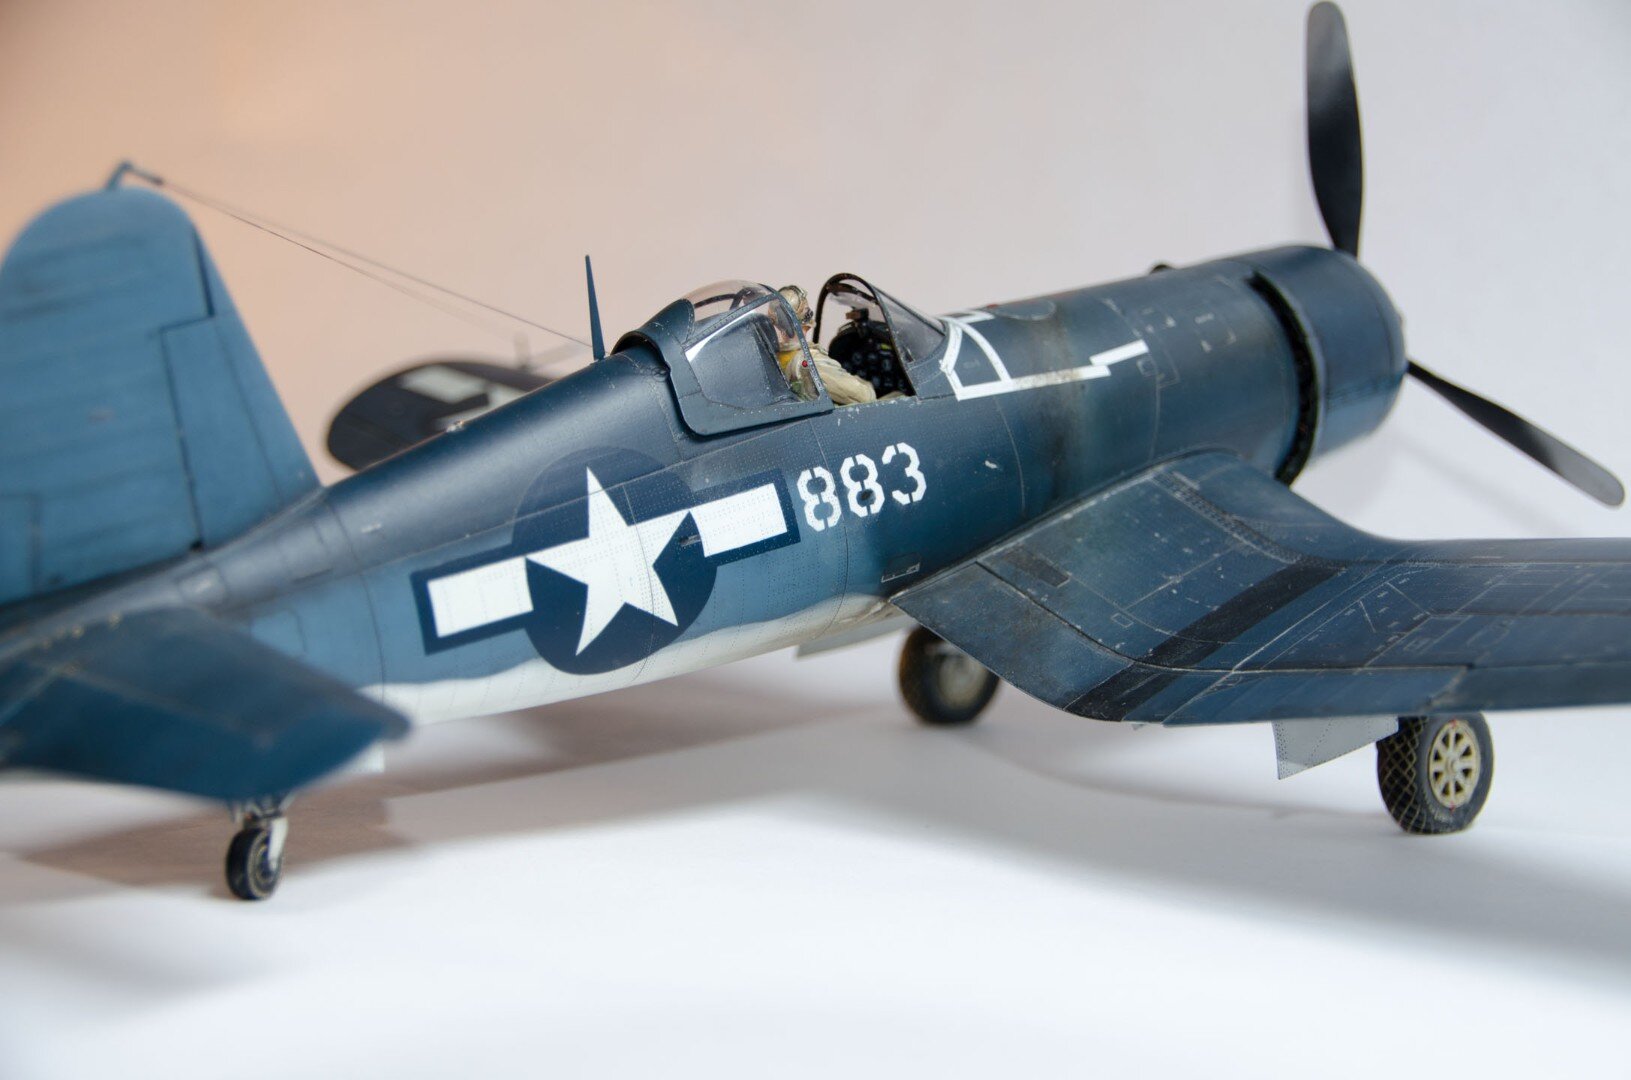
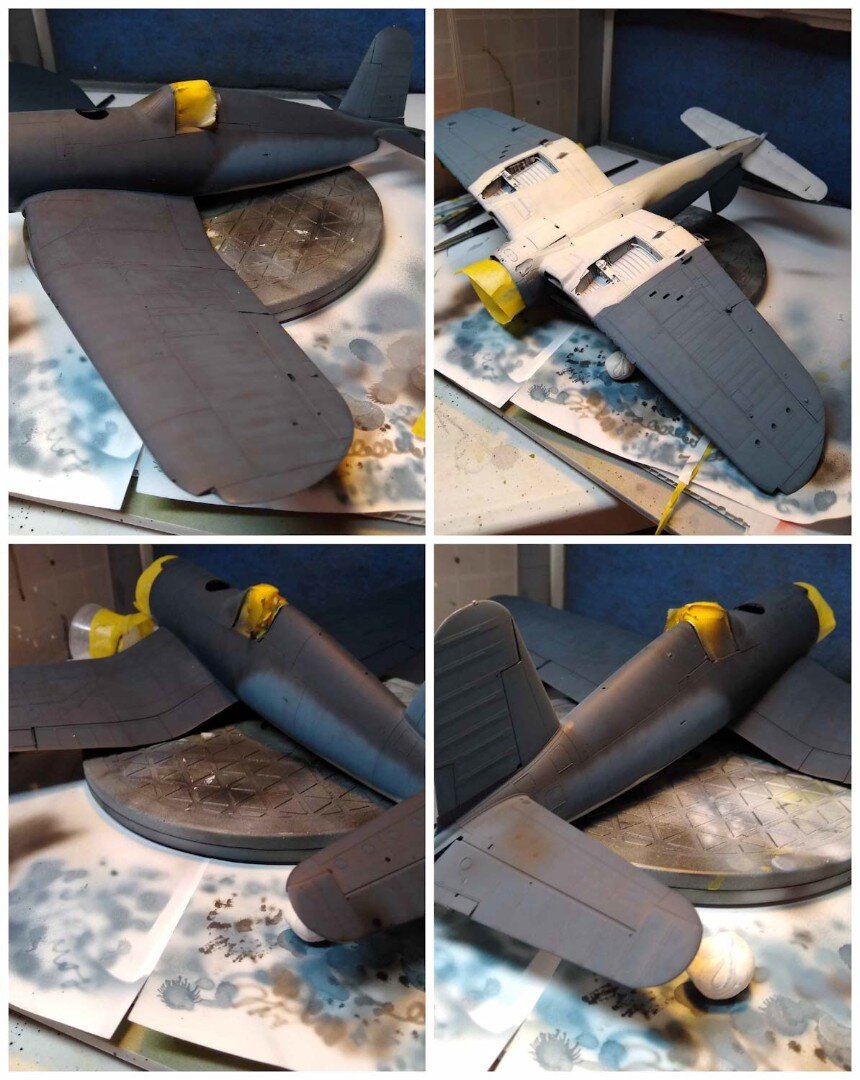
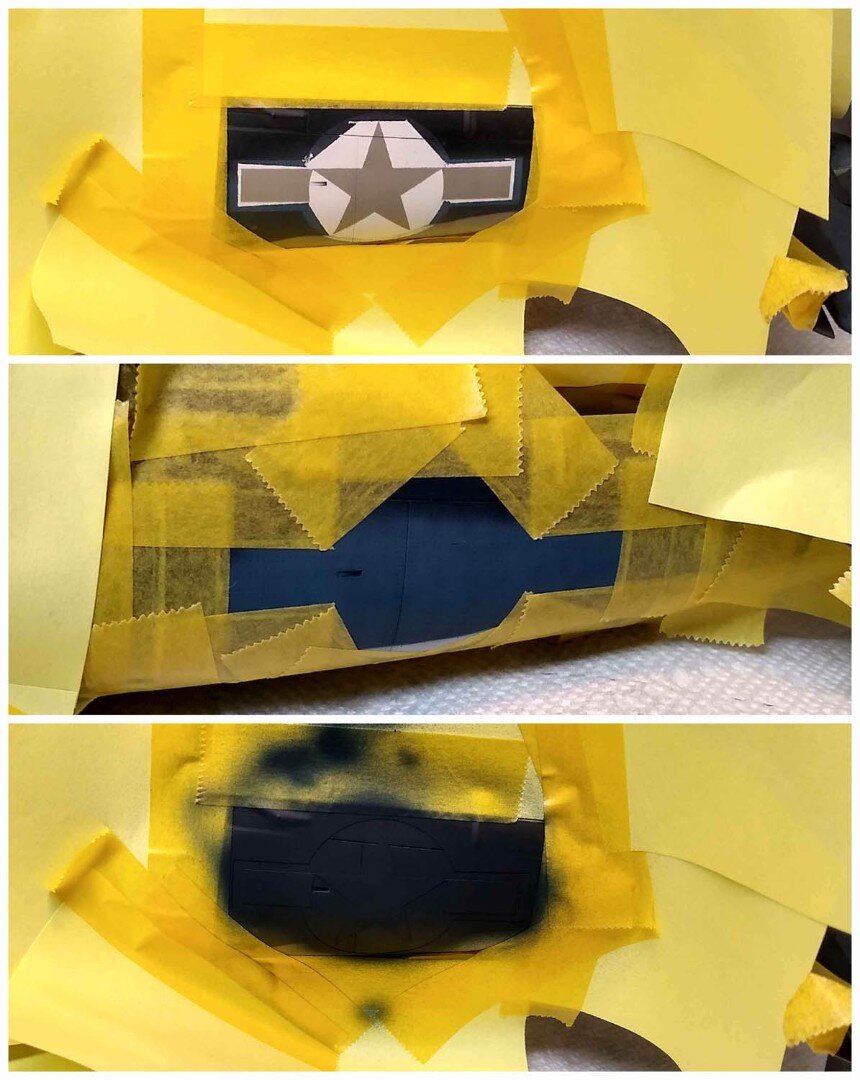
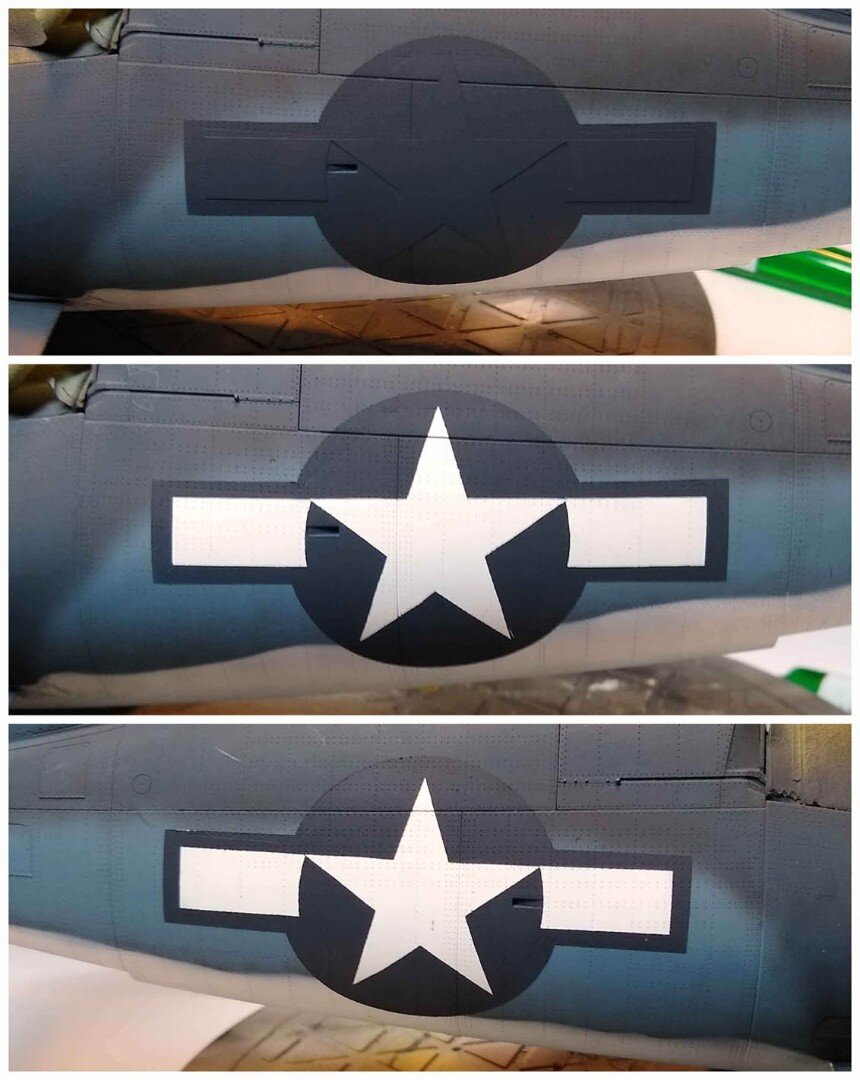
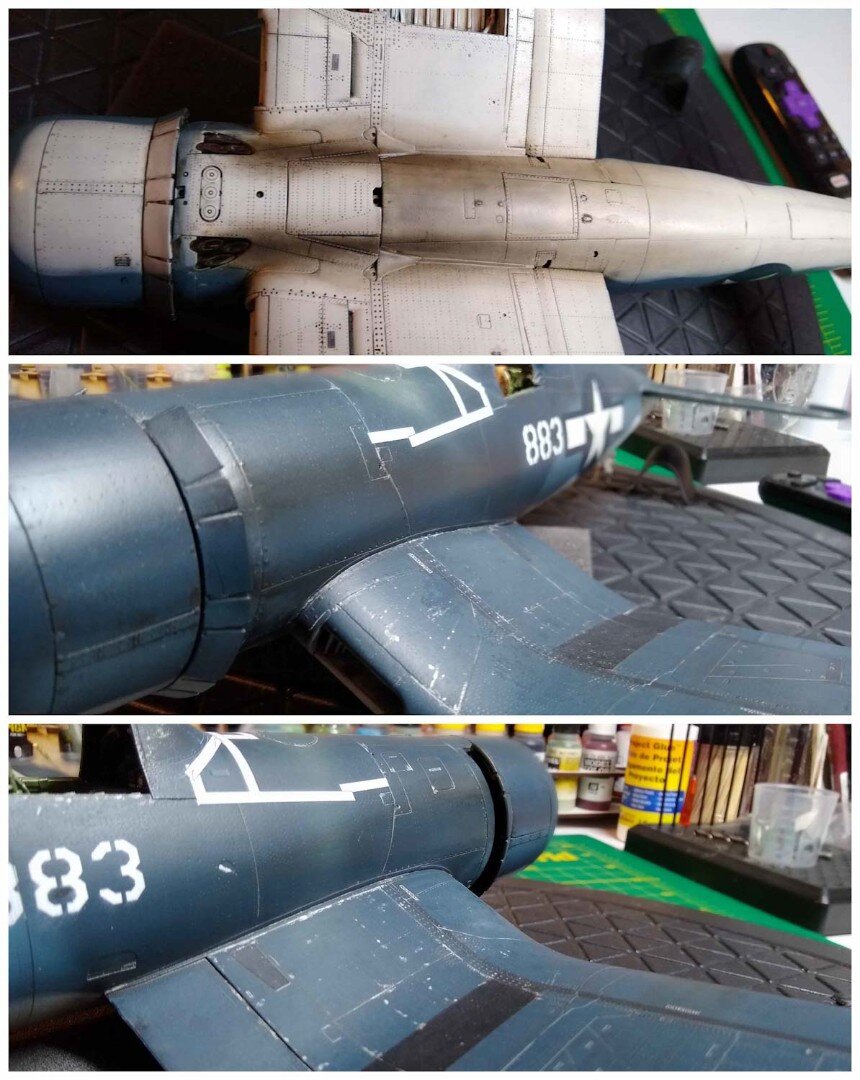
This time I did better and almost repainted the entire upper fuselage, used lighter paint for the fabric surfaces, used a stipple brush of Mr Finisher to makes the non-slip walkway and then made the no walk lines a little thick and started in on my very first stencil (Montex). I felt pretty good…bottom right pic is the first layer (after peeling off the mask). Then things got interesting…
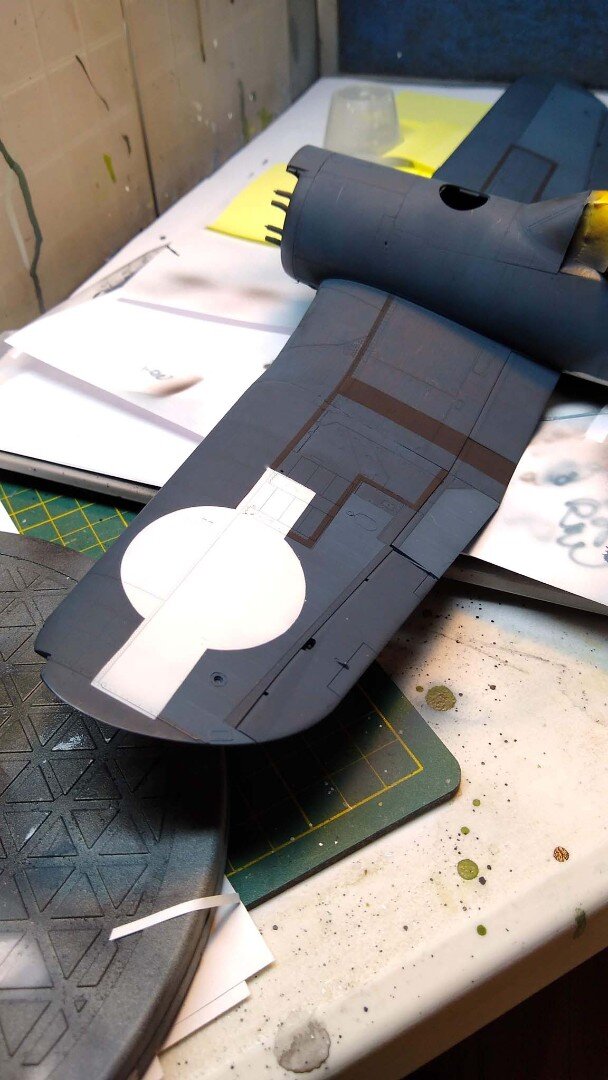
I painted the blue in over the white and as you can see in this top picture…it’s not good. A white “halo” and the star is slightly crooked and does not hit the point-edge of the bars.
So I took another crack at it…but this time on a lower wing and the bottom picture is that result. This time I didn’t let the white paint go too far outside their intended resting spots on the wing, allowing the blue to cover the edges. I also spent time making sure I had lined things up better. The paint’s still a little too thick but I was OK w/it. I still had a problem to fix…my top wing halofied stencil.

So I removed the stencil…

Mistake->Wipe->Fix
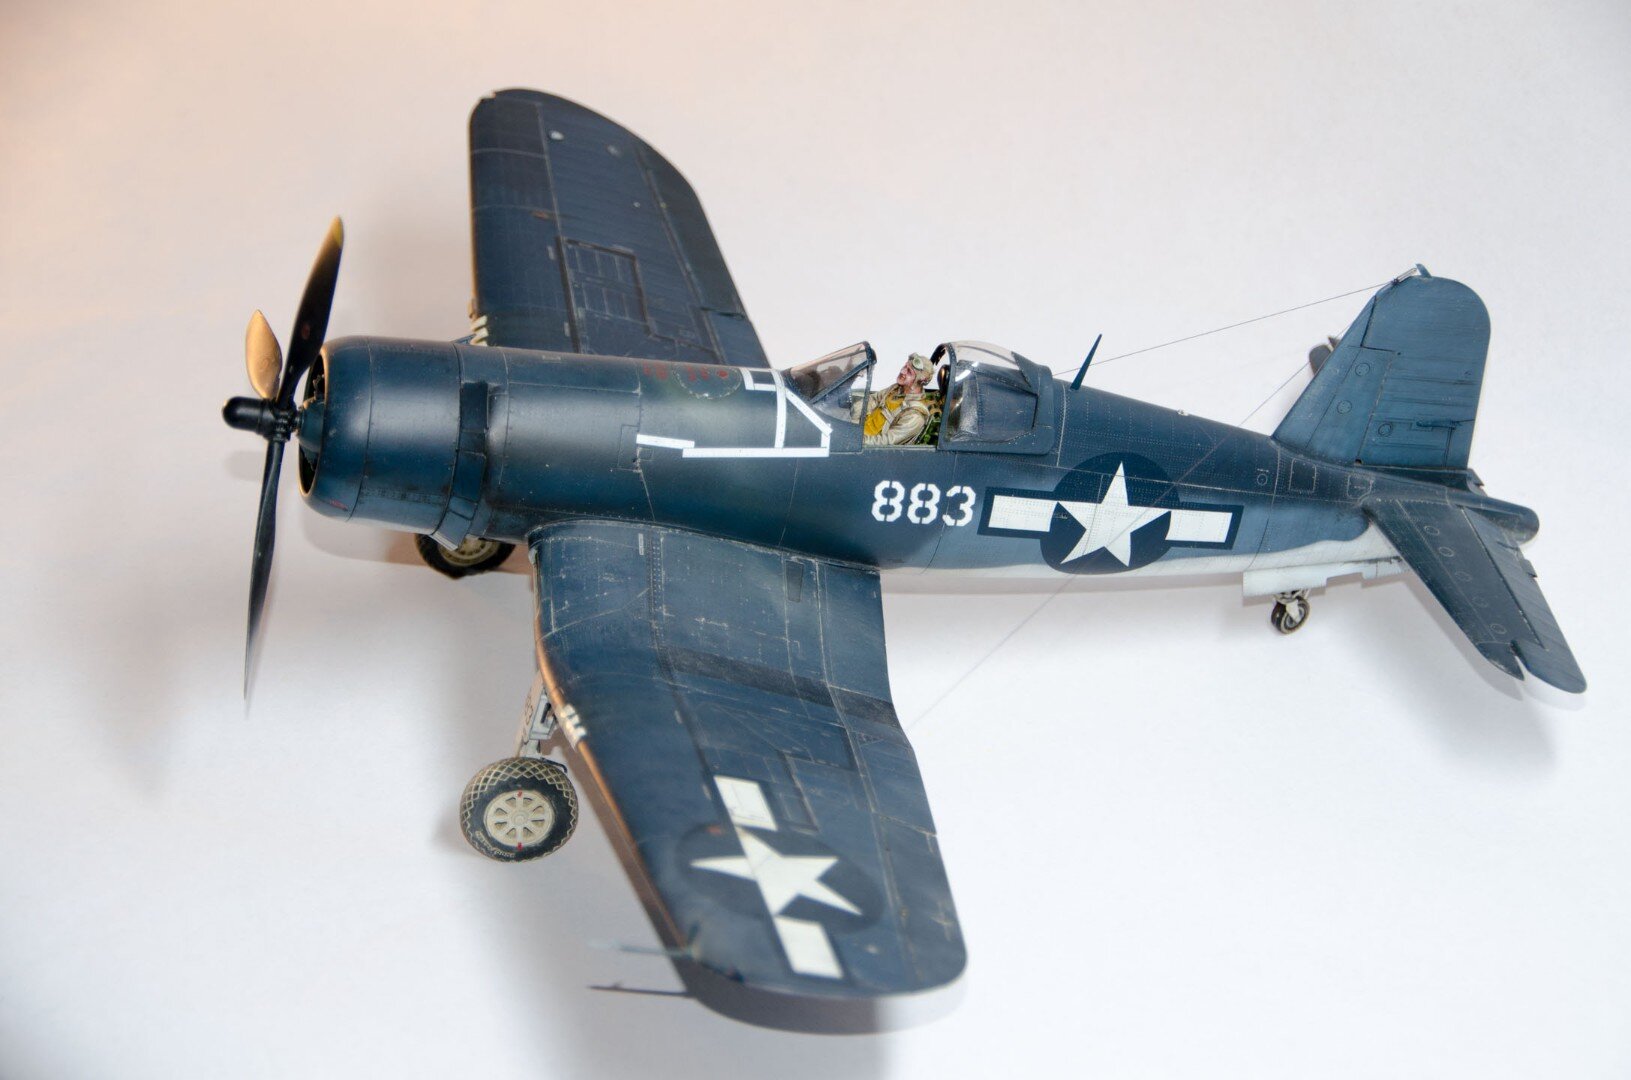
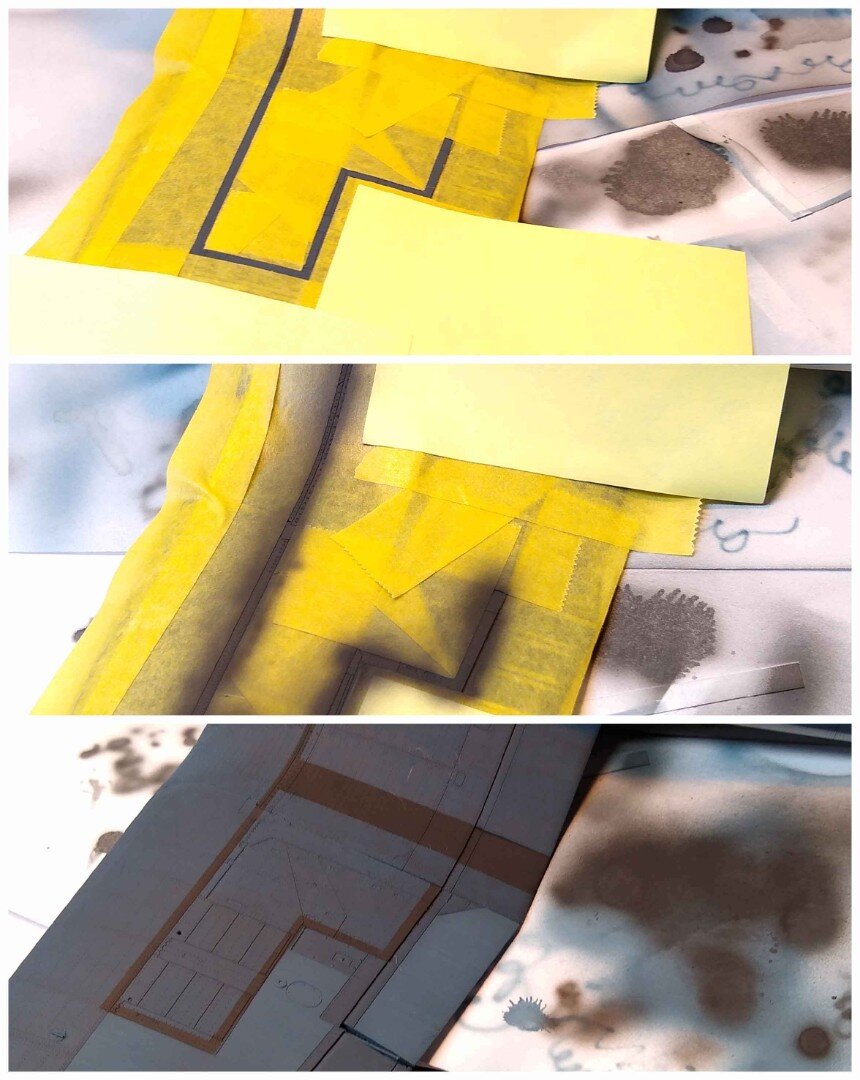
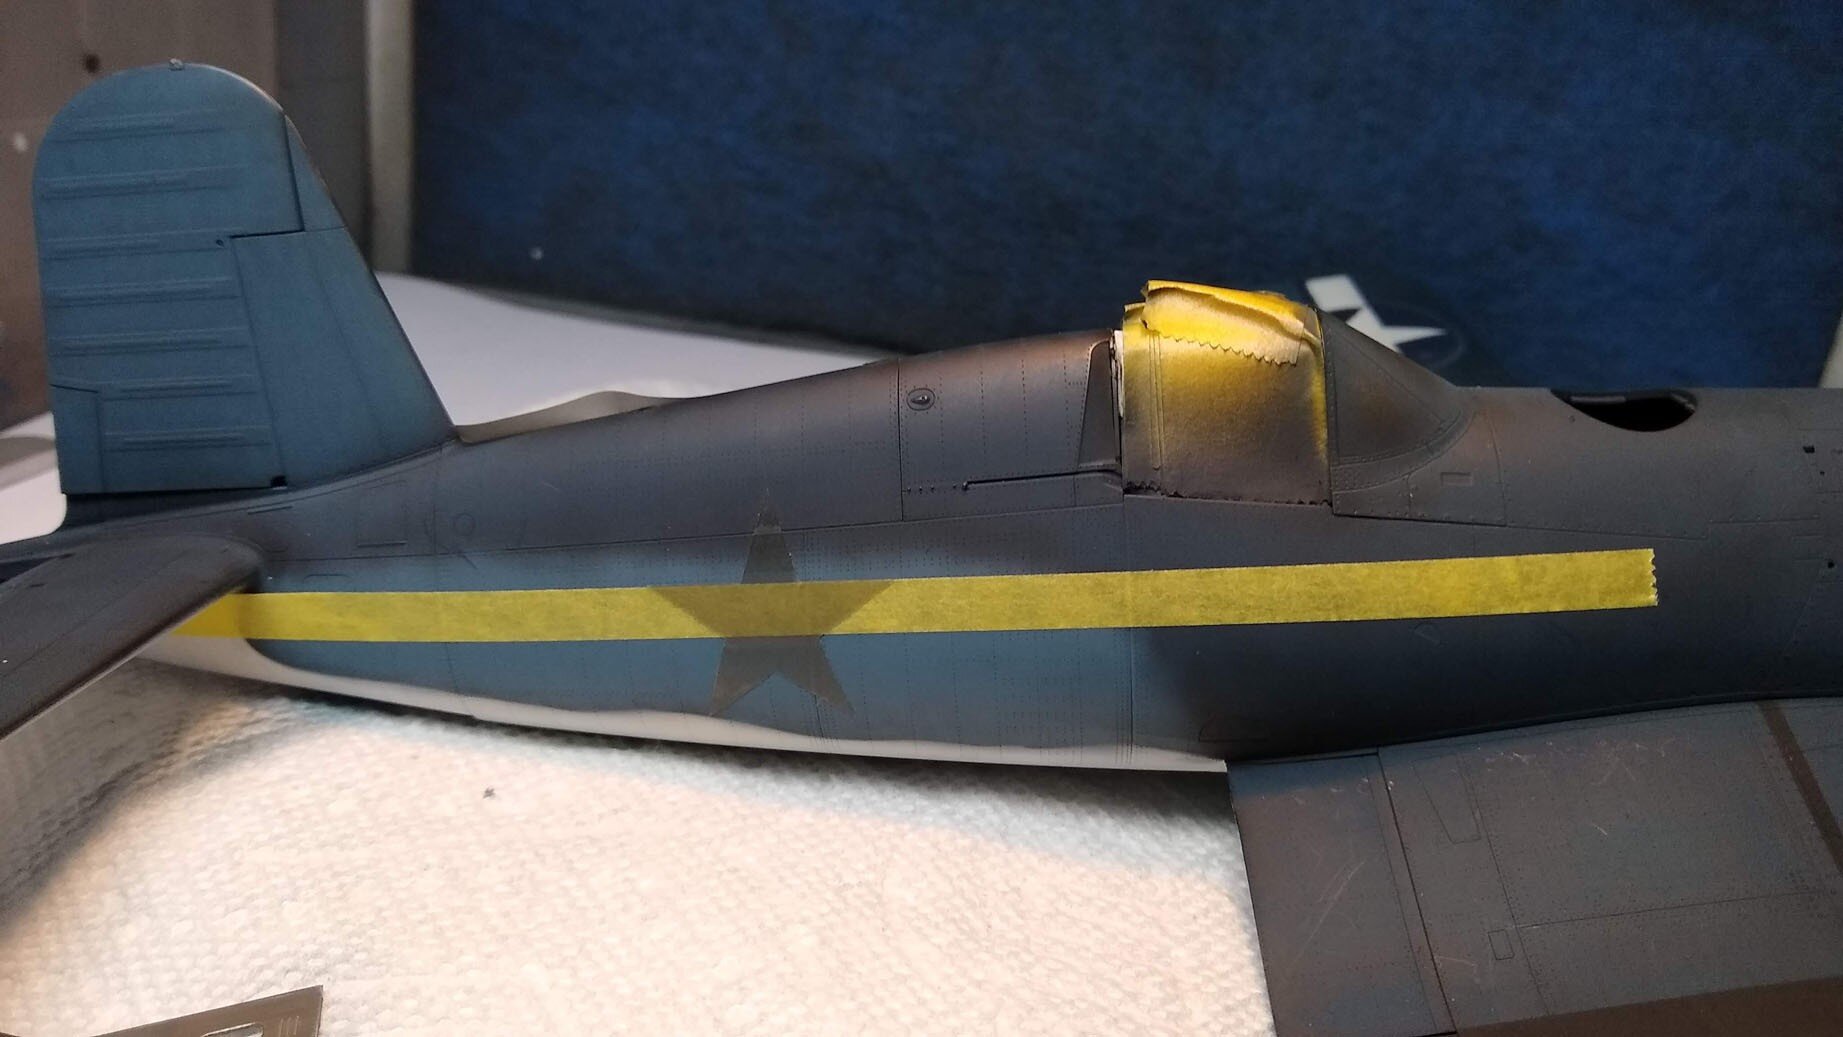
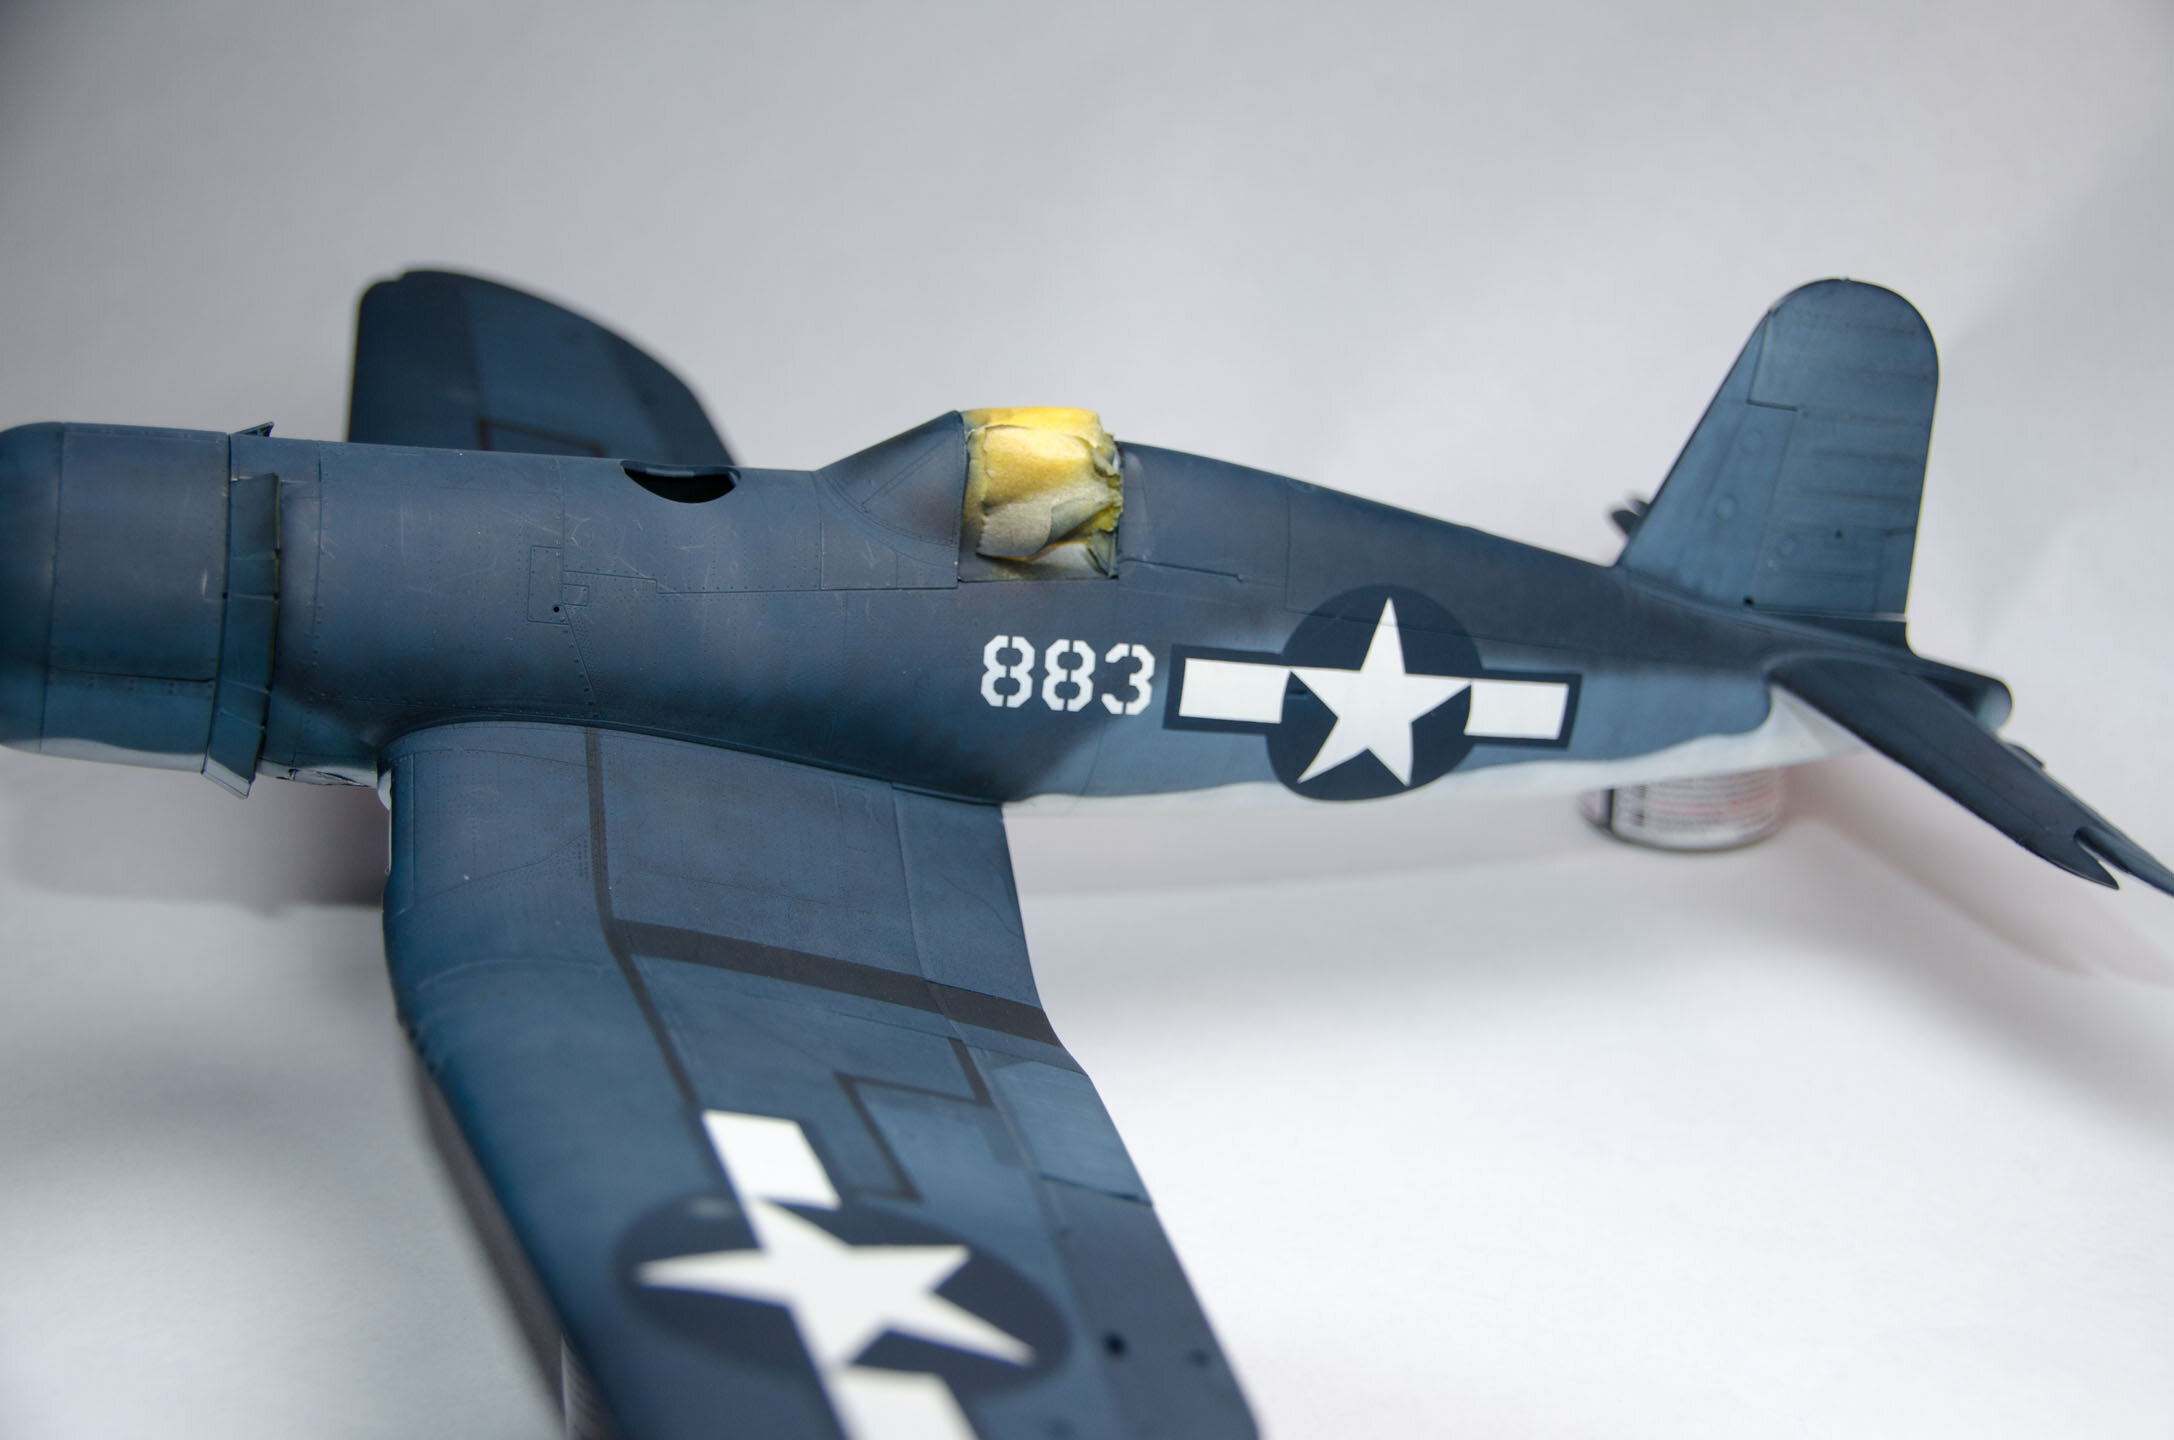
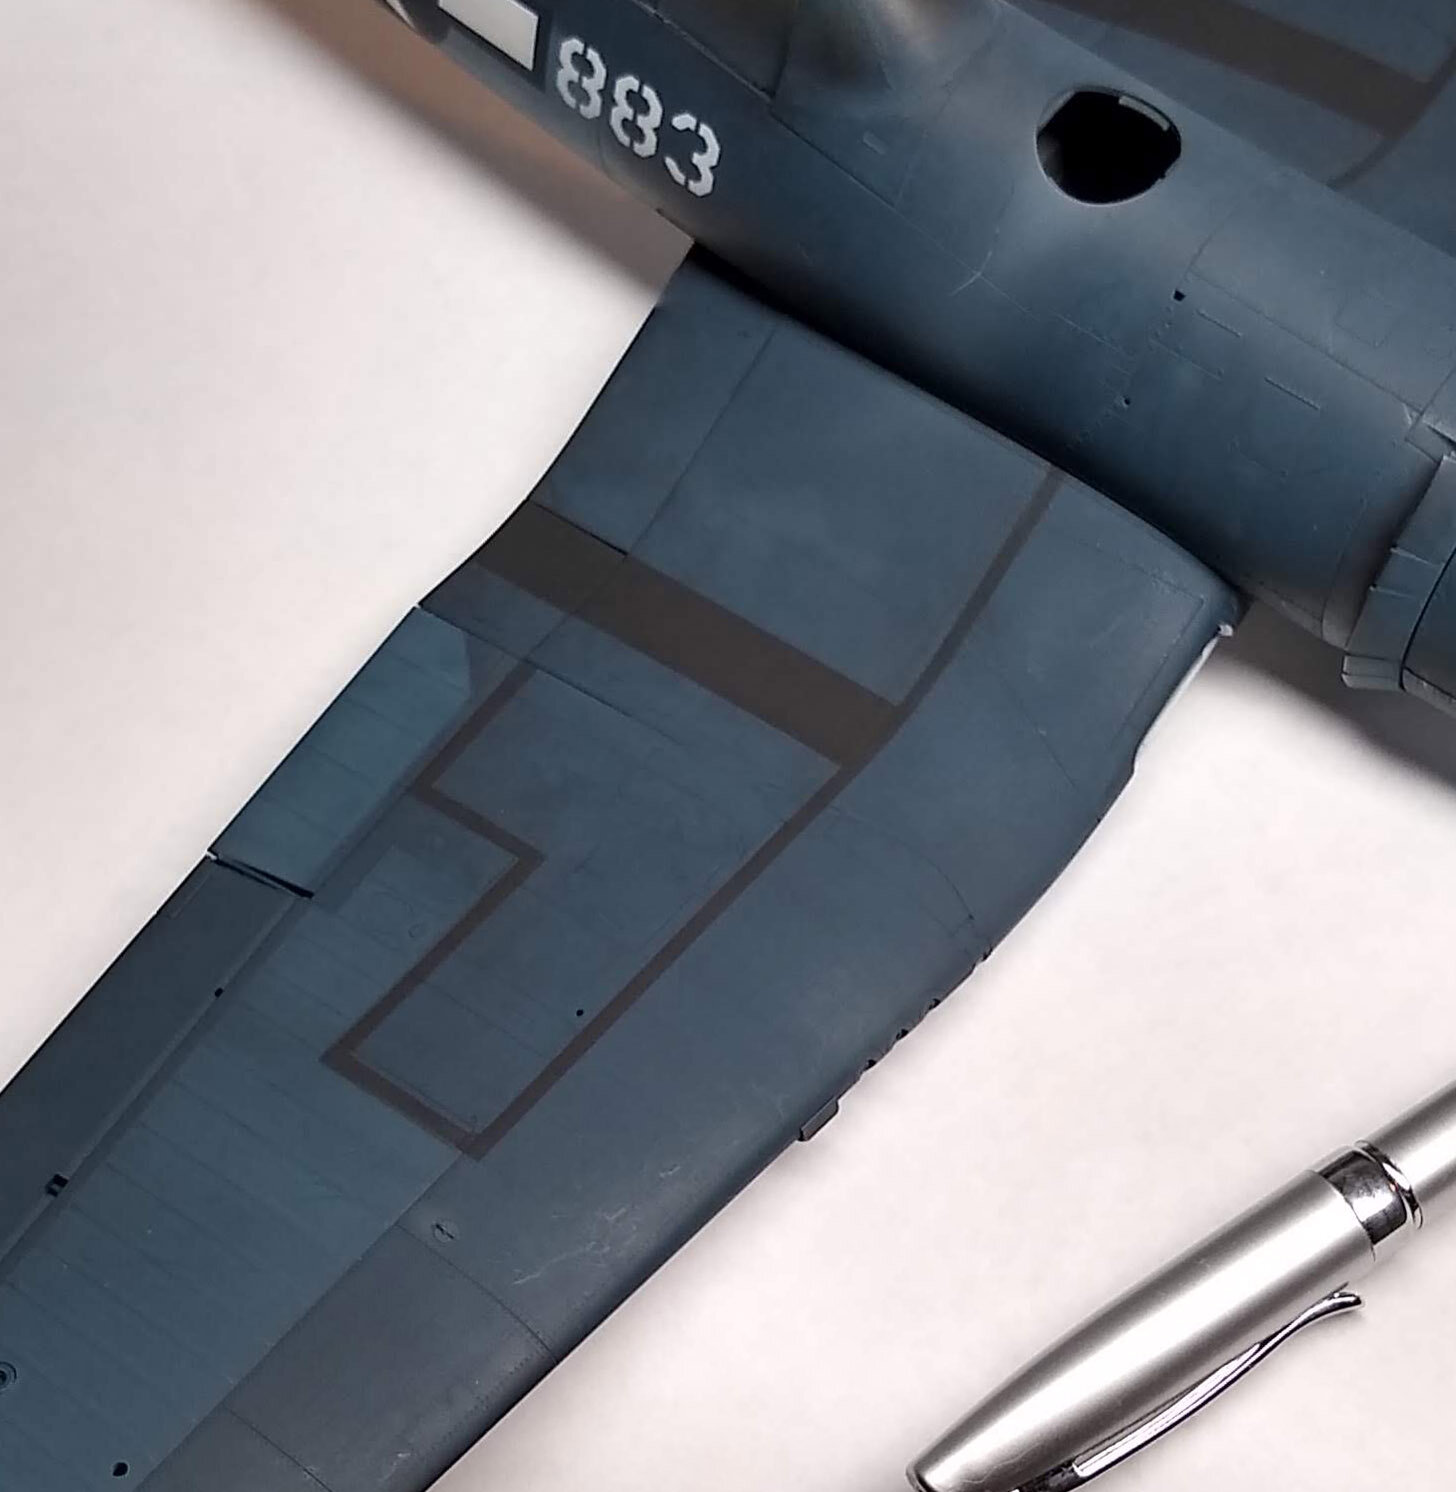
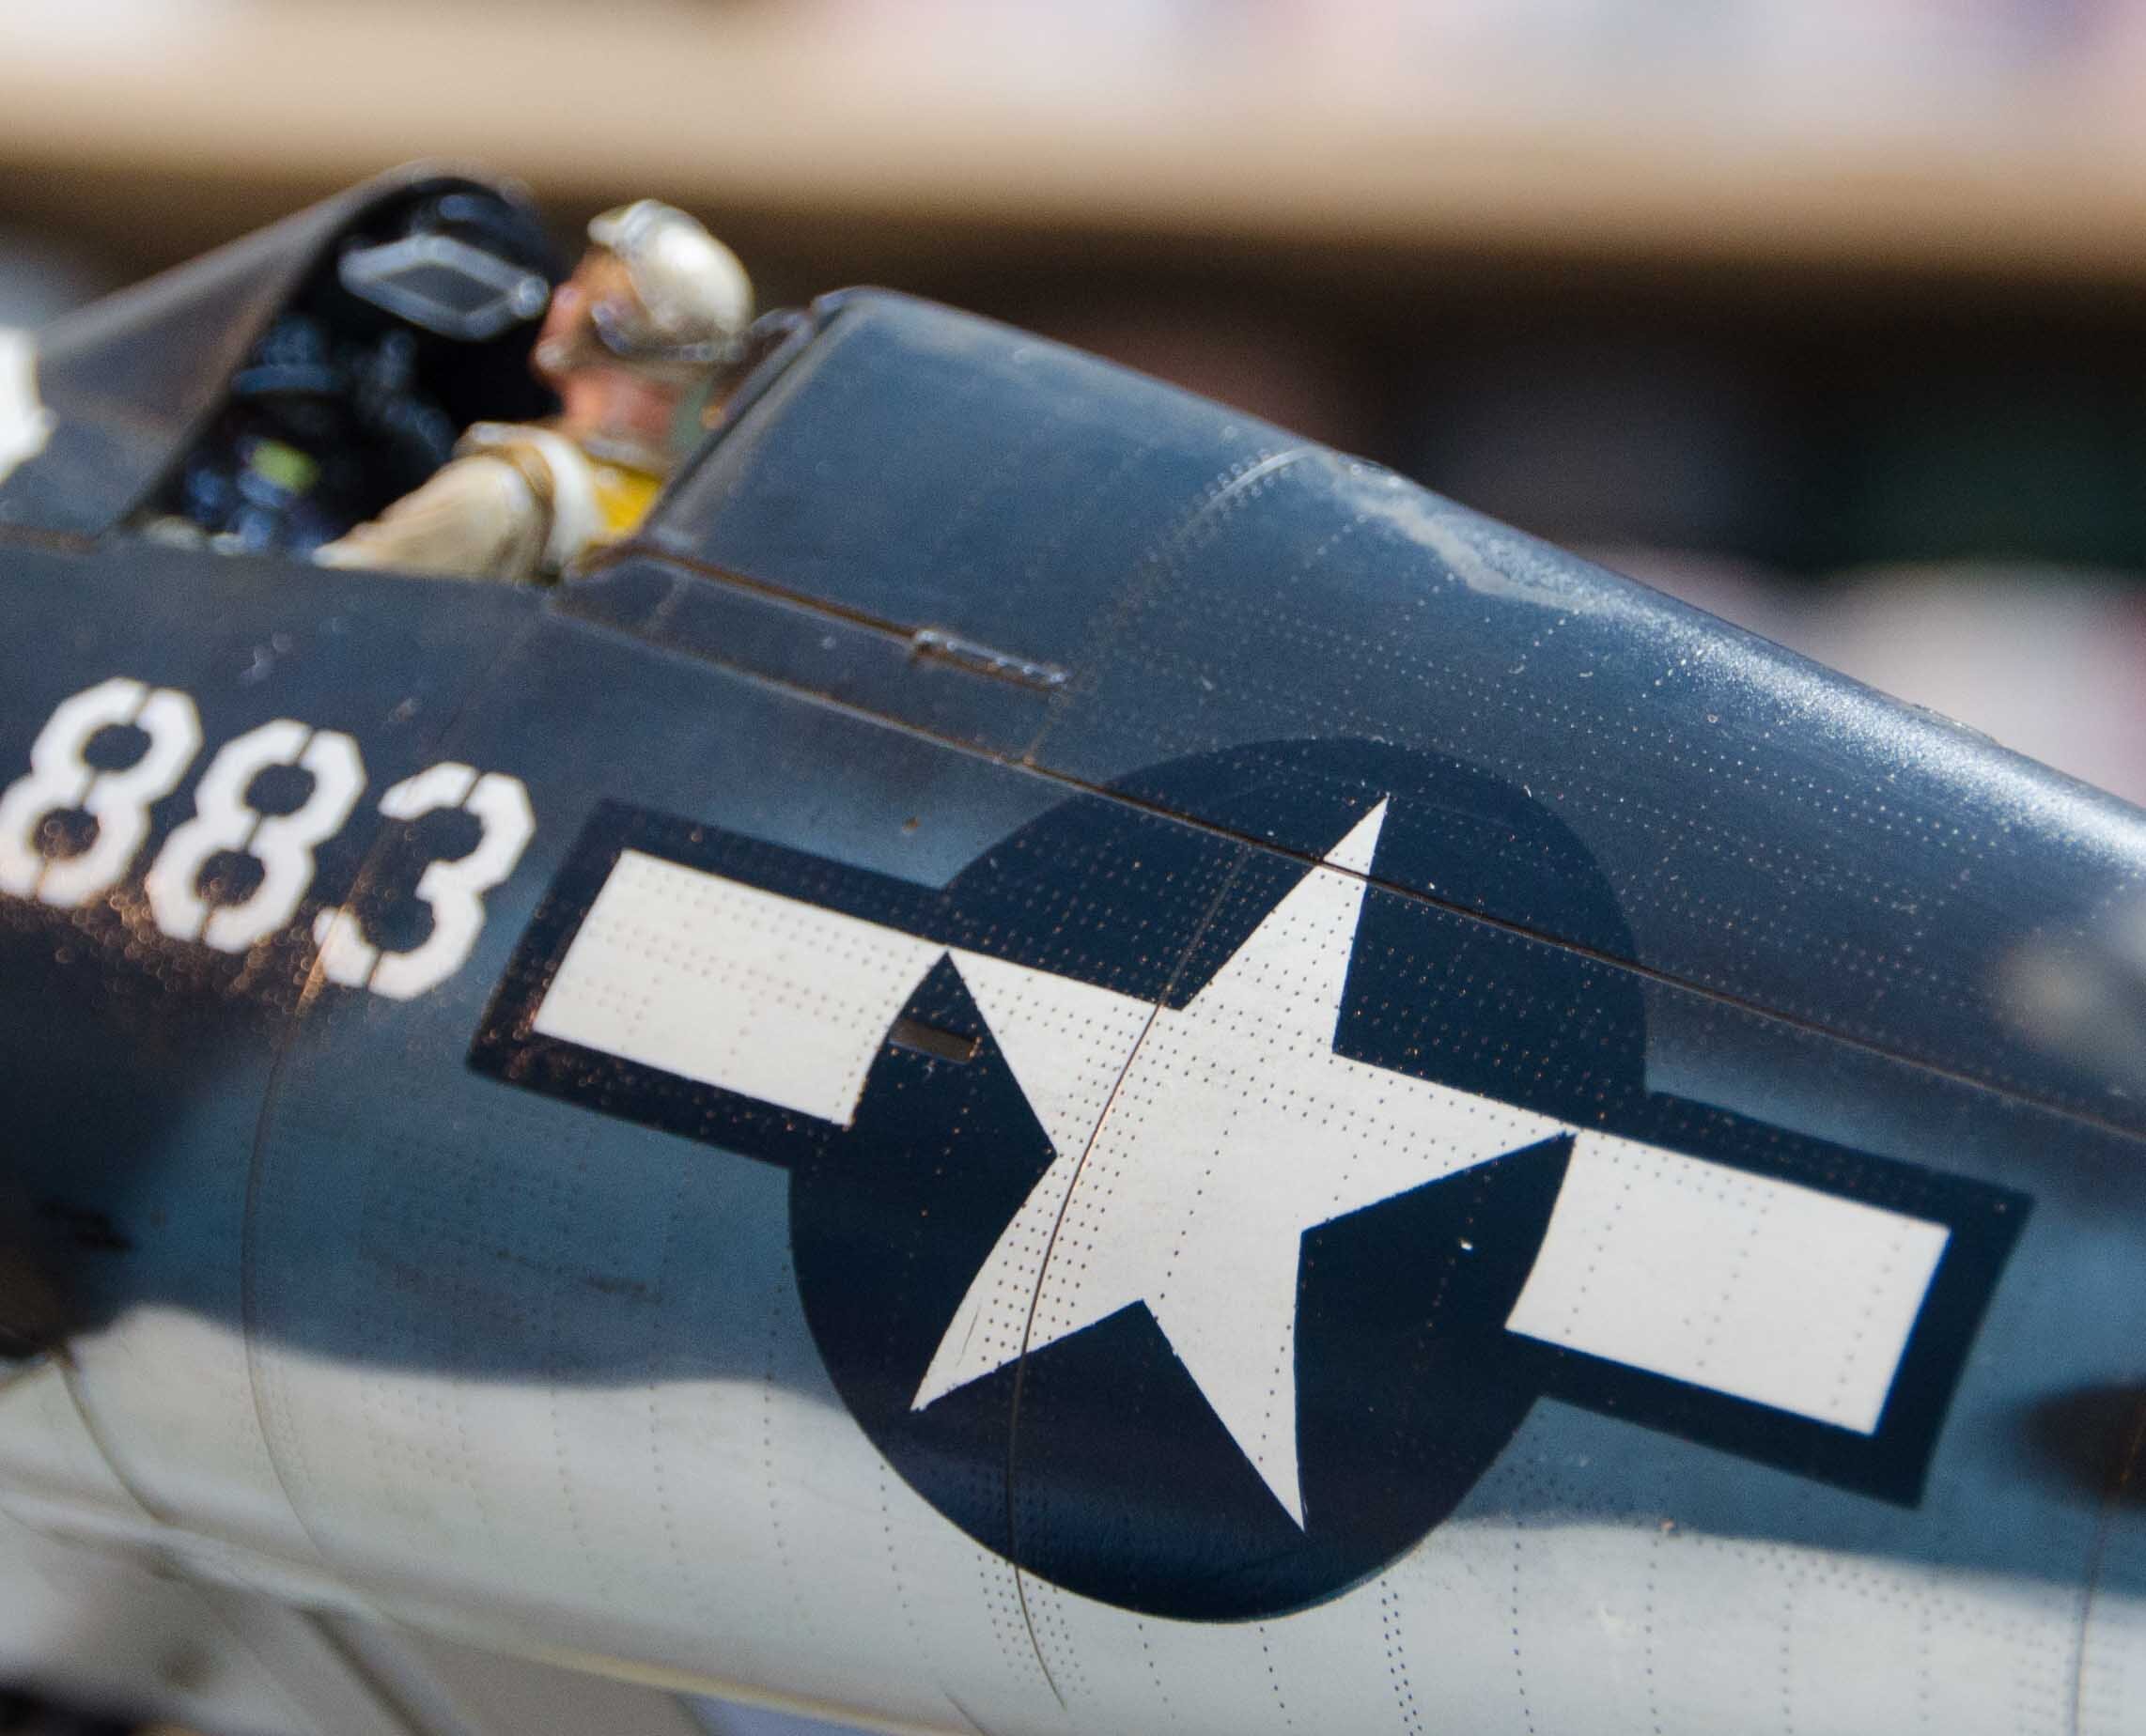
Put on the mask and redid the stencil for the wing…and then did the fuselage and the numbers. I had to tweak the colors and it took me several evenings of paint-redo-paint-redo to get it the way I liked it. Getting the theme of this build so far? In the progression of shots below you can see how I masked, and aligned some of the insignia’s. I also had to paint the “883” a couple of times because of paint bleed. It took some time but I liked the results and for 1/32 scale I think painting your insignia’s is the way to go.
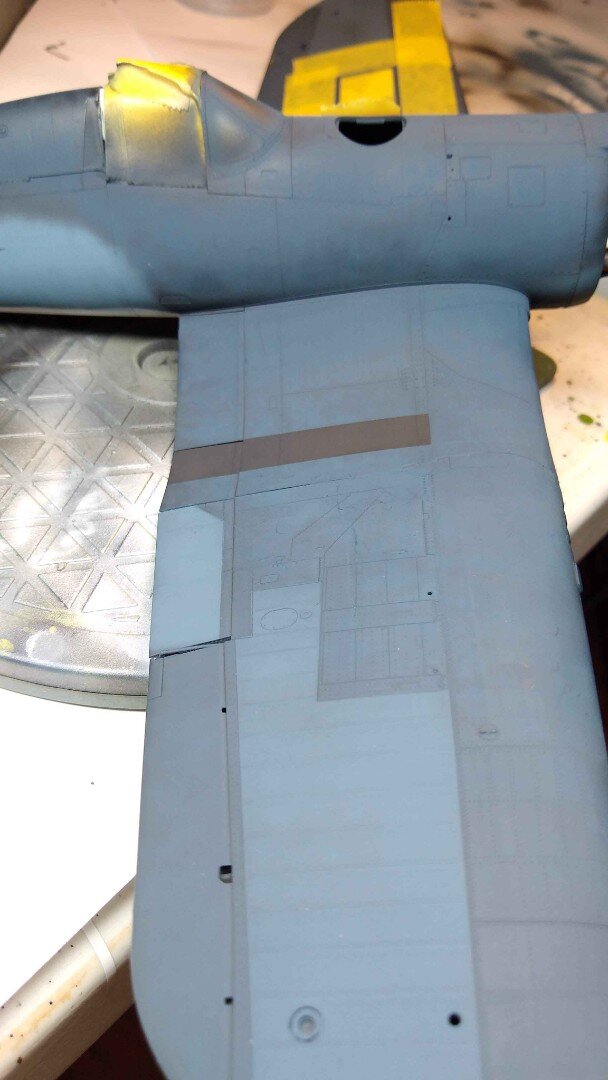
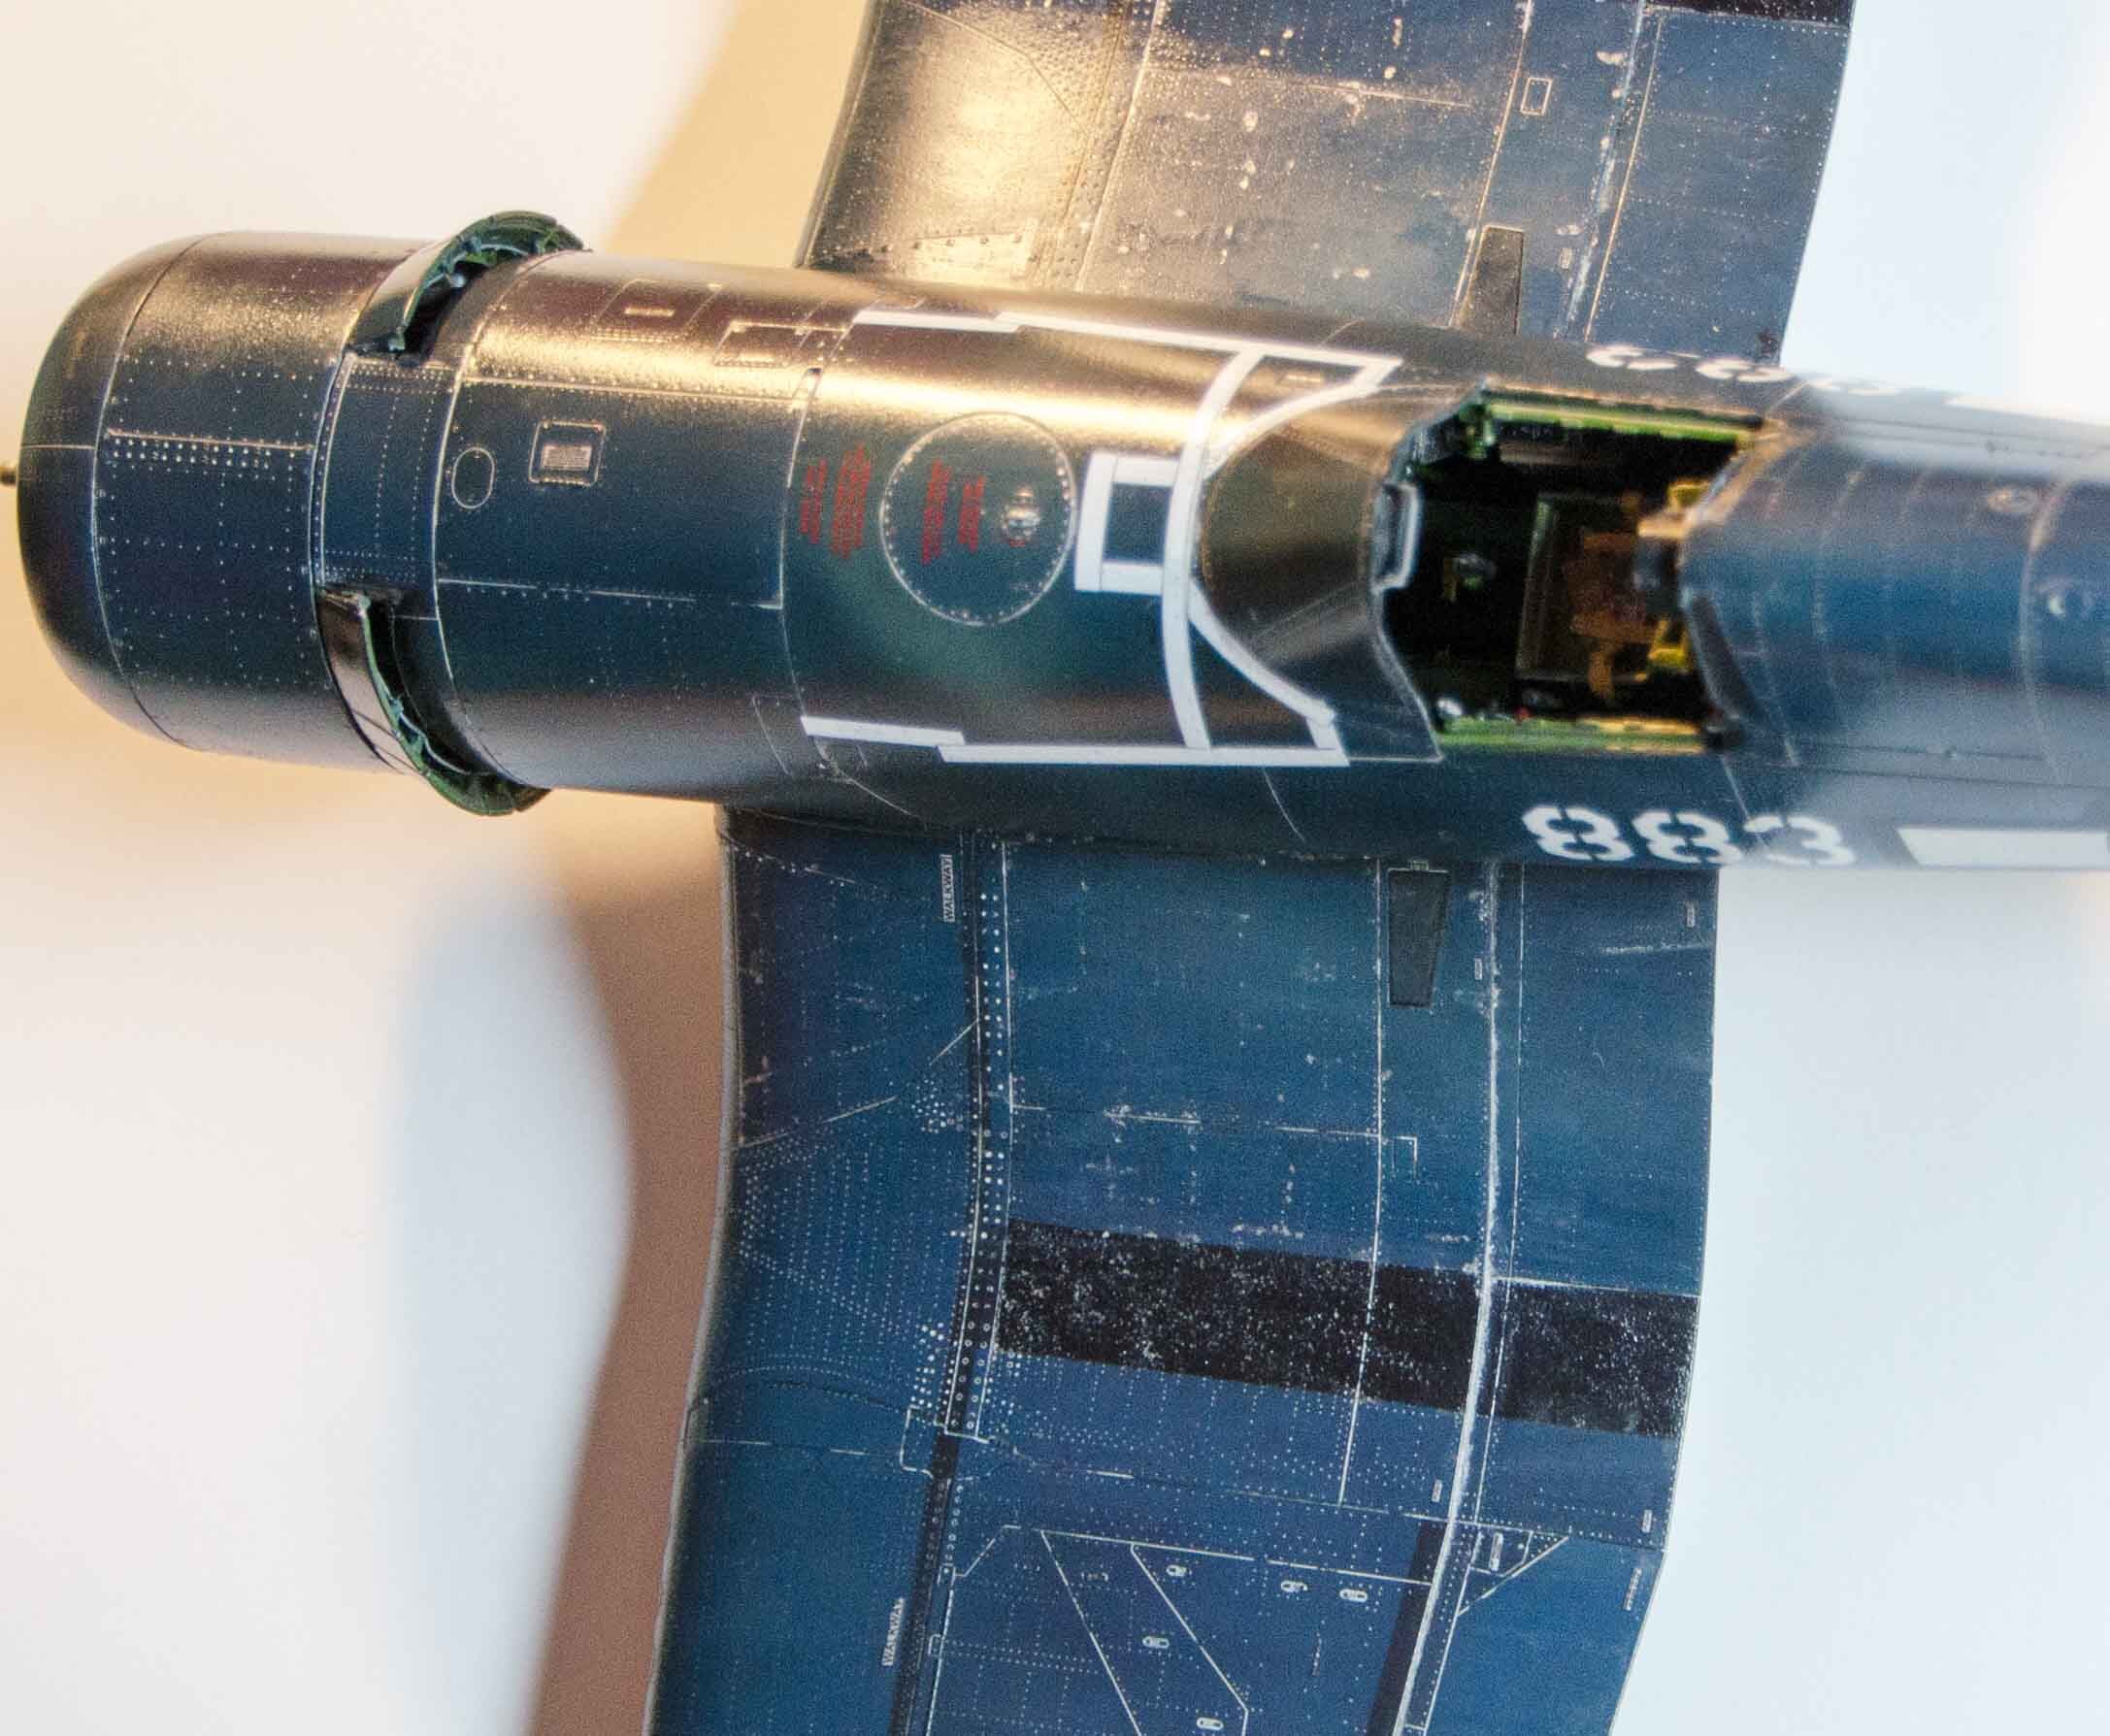
In the last two shots showing off most of the model you’ll see me starting in on weathering…primarily 25-50 part thinner, one part XF55 (Deck Tan). I use it on some of the places I expect fuel, oil, or other fluid/stain marks. Multiple light one-way passes of the airbrush set at 12-15 PSI. The other weathering technique is purely accidental. In a lot of these shots you’ll see scuff marks on the wings/fuselage…like the Montex Mask overhead shot of the insignia. That’s just me rough-handling the model w/o gloves on and getting either fingernail or tool scratches on the paint. I left them in but over time, the oils in my hand would soften those marks up and they become more natural looking. Later on when I get into serious weathering I am not above using my fingers to smooth out oil-based stains or places I have too much weathering. If you do so…just follow the airflow.
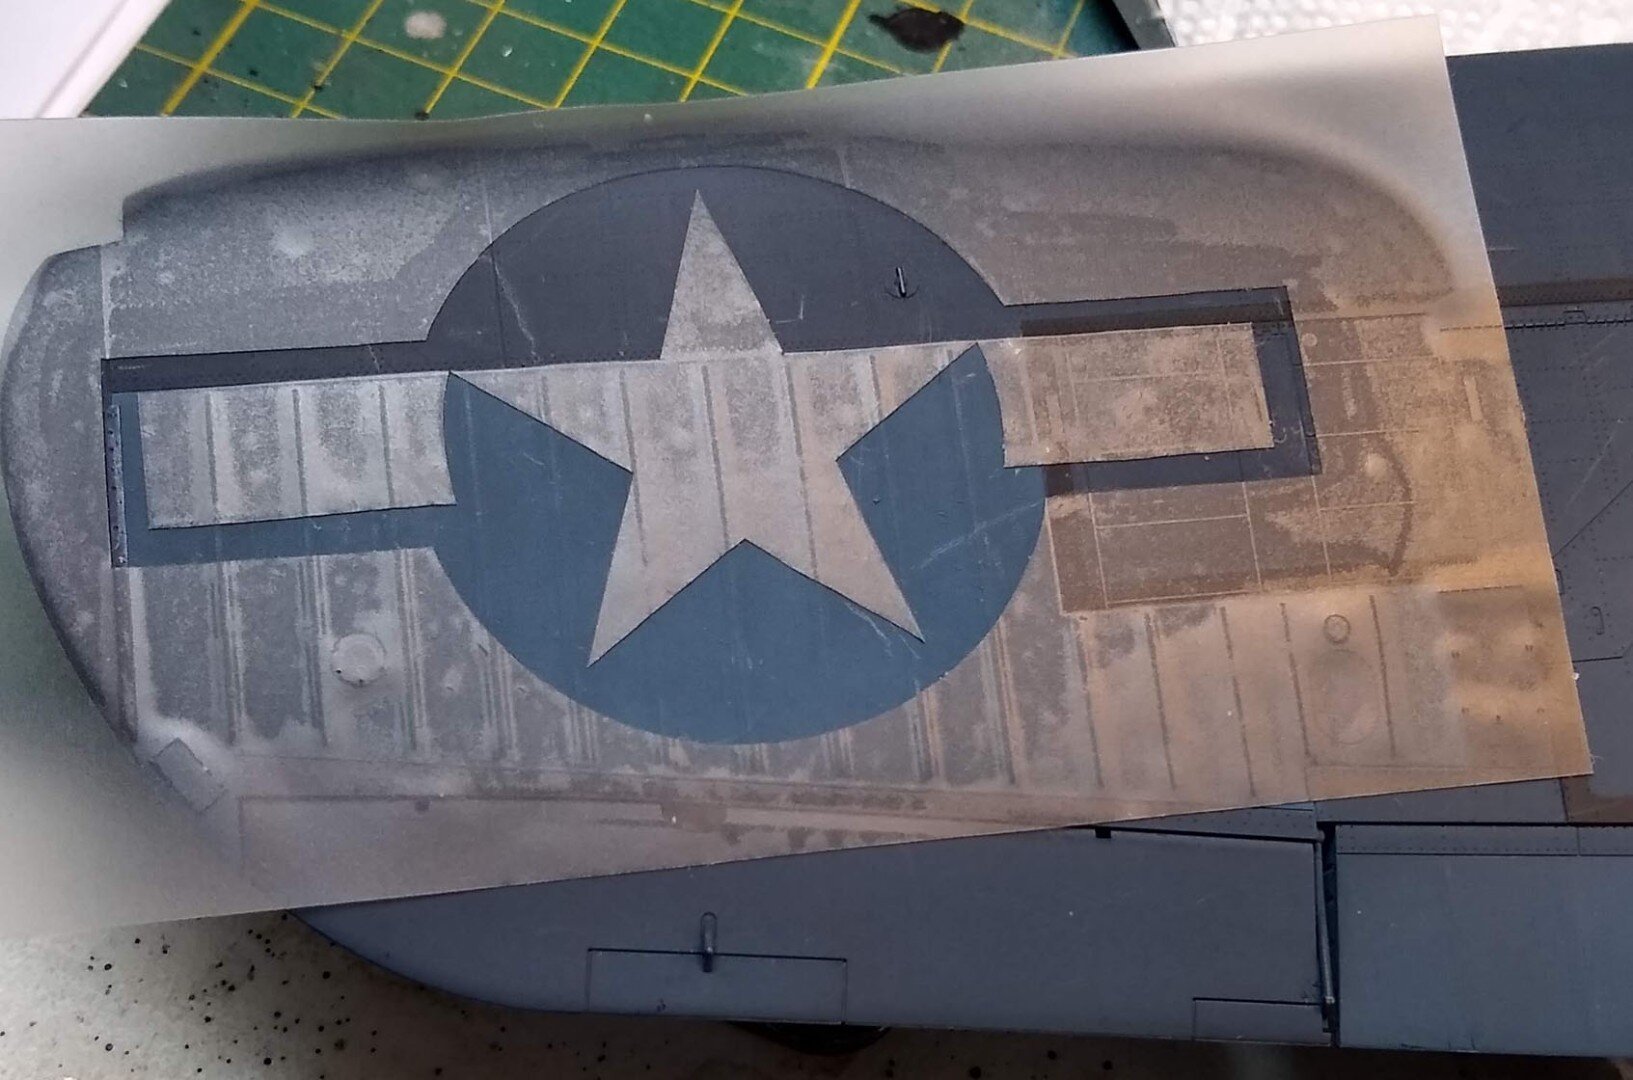
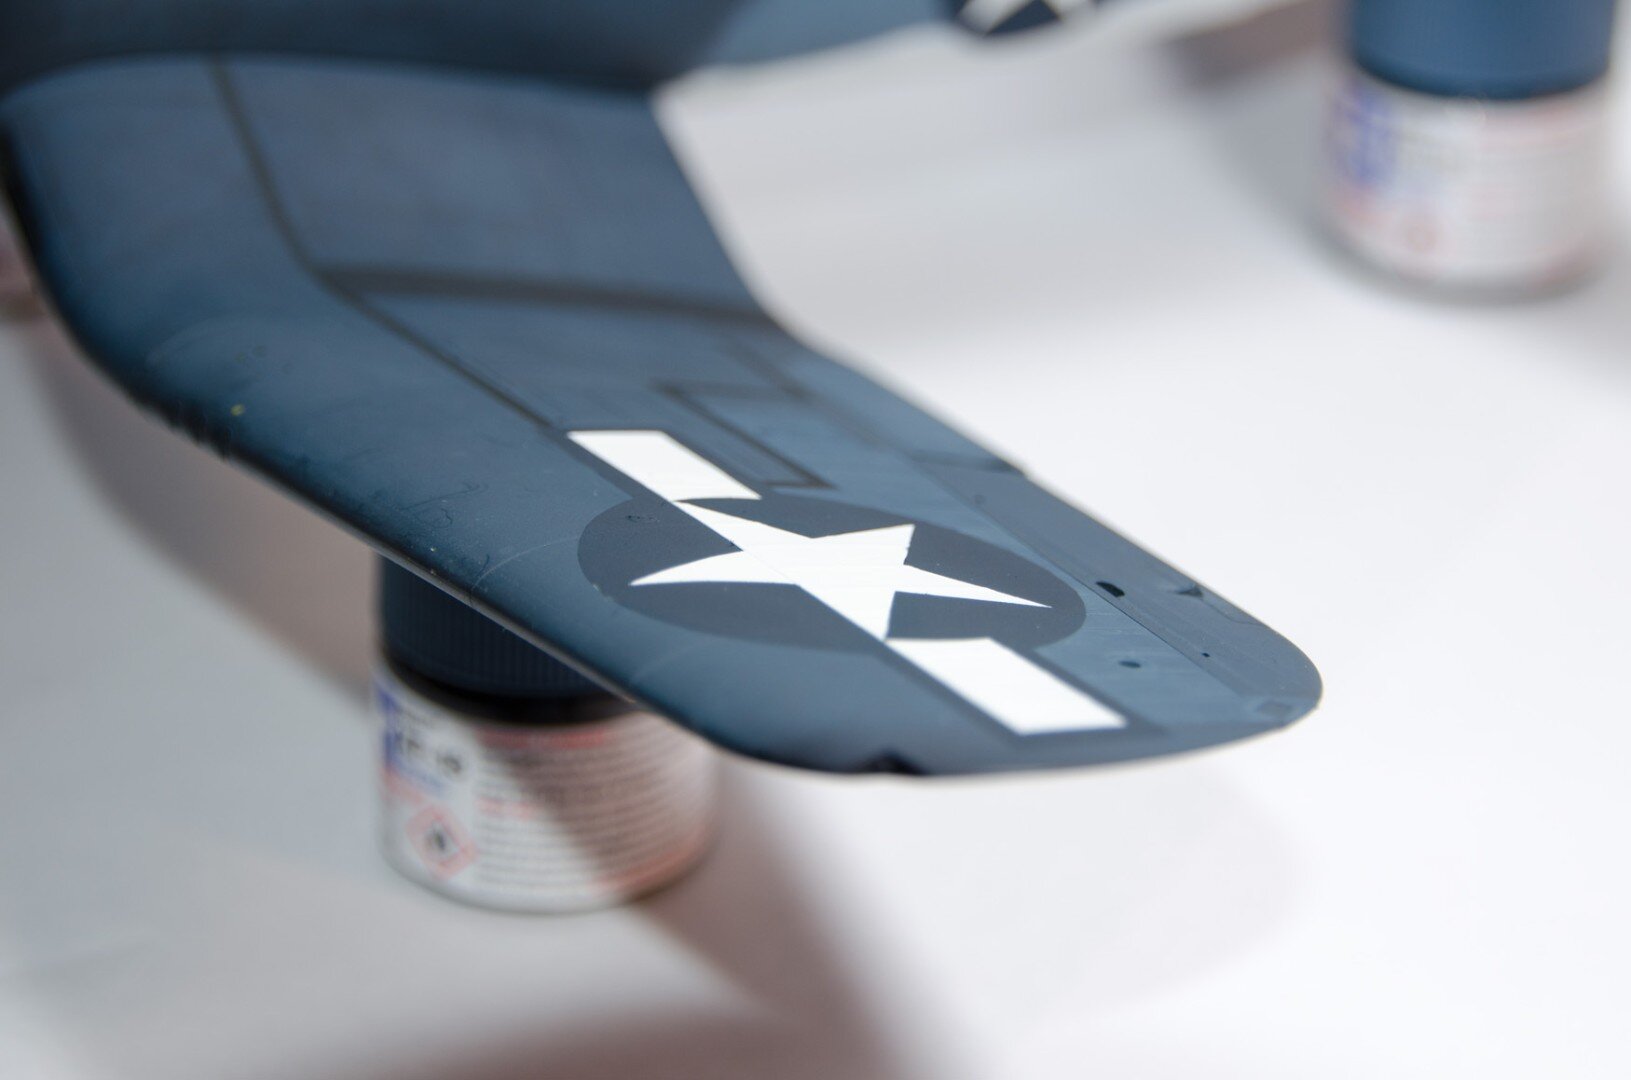

See the Montex mask above? It’s vinyl and as long as you smooth out the edges to get rid of trapped air they work great. I used my fingers and a soft pen cap and other items to make sure the vinyl was connected to the plastic. You can see in the pic I had not done that yet…before I painted I went back and did my best to seal the edges.
Weathering or how to try and screw up everything
When building a model I tell myself “today will be the day I do subtle weathering”…and a few minutes later there’s so much of Flory’s Dark Dirt Wash on it looks like my prized model was dropped in the mud and ruined.
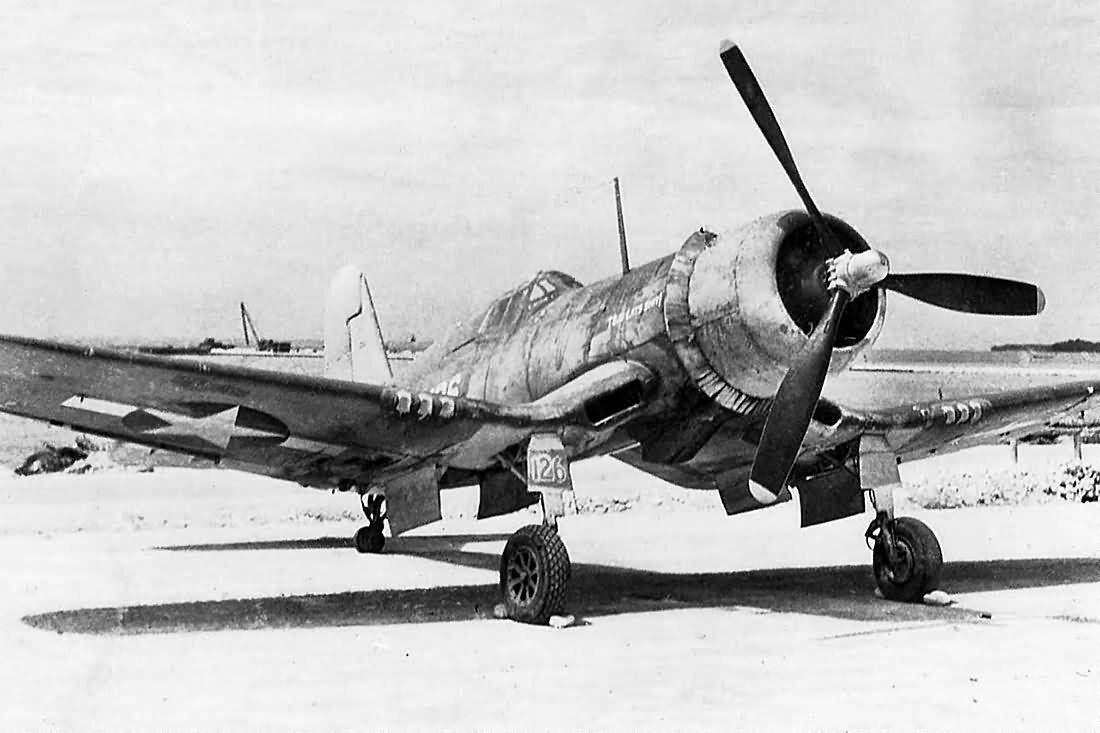
Getting the right amount of weathering takes time and patience. I think it’s partially more art-form than coloring in-between-the-lines work. You want to stay fairly true to the era and type of model you’re building so you do research and you read a lot and surf the web a lot. In this case, Corsairs in the early part of the war in the South Pacific were truly a sight to believe…they looked like used, beaten down, about to fall apart…if your mother saw you flying that she’d die of a heart attack, bad.
Just a few examples:
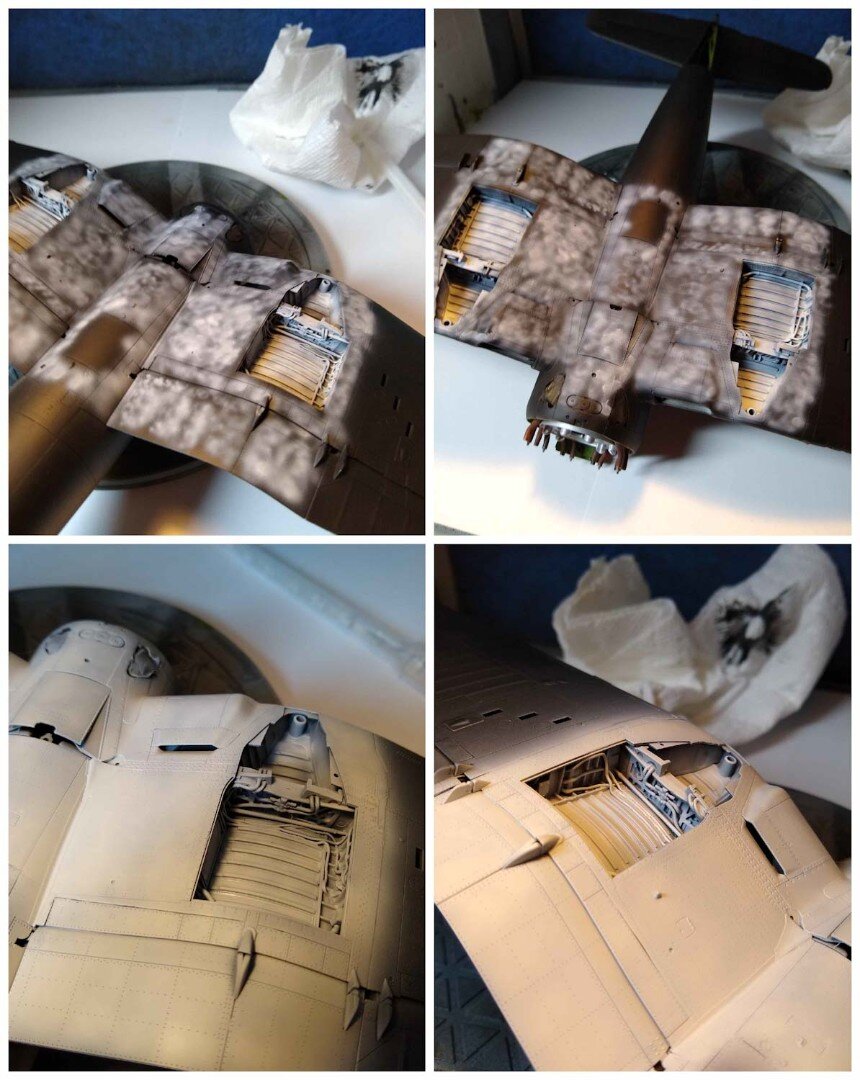
I used multiple weathering techniques…and assorted panel liners and Flory’s washes and spray paint (thin layers over and over again) and salt and oil off fingers and you name it and I tried it. The progression here for slides 1-6:
Sprayed a thinner/deck tan mix to start weathering gas caps, stains off access doors, etc. One-way pattern and you can get in a rhythm
Sprayed a Testors Clear Coat layer over the entire aircraft and then used a combination of Flory light and dark washes…depending on the part of the aircraft would be effected by either or both. I think I used five or six of them…
Dark-washed the underside and landing bays and doors. Wet the model, sprinkled salt (rough crystals) on the area’s directly exposed to sun, let dry (overnight perhaps) and then slowly cover that entire area with a VERY thin mix of thinner and Tamiya Deck Tan…maybe 50 to 1 ratio. What this does is gently fade the paint not covered in salt. Let that dry and then remove the salt…damp cloth w/broad brush. Be nice to your plane.
You can see the results…blotches/tonal differences, etc. You can follow up this with the same technique but this time sprinkle the salt on shaded area’s of the aircraft but use a darker paint. I did not do that here.
More results…although the little white lines are me messing up (wiped off w/wet paper towel.
I did some wear and tear aging on the plane with a combination of silver prismatic pencil and alcad aluminum paint. I also used the same spray technique above on the exhaust running down the fuselage…but with darker paint and less thinner.
NOTE: Getting all the salt off the plane was difficult at best and I still find salt crystals in some of the extremities.

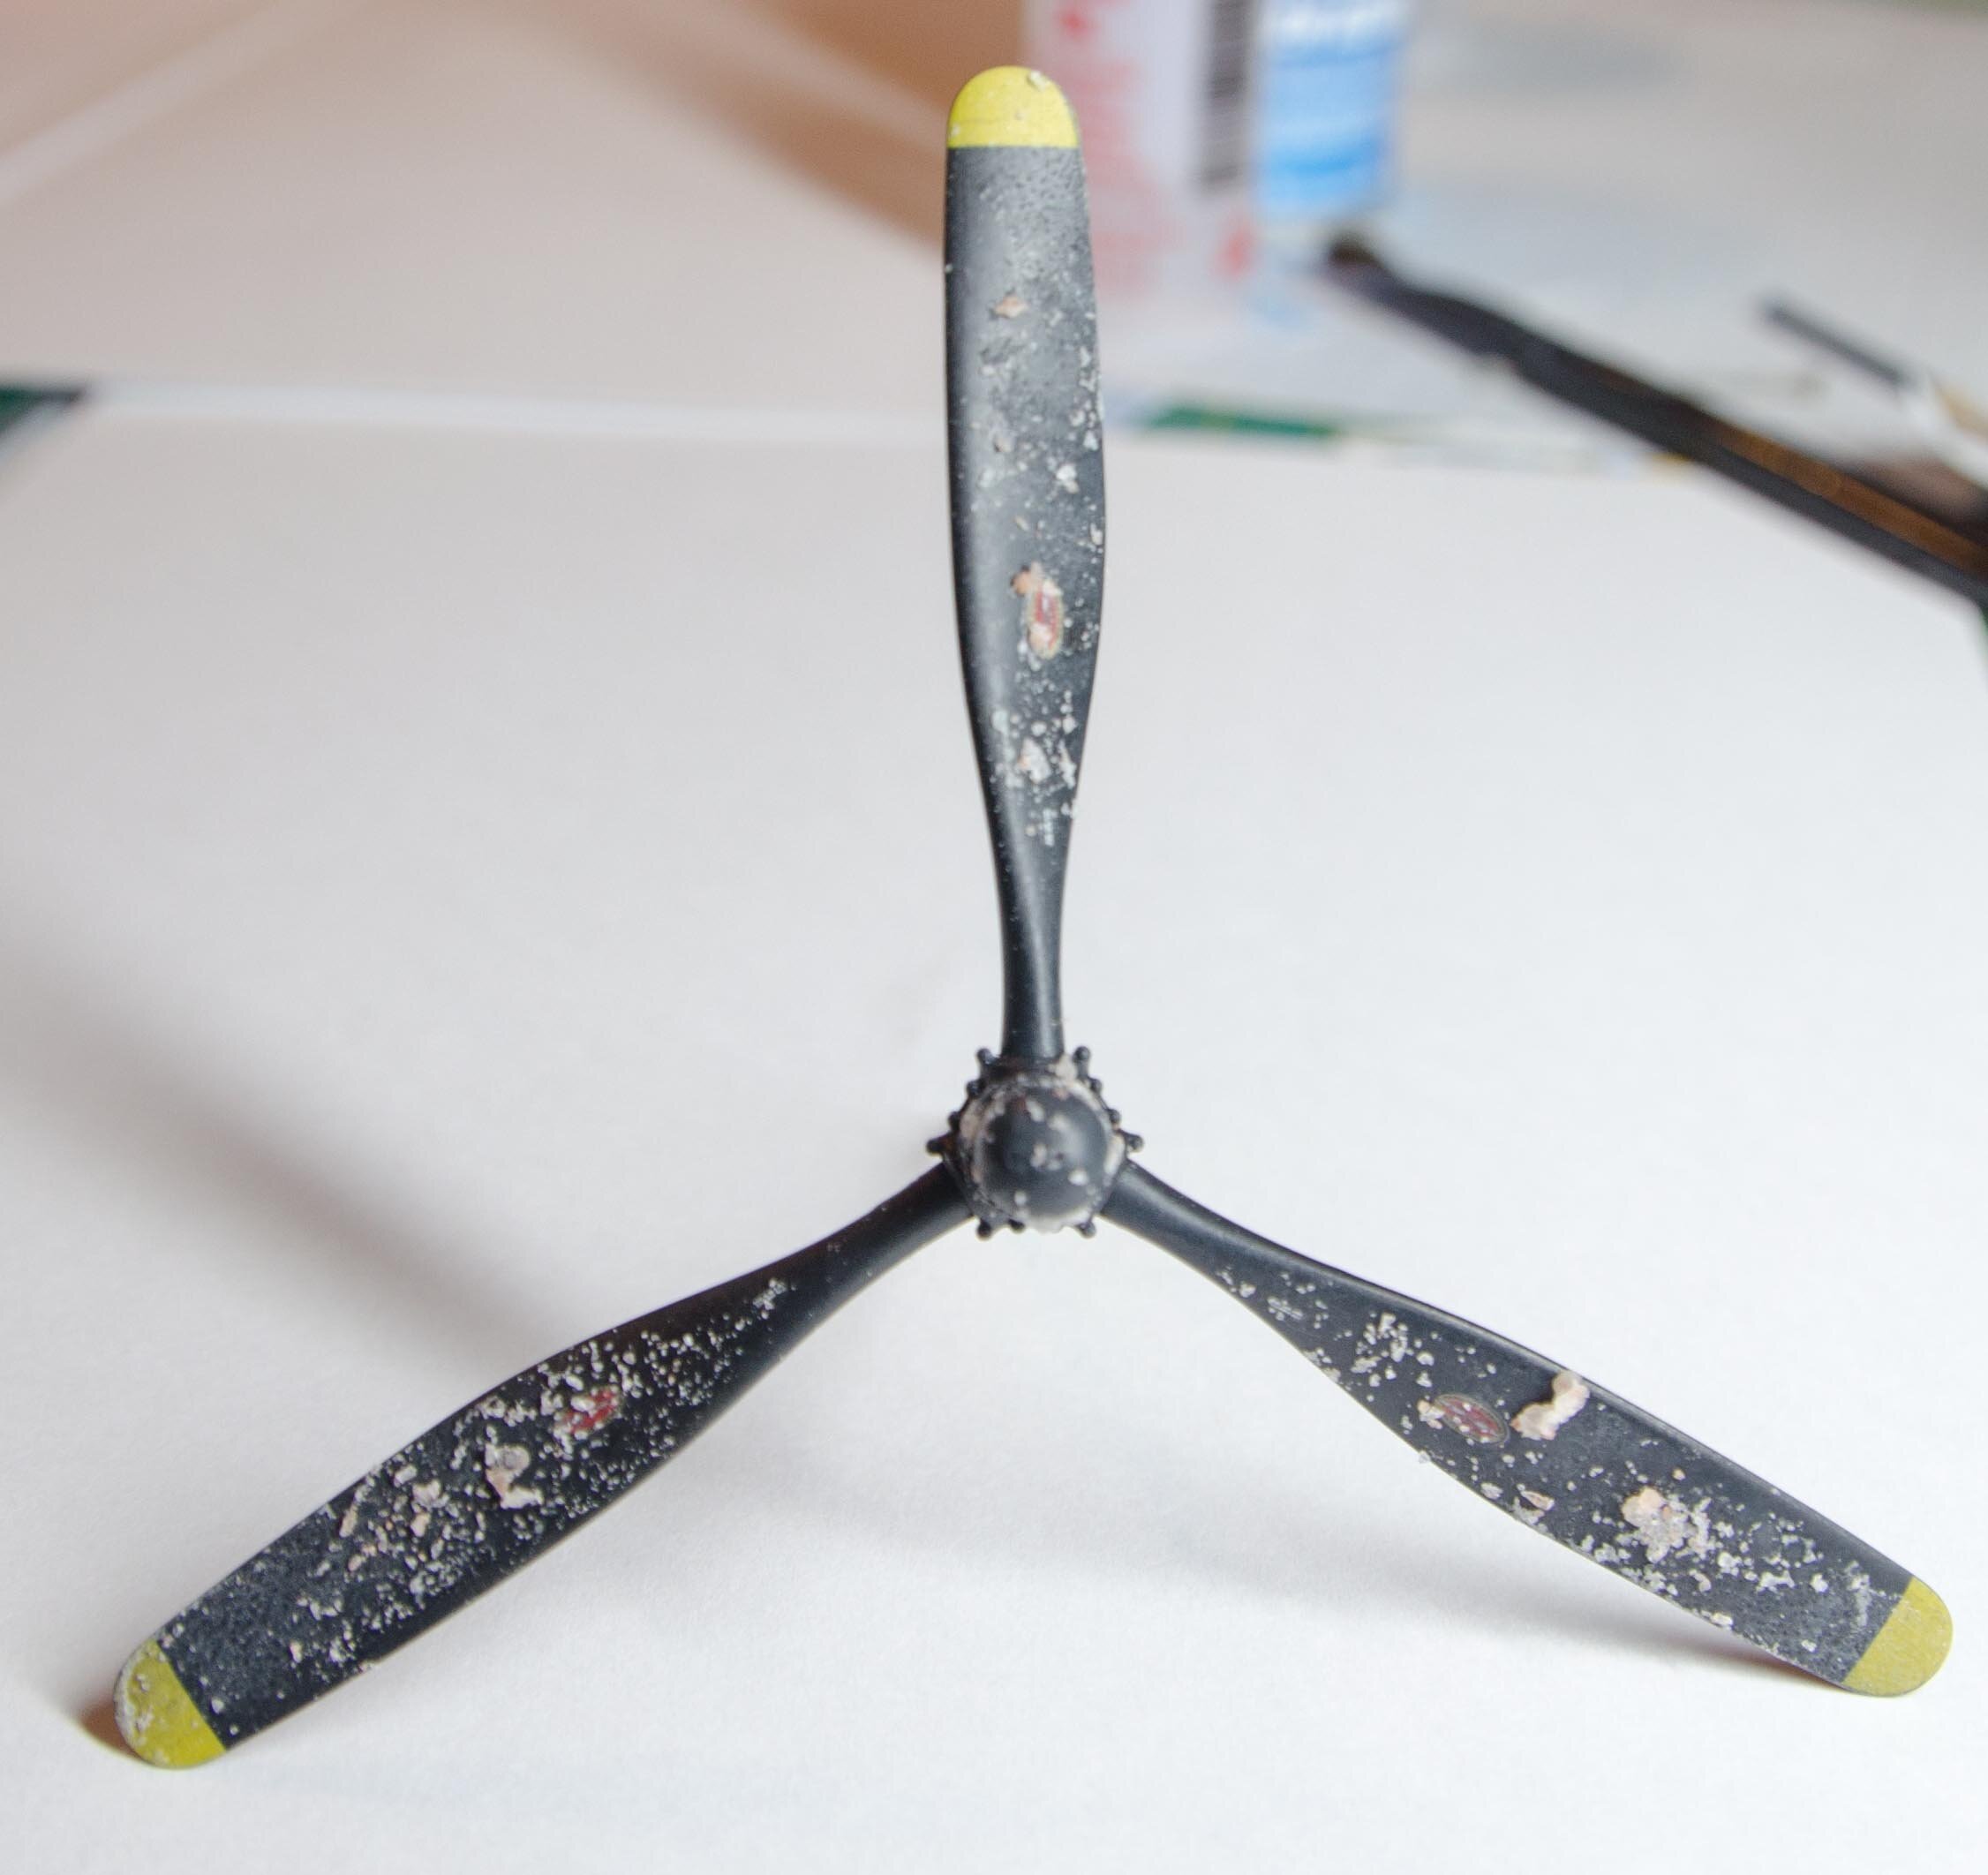
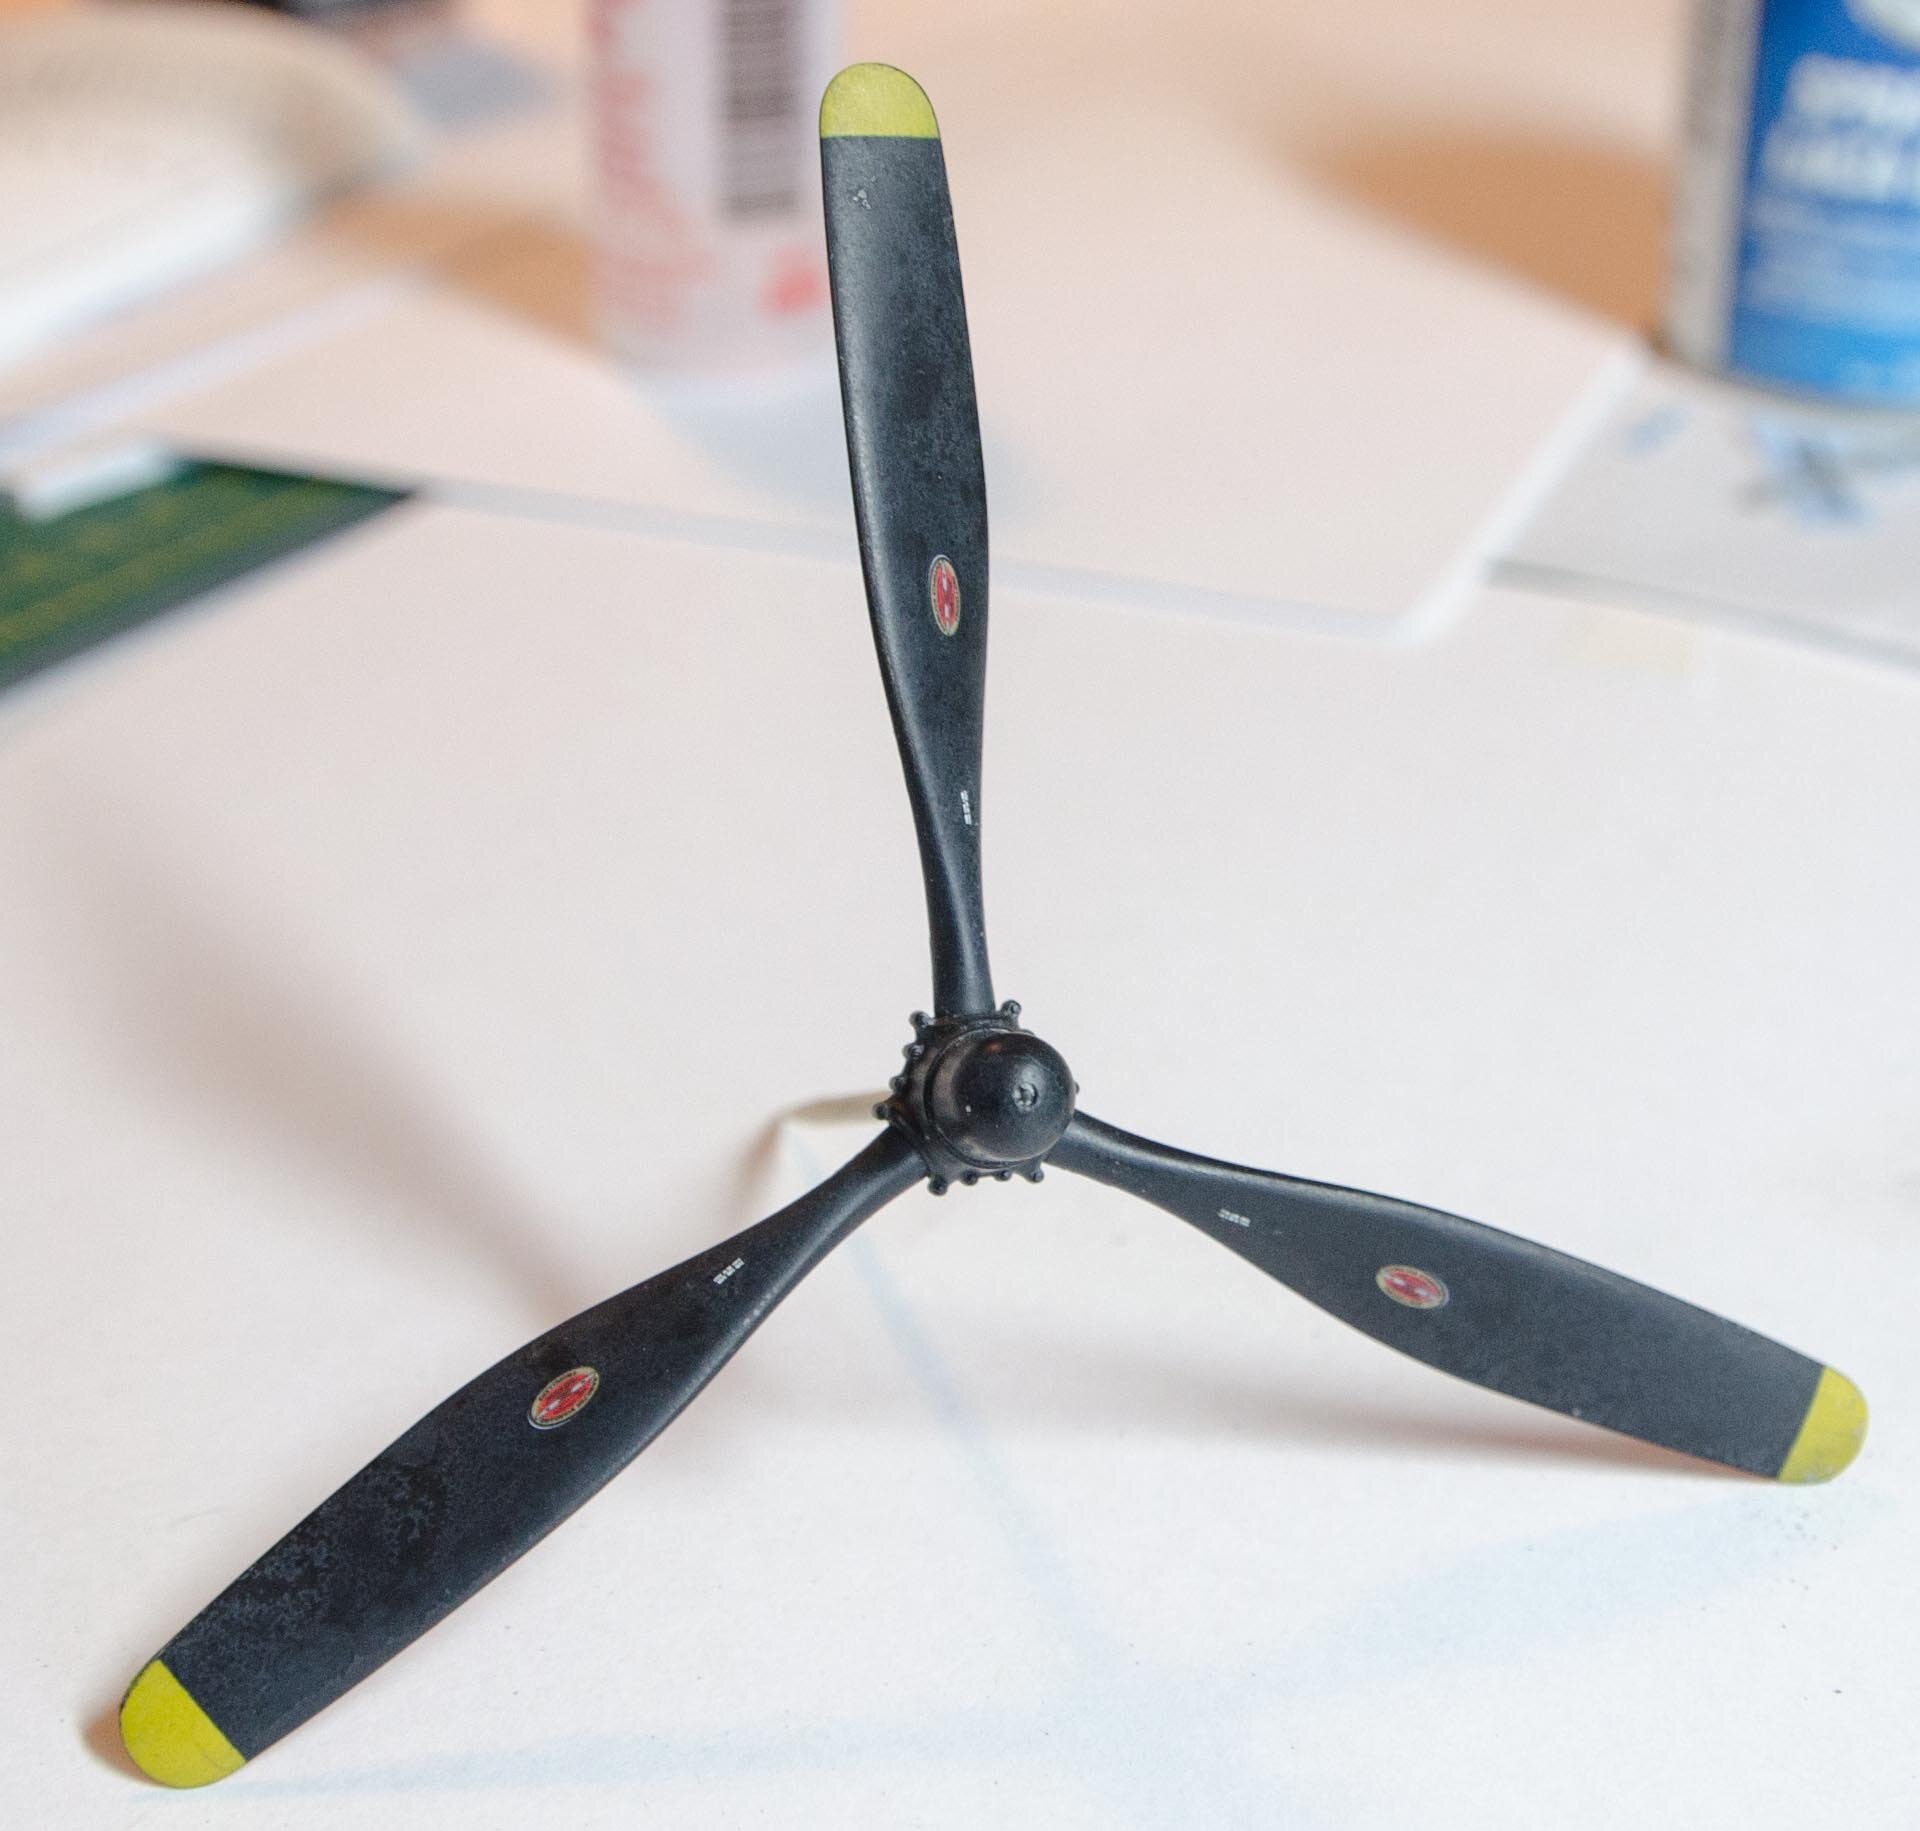
I continued to weather the aircraft in spots as I finished it up….most notably from the top gas tank on the fuselage, tires, propeller (salt technique), etc.
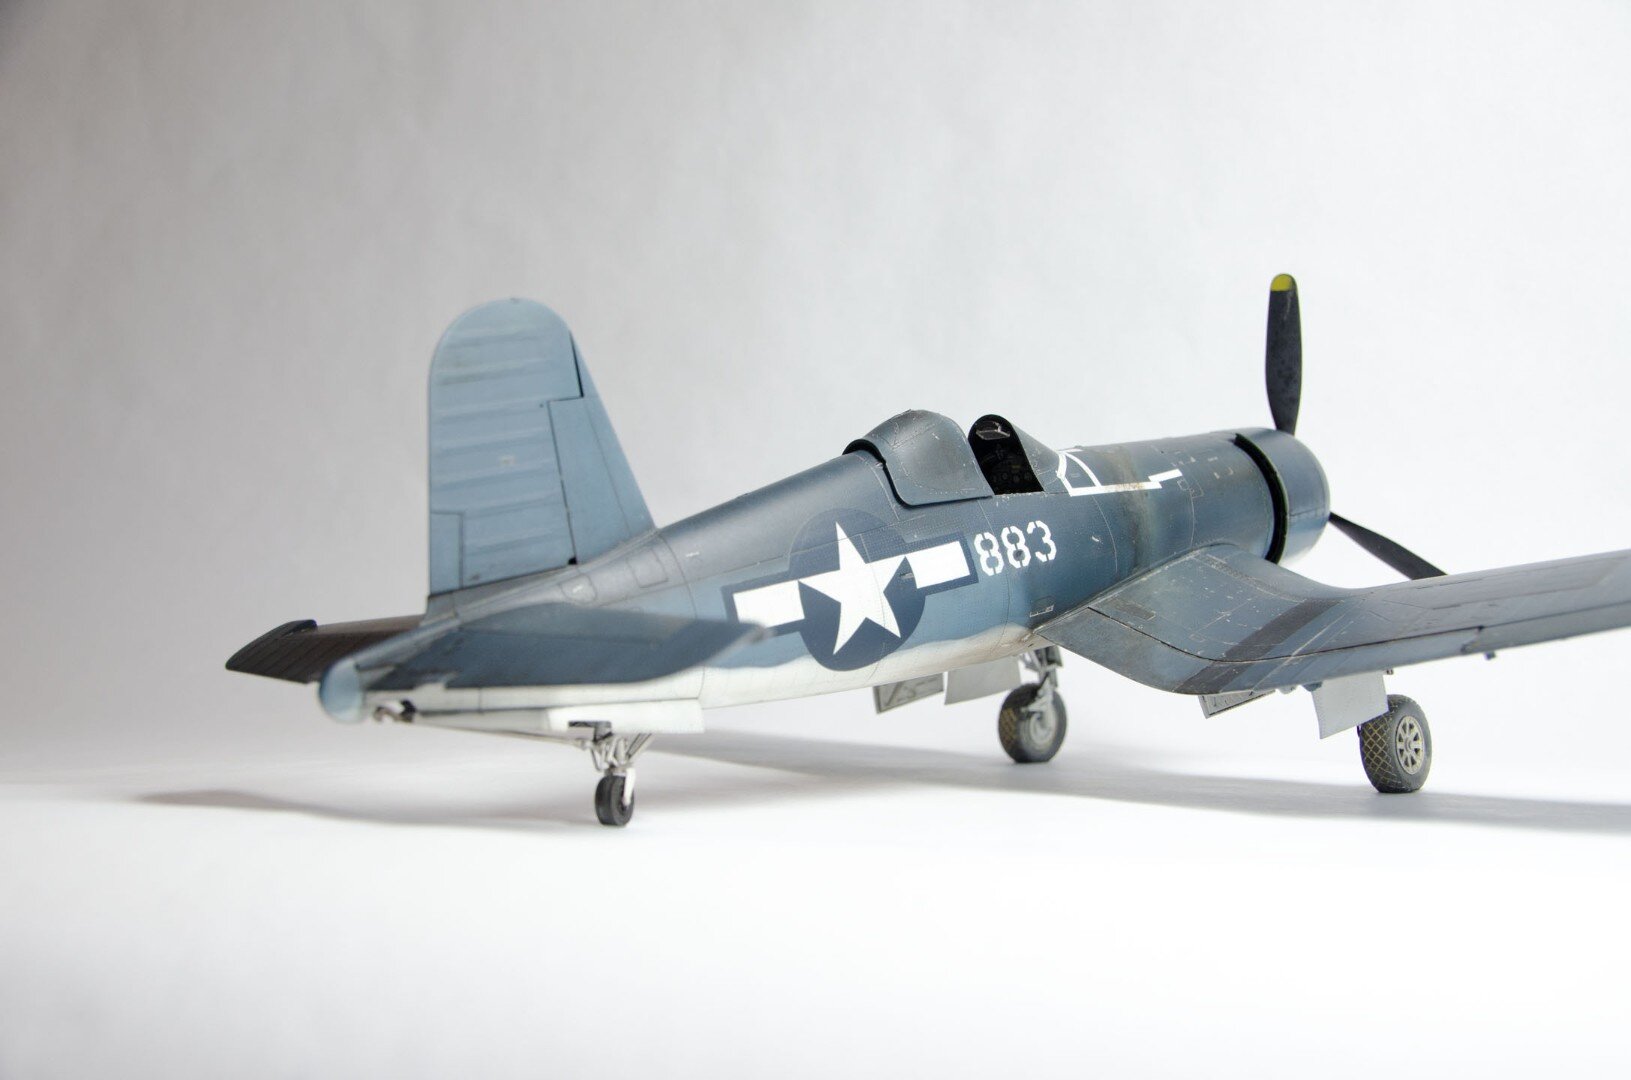

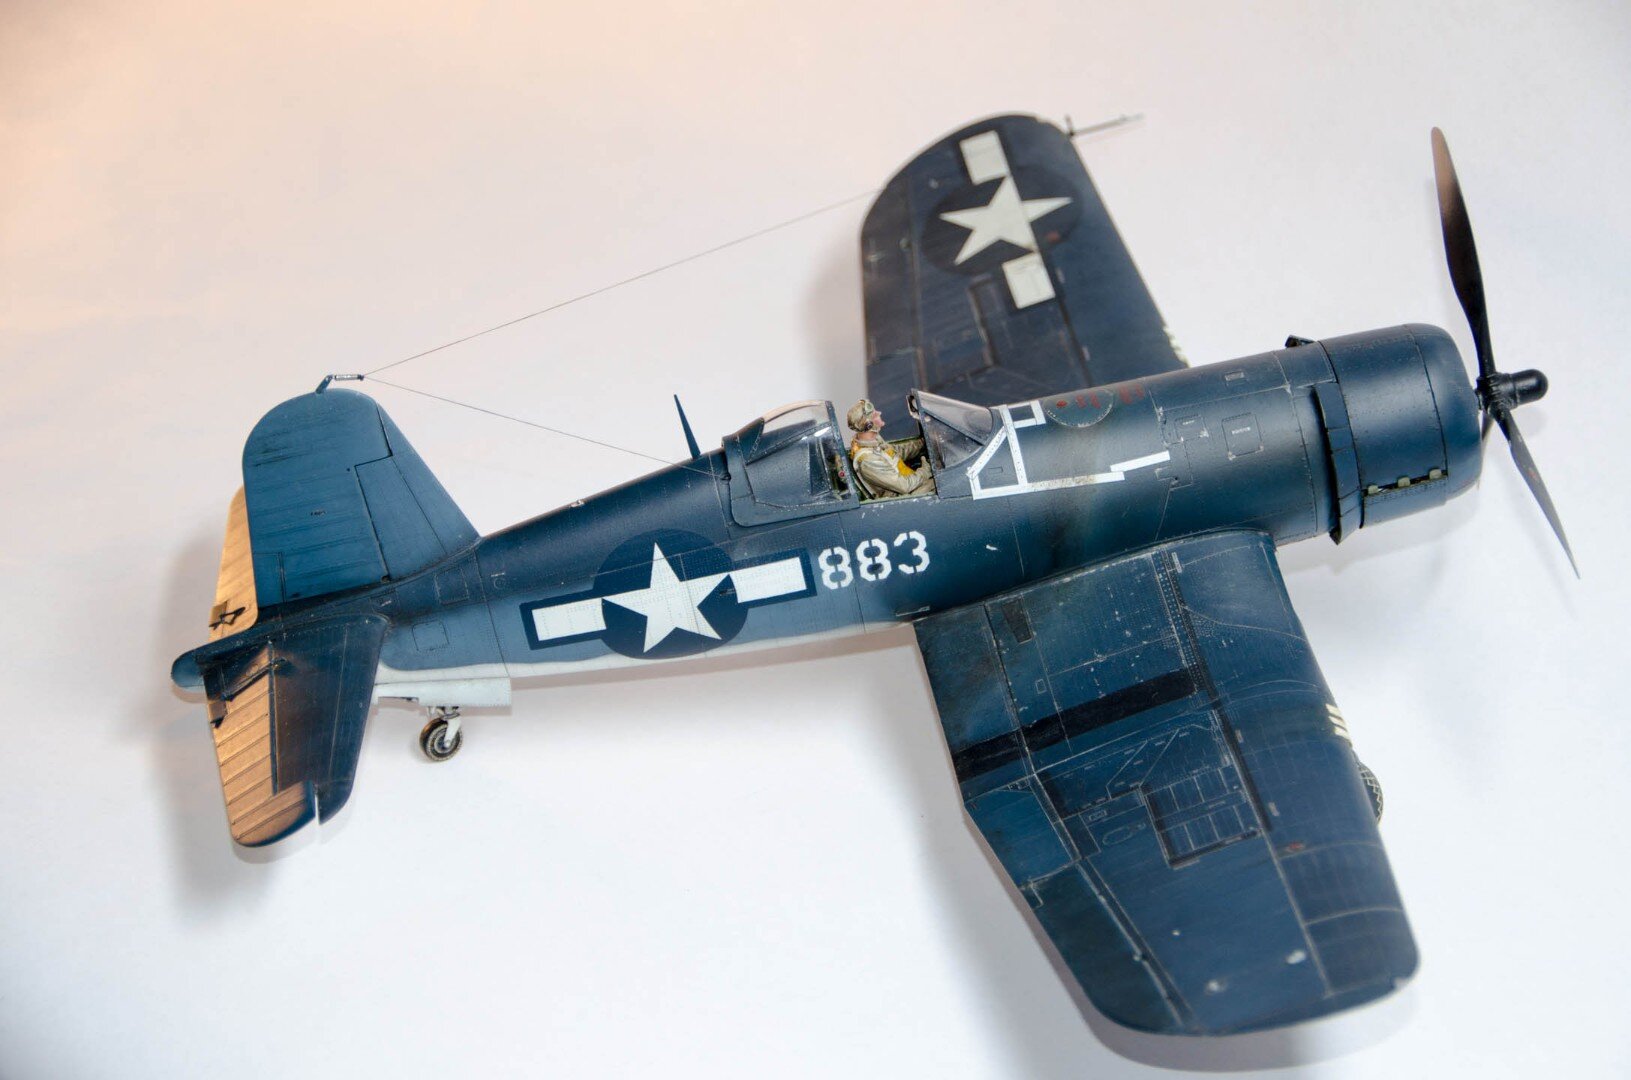
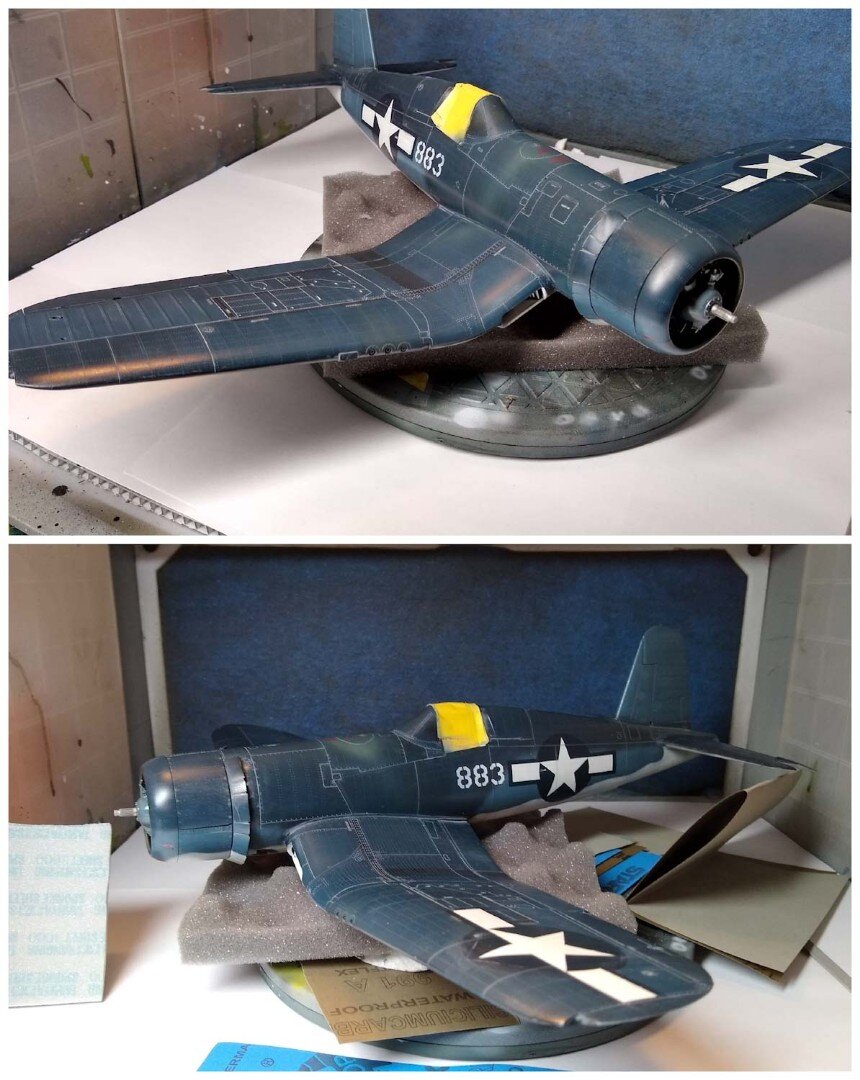
So this comes back…goal mostly met

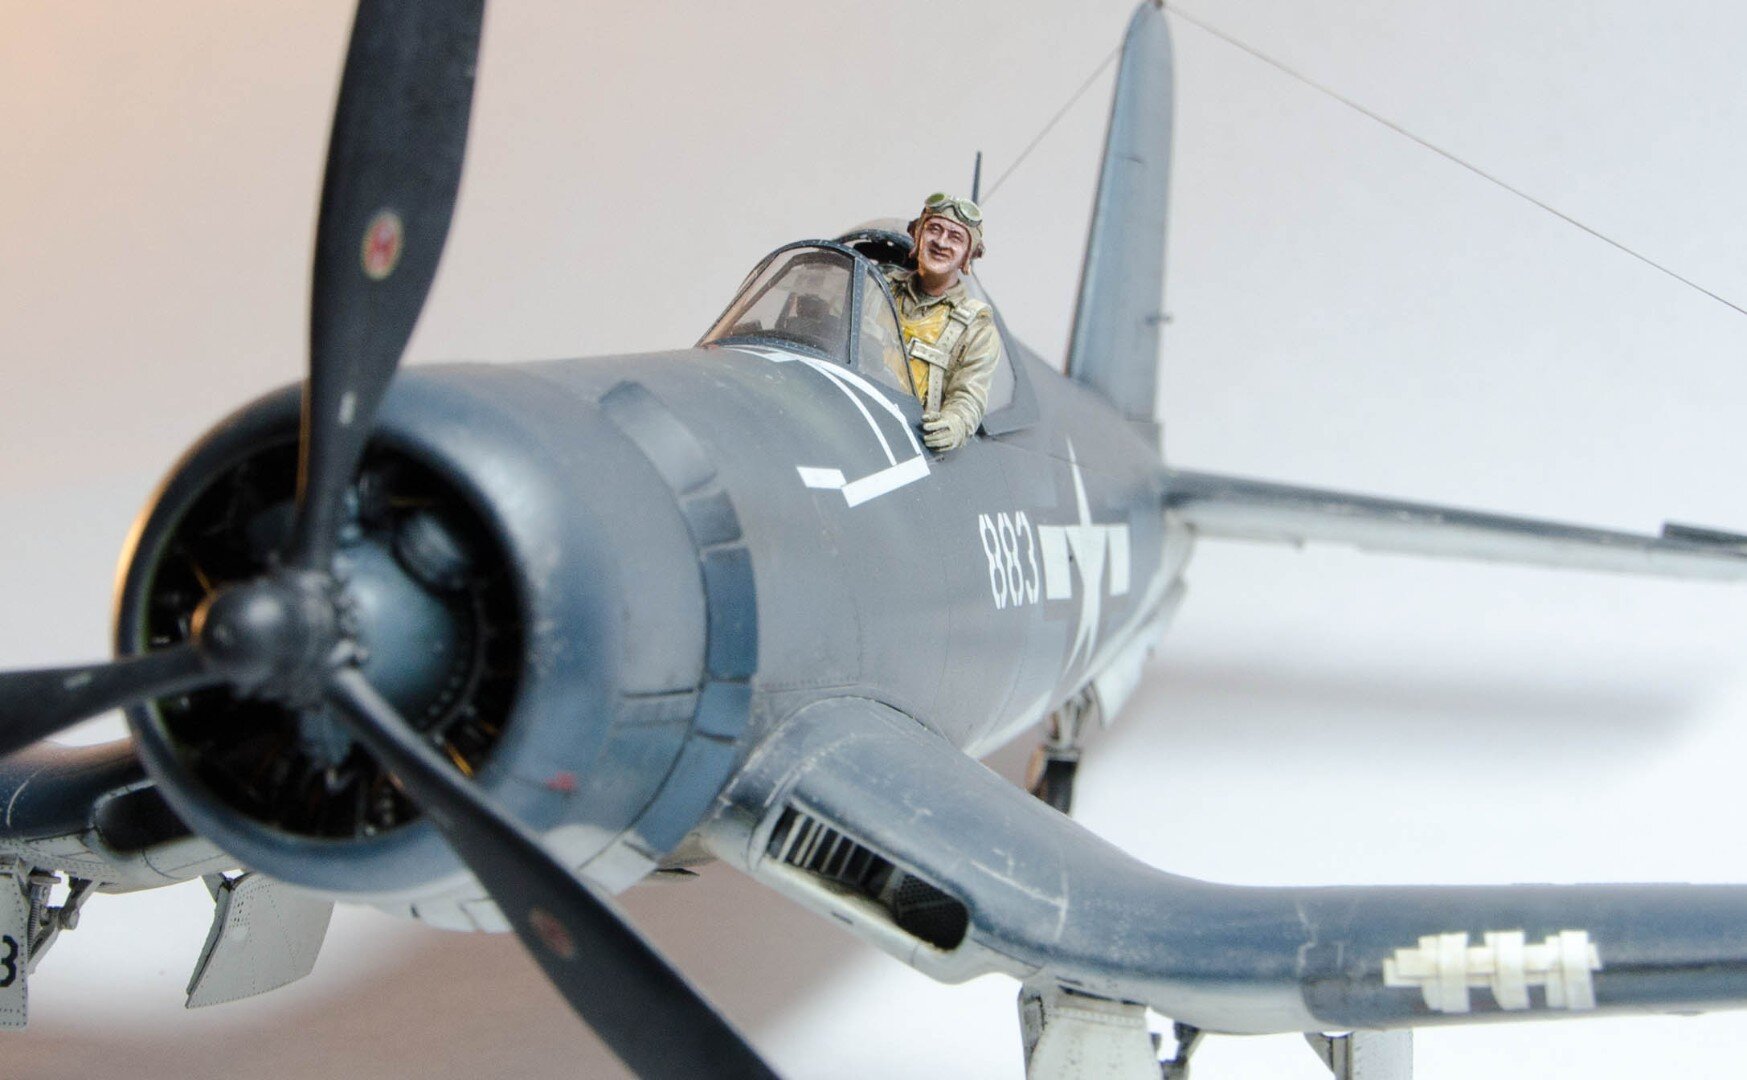
And I added a Lil’ Pappy Boyingon…
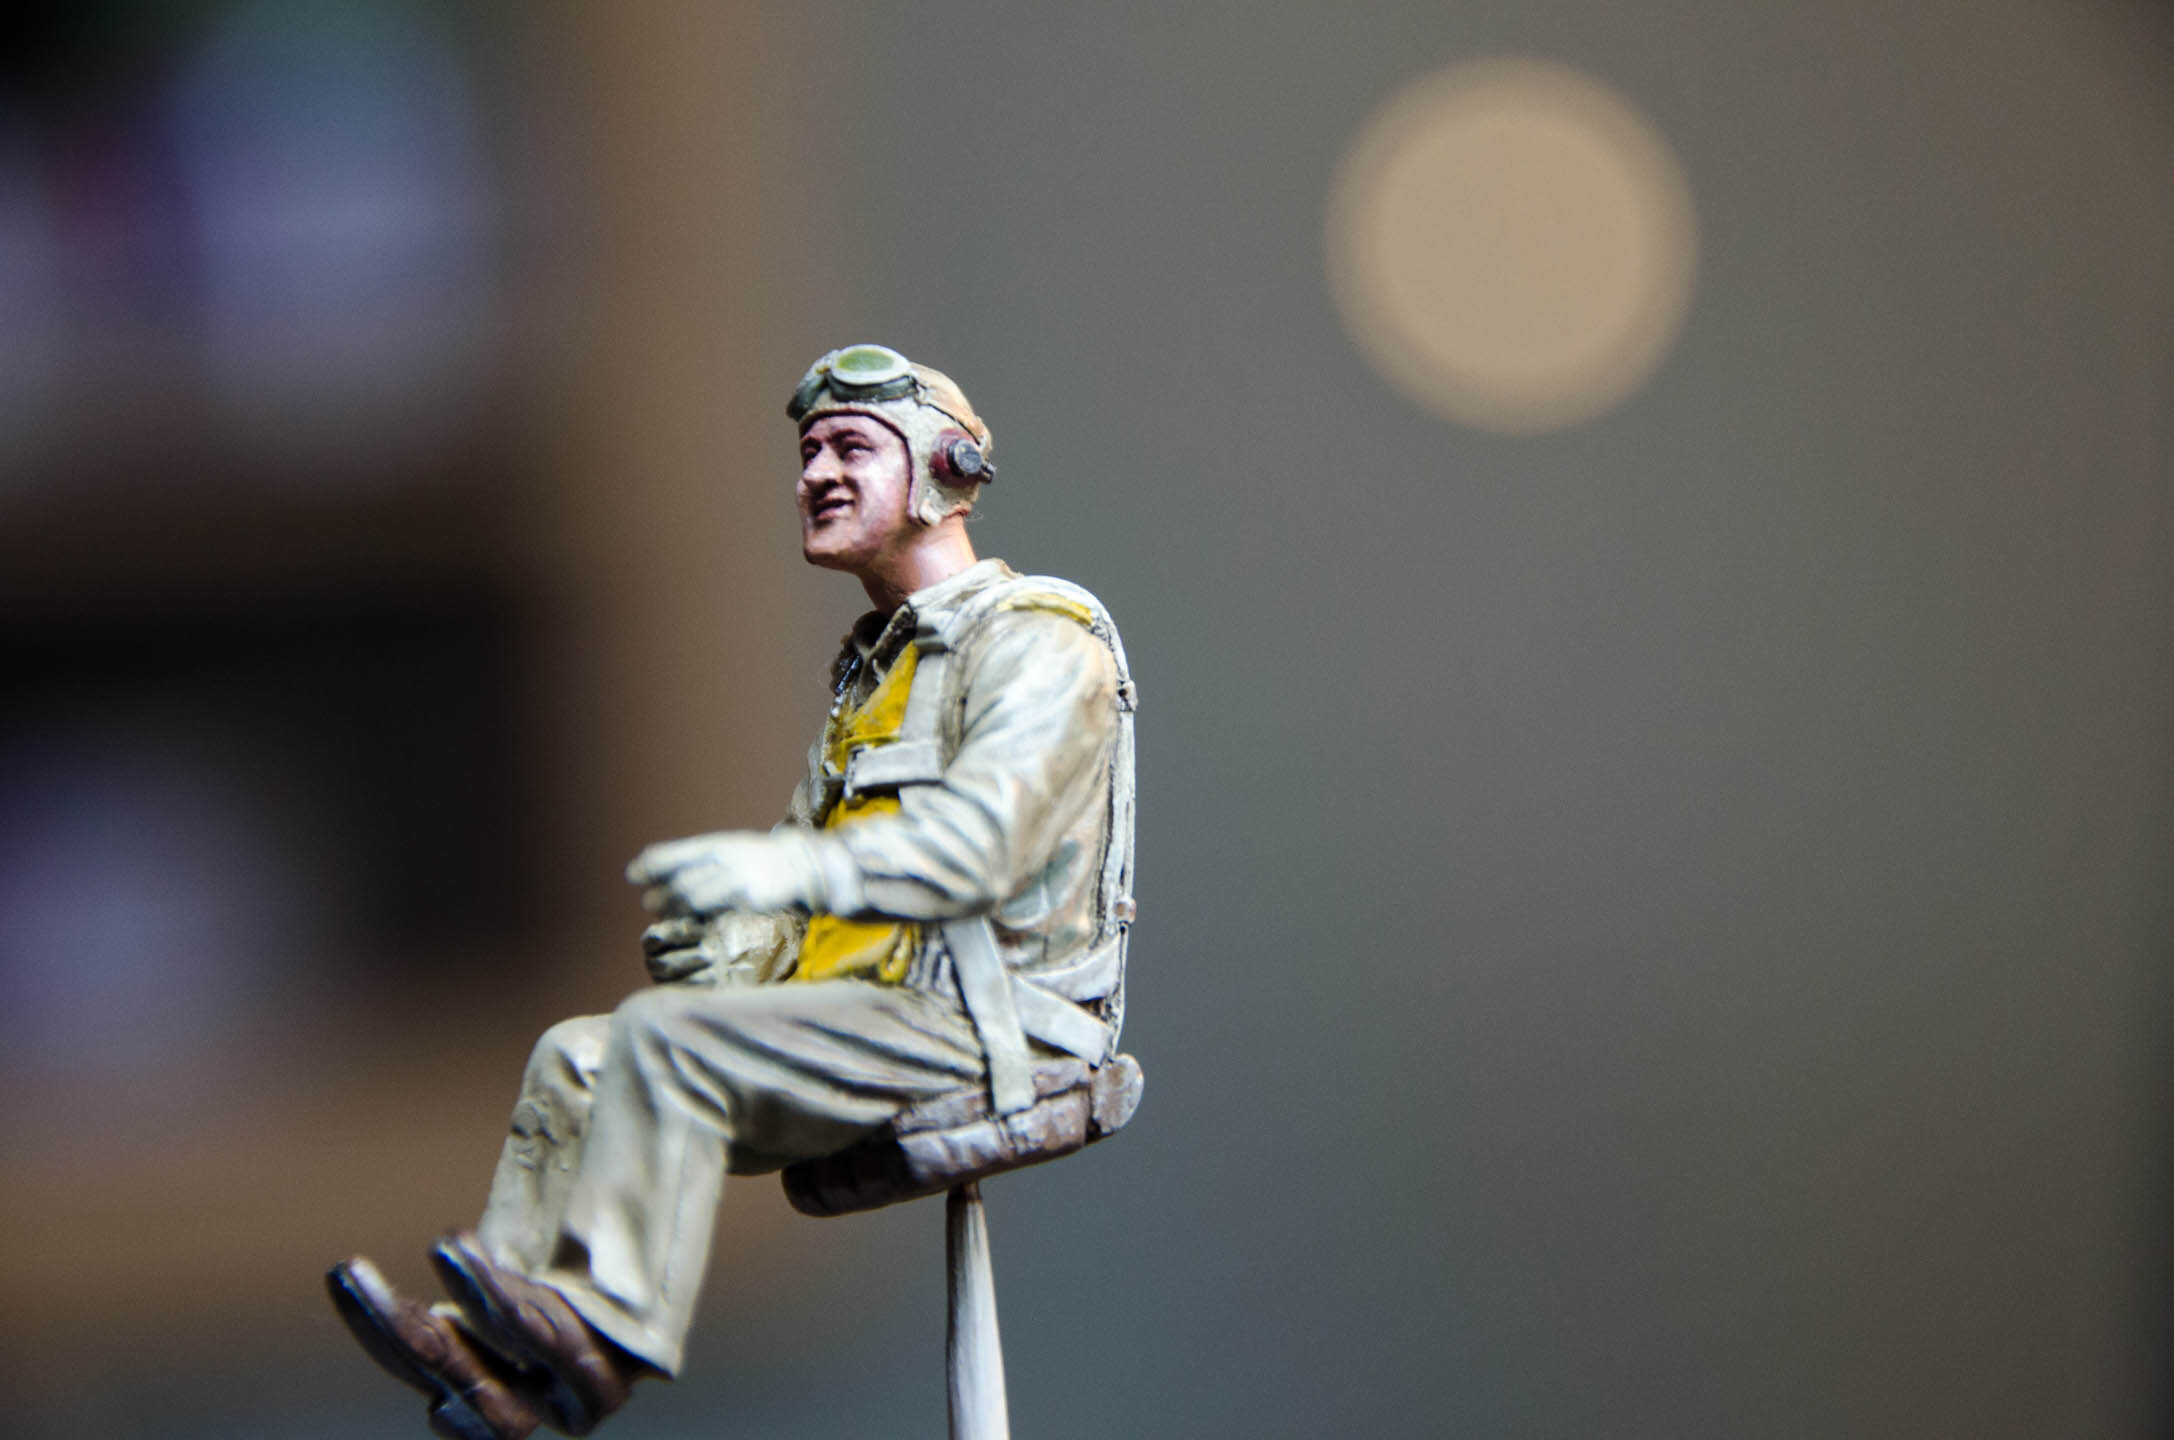
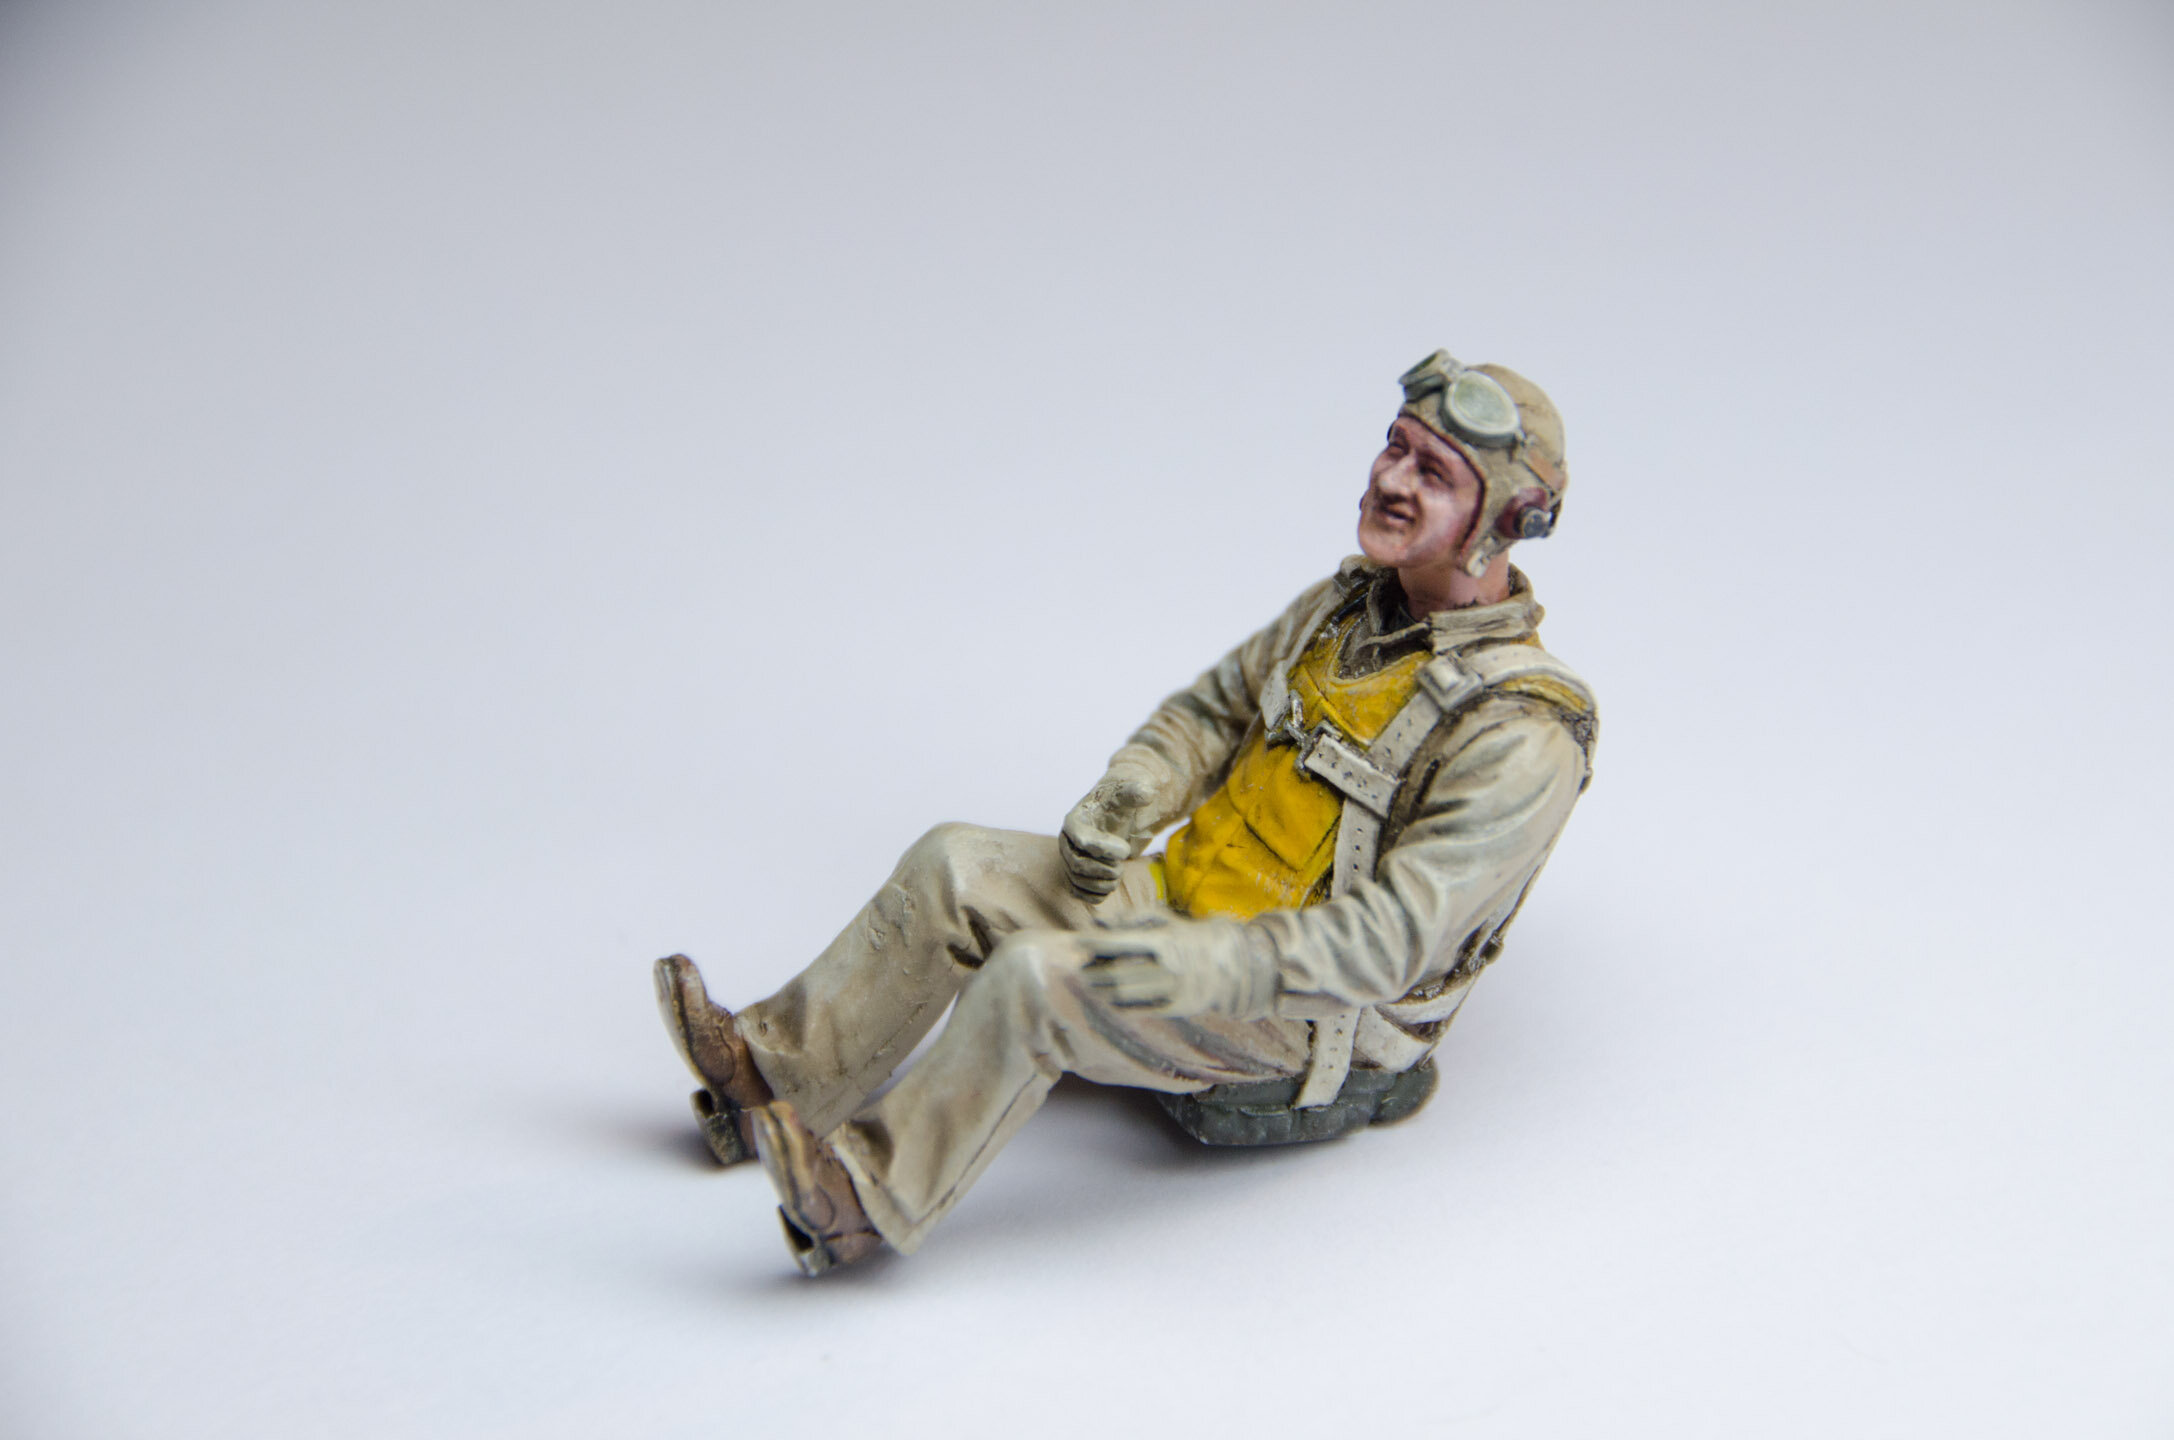
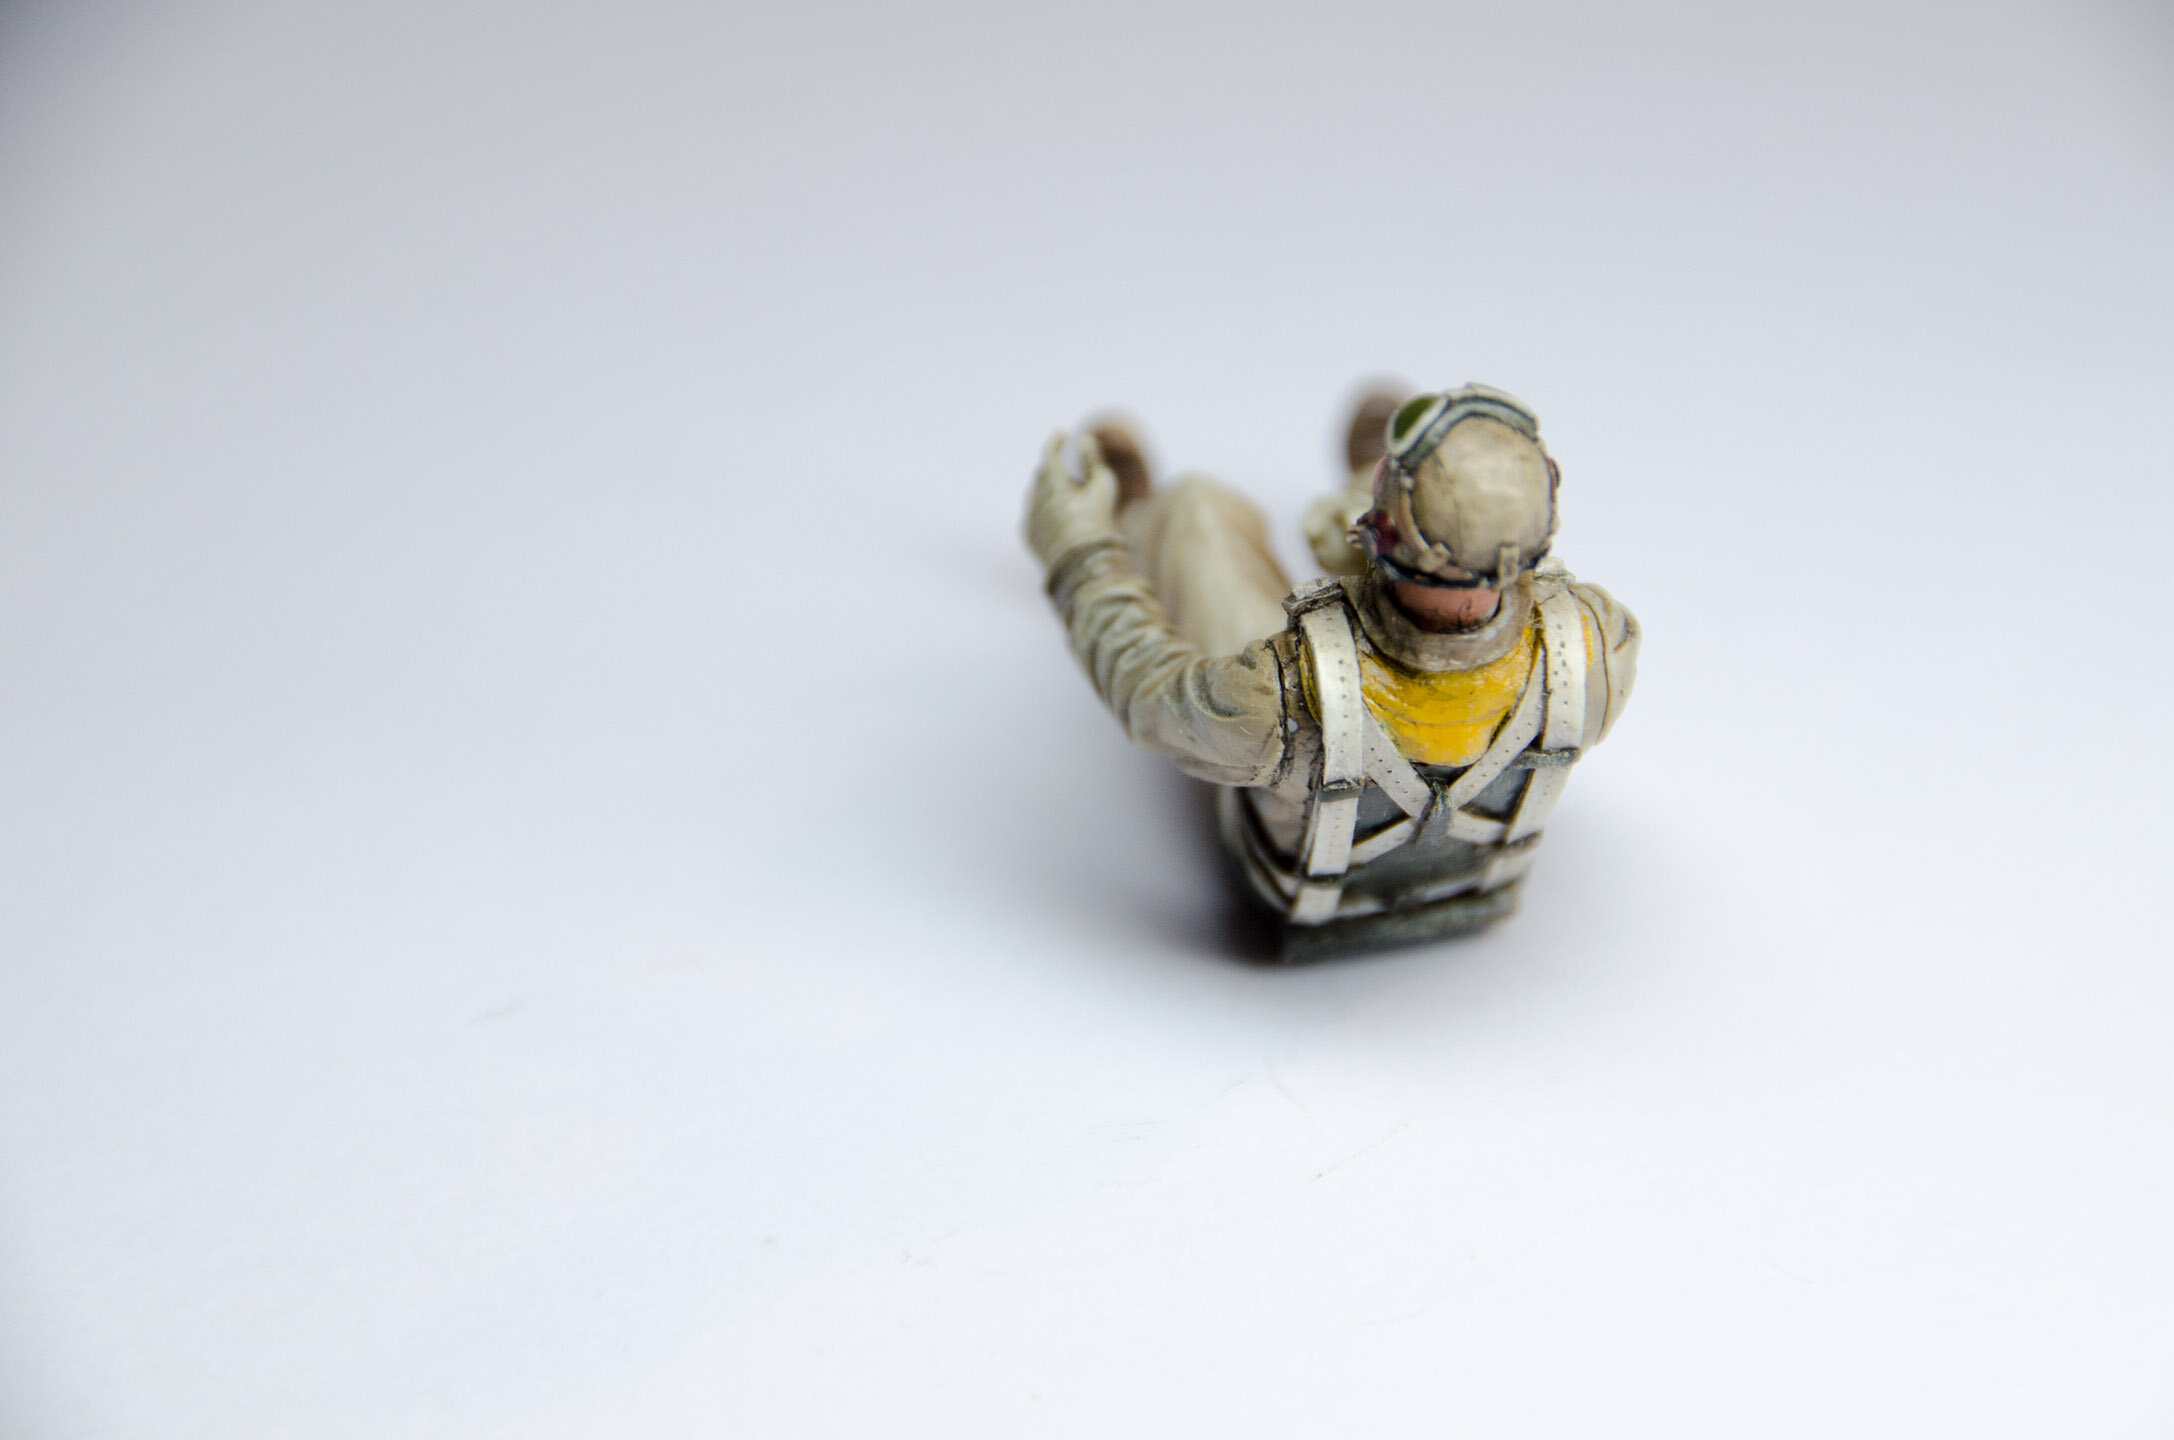
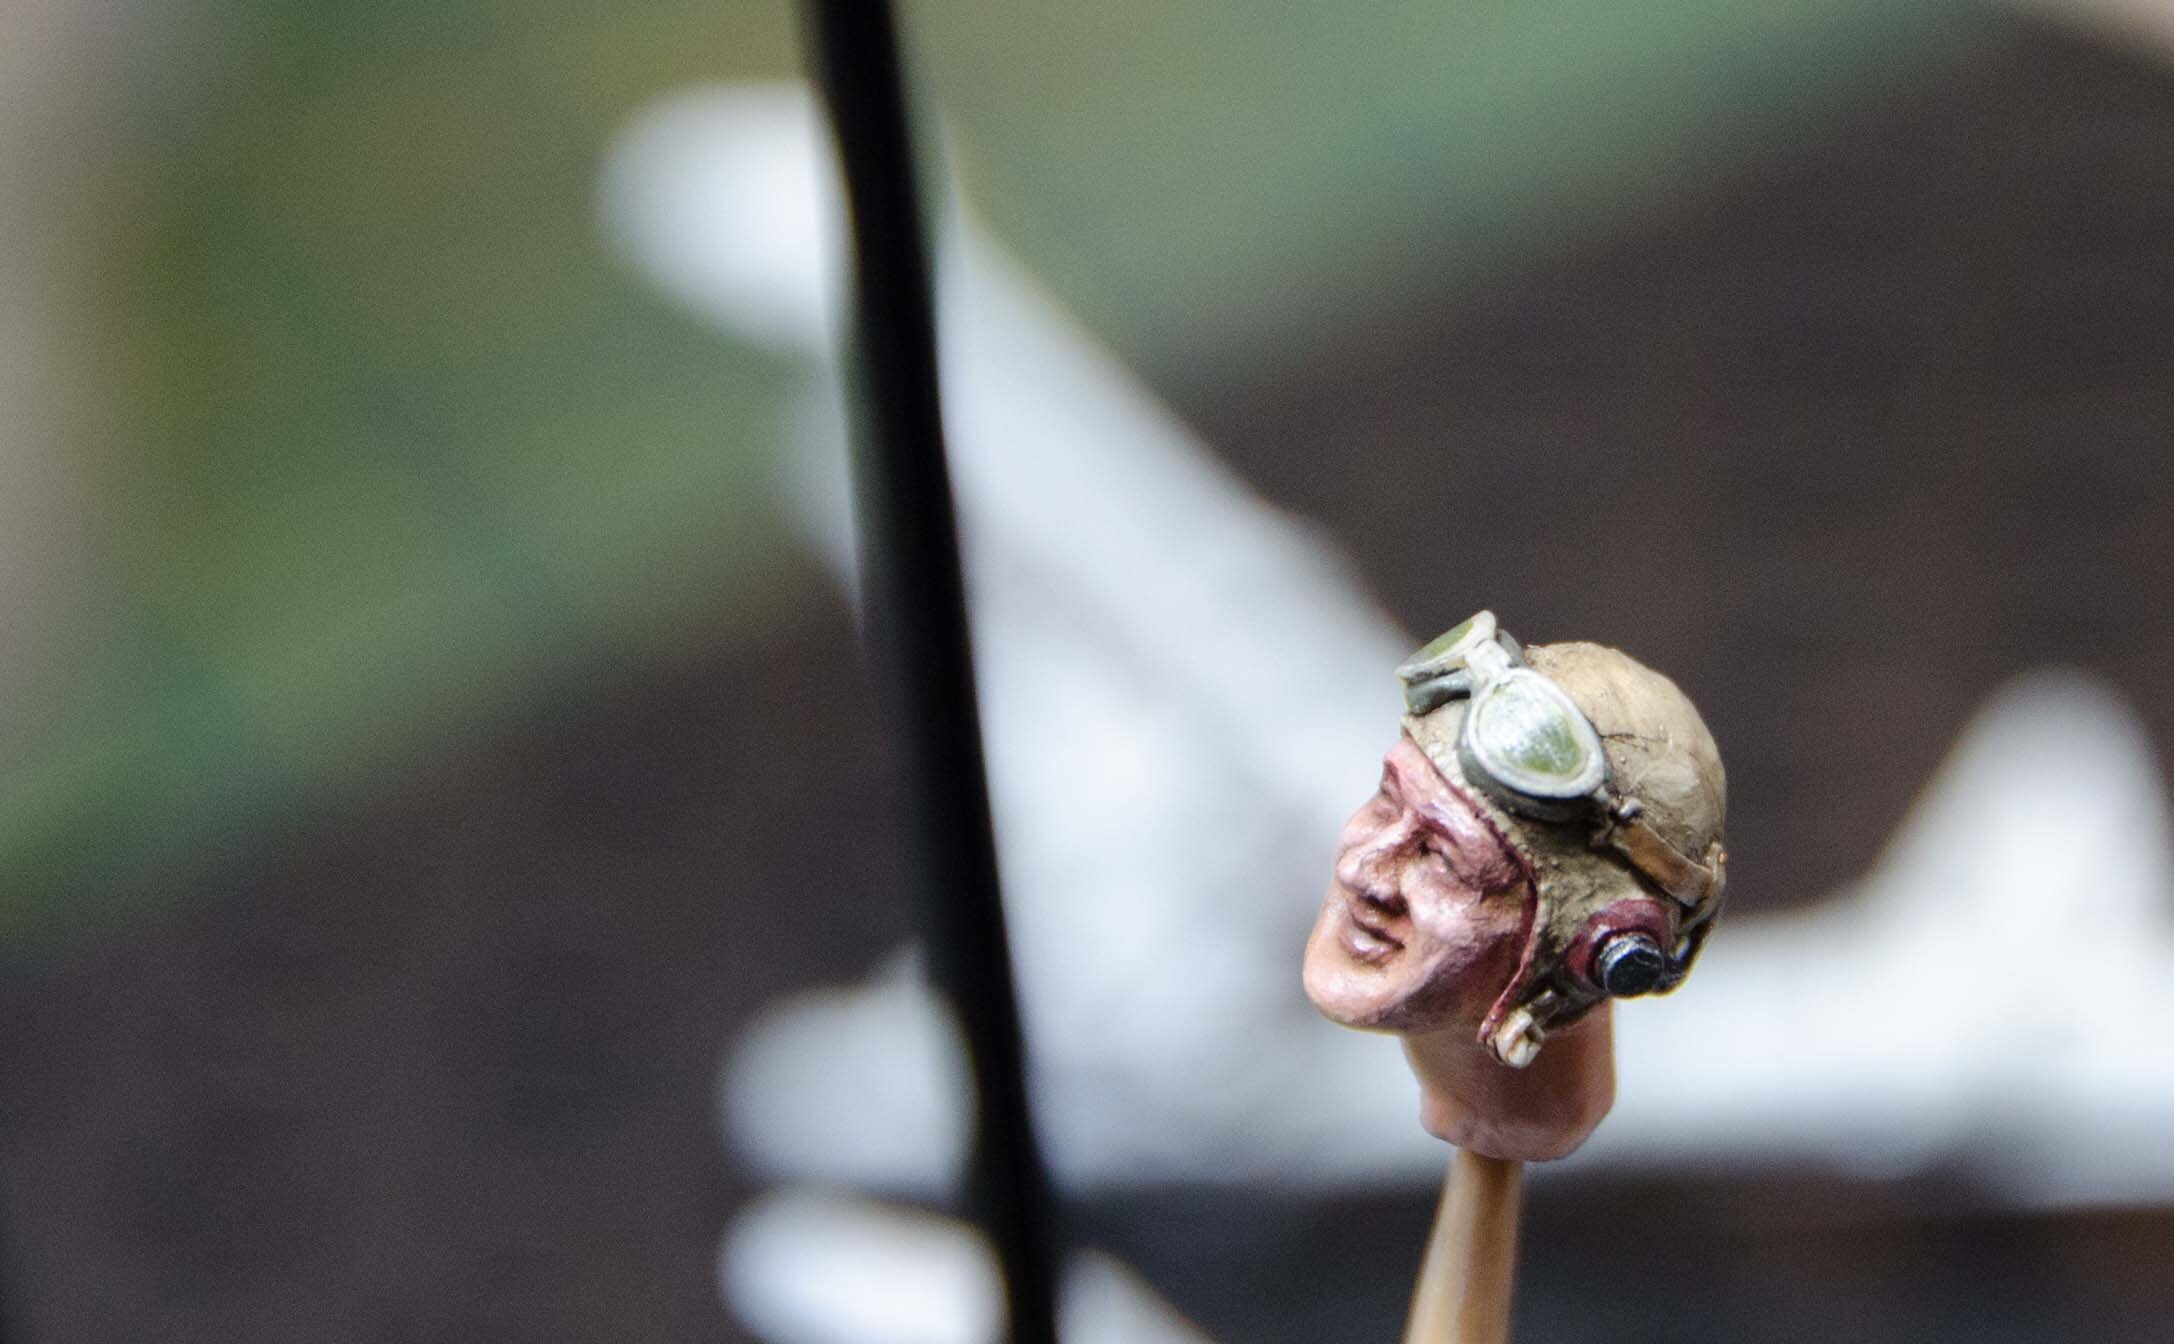
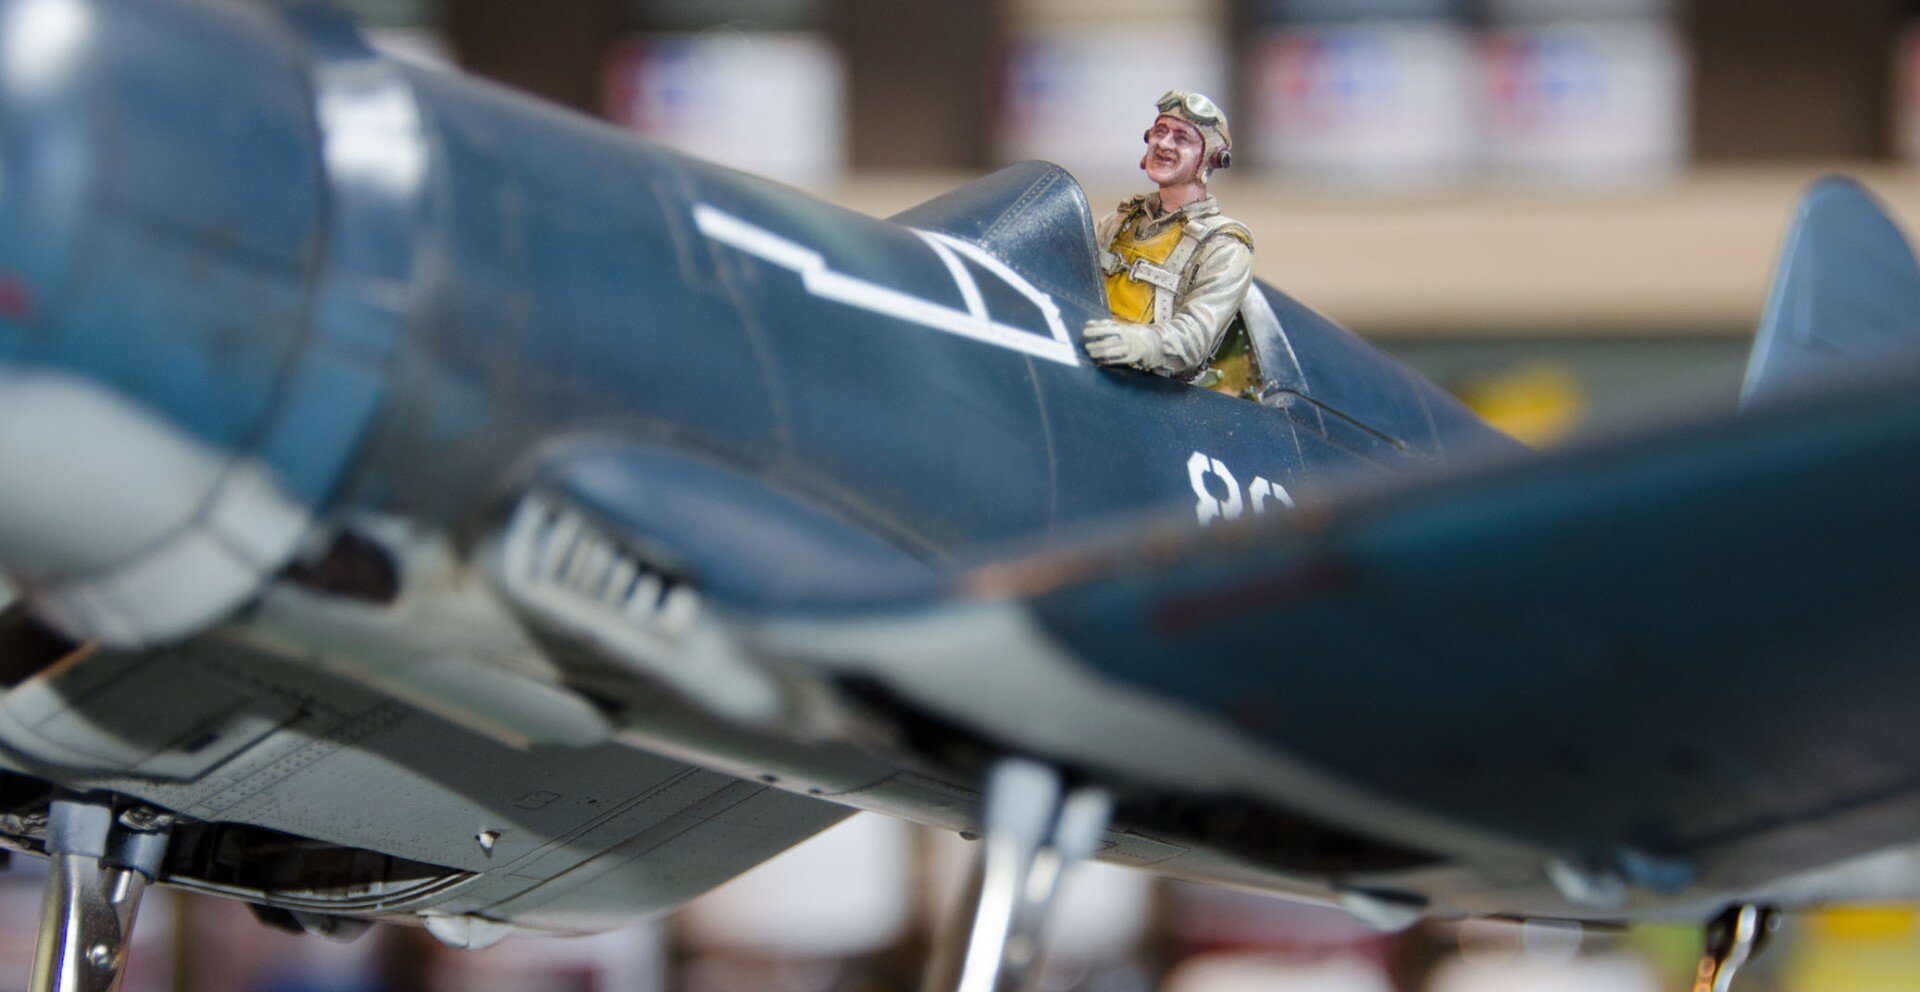

Painting Pappy was difficult…or rather, painting his face was difficult. I watched a bunch of YouTube videos on miniature face painting (mostly War Gamer stuff)
I added some additional detail (radio wiring), more decals, some additional panel liner and basically called it done
Final Shots