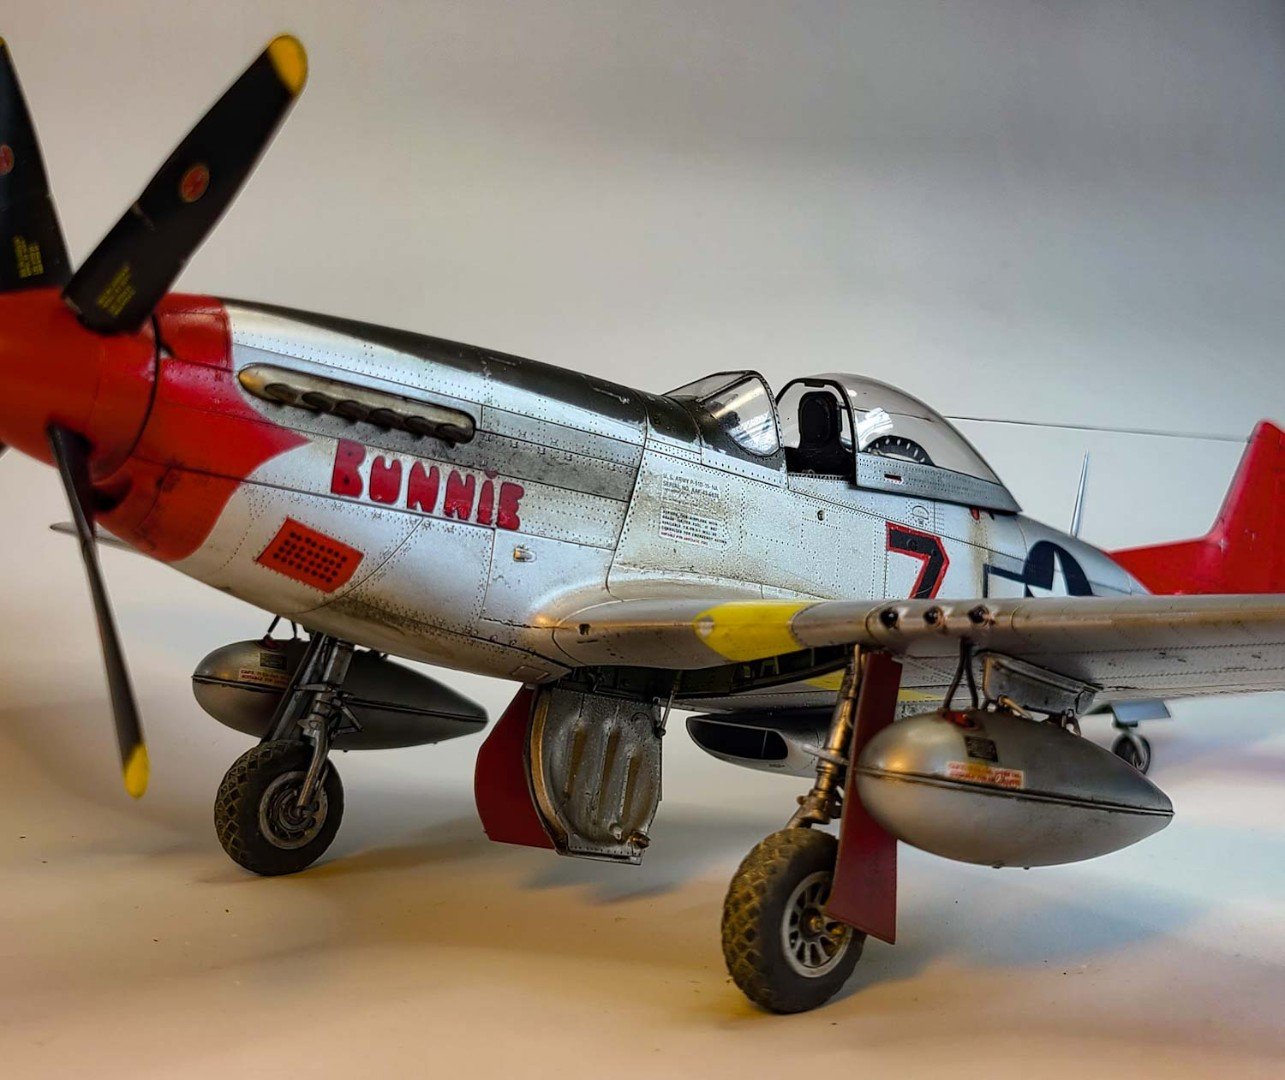
Tamiya 1/32 P-51D Mustang "Redtail"
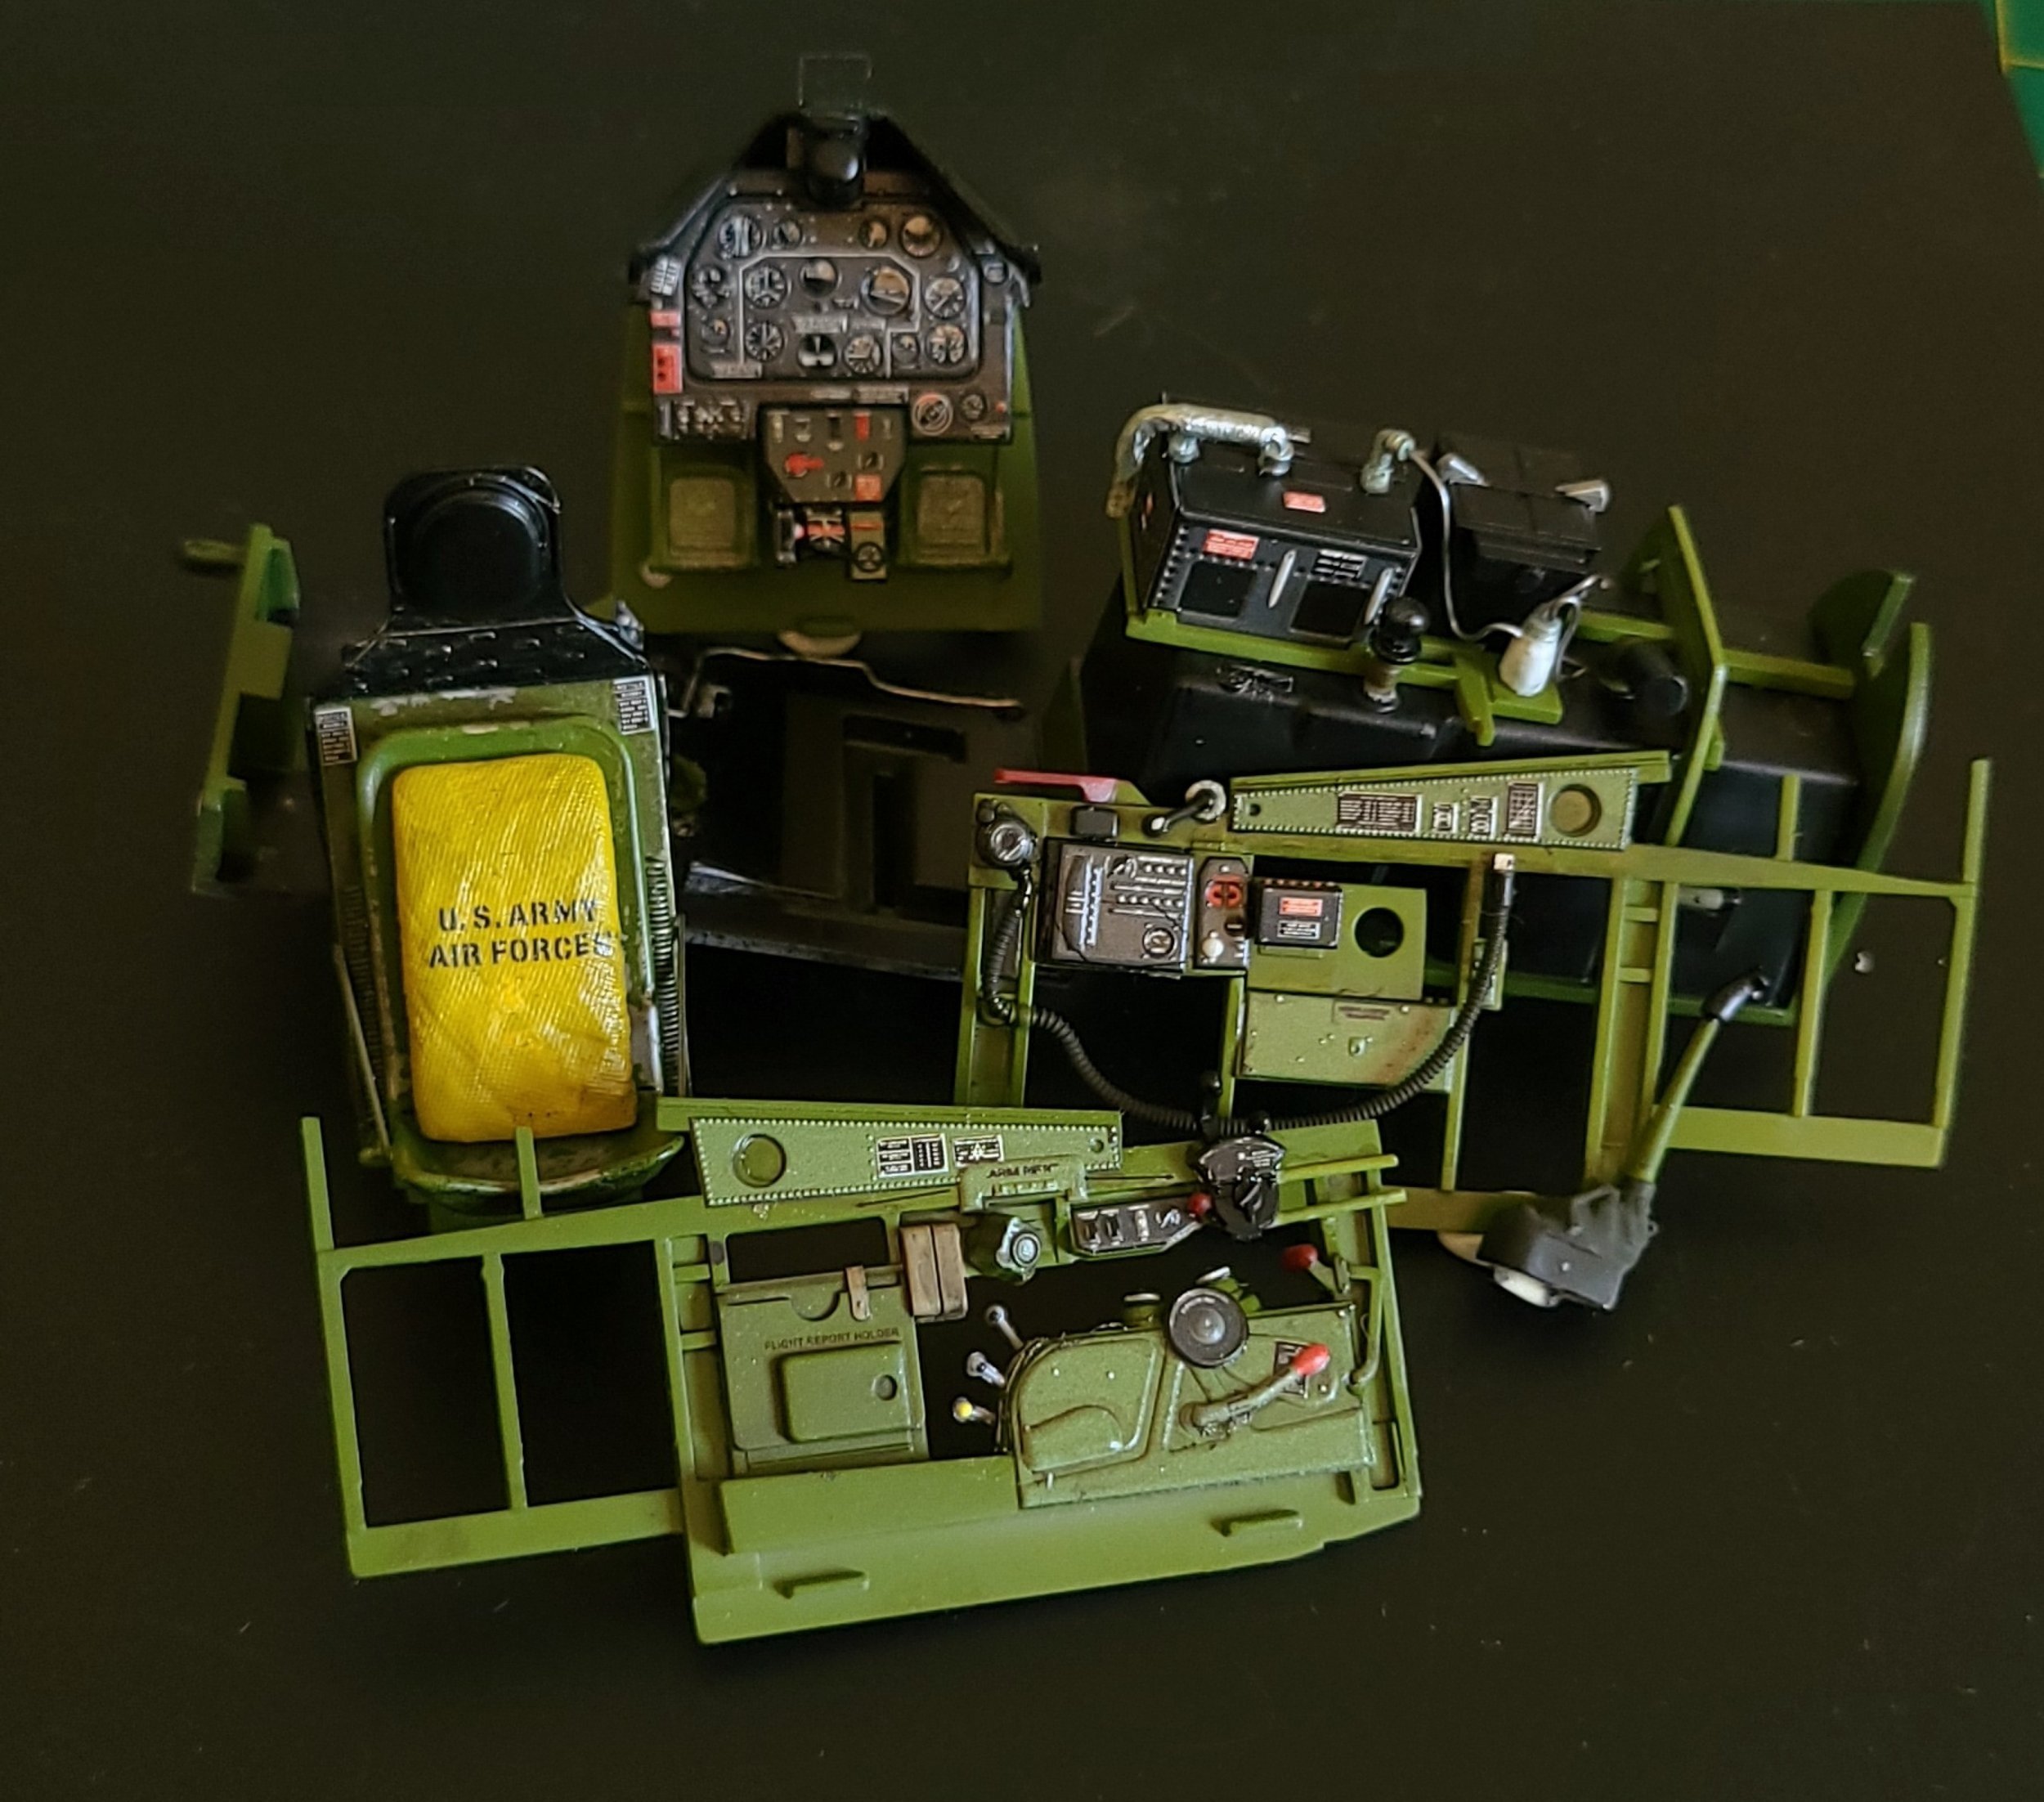
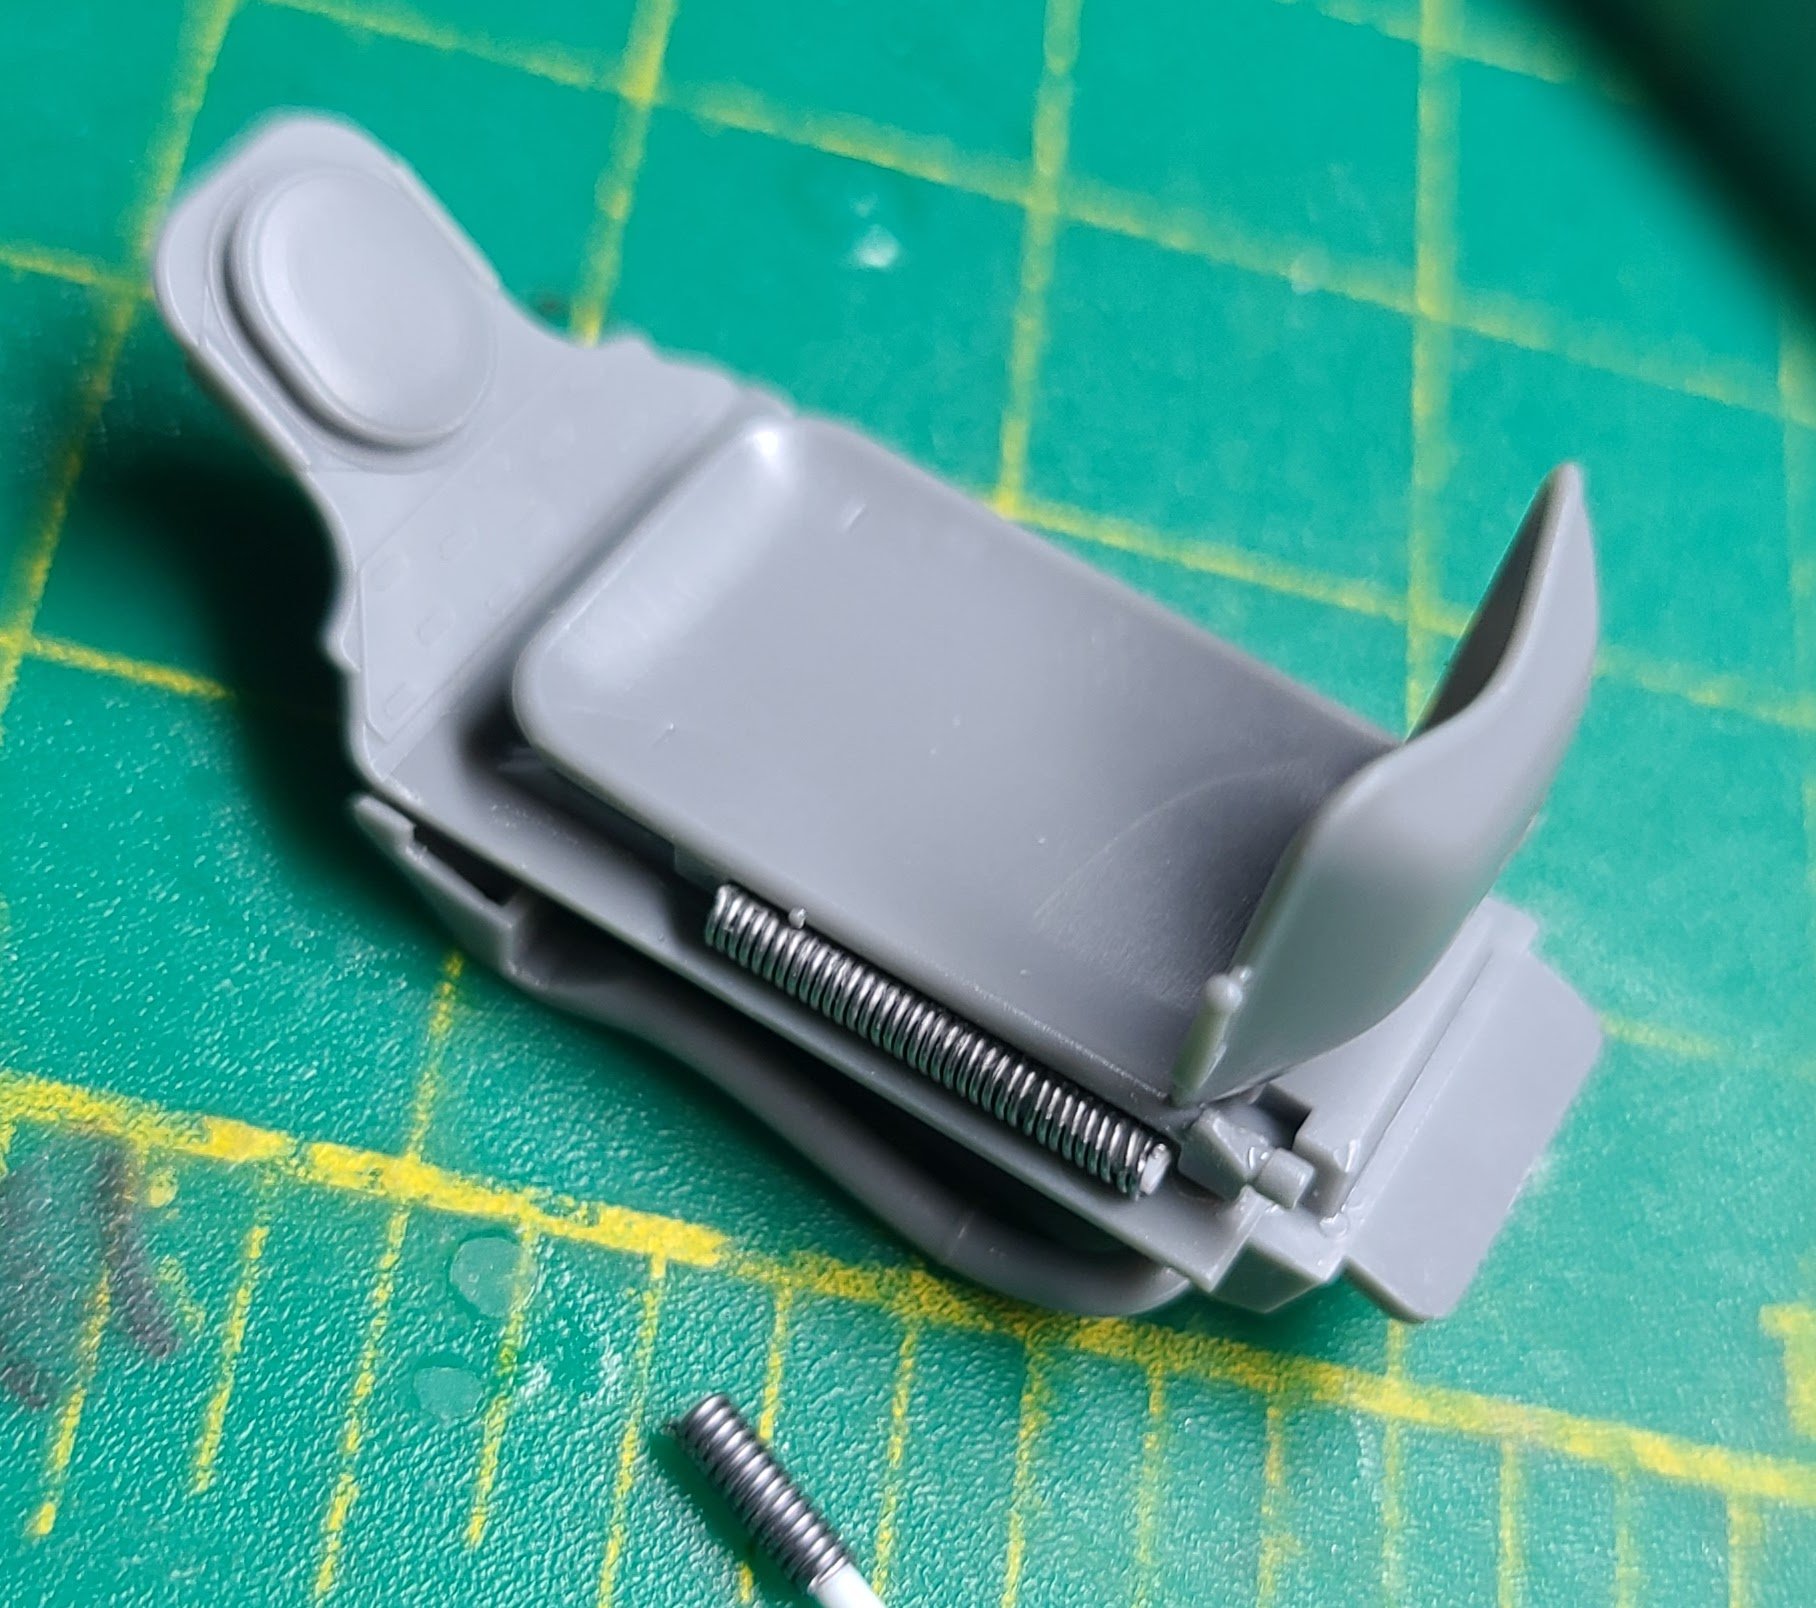
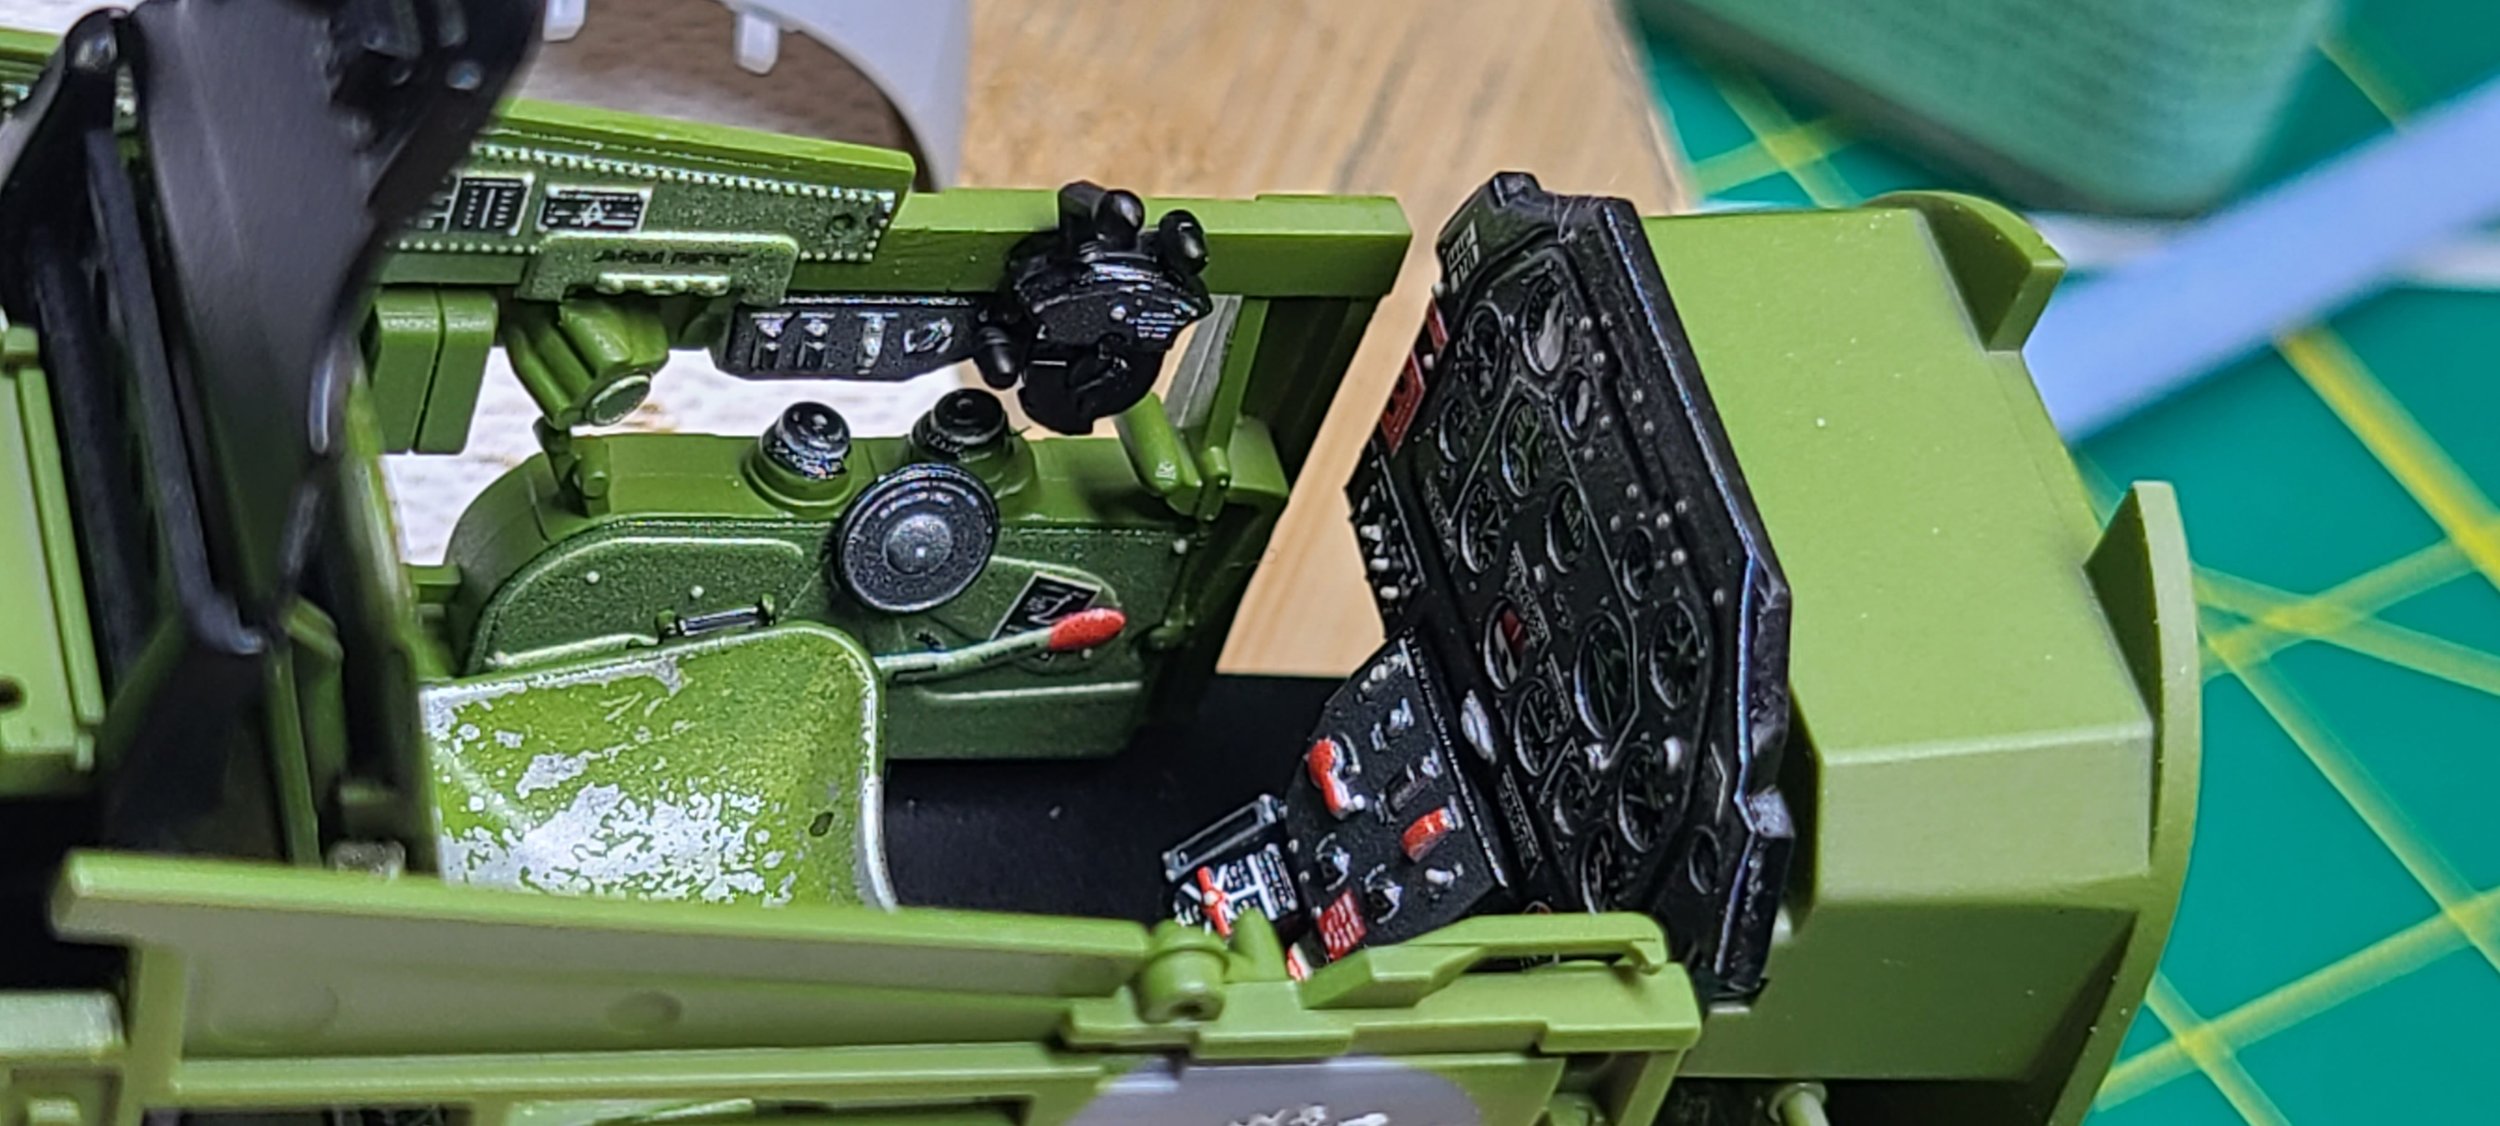
Started on this back in May 2022...in order to do this I mostly needed Hasegawa decals to get the front cowling and the "7" as I didn't want to paint either of them poorly. Base Tamiya kit, HGW seatbelts, QuintaModels 3d cockpit, Some additional pe for cockpit parts, some detailed wire work, every AK metal paint I could buy.
And this is my attempt at "silver" work.

I bought a lot of silver paint…
…and a little red.
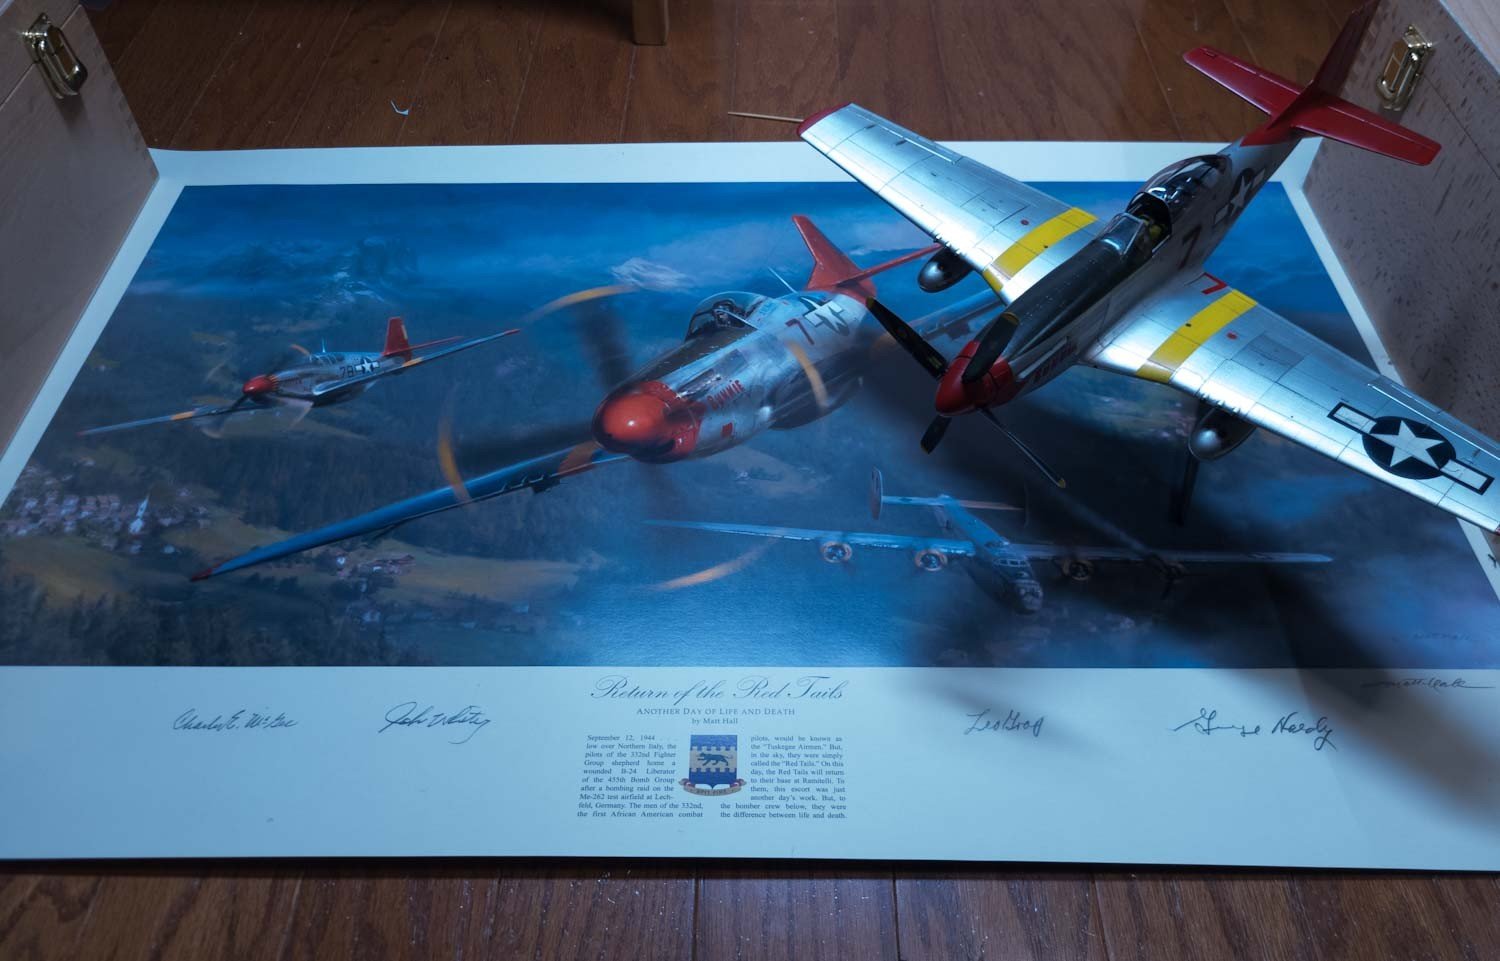
I bought this at a “yard sale” outside a local hobby shop a few years back (before Covid) where members of the local IPMS group also brought their models they wanted to sell. I got this, a couple of Zoukie-Mura kits and a few others for a ridiculous low price and it was sitting in my stash awaiting inspiration. I was doom-scrolling through Twitter one day and I came upon an article on the Tuskegee Airman (I knew of them and had studied them a bit in the US Army). Specifically a story about Lt Roscoe C Brown. Inspiration!
Roscoe’s story is impressive…more impressive considering what he had to go through as a black man in a country and time where the color of your skin meant you were not considered “equal”. I’ve added a link to his Wikipedia page below his wartime photo


So I had my inspiration and now I had to figure out how to tackle the work…I had never done extensive “silver” painting before so I brushed up on some YouTube vids and bought just about every silver paint I could find and after some testing decided to use AK Metals as the primary set of colors to use.
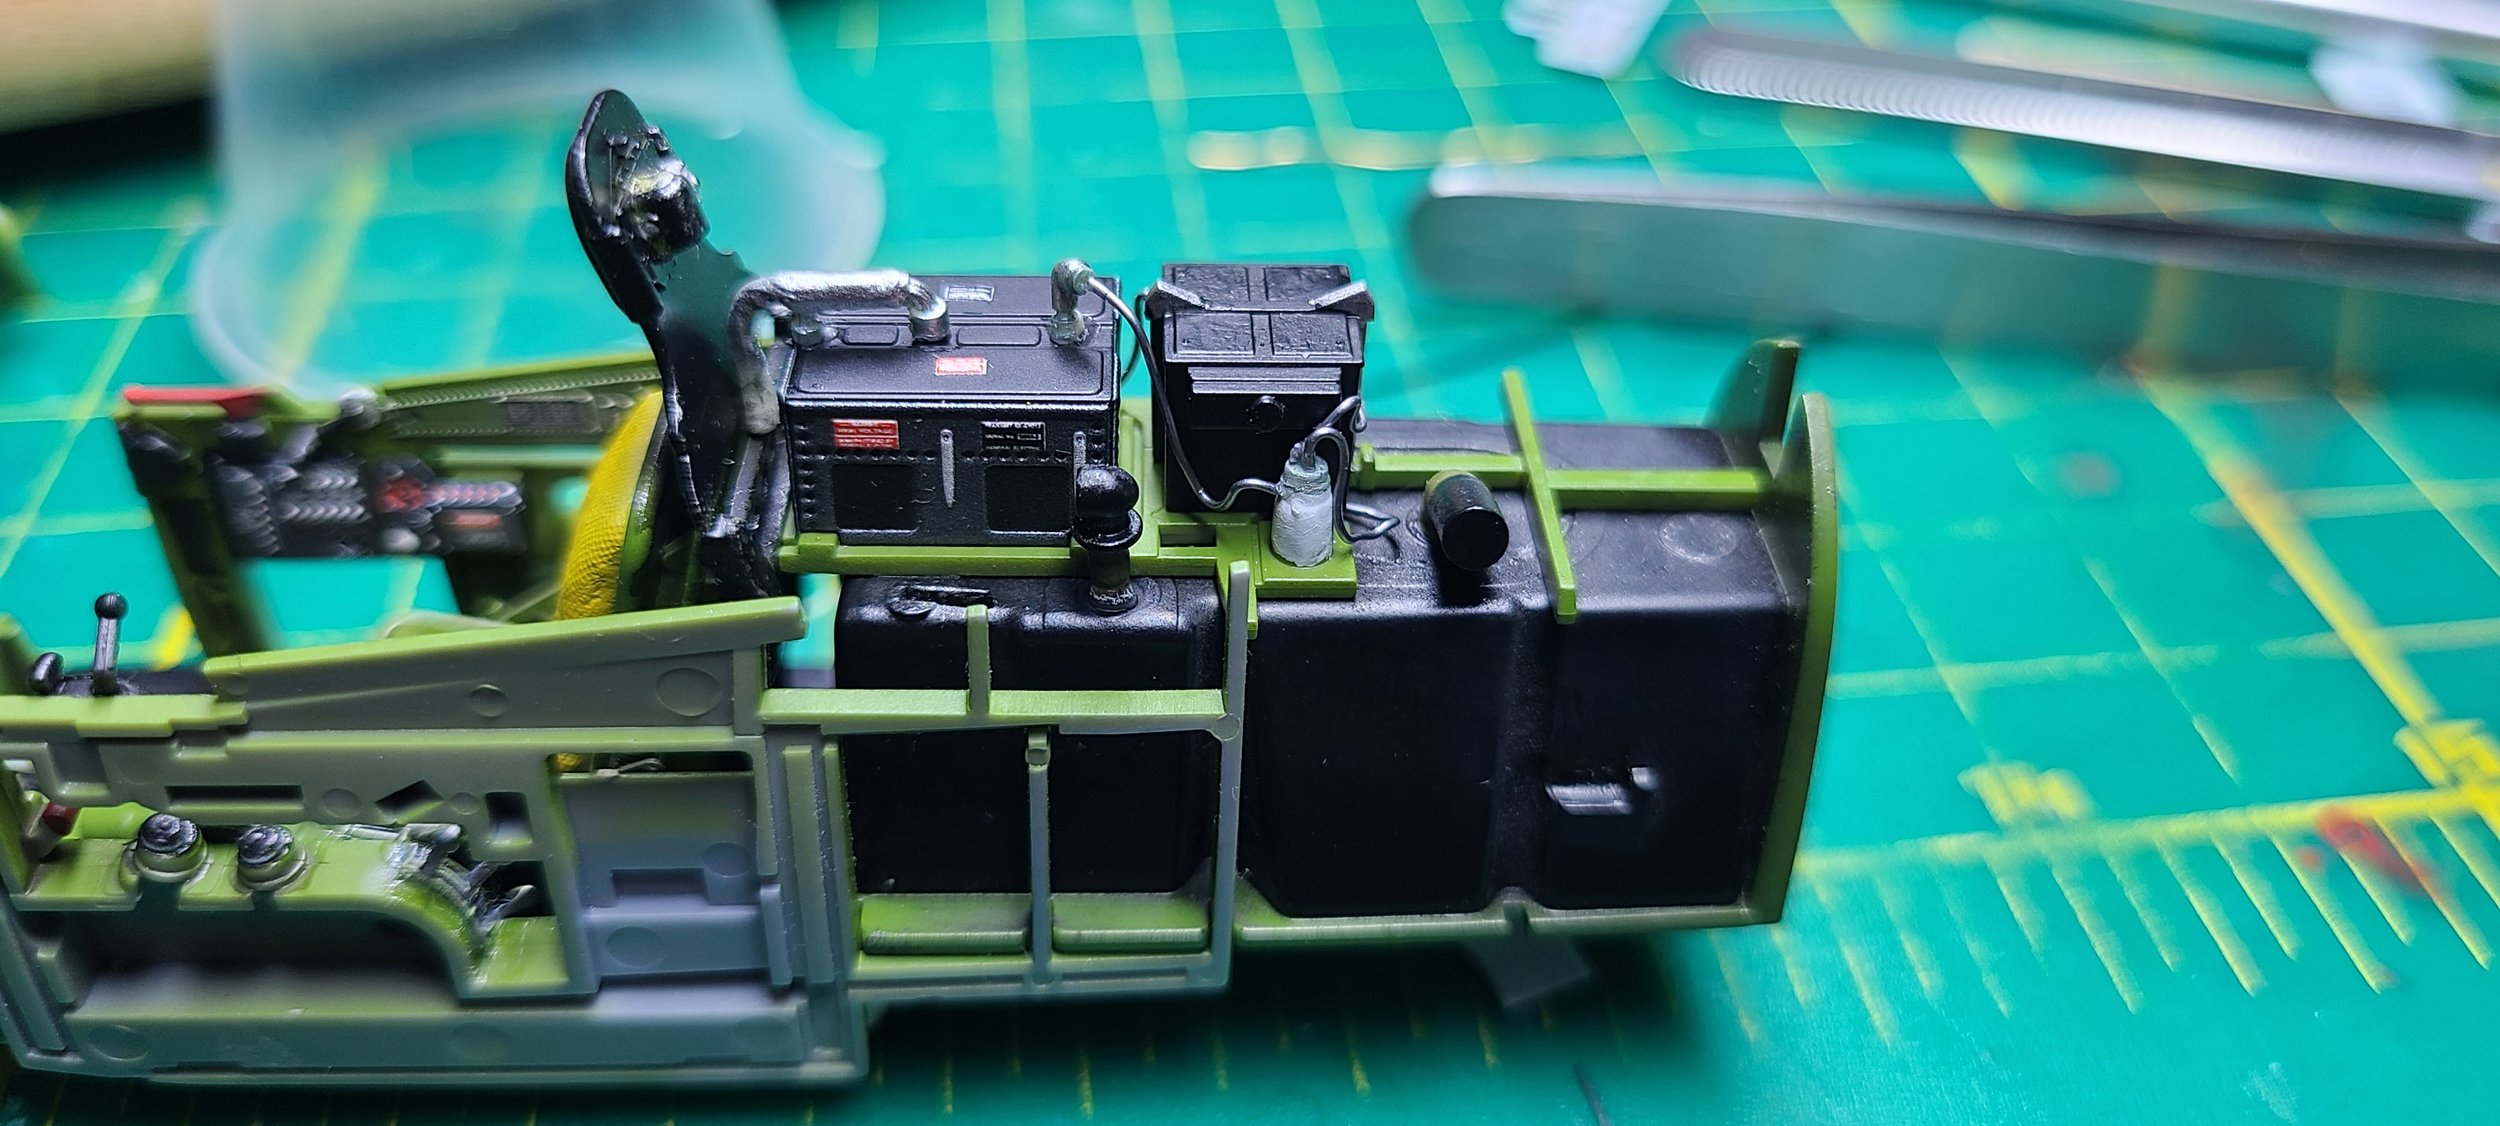
First up the engine…also please read the instructions. I used the wrong part and had to do some fairly extensive surgery right at the start to pry the supercharger housing apart and to fit the actual part in place. I ended up painting it in Mr. Surfacer 1500 black and then rubbing it down w/my fingers to get the weathered look. I added lead lines for spark wires and other minor detail and then weathered it more w/drybrush and some AK grime.


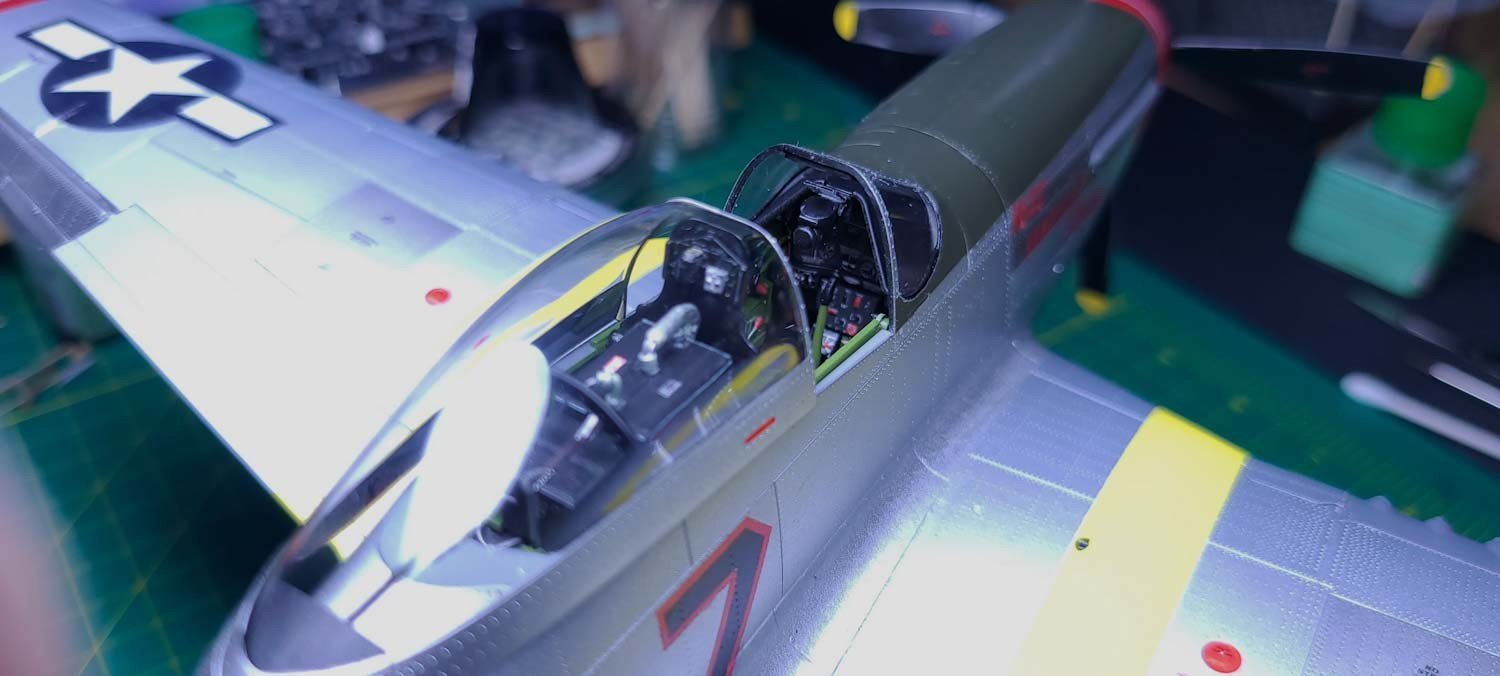
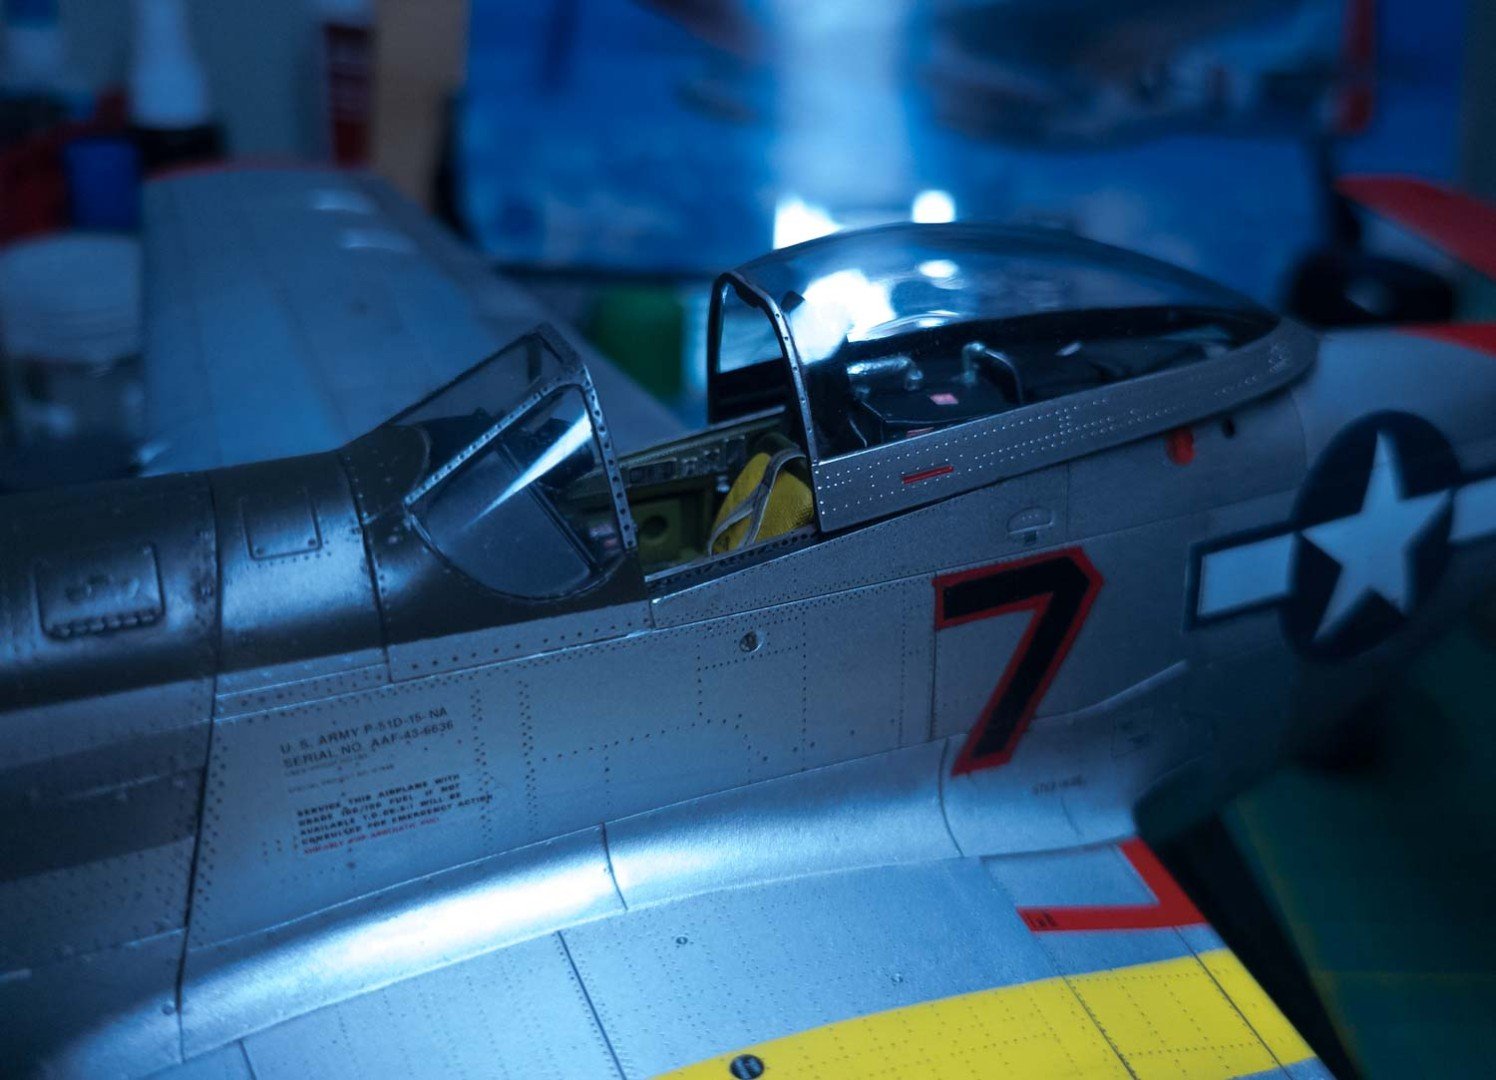
Next up was the interior and fuselage work. Tamiya gives you a beautiful cockpit but I wanted to try Quinta 3d decals. Other than the small levers, you don't have to do a lot of work to get a beautiful result. I still think you can get a realistic and weathered look w/paint, regular decals, varnish, and a wash but these Quinta’s are amazing. You can weather them afterwards (use a little PVA or superglue to put them in place).
Seat springs too large but oh well...copied those from Plasmo's 1/32 Mustang build. I took lead wire, wrapped it around a plastic rod and superglued it all once I had the desired length.

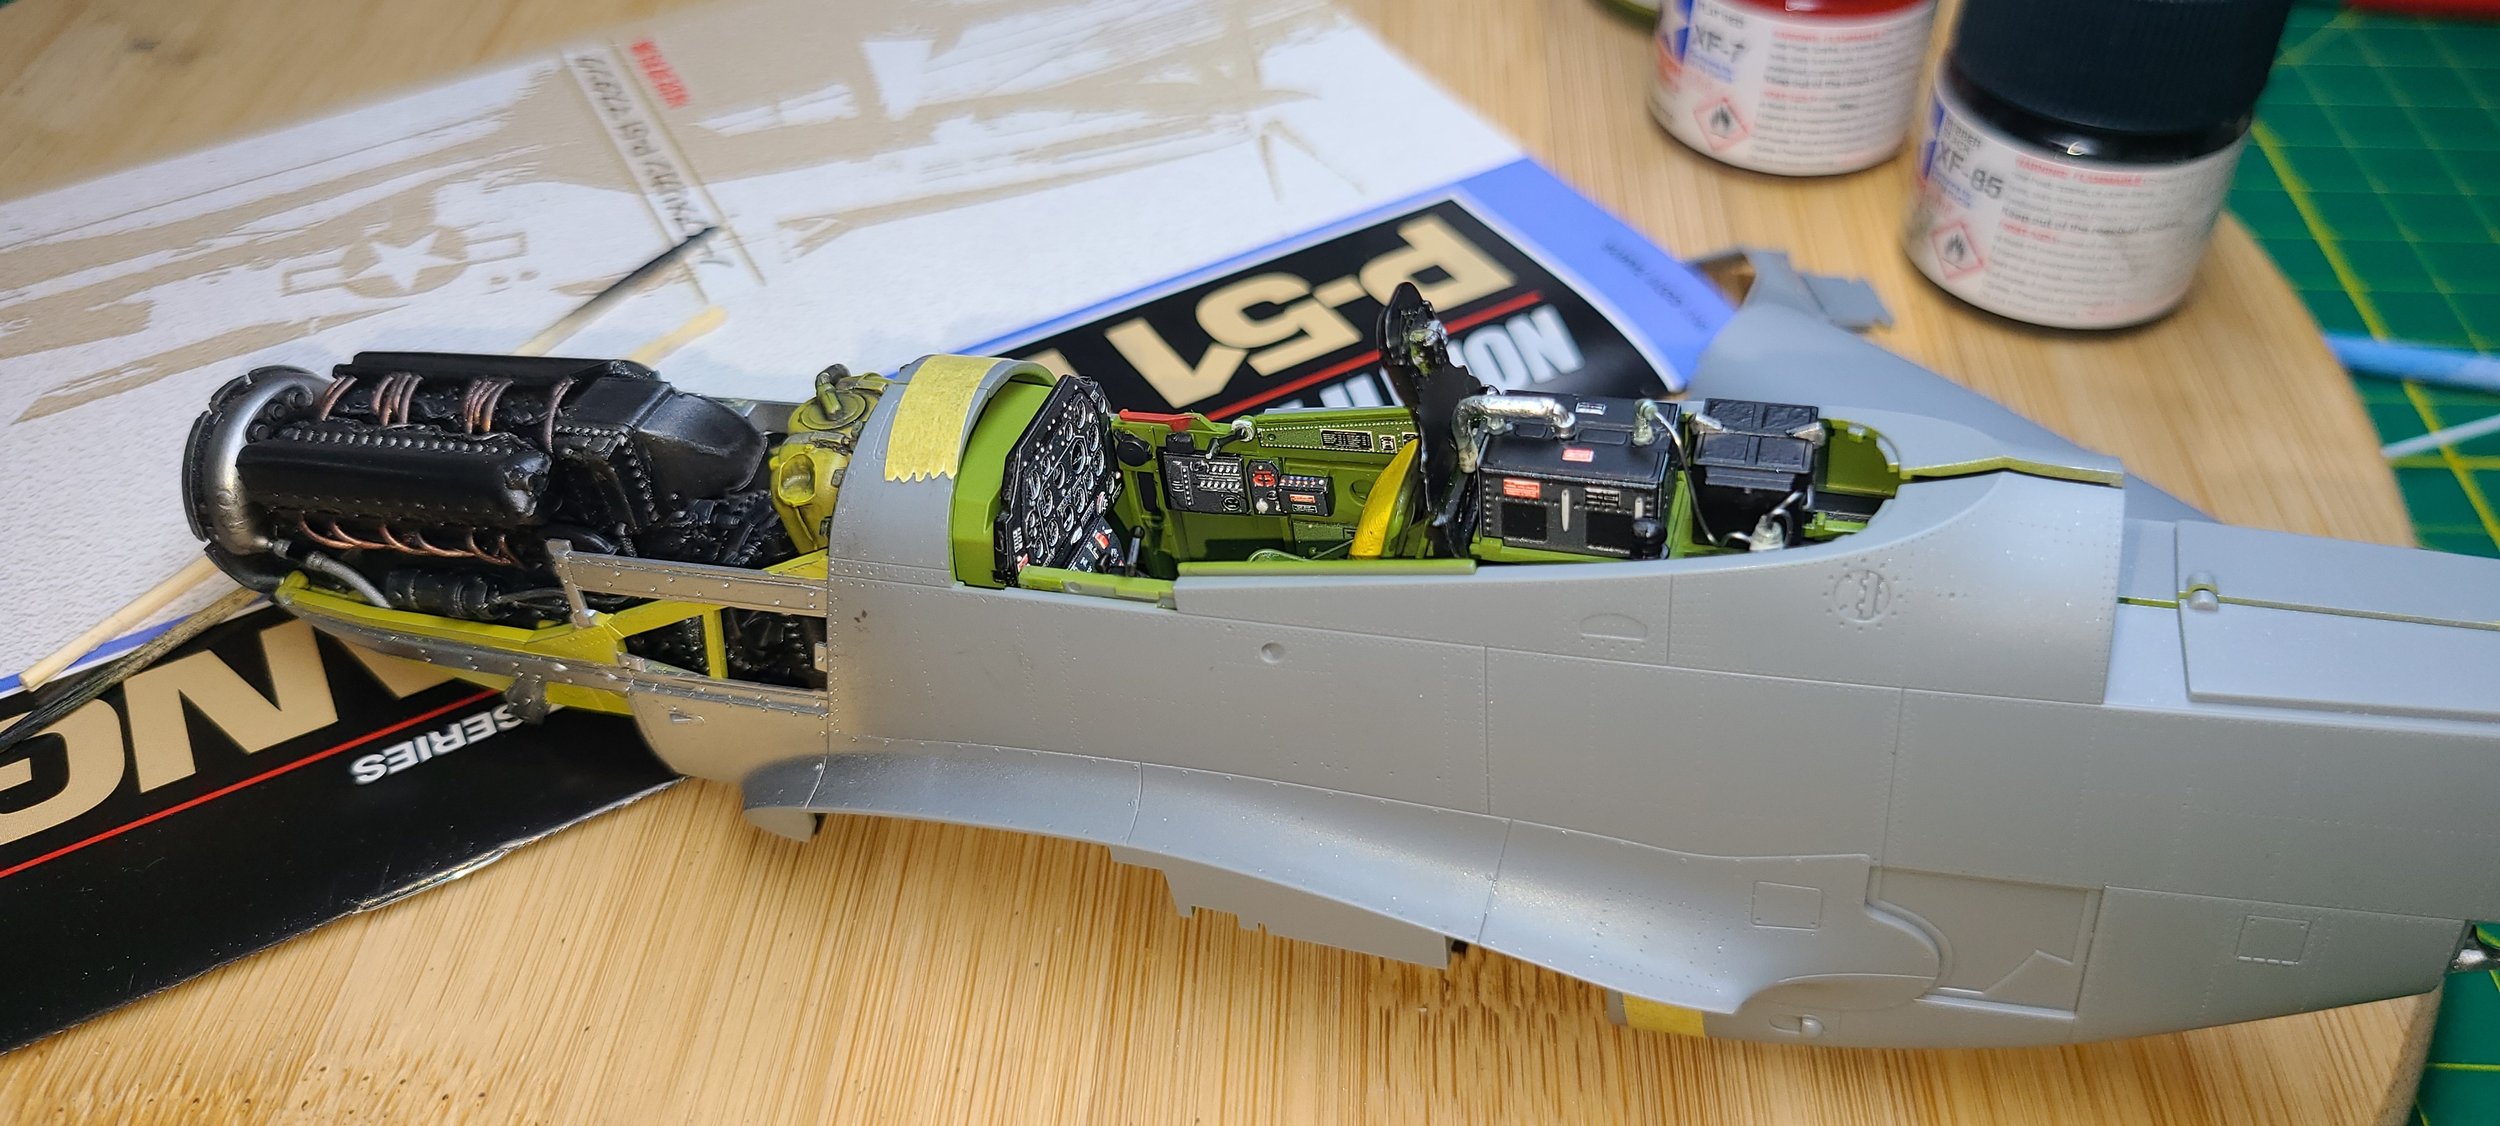
At this point I started to put the aircraft together and dry fit everything I could. It all fit OK but any mistake can magnify itself here…especially with models that have the cockpit integrated w/firewall and engine (as do many 1/32 models). Once I felt comfortable with how items fit I started the process of getting all the major components (fuselage/wings/engine/cockpit) together.

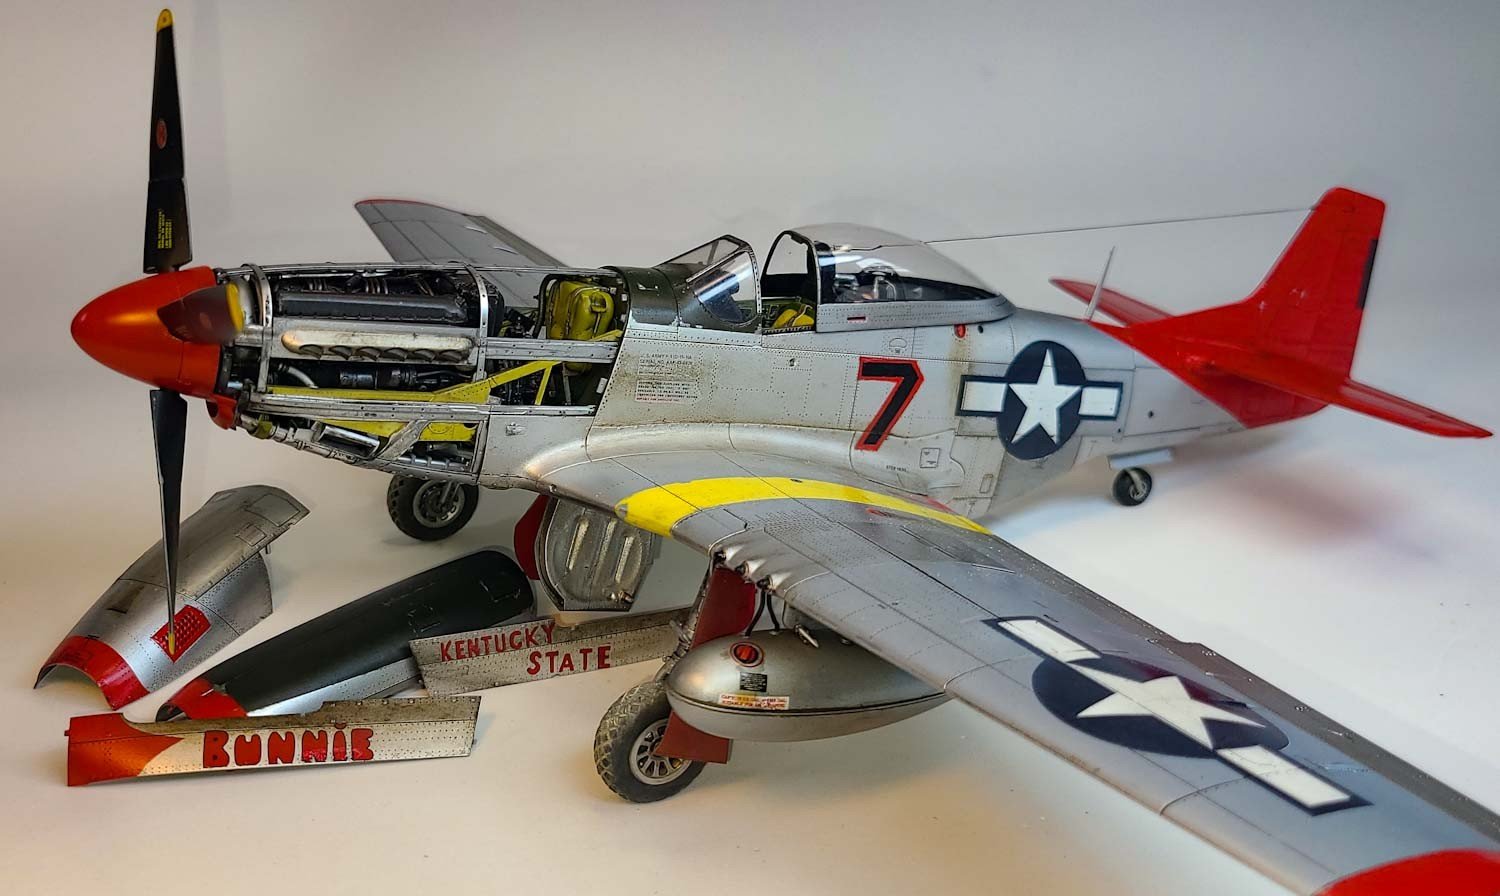
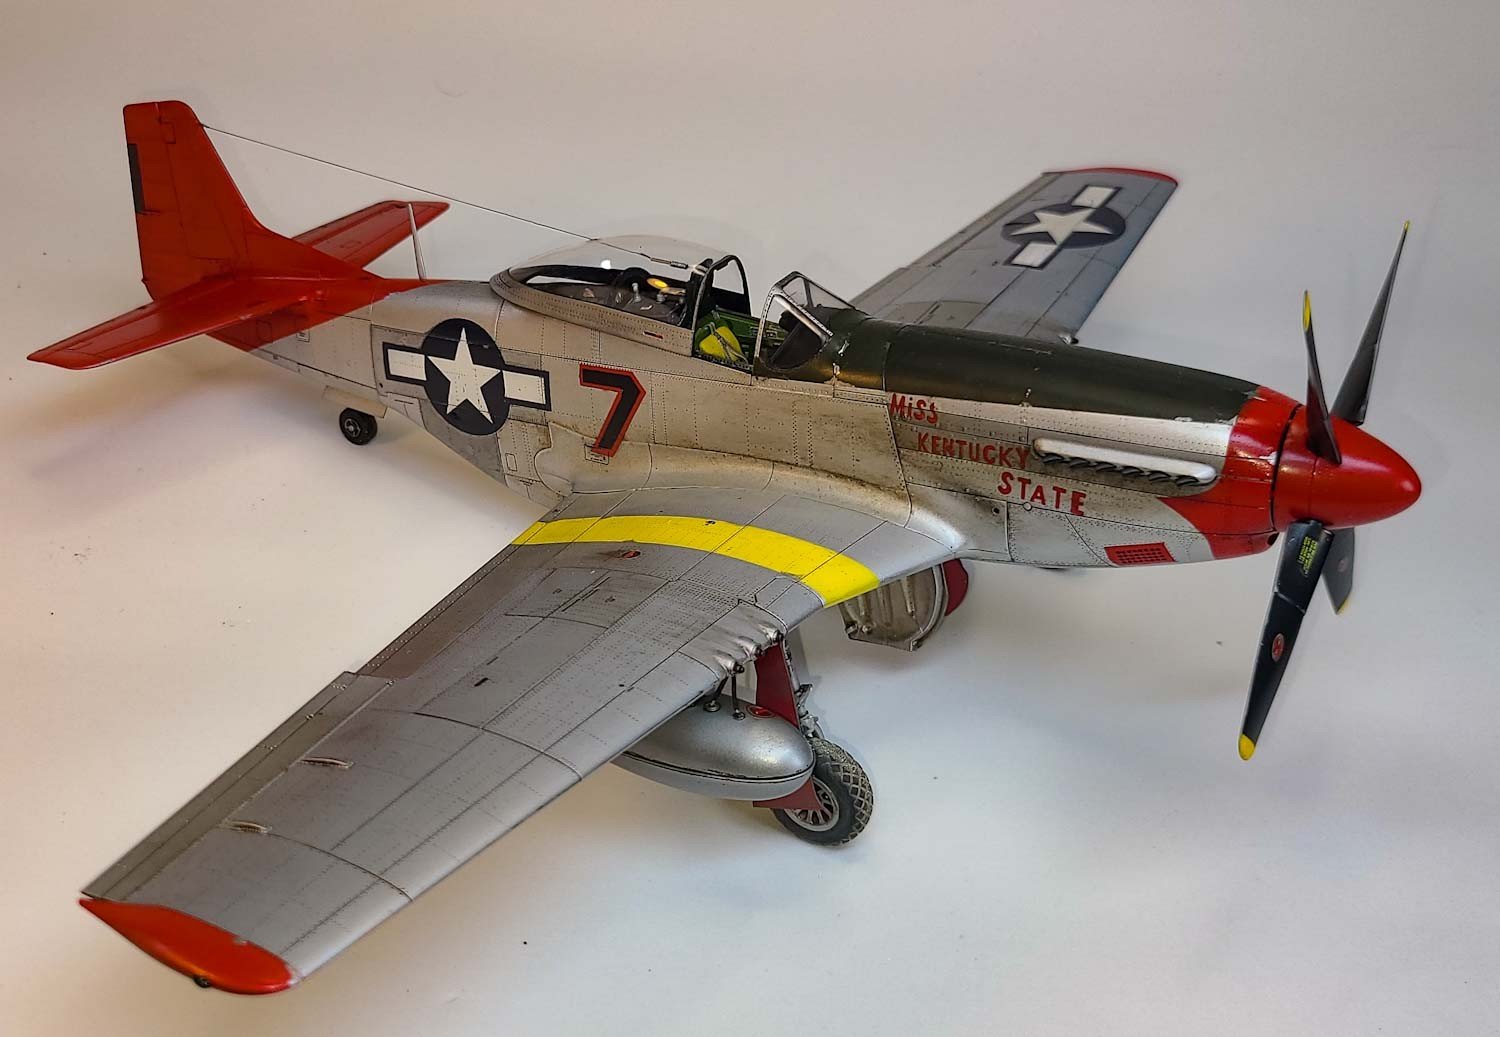
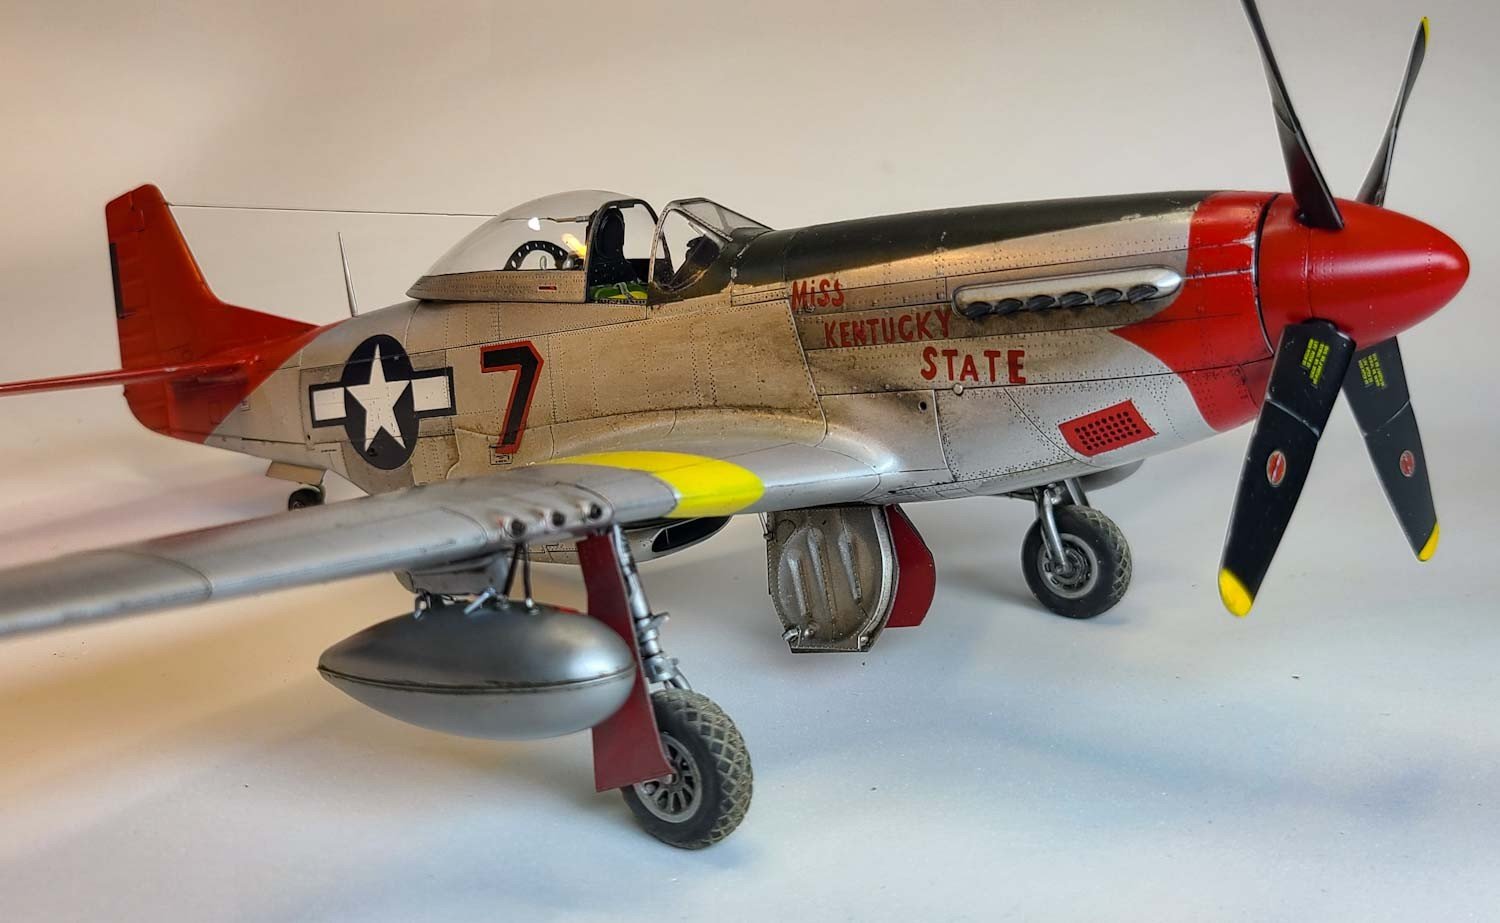
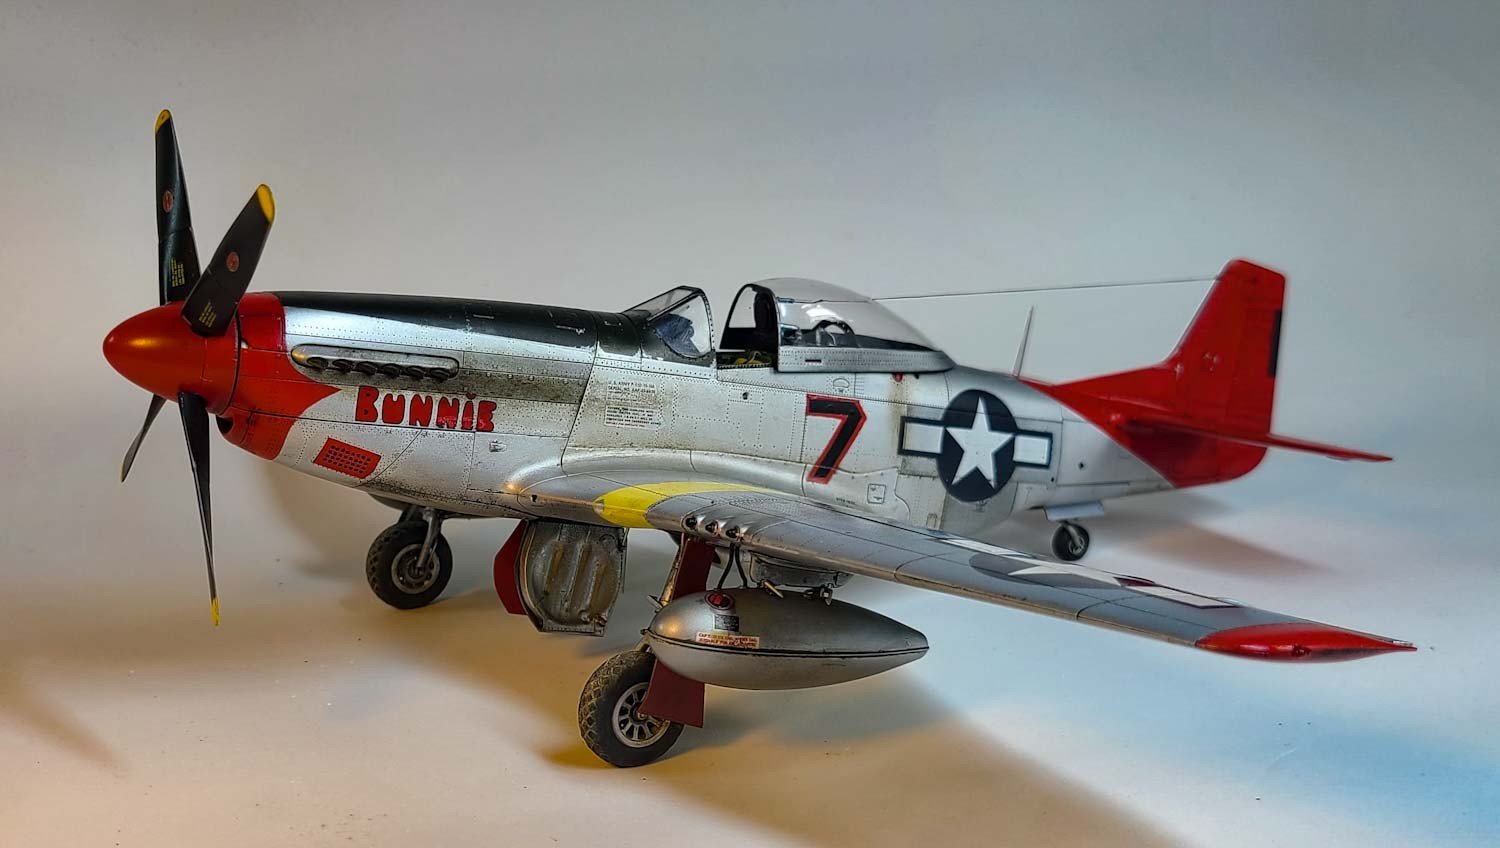
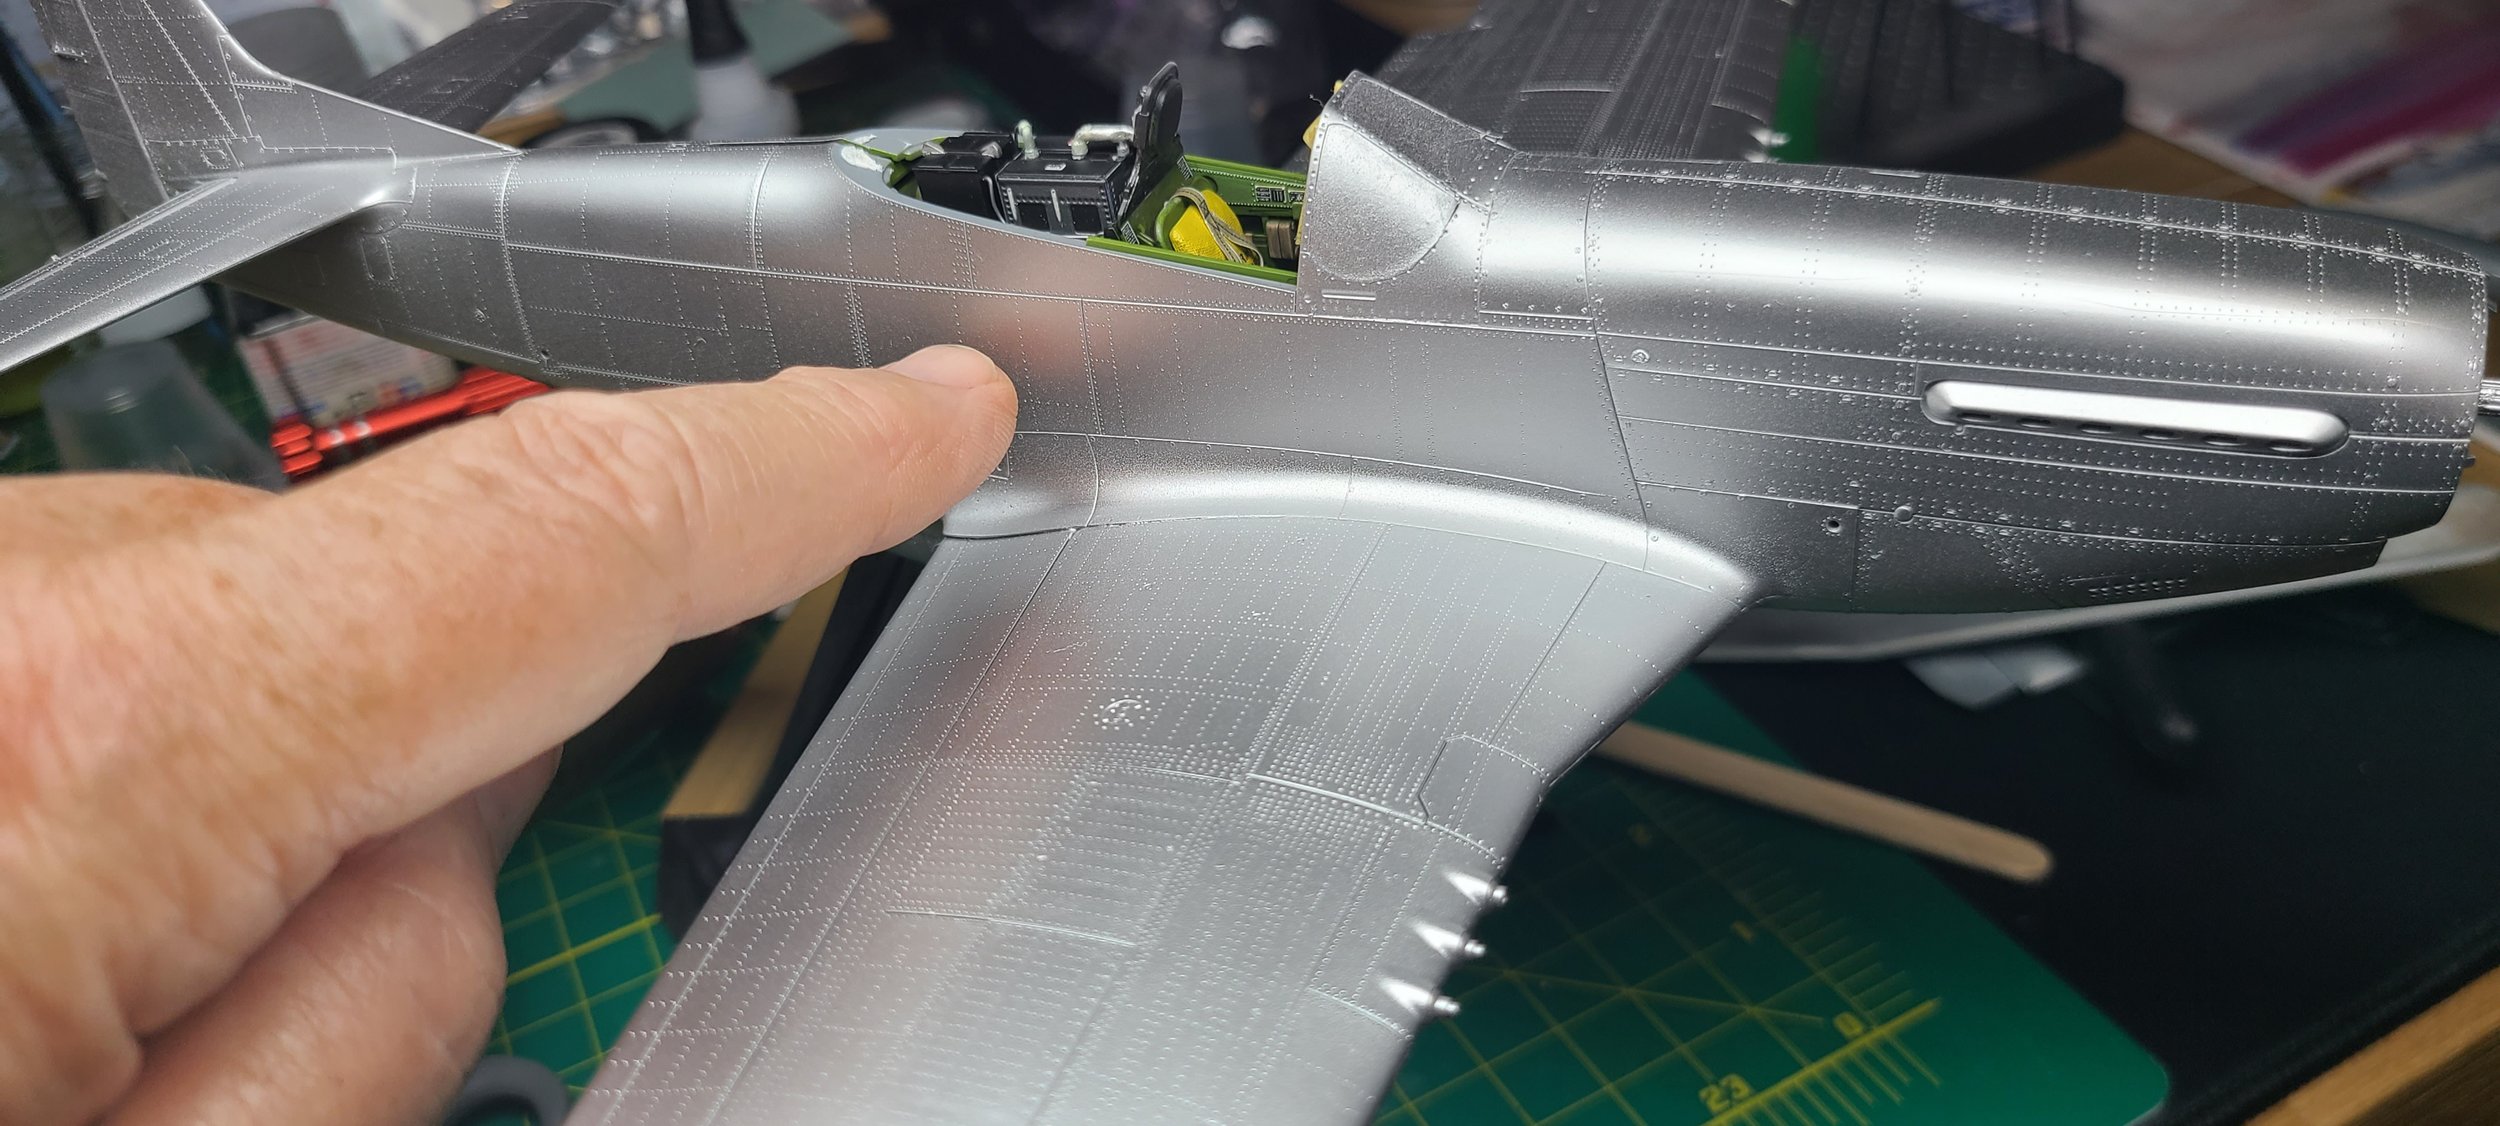
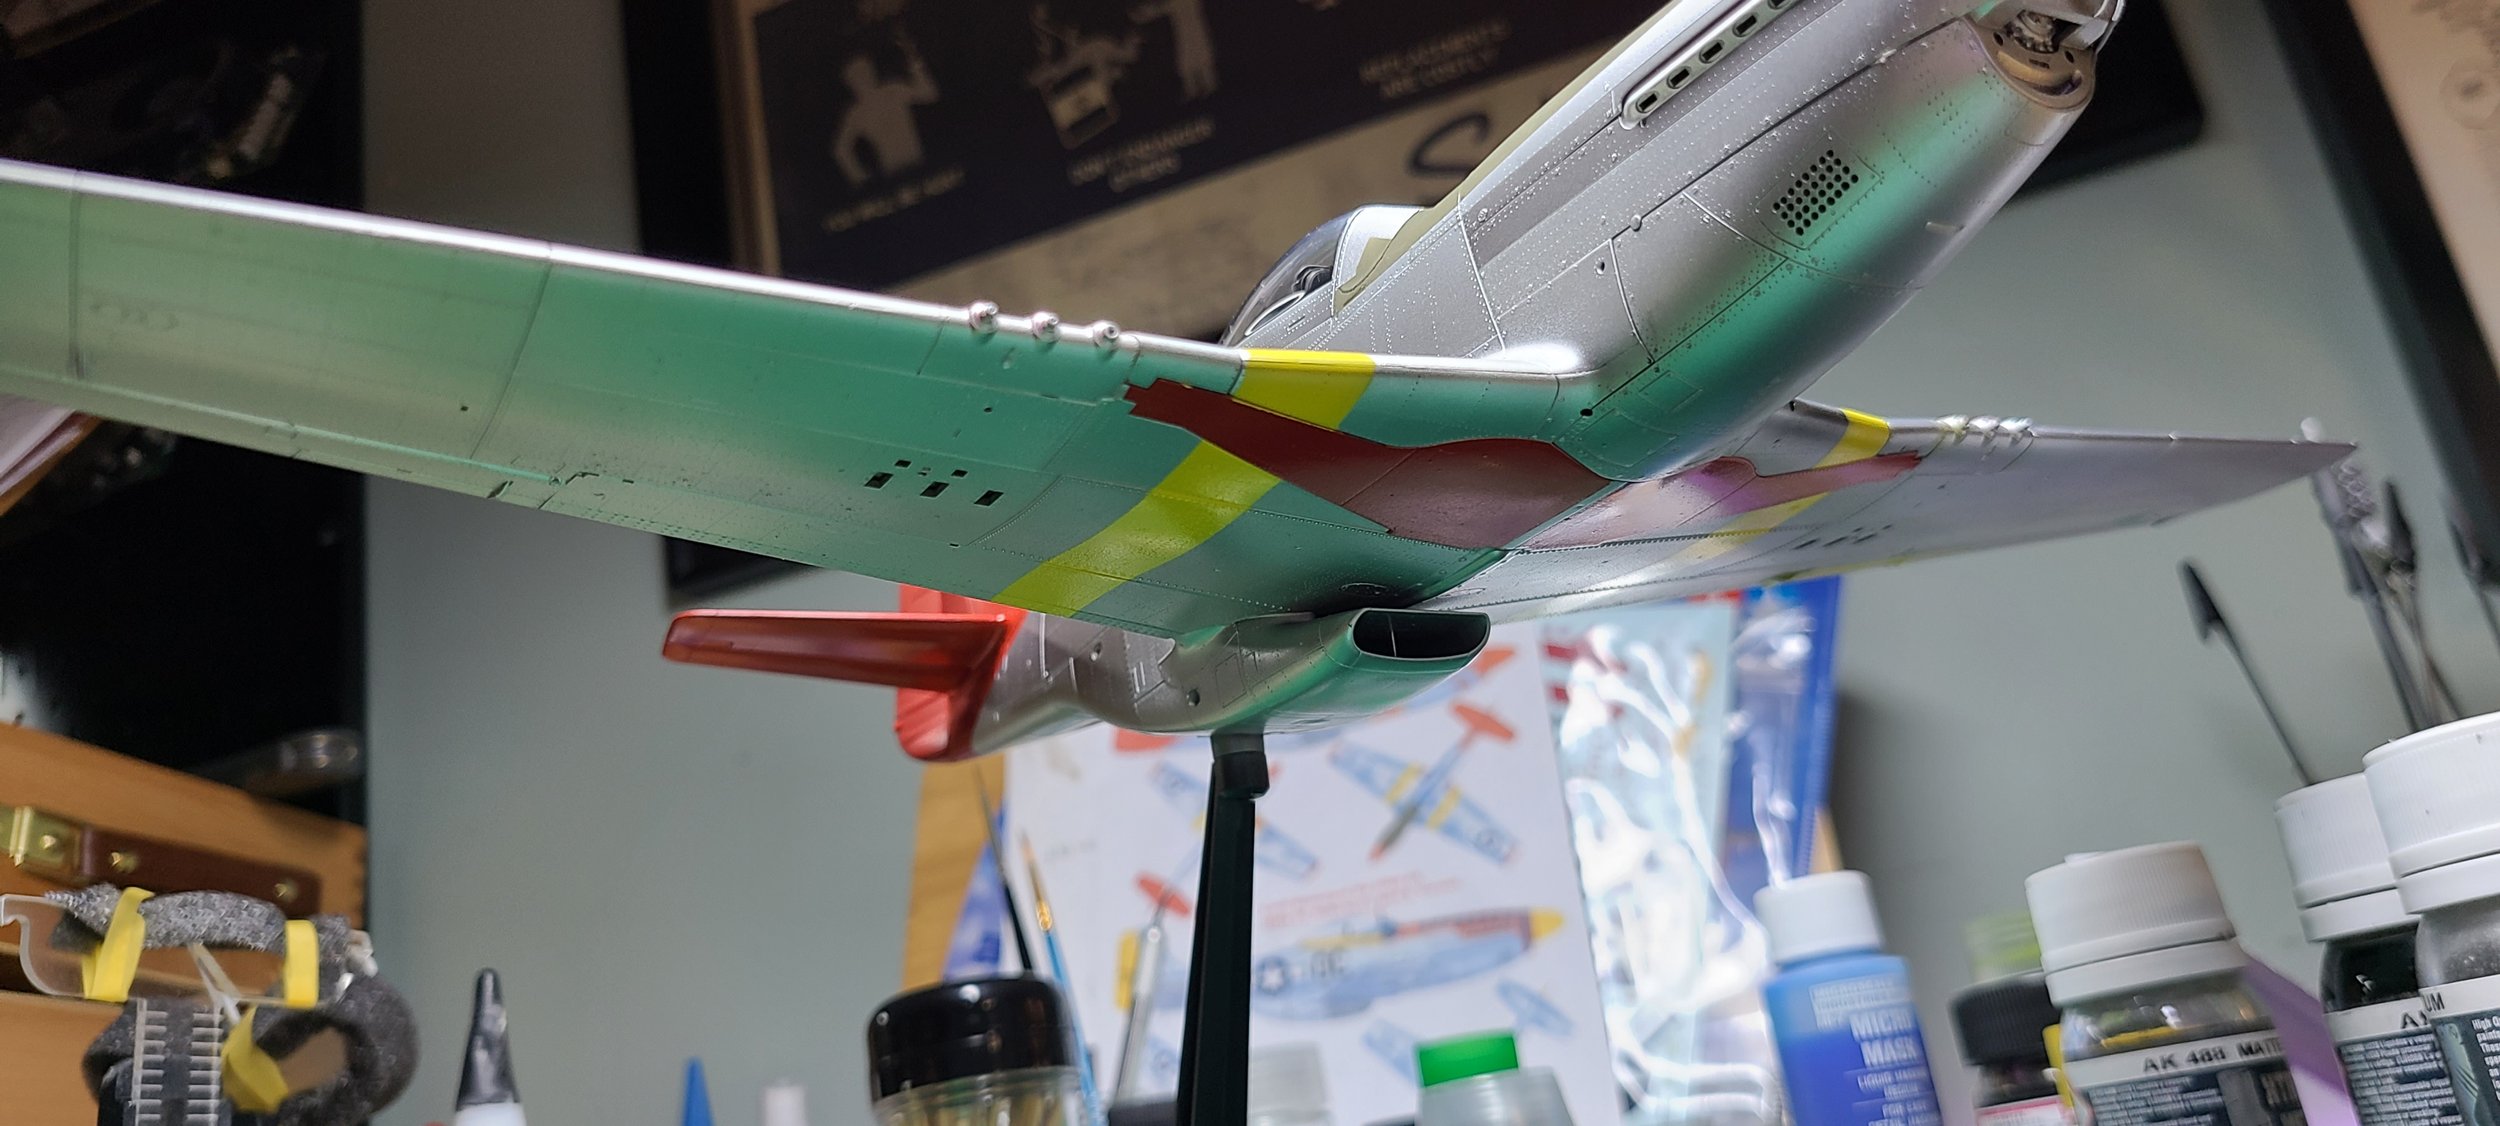
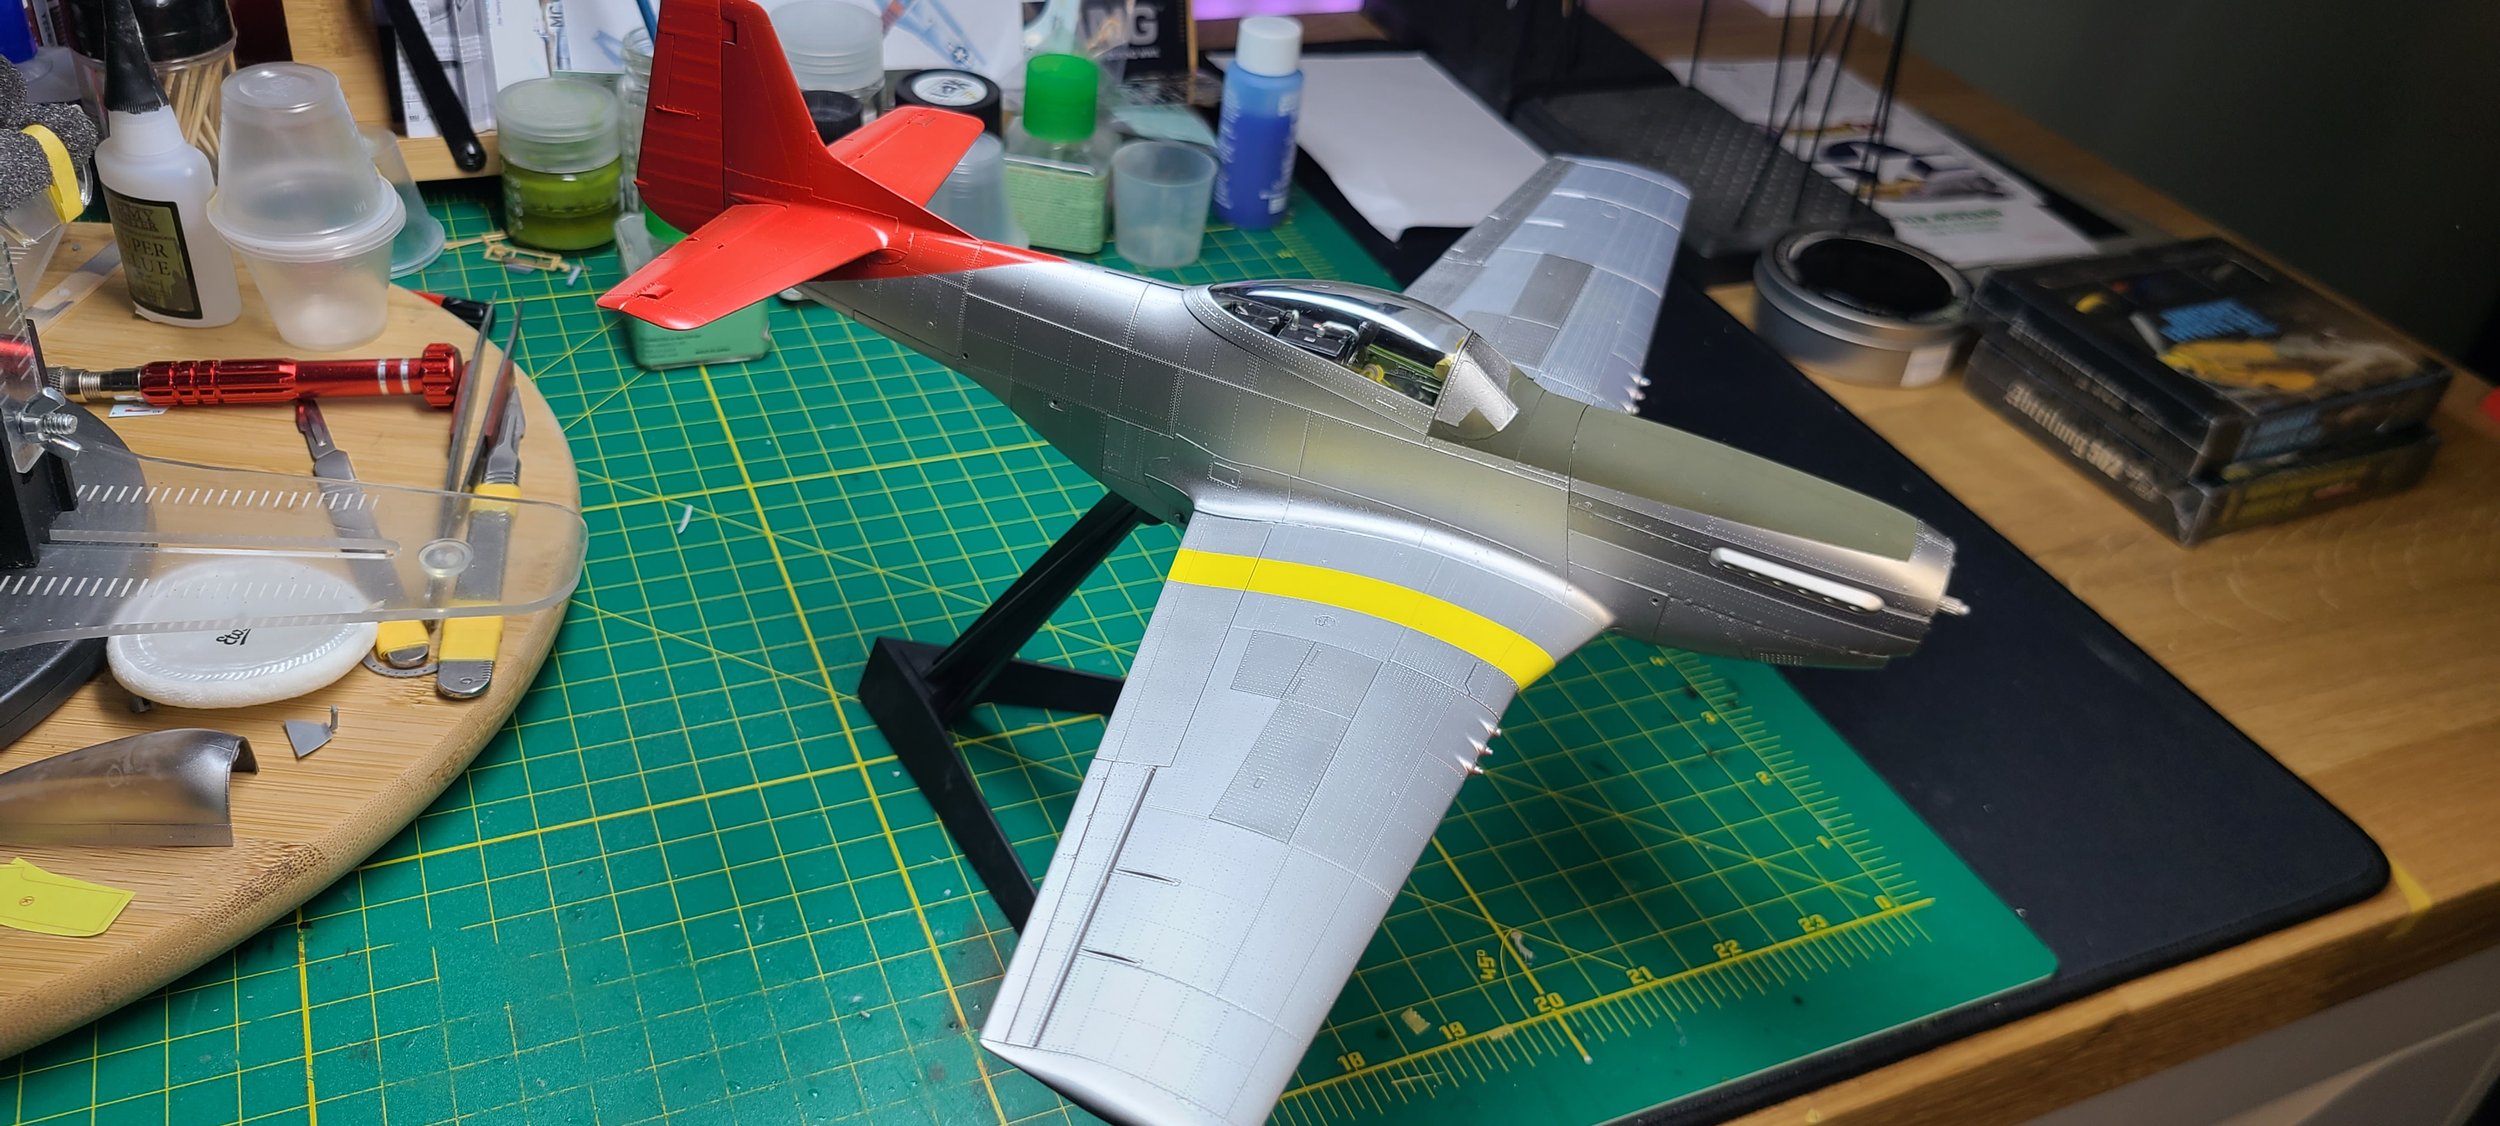
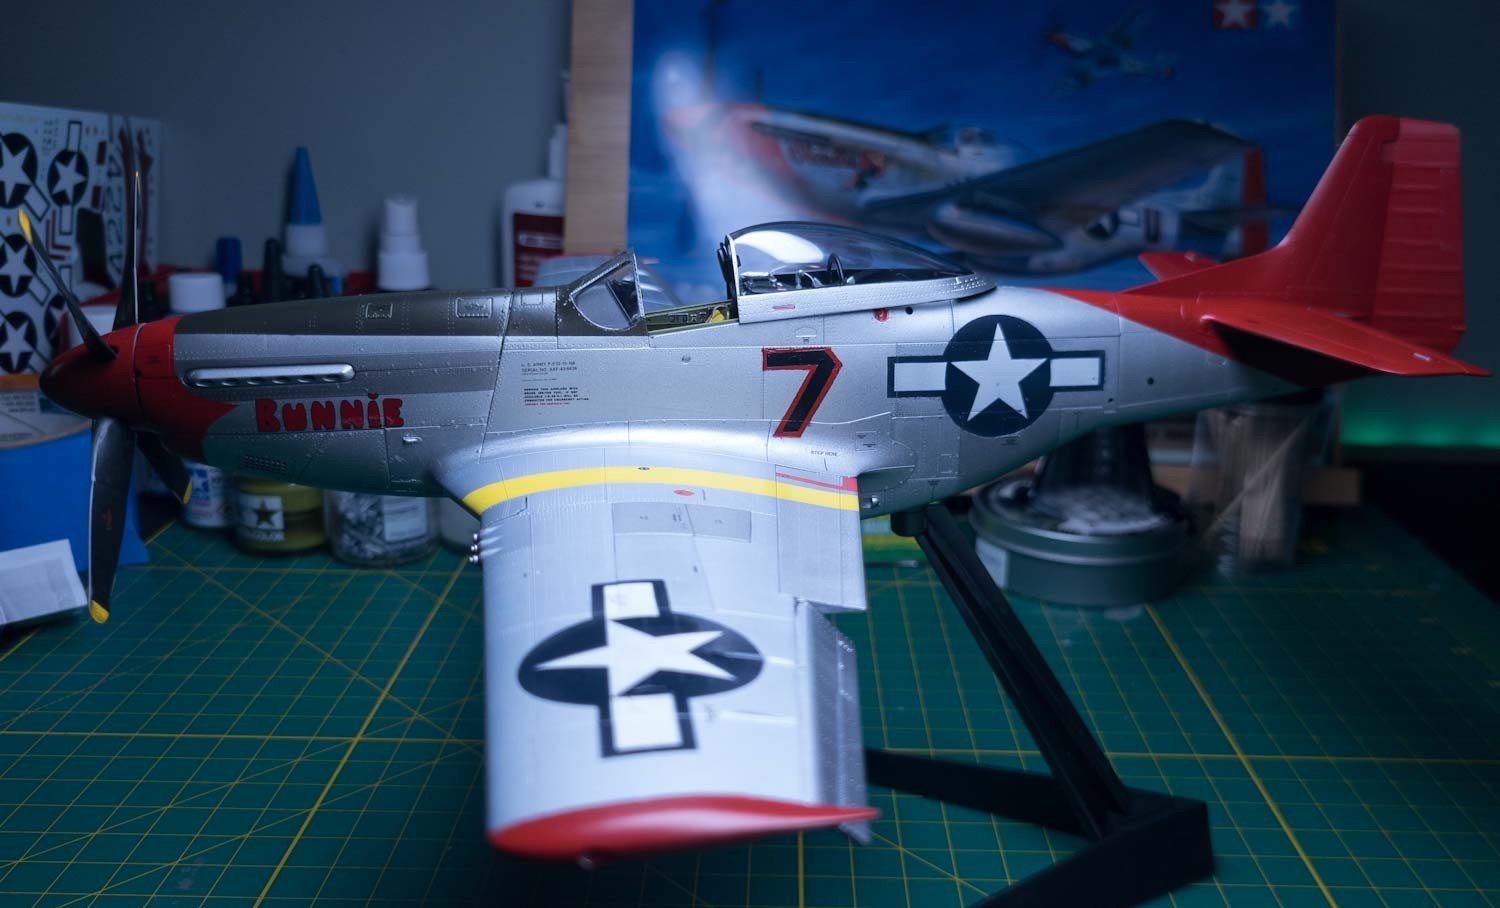
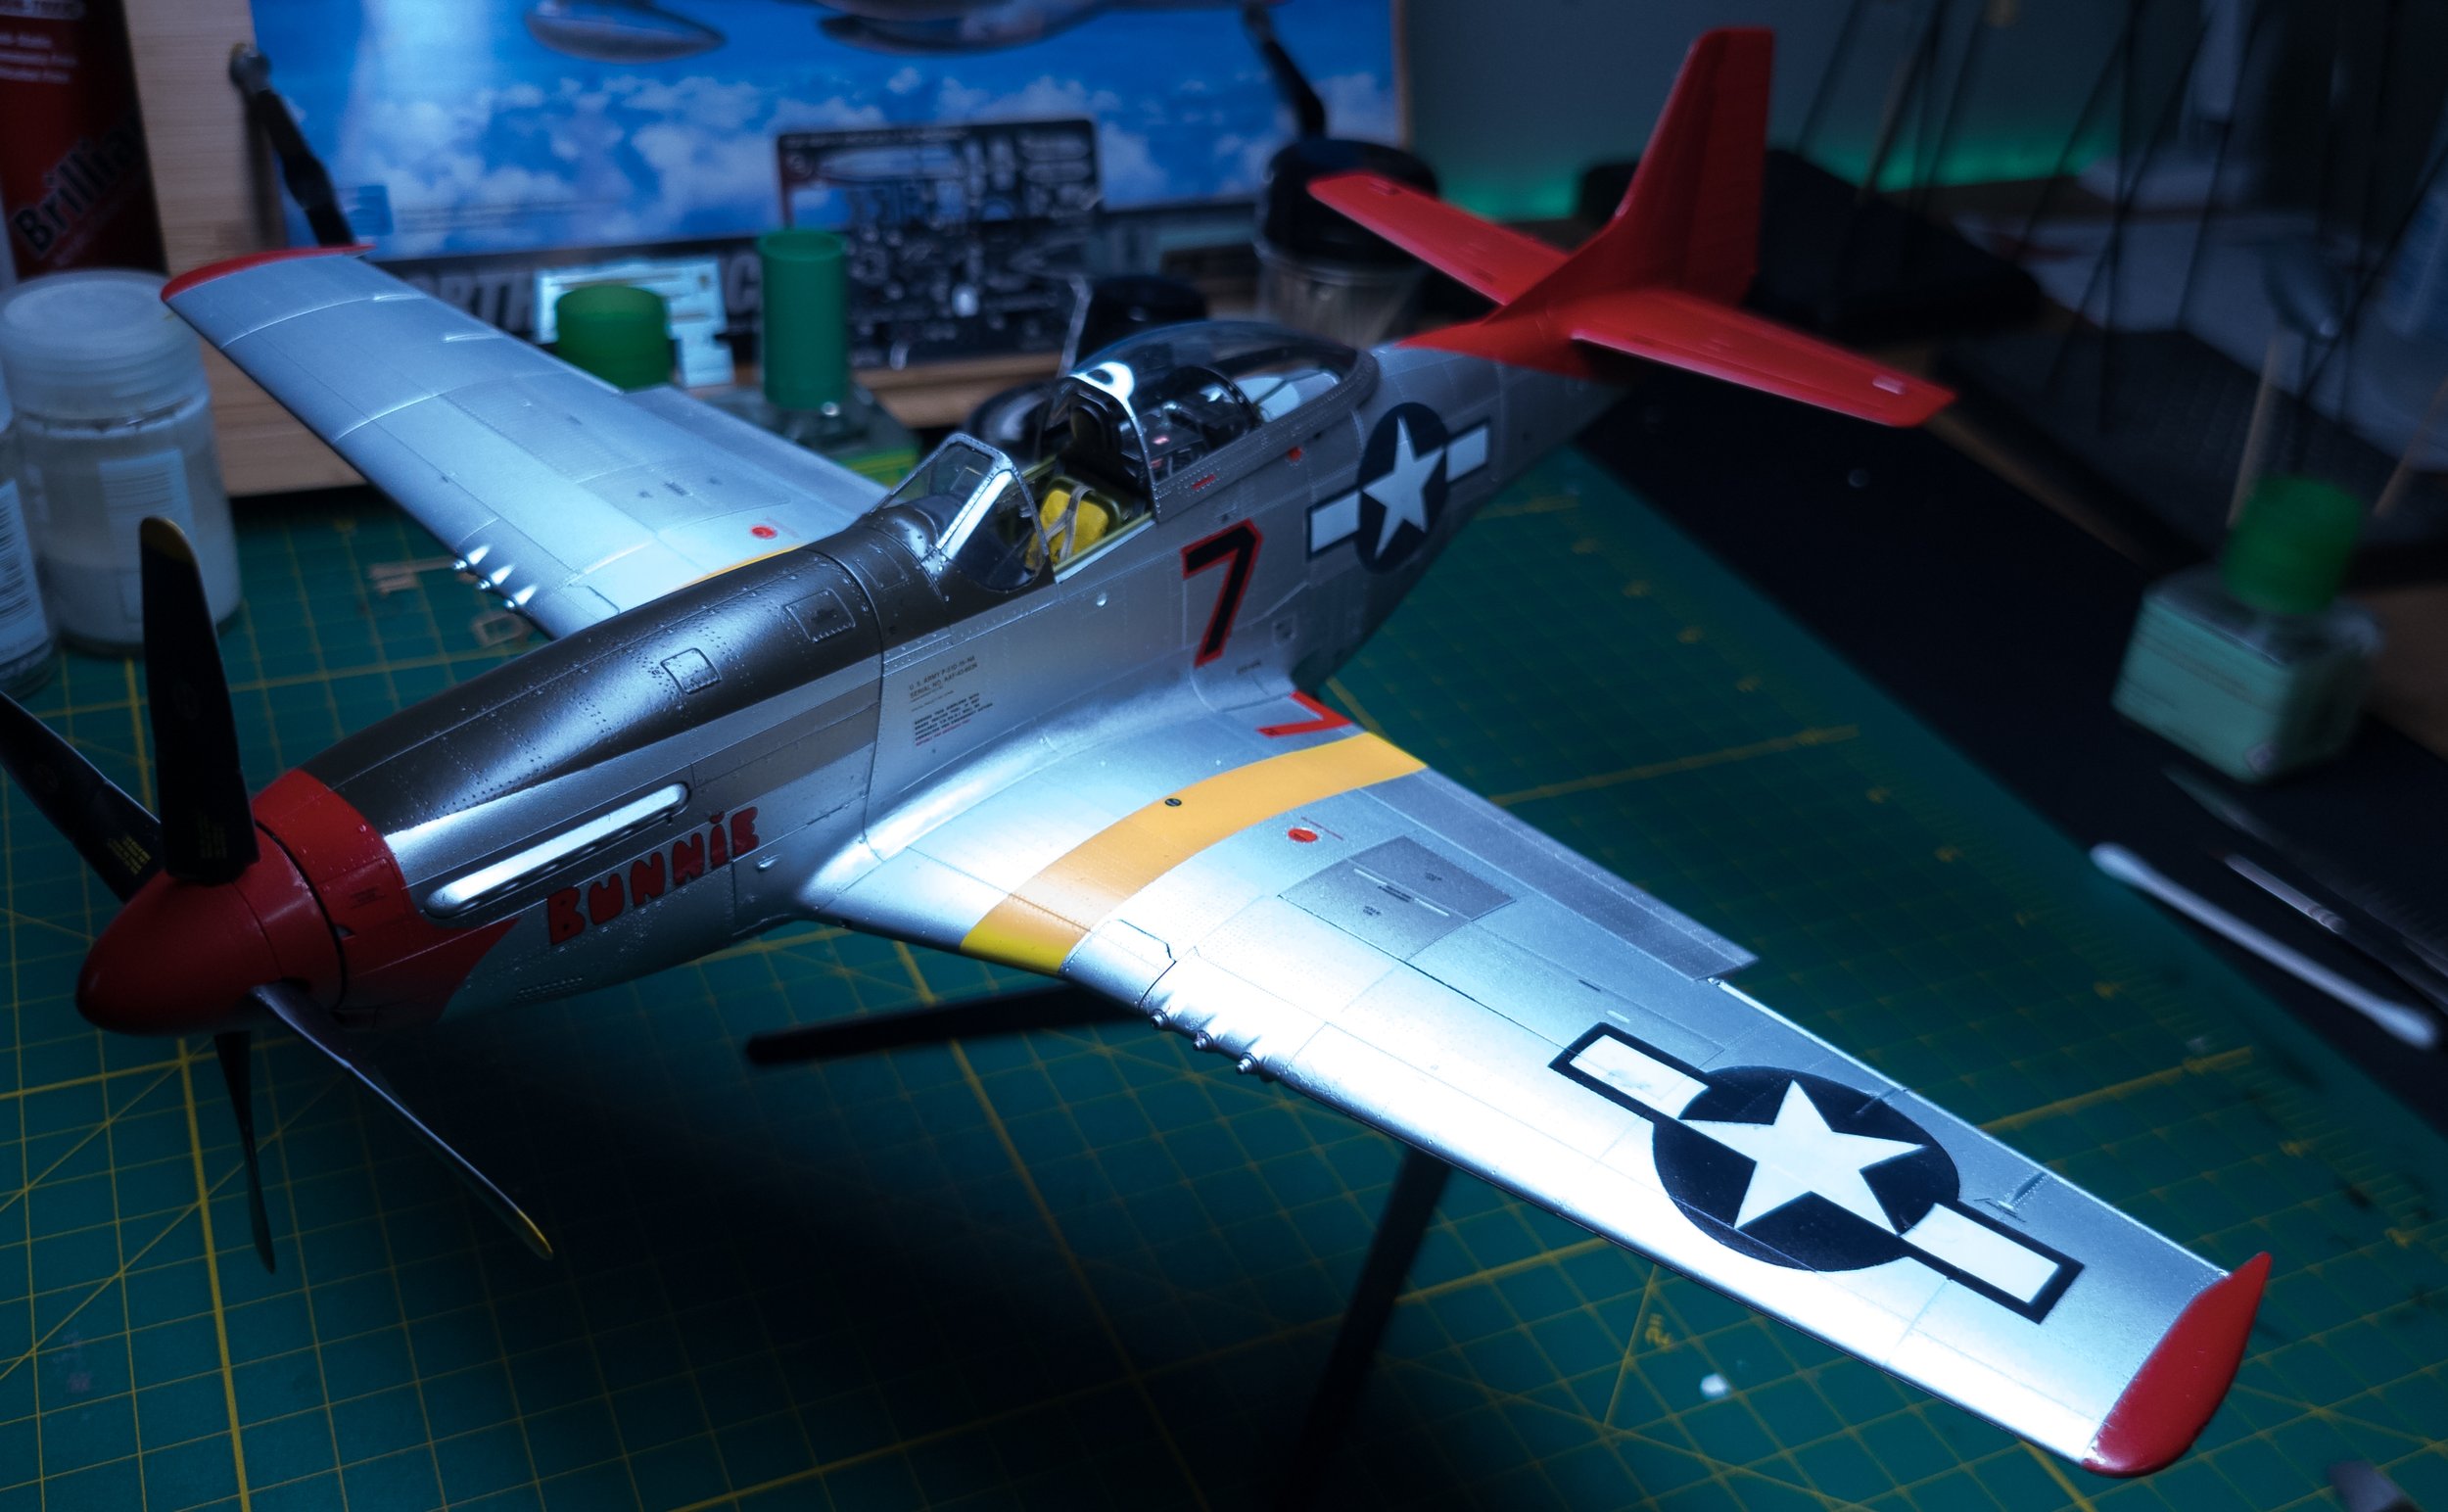
Now came the part I had never done before…paint a natural metal airplane. I read up as much as I could and bought a slew of AK Extreme metal paints and used four or five of them as I painted on layers. From Aluminum to Steel, Dural, White Aluminum, etc. These aircraft used different metals on different sections and sometimes field repairs used hanger-queen skins, etc. So they were not all shiny and unique.
I used a spare canopy to block off the cockpit, then Mr. Surfacer 1500, then using nitrate gloves, I hand-wiped the model getting a lot of the loose paint off it. Then used 5k grit sand paper wet/dry and sanded down the entire plane and that smoothed everything out. Had to do a little sanding on the bottom and used some sprue glue where I got adventurous with scalpel, and then a rattle can of Mr Hobby semi-gloss to get a reasonably shiny level (some people just shoot black gloss).

First coat of Xtreme Metal Aluminum and then masked and painted in the basic marking of the plane (How I got a clean canopy is a bit below this).
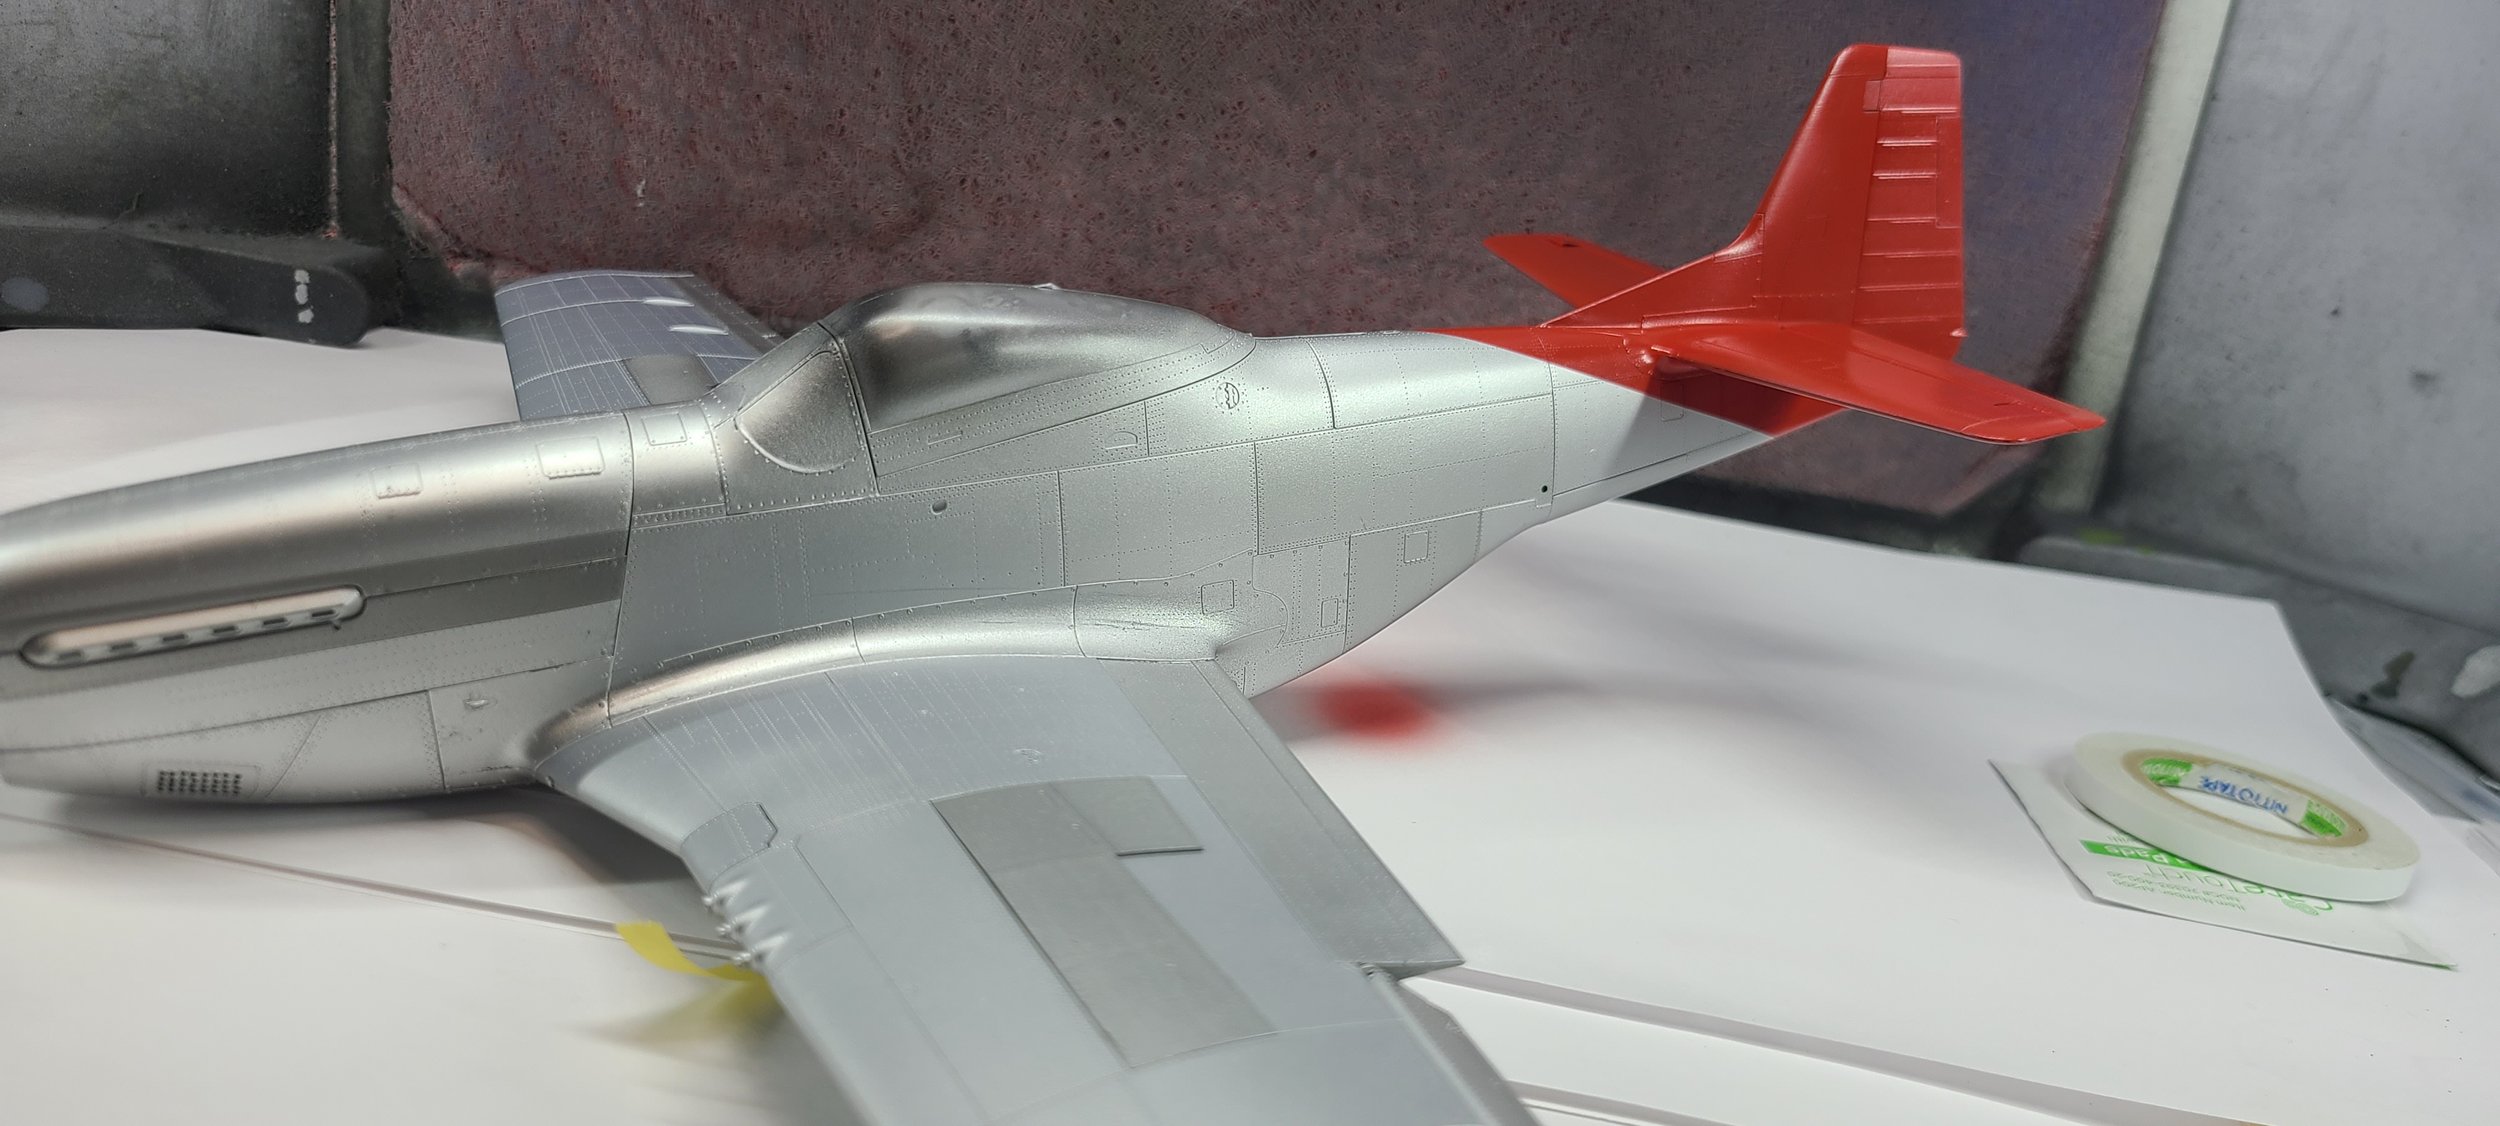
There were two things I was worried about w/this build and one of them was removing the centerline seam on the canopy (the other is NMF). I watched a lot of vids, read some stuff and followed what most said to do and although I made a few mistakes, it'll do. I started w/fresh surgical blade and scraped off the centerline. I then used progressively smoother sandpiper (1500->7000) and two Tamiya cremes (fine and finisher). Next steps will be future floor wax dip, mask and paint. I did accidently sand off the small protrusion on the canopy where the aerial wire passes through, but I might just stick w/it. I have two more canopies but they're not the type that went on his Mustang (also used the wrong gunsight...pfft).


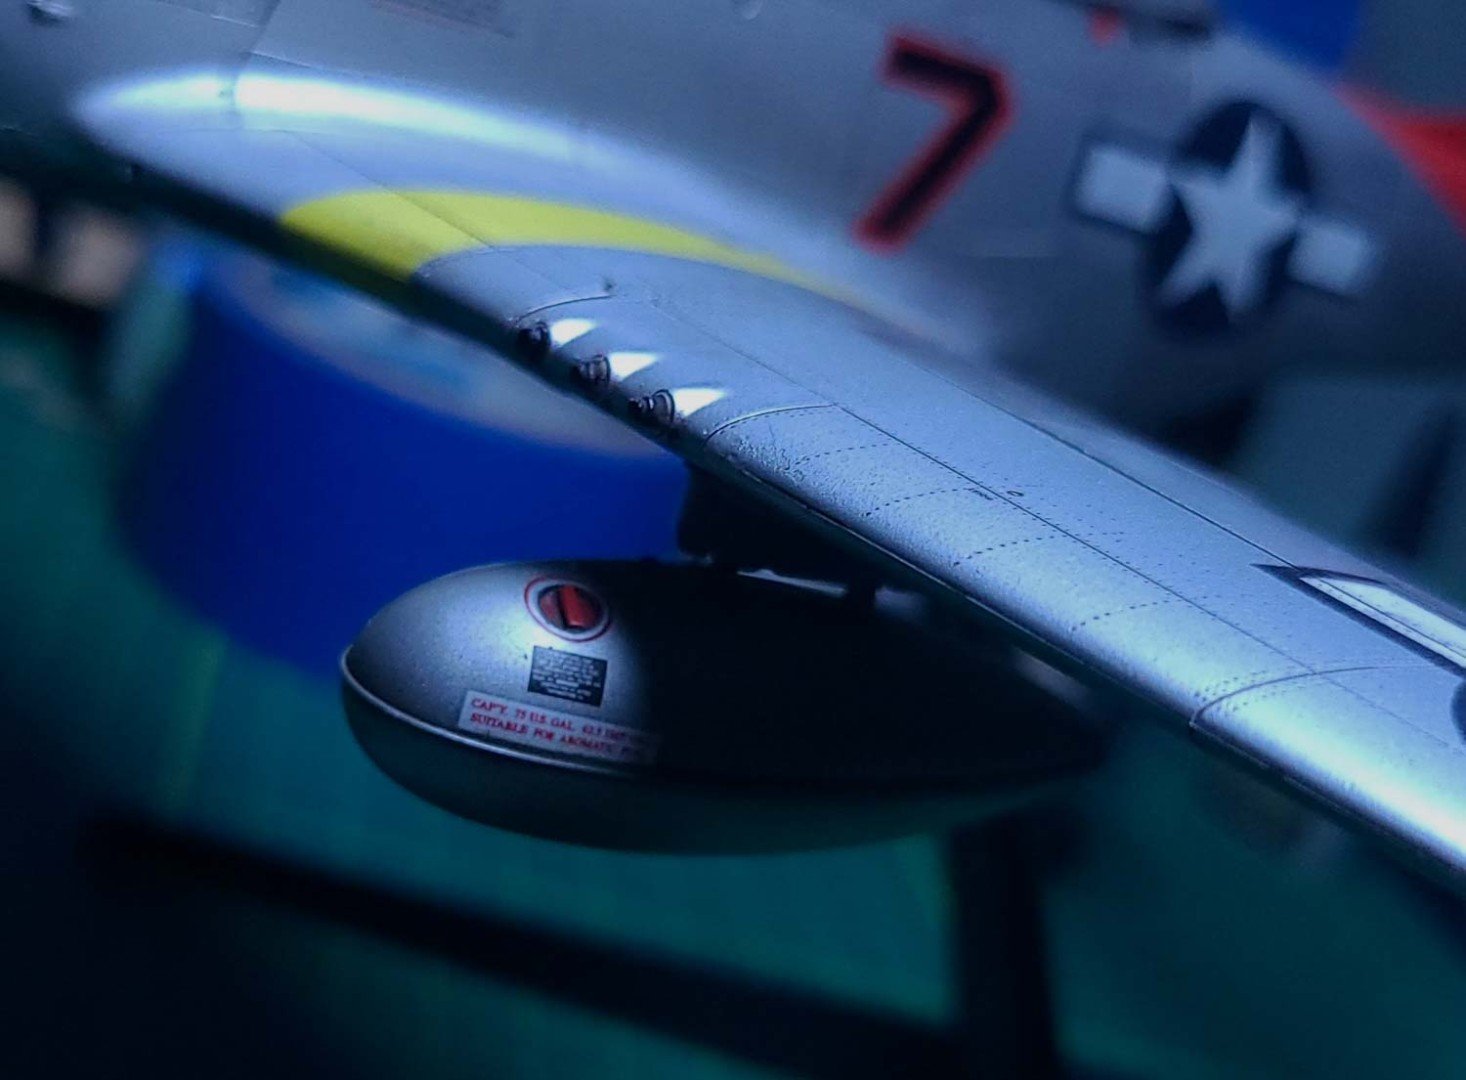
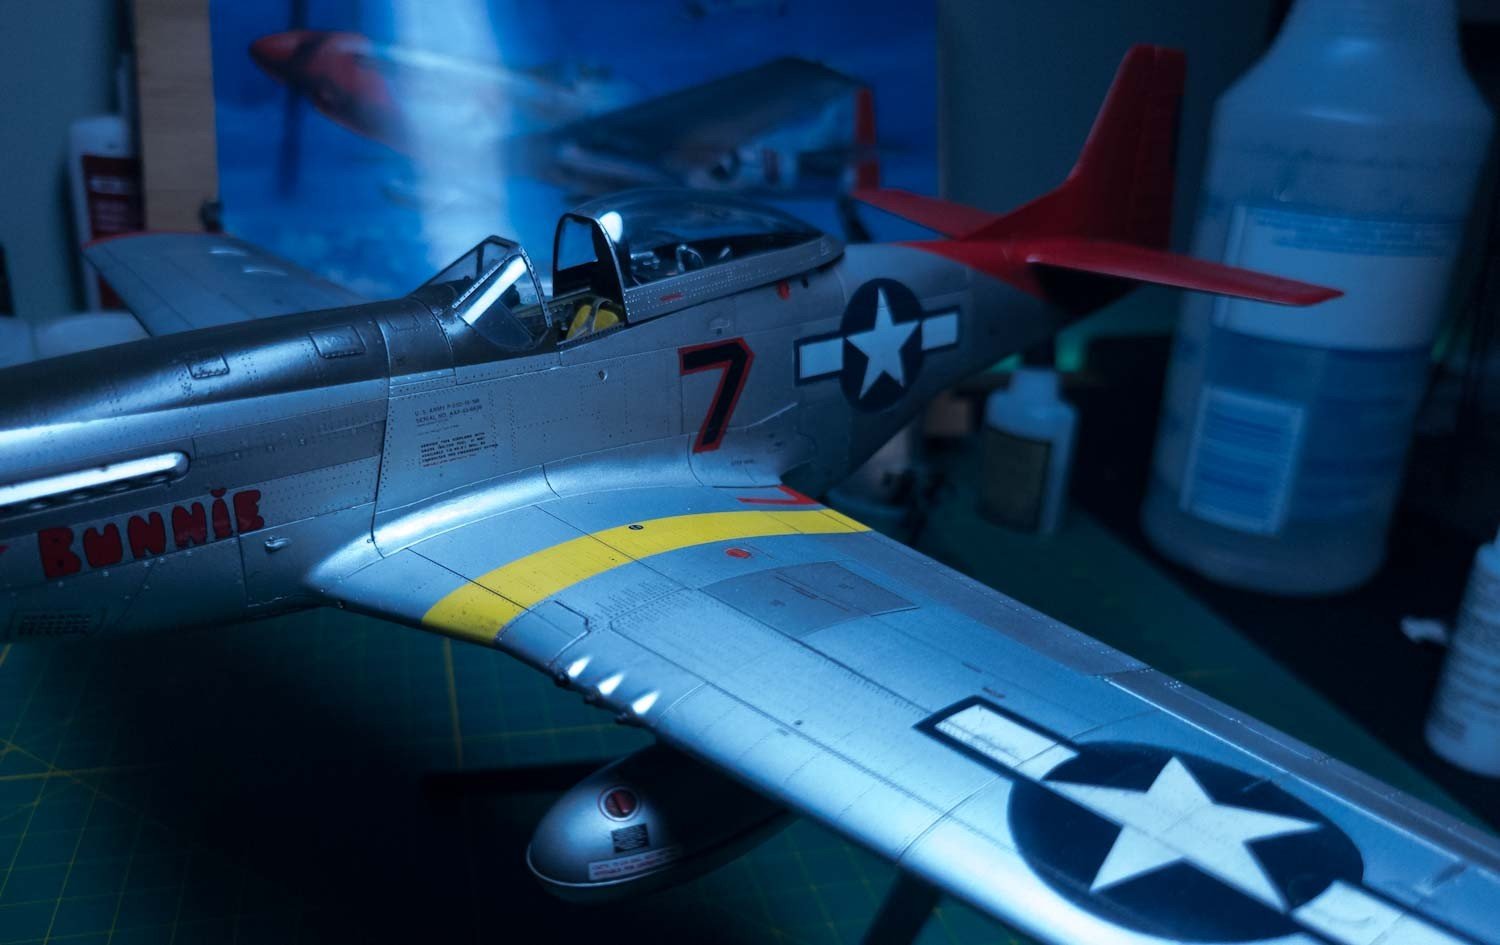
Next up were major decals and insignia’s. I decided to mask and paint the large markings and the “7”. A big issue is the silver paint pulls the adhesive off the tape a lot so had to be careful to clean up a lot. The stuff I couldn't get too I'll call "weathering".
The paints also too thick on the insignias and I pulled up a bunch of edges when I removed the tape too soon. I "fixed" them by hand painting. I'll lightly sanded them all down a bit after a few days drying. Also, the only "Bunnie" decal I could find blotched up a tad so this will probably end up being a "2-footer". I also got some overspray on the front windshield (starboard side…but it’s starting to look right.


Finished up decals, some touch-up paint, sprayed Mr. Hobby "Top Coat" semi-gloss (rattle can) and removed the front canopy masking. So what's left here are some minor paint fixes, the wing tanks, a Flory wash, some oil pigments and weathering. Some cleanup required on the port wing insignia, I have some PE canopy rails to put in and resin wheels on the way but that's for later.
Real nice lessons on using AK Xtreme Metal paint (let it dry overnight...use a lot of clear coats, etc). Also used more masking tape, airbrush cleaner and clear coats on this than the 1/24 Hellcat and 1/32 Duck combined...so many "silver" variants.
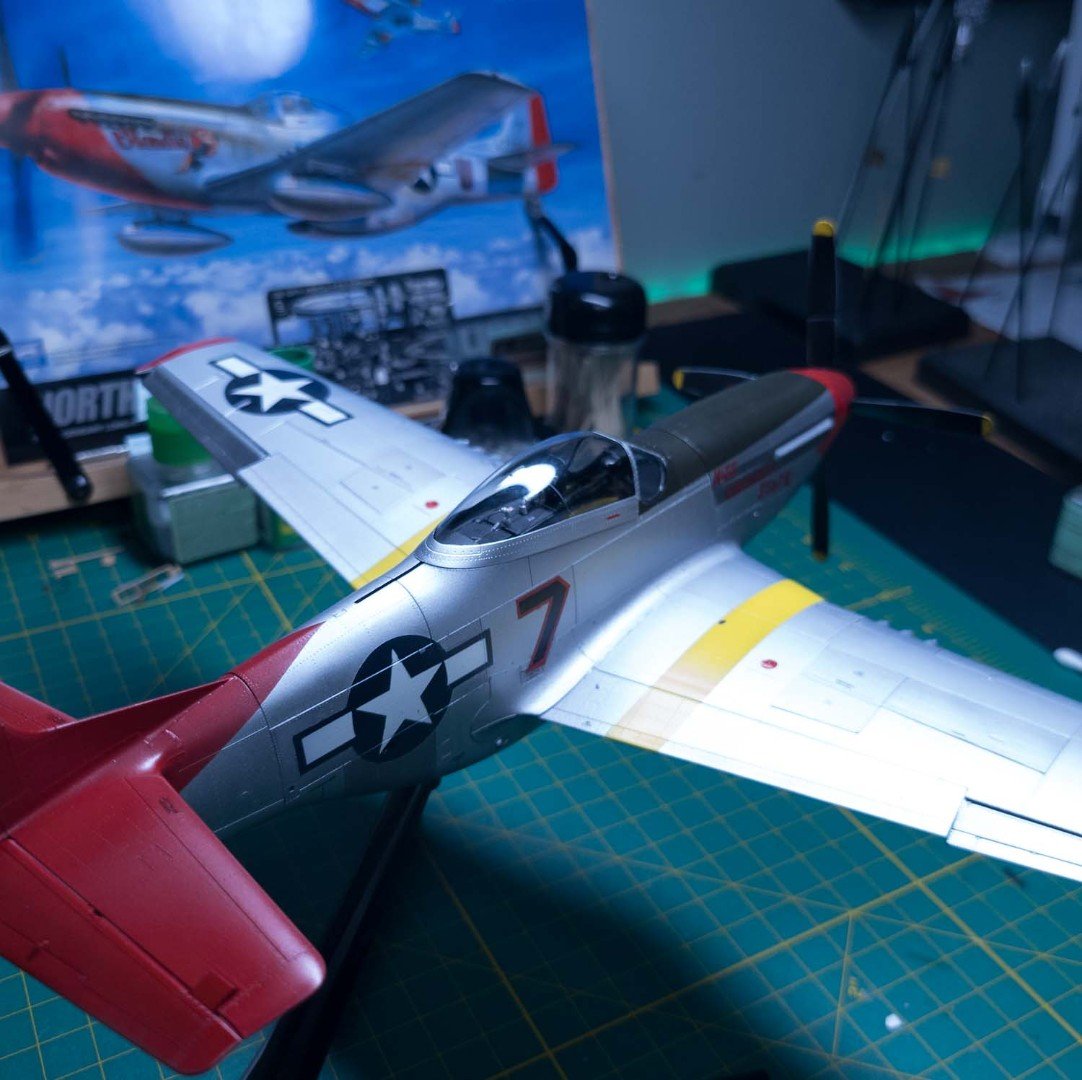
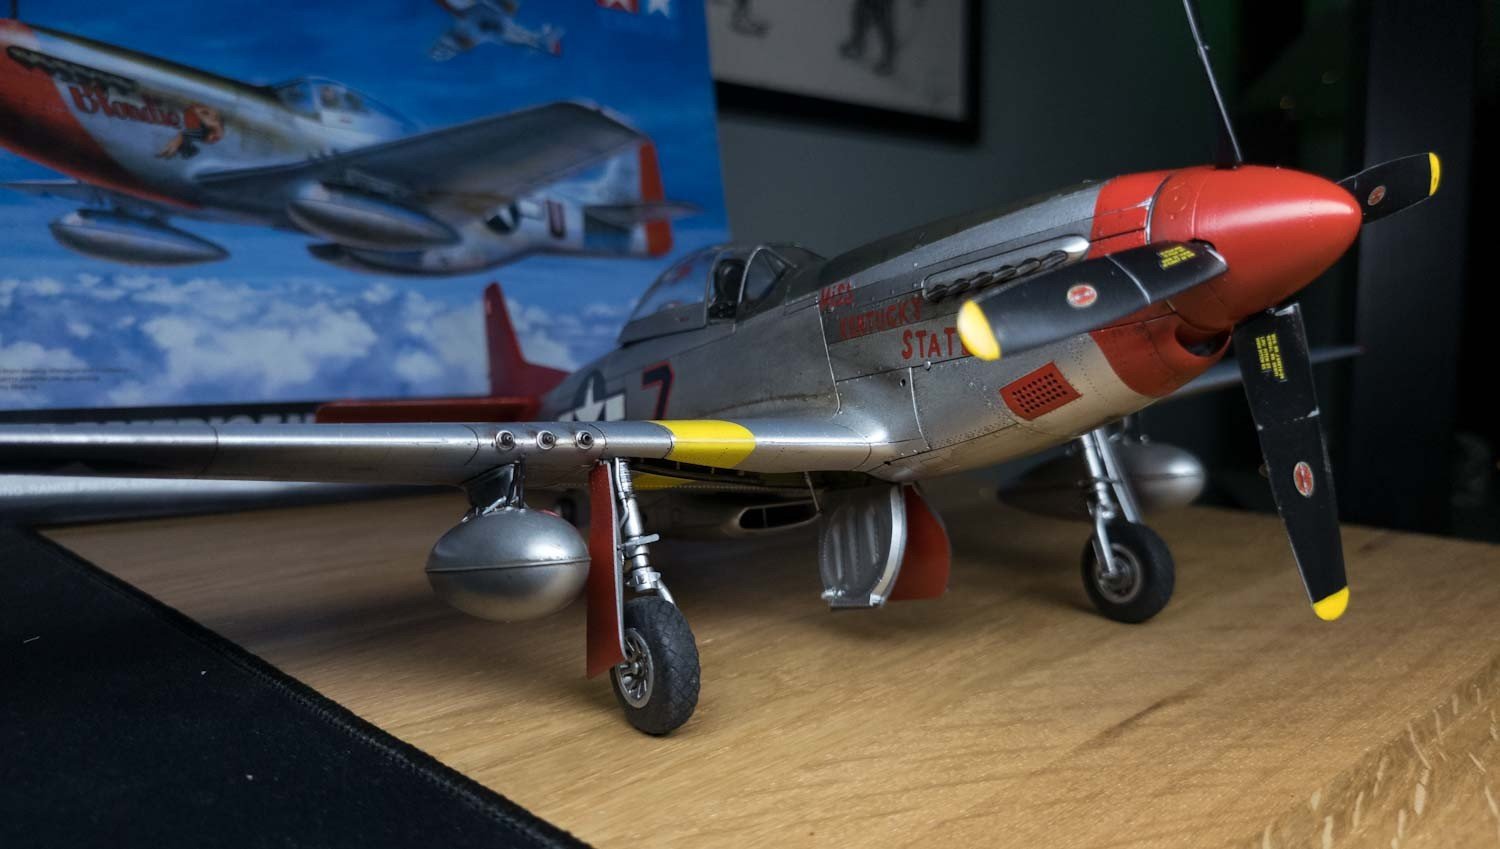
Couple of things...I found and bought a Matt Hall signed print of Lt Brown's plane (four signatures but unfortunately not his)...and did a little weathering with Flory's Dark Dirt, added some cockpit rails detail, and had to DIY those gas caps (plastic rods cut to shape) on the wing tanks after I found the ones in the kit deformed (the plastic never completely formed them). These are not "historically accurate" but they're fine and I am going to add the fuel line detail that you saw on them at that time that was nothing more than rubber tubes attached w/clamps to the wing tanks coming from the wing.
Got her up on wheels...although not fashionable I'm going with the rubber wheels and still need decal and weathering and detail painting on the under-carriage area, but all major build functions done. Finish time.

Other side with some weathering done. Need to clean up the tires, add a few more parts (landing gear light and wheel-well detail). I did end up doing more chipping and then hated it and had to carefully remove it (painted on stuff) so spending more time cleaning up my mistakes than finishing it.
Pretty much finished. I have replacement decals coming as the “Bunnie” got melted a tad w/clear spray and some minor odd-n-ends to clean up but time to move on.