Wingnut Wings 1/32 Fokker D.VII

Decided I would try a Wingnut Wings model. The Fokker D.VII is considered one of the easier to do because there's not a lot rigging required. I used lead wire to simulate springs and had some resin sparkplugs (not ww1) from ANYZ. As I continued I had a change of heart, cut the non-standard spakplugs out and had to wait for some after market stuff.
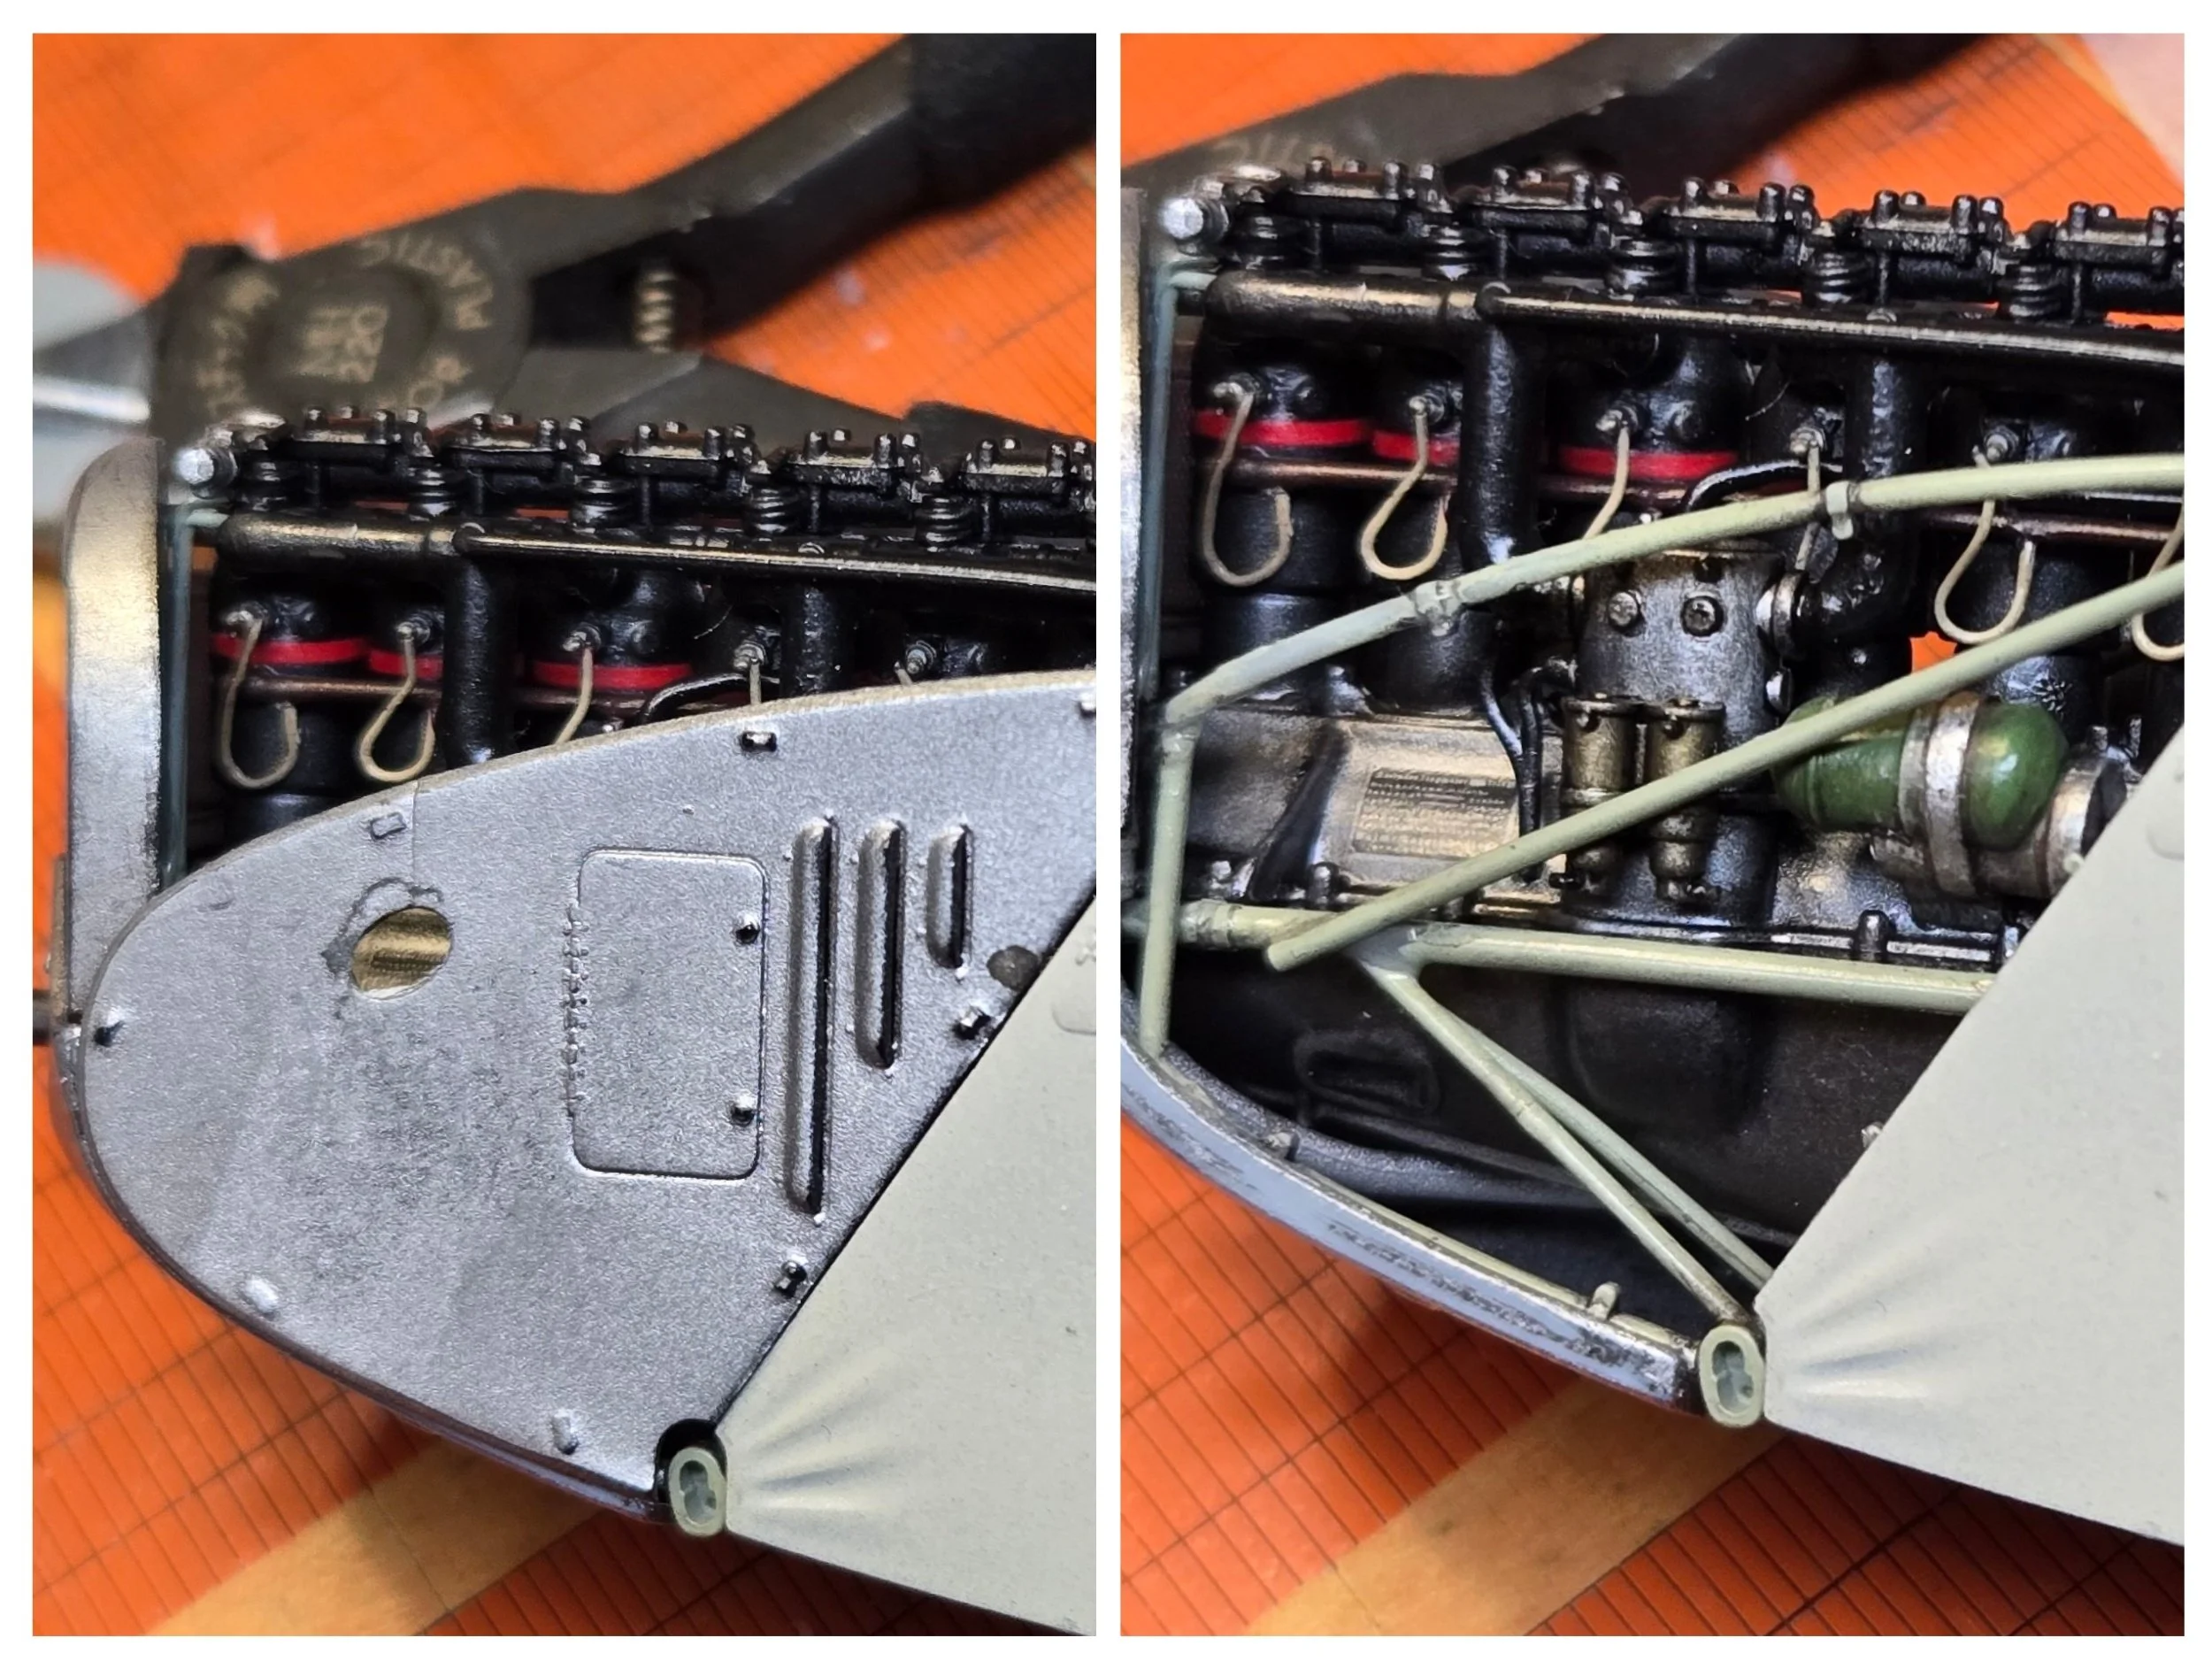
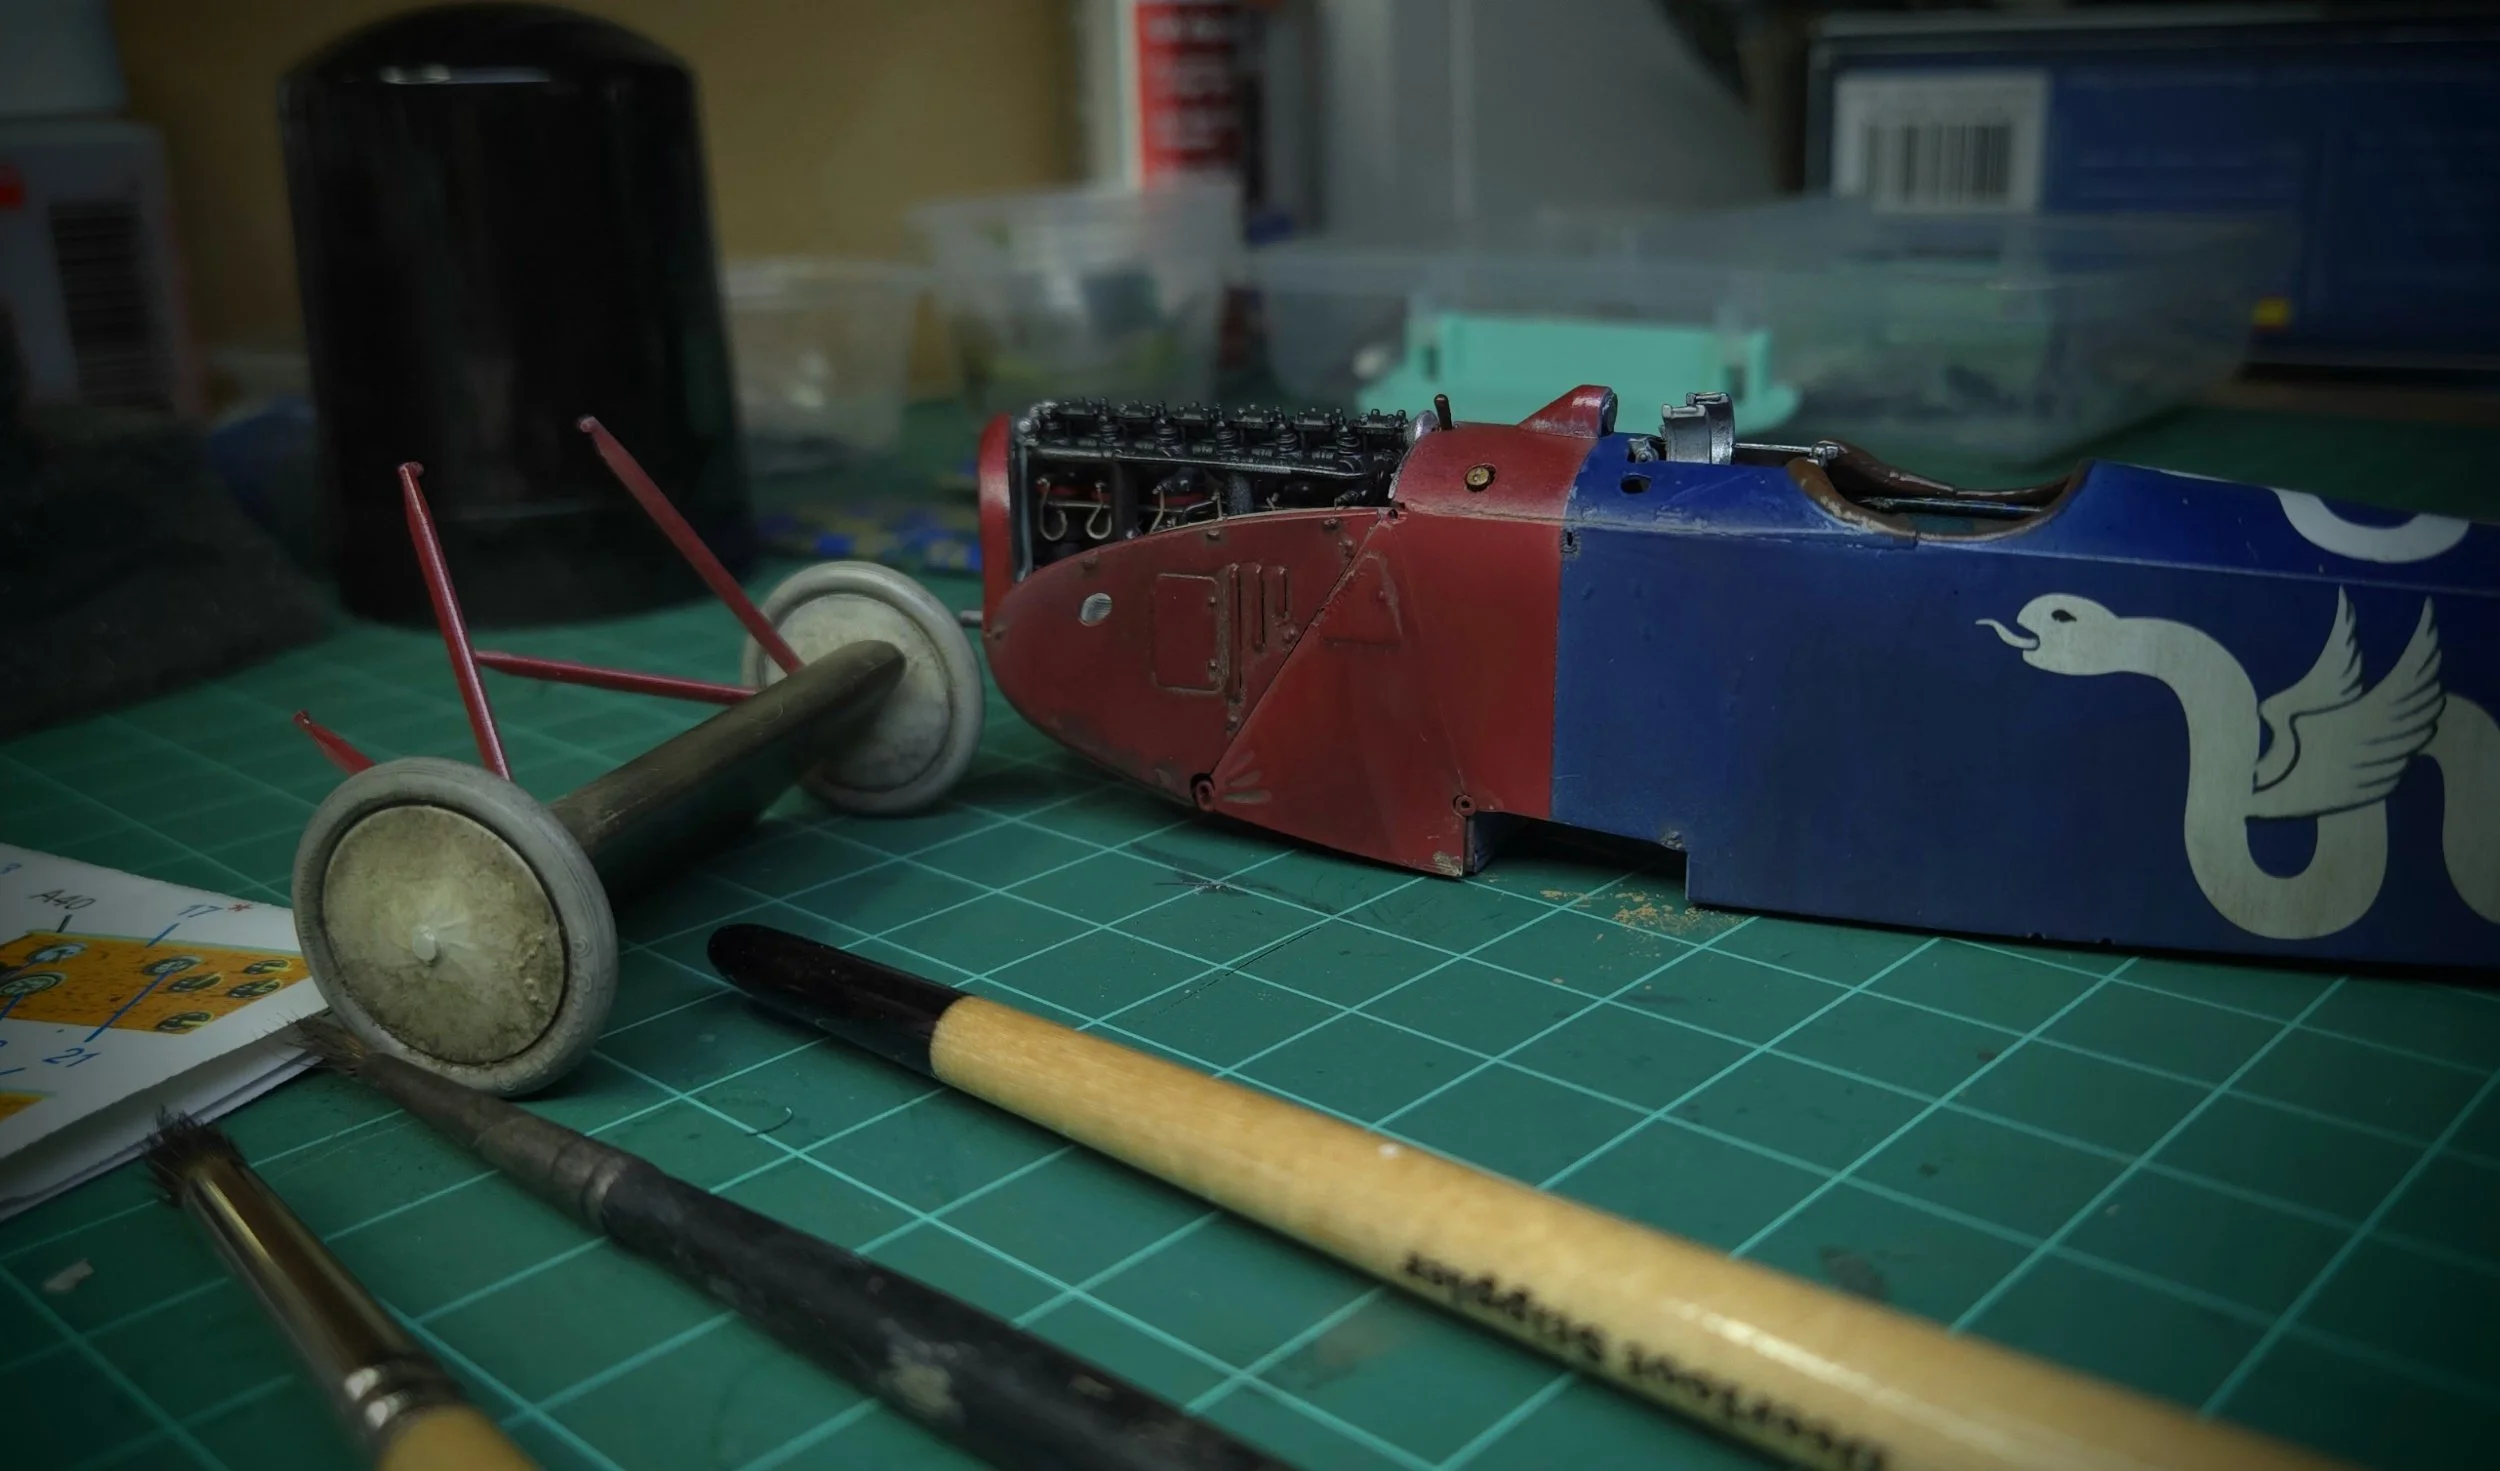
I dry brushed aluminum over Mr. Surfacer 1500 black for the crankcase, used polished metal pigment over the whole engine, .01 lead wire sparkplug leads and Taurus Model sparkplugs.
The only airbrushed part here was the Mr. Surfacer base coat on all parts...the rest is hand painted dry brushed with touchup work. I added some Tamiya black wash and just have the distributor wires to do.


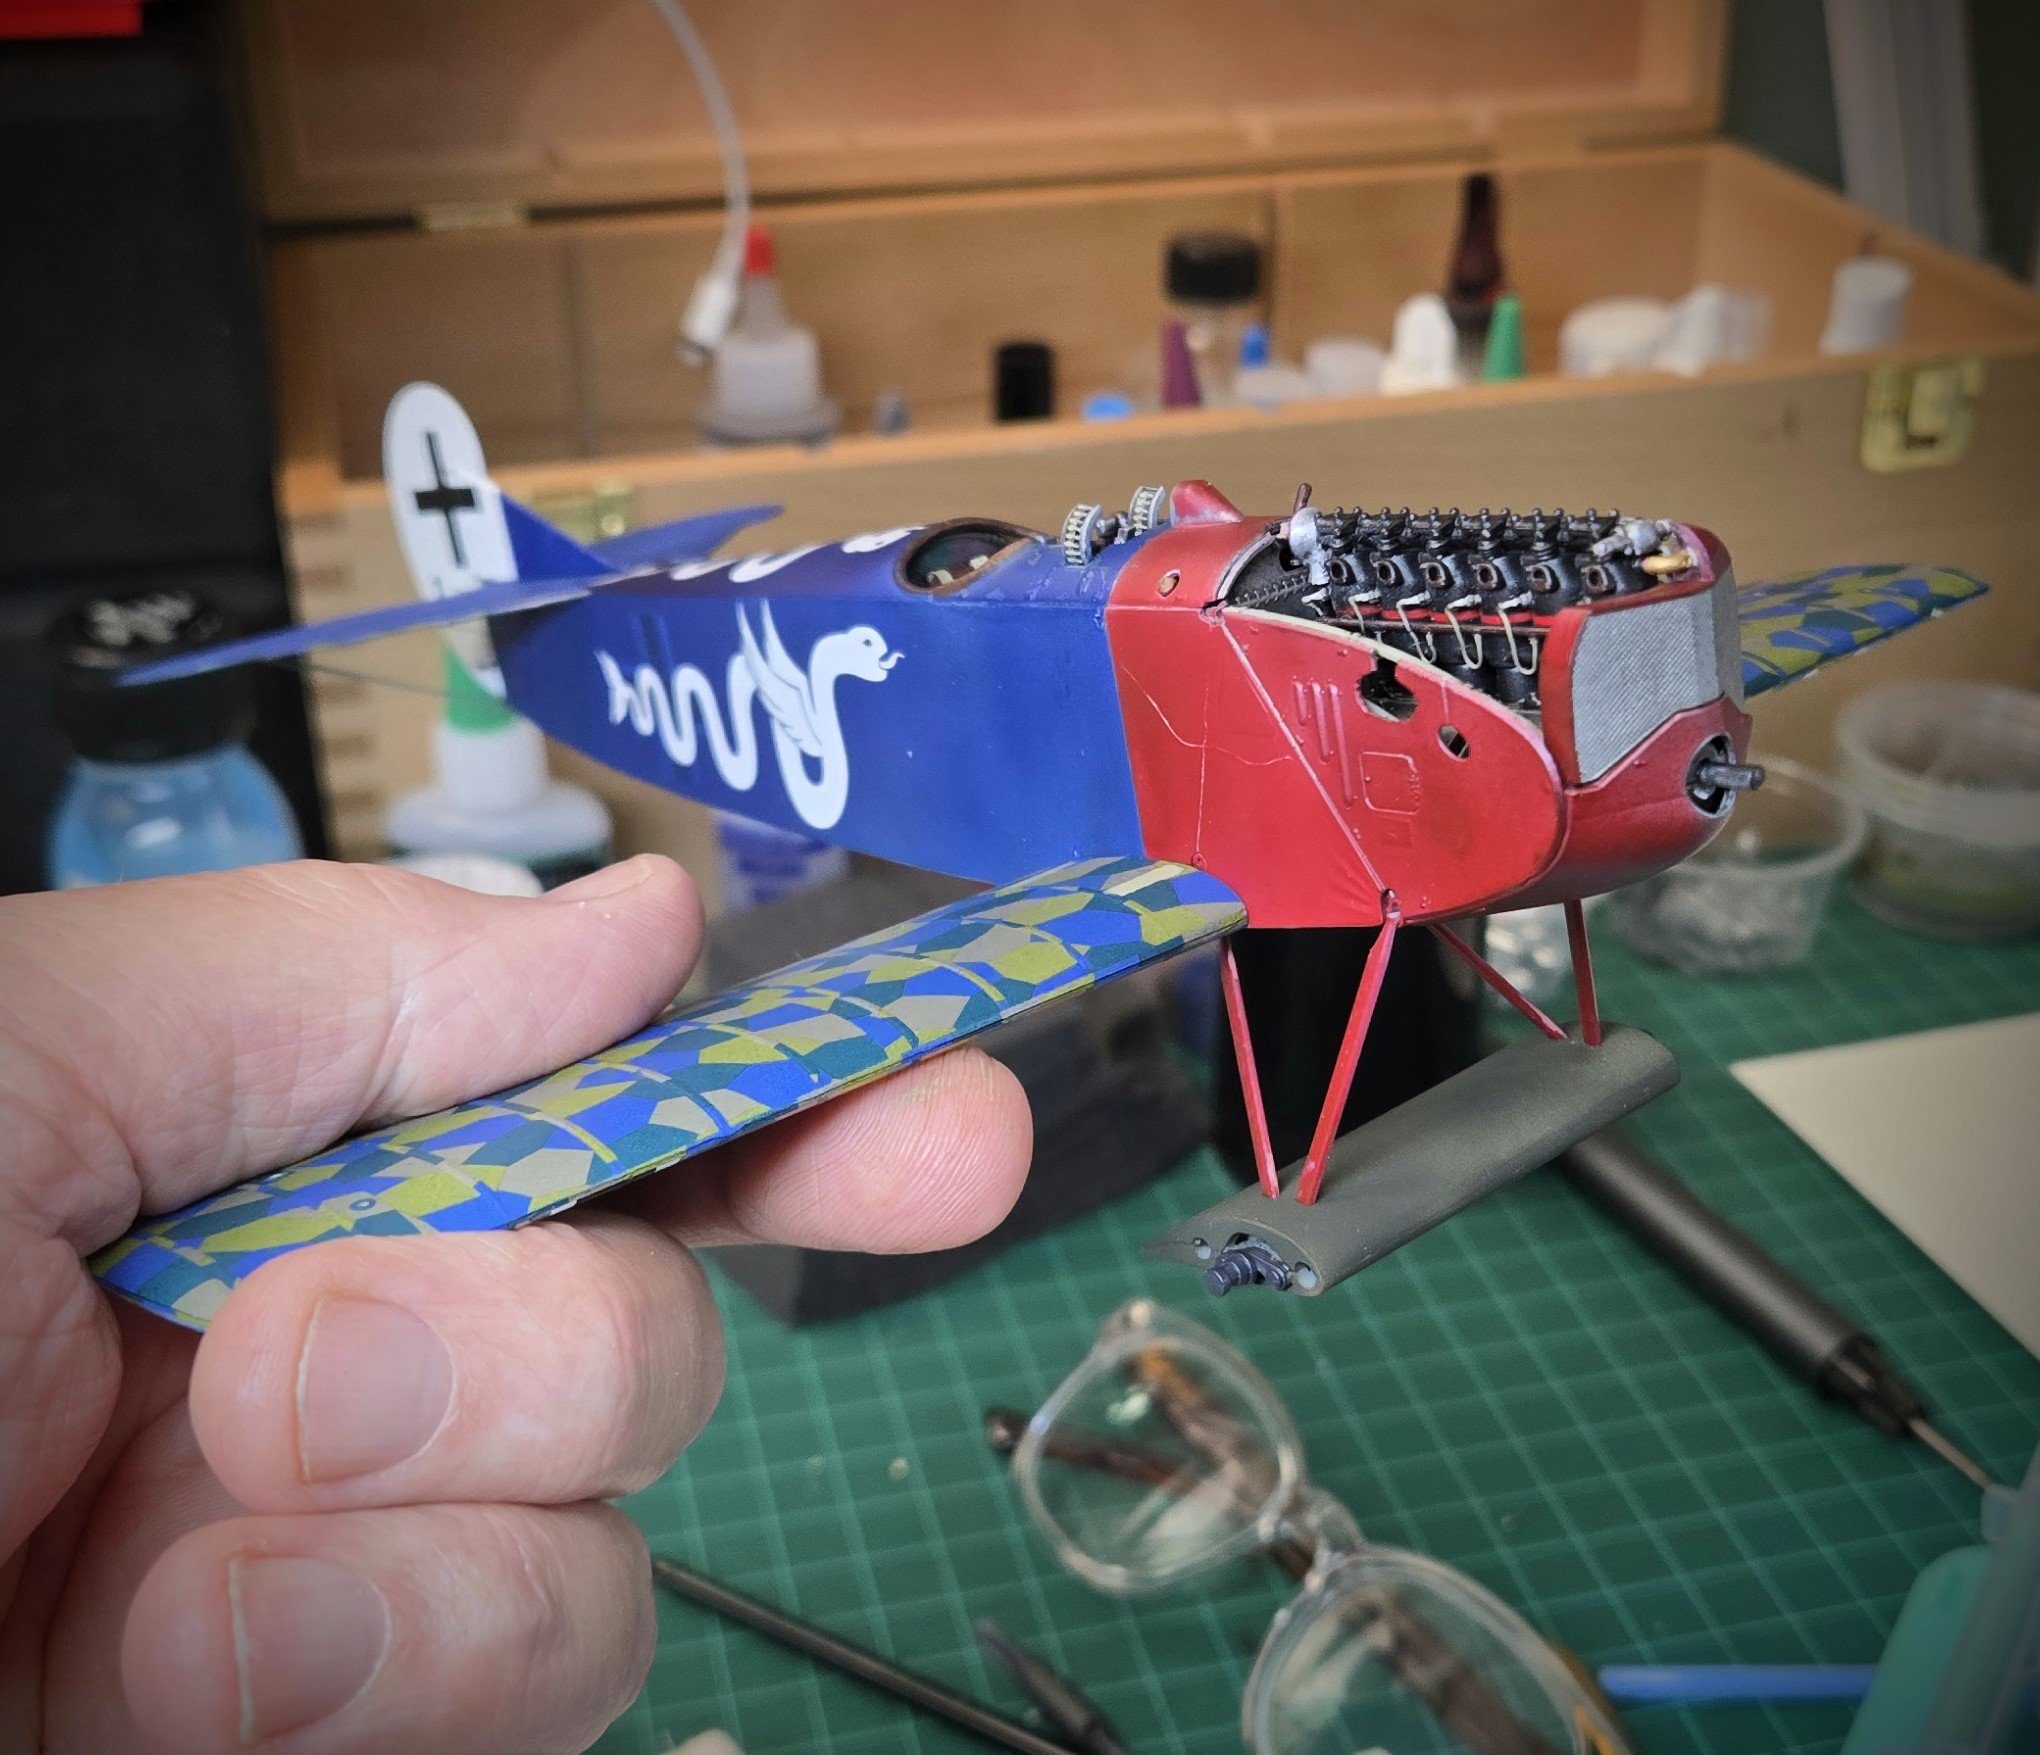
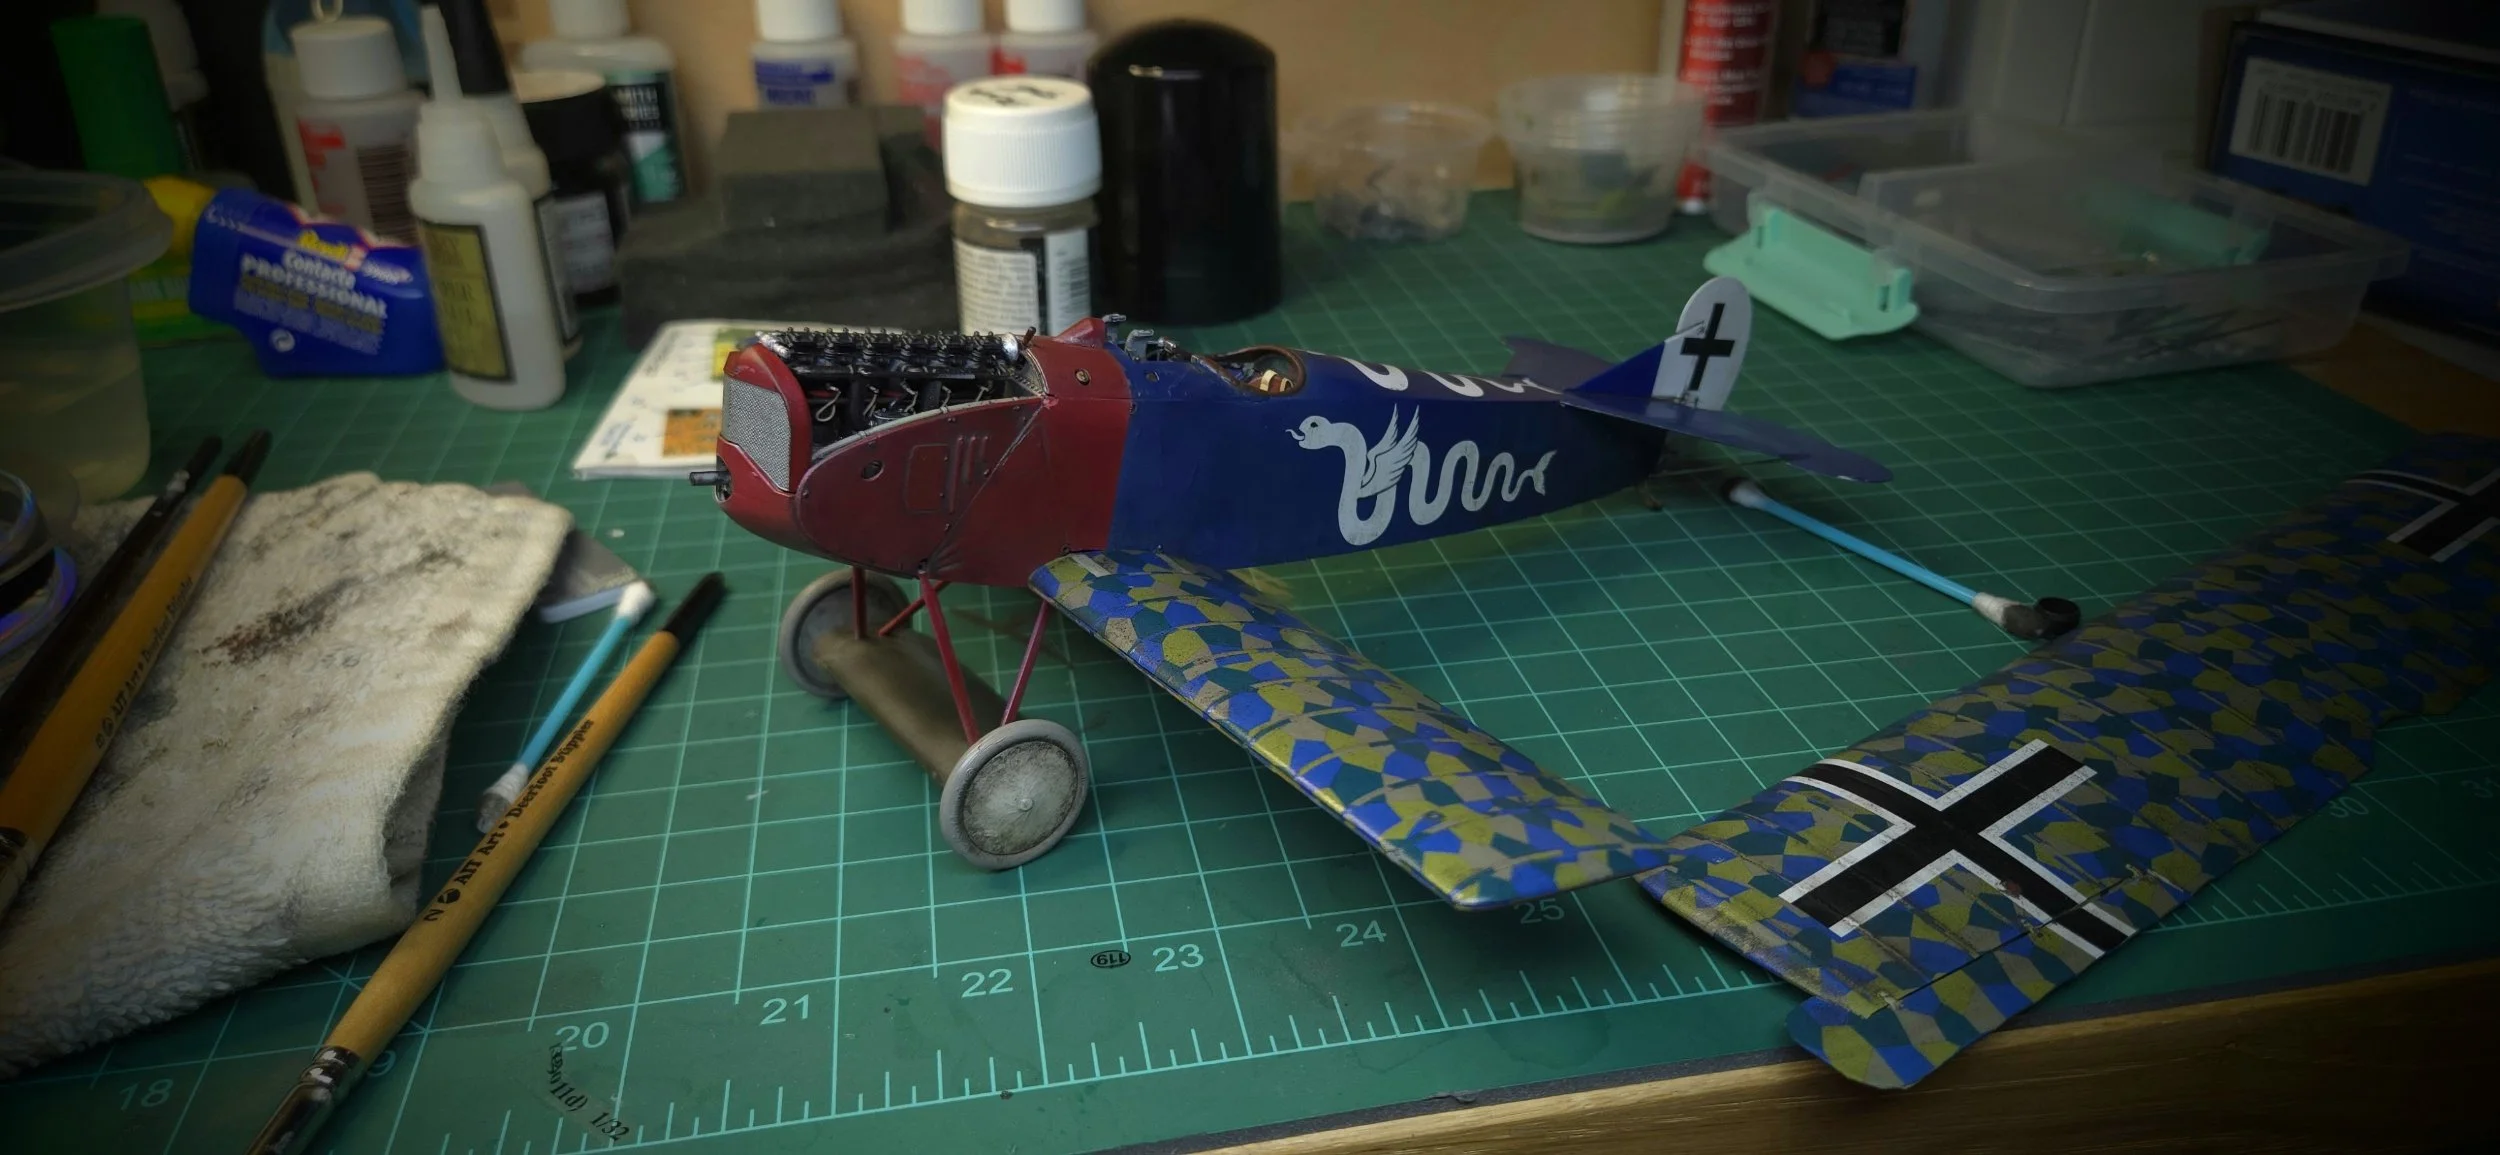
Small progress on the 1/32 WNW Fokker D.VII. Still need to do the distributor wires but I want to start in on the cockpit and fuselage so done for now. Can't speak to the kit, yet, being any better than Tamiya or Eduard, but it's fun to work out of my comfort zone and so far, excellent kit. Probably should thin out some of the wash but honestly...most of this is hidden by the cowling (but thinking about doing an open-cowling version).

Small steps Ellie, small steps. What’s done so far…Firewall/fuel tank/bullet stuff, leather seat, engine. Not sure if I'll try and paint the cords holding the linen to the frame behind the chair...would need magnifiers for that and I dont like using them. Almost everything here was also dry brushed on other than Mr. Surfacer 1500 black on most of the parts before brushing, the light green steel framing and the oil spray on the firewall (flicked Tamiya brown wash followed by thinned silver dry brush and clear coat).


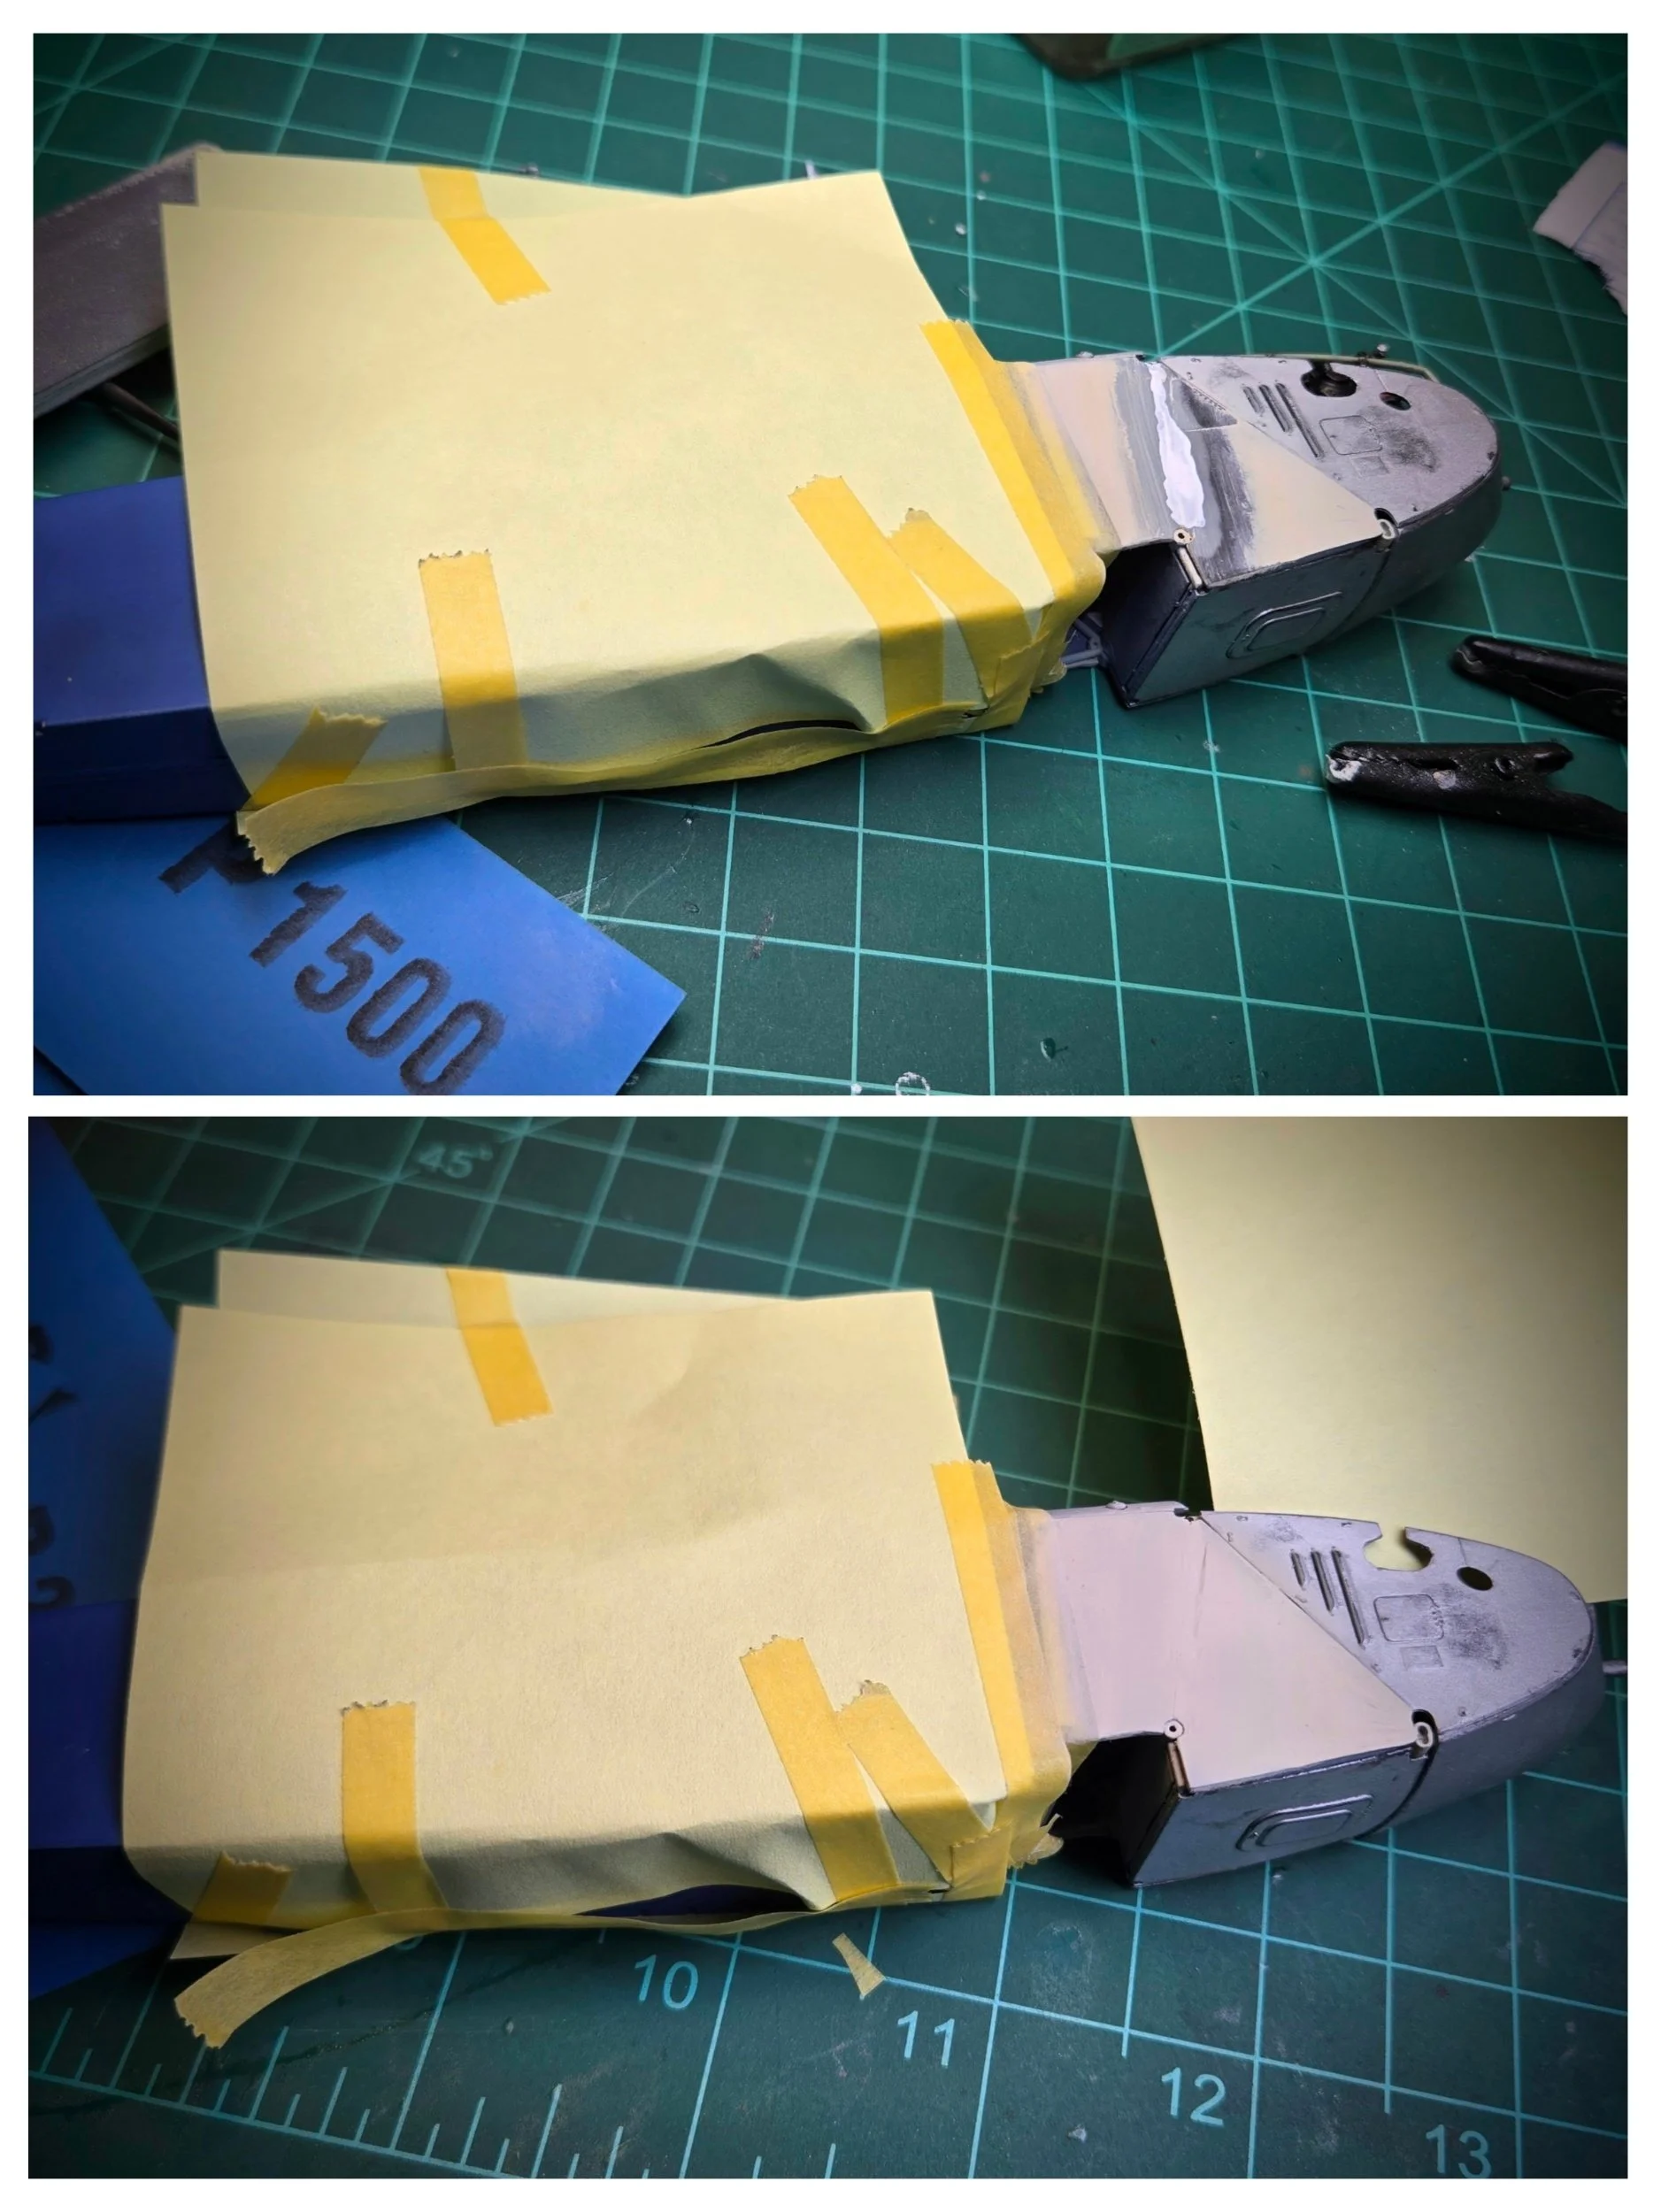
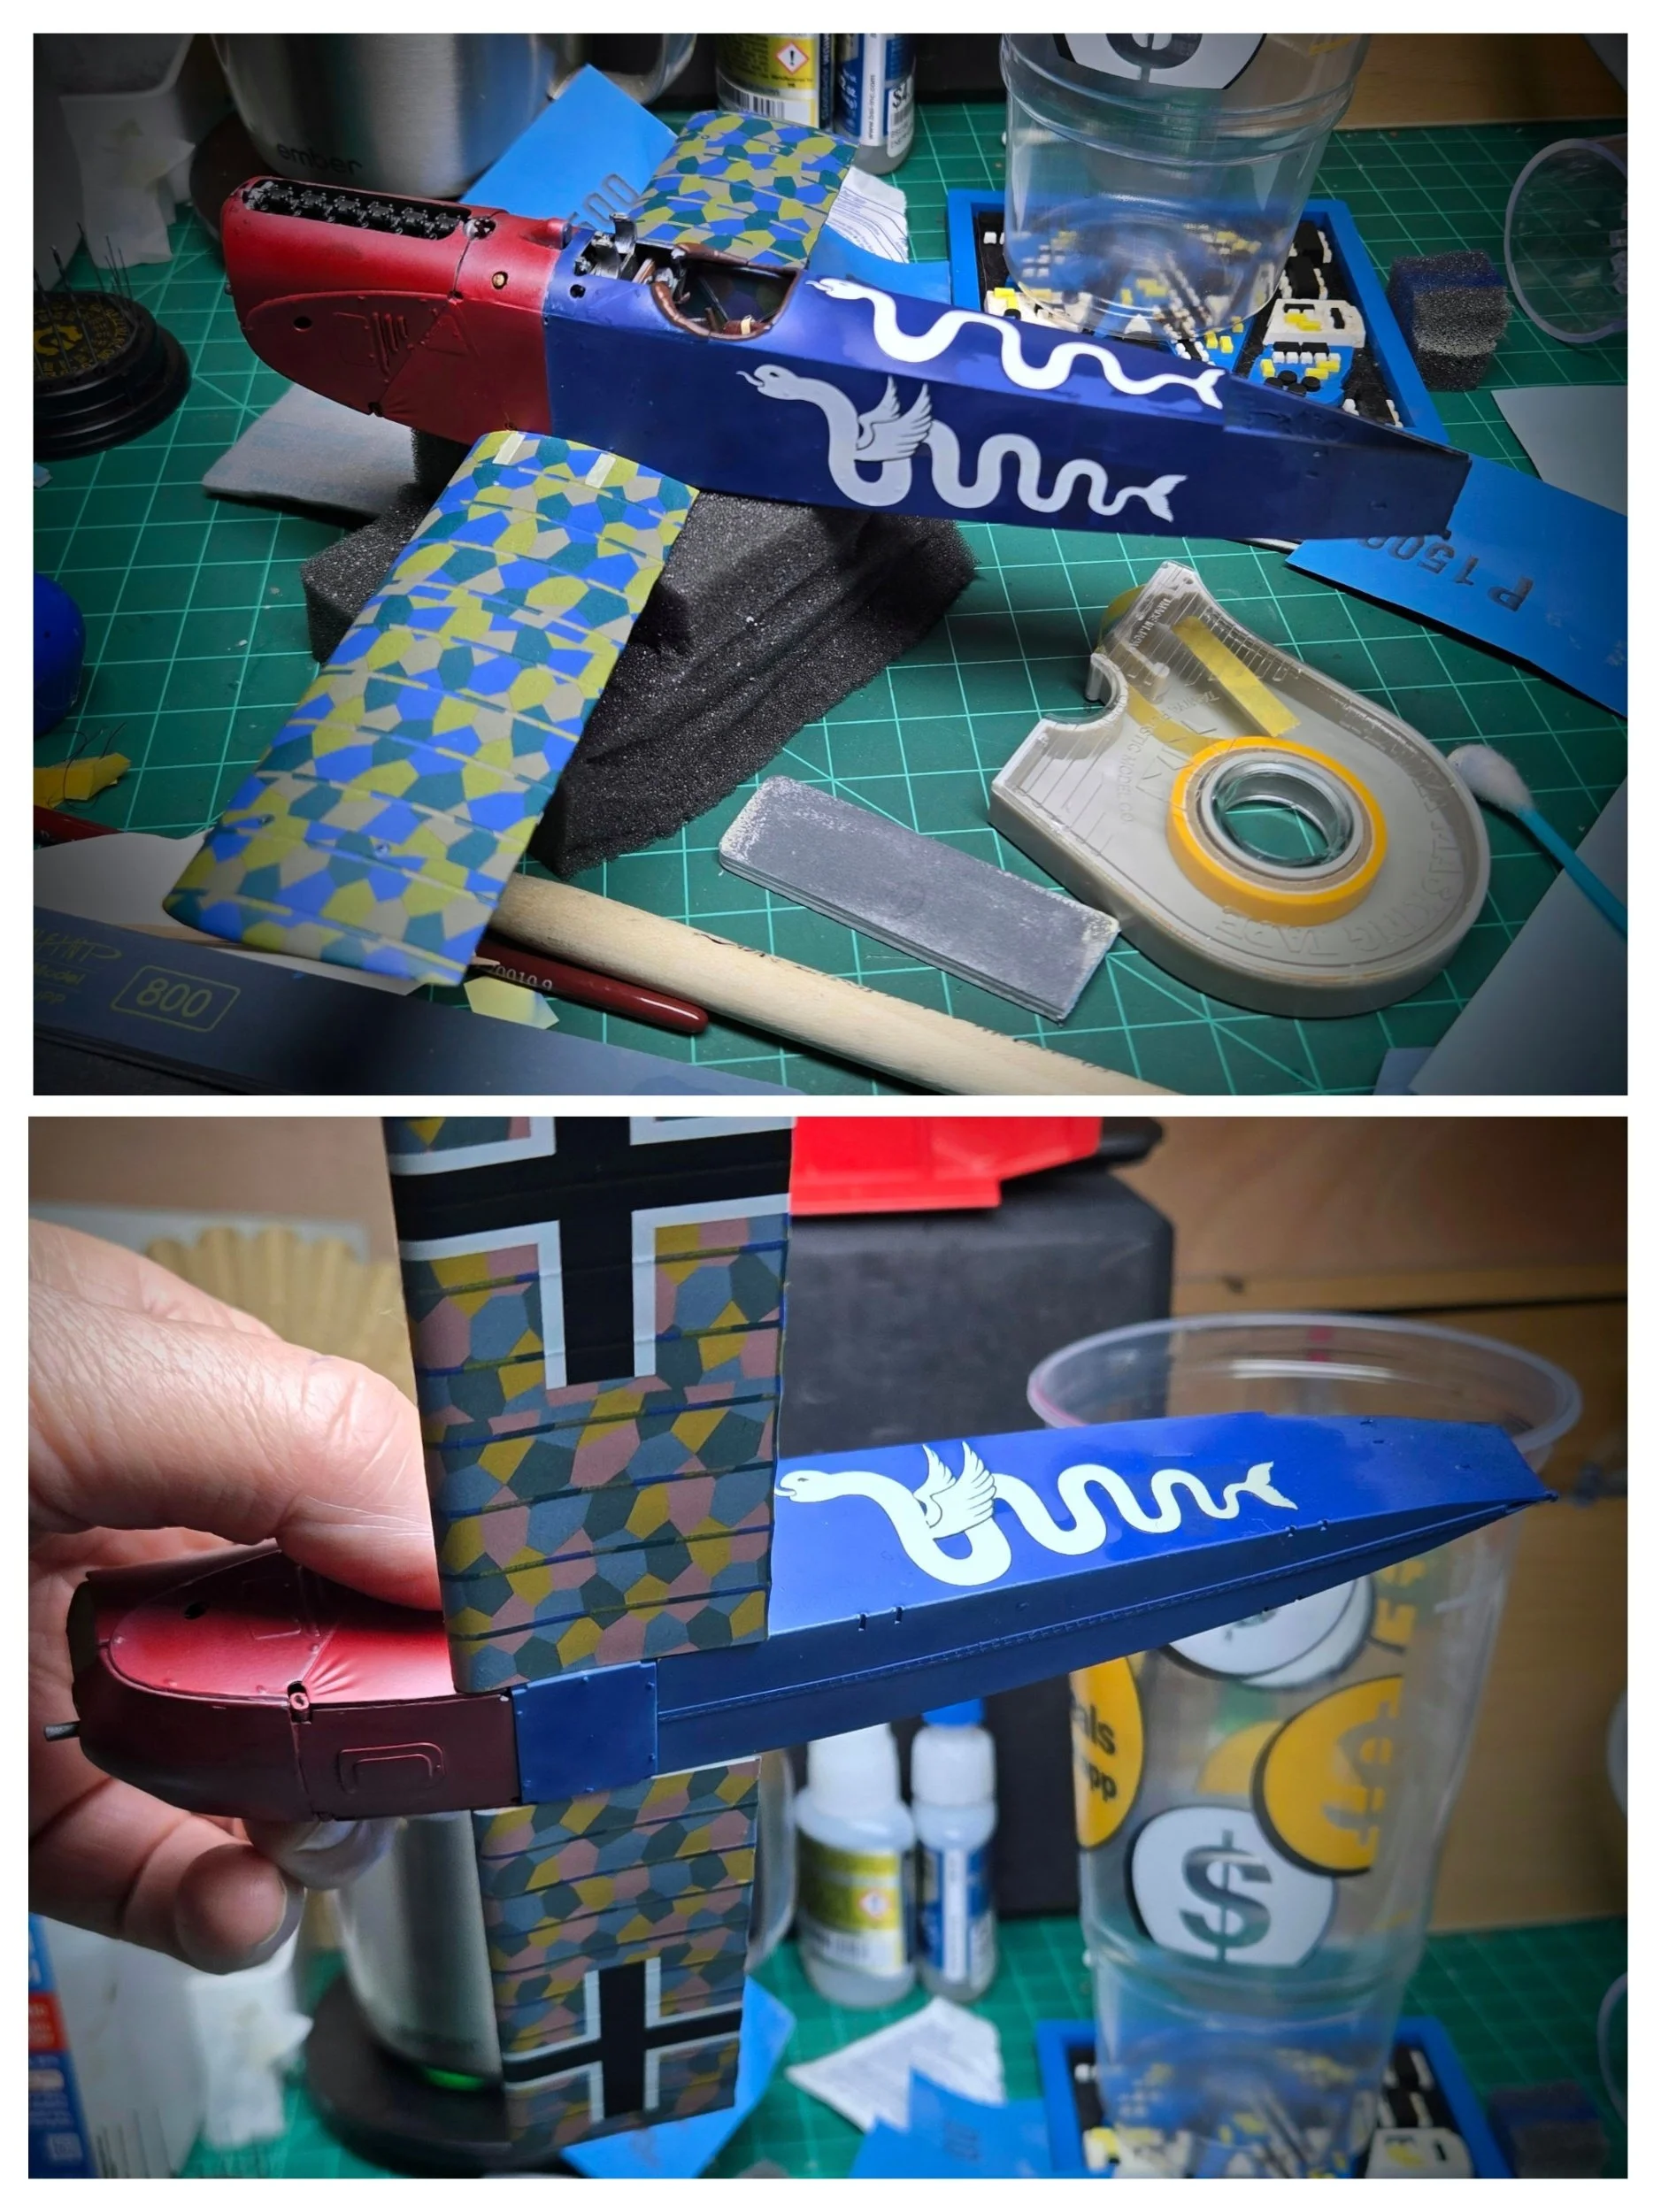
Slow go. This is the starboard frame of the D.VII's cockpit. The picture is a about 2x real size. That bike-pump-looking-thing (used to pressurize the fuel tank to get fuel into the engine for start) took me 2 hours to make...I took the kit part, cut off the handle and extended the internal pipe out 3x the distance, then promptly lost the handle, broke a few other parts, swore some, tried brass then styrene and the cat jumped on the table causing some issues. And the "wire work" on that single bracing wire took me 90 minutes because it was my first try ever with turnbuckles...I have both newfound respect for folks who do this tedious work and a neck ache from bending over to try and get that Itty bitty cord in that "good luck threading that through me big boy" hole in the frame. Still have another set of "wires" to put in and other pipes and wires to go.

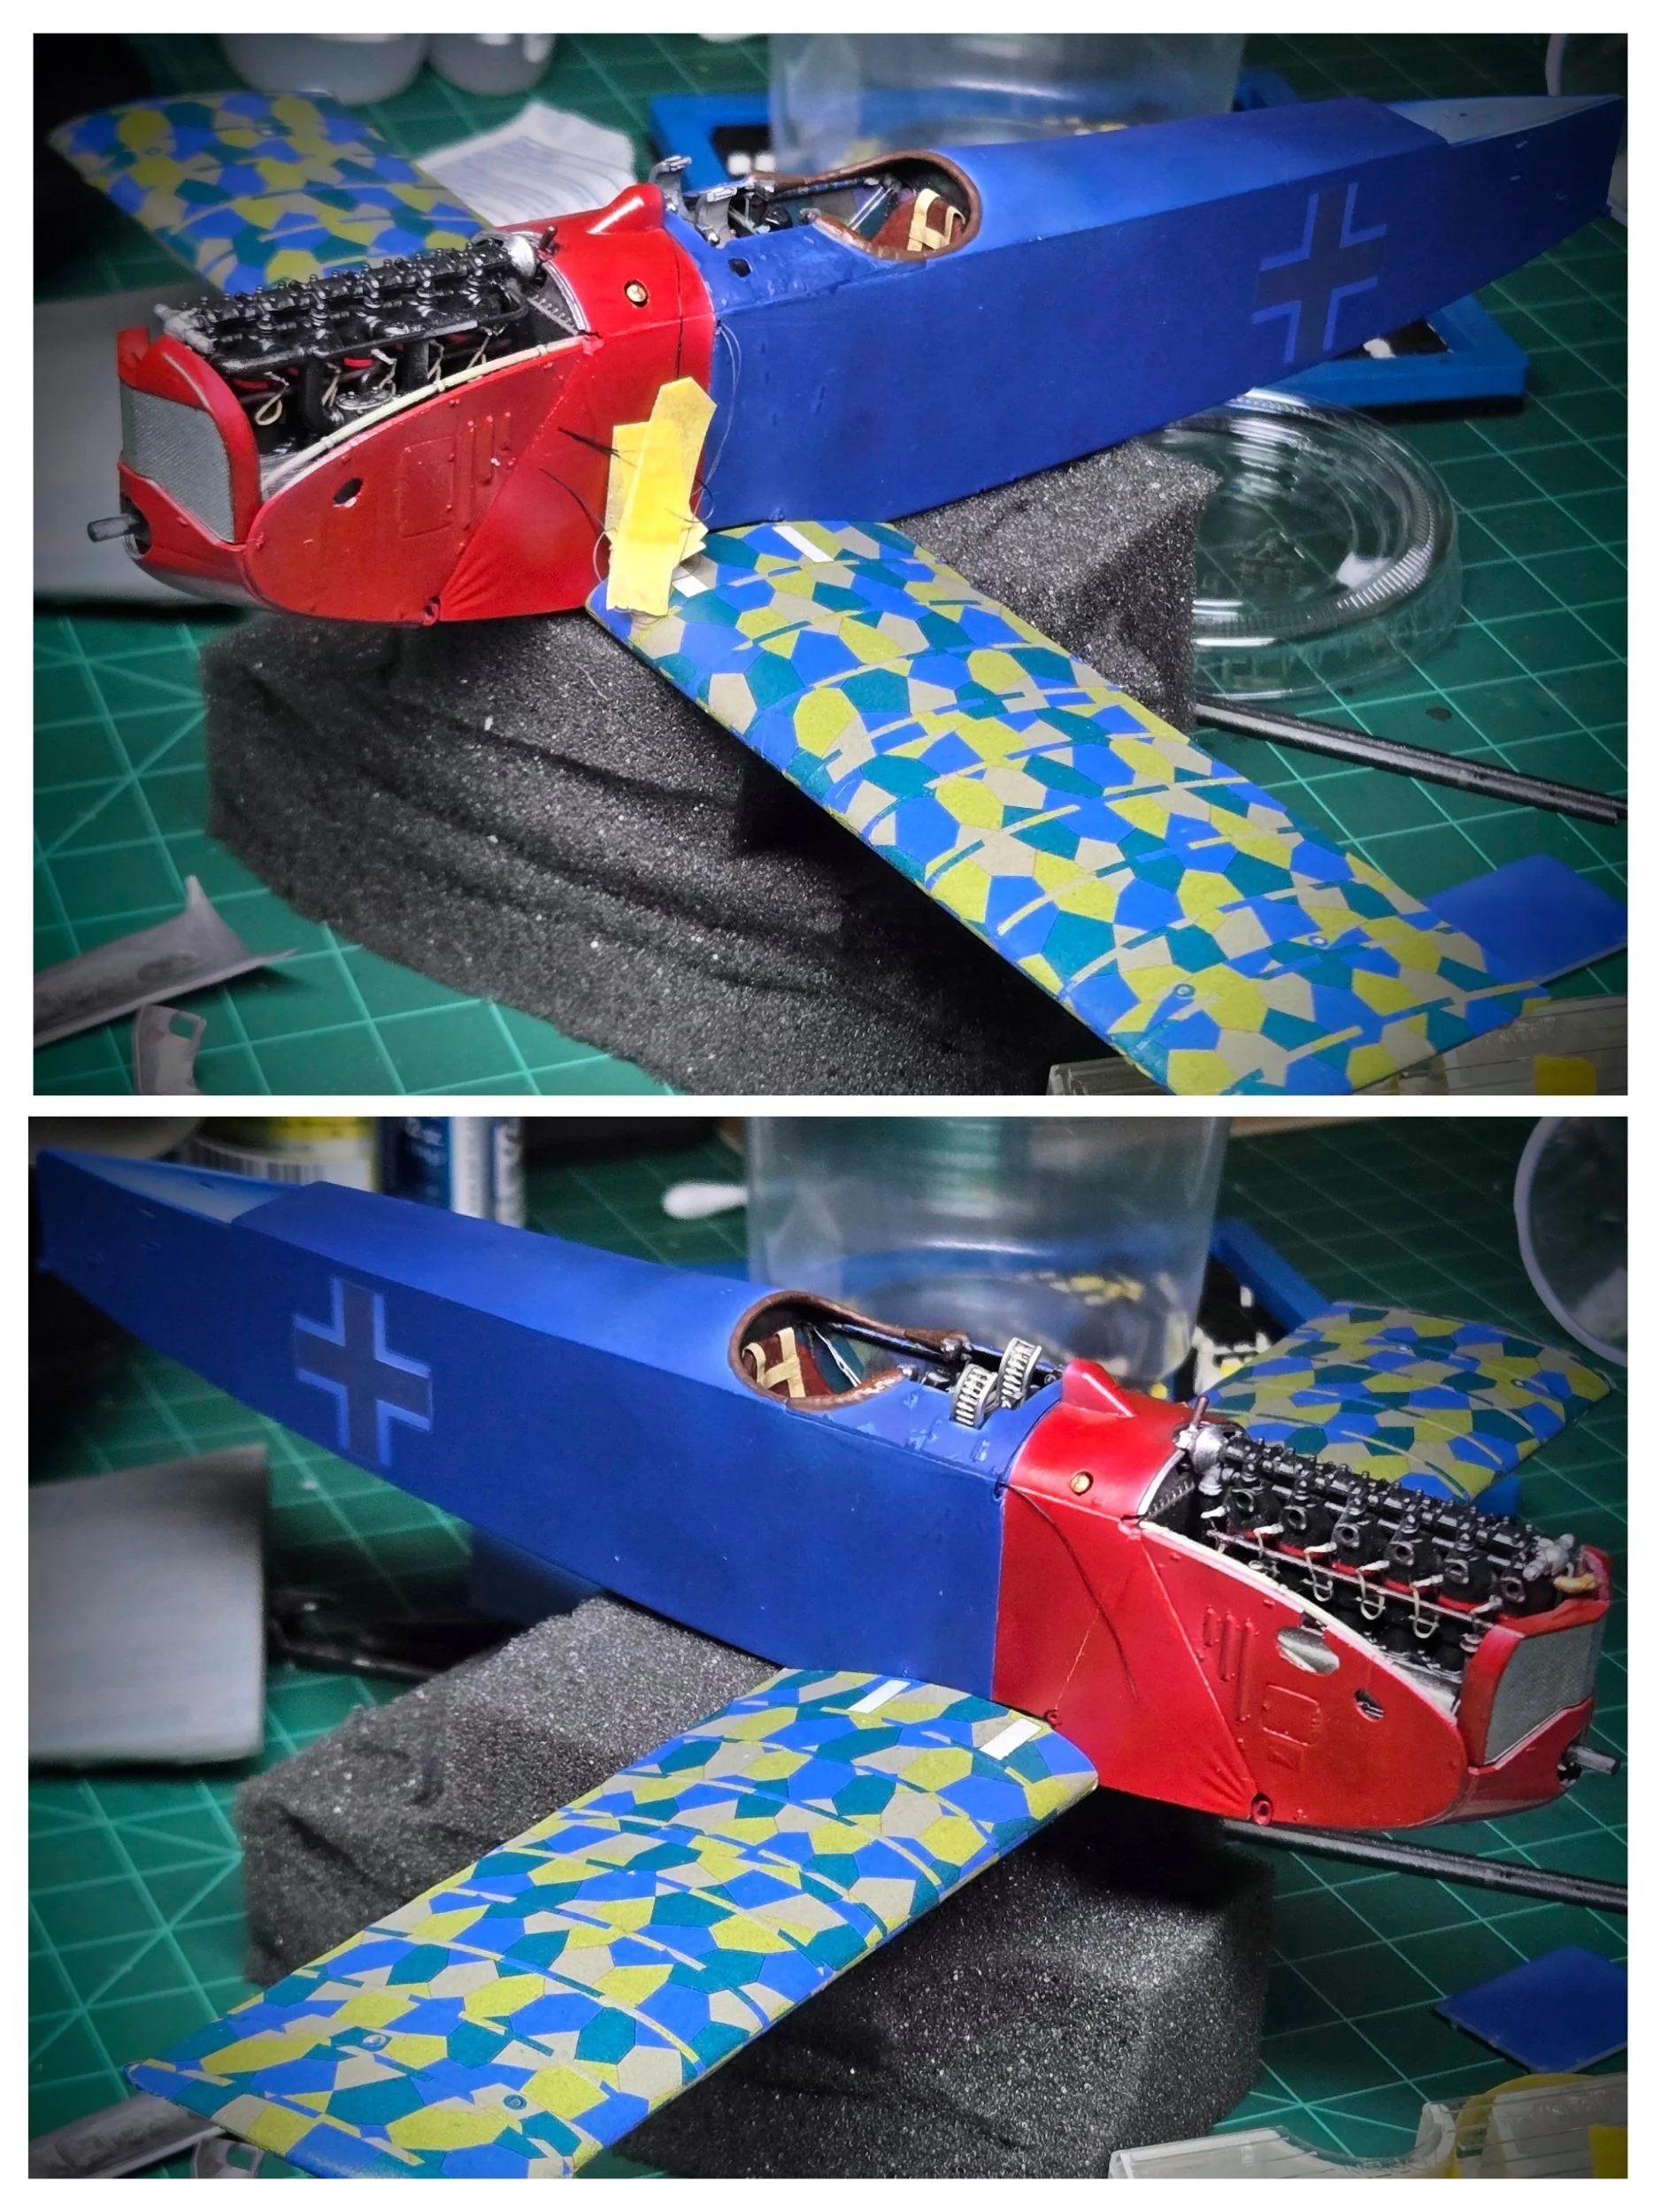
As I'm building the model and doing research it came to mind that this plane would not be out of place amongst ultralights today...same covered tubular steel frame fuselage, simple engine, simple flight controls, very few gauges, and all flying surfaces directly connected with cables from the cockpit.
One technical part...I would not spend too much time trying to dry fit parts...mainly because some of these parts connecting pieces are small, small, small...and break easily.